

bearings
-
Posts
354 -
Joined
-
Last visited
Content Type
Profiles
Forums
Gallery
Articles
Everything posted by bearings
-
I'm 6' 155-160lbs and AP fits me perfectly without shims, if that helps you out. I wear a size 32" pants
-

digitalkid56's: My FIRST TK build (AP Armor)
bearings replied to digitalkid56's topic in Build Threads Requireing Maintenance
Awesome! Take your time and enjoy the build! -
Episode 7 Stormtrooper Helmet, WIP
bearings replied to Dday's topic in Build Threads Requireing Maintenance
Excellent work! I feel a great disturbance in my wallet with all this new stuff! -
AP Armour with ANH Centurion as Goal - Build Thread
bearings replied to MechaPumpkin's topic in ANH (Stunt and Hero)
I felt the same way, so I hear you man. I ended up doing the notches, it wasn't that big of a deal and is not even that visible with the belt on. Great work on your build so far! -
I agree with the others, you probably want to keep the bicep lower. Better to worry about the gap between your bicep and the forearm instead of the bicep strap.
-
Very nice!
-
I just got an email about this new Stormtrooper armor from Anovos, pre-order pricing is just 350 with a completed helmet and armor kit. I haven't gotten a chance to look very closely, but this looks like a nice looking custom sculpt. http://www.anovos.com/products/star-wars-classic-trilogy-imperial-stormtrooper-pre-order?hc_location=ufi
-
TK-65535 Requesting ANH Stunt EIB Status (AP)[451]
bearings replied to bearings's topic in Request Expert Infantry Status
Awesome, thanks! -
I drilled a small hole through the d-ring mount spot first. Then, I bent the ring so it would be open on one side. Next I carefully slipped the open side through the drilled hole... this is tricky because the hyperfirm can tear. Finally, I bent the ring back closed and then painted the ring black.
-
TK-65535 Requesting ANH Stunt EIB Status (AP)[451]
bearings replied to bearings's topic in Request Expert Infantry Status
Hey guys, here are some additional pictures showing more details. I know they aren't all required for EIB, but I'm planning on applying for Centurion next so I appreciate any feedback you might have for me! S-trim: Sniper plate: Arm strapping: Shin closures: Knee ammo: Floating shoulder strap in back with elastic: Shoulder strap glued in front: Snap on right side ab: Cod rivet and 2 snaps: Closed drop box backs: Wrist openings: Notches: -
TK-65535 Requesting ANH Stunt EIB Status (AP)[451]
bearings replied to bearings's topic in Request Expert Infantry Status
I certainly appreciate any feedback I can get, but I'll wait for official word from Steve before I do anything major. I'm happy to do whatever I need to do, just like everybody who has applied before me I've been reading these application threads for months, it's fun to have my own now! -
TK-65535 Requesting ANH Stunt EIB Status (AP)[451]
bearings replied to bearings's topic in Request Expert Infantry Status
Thanks! Great idea to get some feedback earlier, since I have to wait a little while anyway. I'll take/post some additional pics tonight. -
Good idea to wear it on the body somehow instead of hanging on the armor.. I hadn't thought that far yet! The cool vests that I've seen in my searches don't really seem like a great fit, and I'd rather keep the cool air in the helmet if possible.
-
The gel pack I was trying is roughly 5x5x1 inches, I think it would fit on the back ok but I could get something smaller if needed. I'll try to figure out a styrofoam box that would fit to build a more real setup next.
-
So, I'm in sunny/hot Florida and I've been trying to think of ways to stay cool while trooping. I've seen a few videos like these, where people make little air conditioners out of 5 gallon buckets, a fan, and some kind of ice. So, I set out to make a smaller prototype that might fit on the back panel of trooper armor and this is what I came up with: It's a little cardboard box sealed with duct tape + fan for air input and a gel freezer pack inside. The real deal would have to be some kind of better insulated box and probably a different style fan to sit flush with the box... but I think it works pretty well. Also, instead of the straw I would use some aquarium air tubing or something to run up the neck seal into my bucket. Another nice plus to this approach is that the fans are not in the bucket so there's much less noise. Has anybody tried something like this?
-
Hero CRL says: Tube stripes are medium blue, and include (11) or (13) per side, but can be between (9) and (16) per side with the curve bends extending backwards. I think removing the ones under the ear should be fine!
-
I had the same exact issue, just remove the last stripe that goes under the ear on each side! Mine was for stunt, but I believe its the same? Maybe someone else can chime in to be sure for hero
-
TK-65535 Requesting ANH Stunt EIB Status (AP)[451]
bearings replied to bearings's topic in Request Expert Infantry Status
I think that's just for centurion, but I'll go ahead and add it anyway since I'll need it for that application anyway. Thanks for the feedback guys! -
Name: Ben Rigas TK ID: TK-65535 Forum Name: Bearings Garrison: Florida Garrison Height = 6’ Weight = 155 lbs Armor= AP Helmet= AP Blaster= HyperFirm E11 Thermal Detonator = TM Boots = Roamers Jodhpur Equestrian Riding Boots painted white Canvas belt = self made Hand Plates = Karin / Sonnenschein Neck Seal = self made Holster = Darman Full Body Front - Arms at side Back - Arms at side Right - Arm raised Left - arm raised Right side detail Left side detail Armor details Ab details Action shot Cod and butt plate attachment Interior strapping Helmet details Front Side Back Hovi tip detail Lens color Blaster Details Blaster left Blaster right Accessory details Neck seal Thermal Detonator - Back Holster attachment Thank you!
-
AP Armour with ANH Centurion as Goal - Build Thread
bearings replied to MechaPumpkin's topic in ANH (Stunt and Hero)
Good luck! Definitely go with E6000 for your first build in case you glue something on backwards I found it helpful to look at screen references while I built as well as other EIB/Centurion builds. -
storage and transport bin for one piece torso?
bearings replied to LaserBrain99's topic in Hard Armor (General Discussion)
I'm using a 25gal husky bin, everything but the helmet fits. Arms into shins into thighs x2 into torso. It's fairly tight, so the one you're looking at should have plenty of room. -
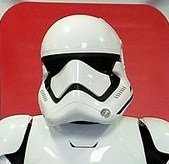
How's this look?
-
ANH build, need critiques!
bearings replied to justjoseph63's topic in Build Threads Requireing Maintenance
Nice work! In order to keep your forearm and biceps the right distance apart and turned the right way, you might want to strap them like this: http://www.whitearmor.net/forum/topic/19372-correct-bicep-to-forearm-connection-anhesb-video-and-photo-references/ -
Haha, I see what you did there. Awesome, thanks for the info guys! I'll post again once I do some painting and attach the D-ring.
-
I picked up a Hyperfirm E-11 so I can apply for EIB and Centurion and start trooping much sooner than my PP E-11 kit will be finished (I want to take my time and add electronics to that one). This thing is really light weight and seems very durable: I want to tone down the brass color of the scope, what kind of paint should I use for that?
