

bearings
-
Posts
354 -
Joined
-
Last visited
Content Type
Profiles
Forums
Gallery
Articles
Everything posted by bearings
-
More painting updates, I need to finish this so I can start on my E11 DD kit. It's a little rough, but I'll clean that up after it dries a bit.
-
It's the doopydoos kit
-
I have to start this thread with my story about USPS' inability to deliver mail properly. I ordered my DD resin kit from Trooperbay, which he promptly shipped, and USPS had the package marked as delivered. I never actually received the package, so I've spent lots of hours talking to carriers, local postal workers, regional postal consumer affairs people.. and waiting on hold. The package just seems to be gone and I don't know if I'll ever see it. Mike was kind enough to work out an arrangement for a second kit to be shipped, which he again shipped out promptly. This time he left the package as 'Hold for delivery' so I would have to go pick it up at the local post office. I thought there's no way that USPS could lose the package this time. I went to the local post office to pick it up. Some how, some way... they couldn't find the package. I waited for an hour while they looked, but they couldn't find it. I was supposed to get a call back, but that didn't happen. Rage. So, I went back again this morning to check again while the carriers were still there loading up. Nothing to be found anywhere, and then I heard "I found it!". The manager saw the package as addressed to them as the pickup address, even though it had my name on it for "hold for delivery". She said she thought it was some kind of supplies for them, but when she opened it there were no directions so she just left it aside. I don't think E11's are standard office supplies for the USPS... Anyway, without further delay, I present to you my standard photo with all the parts laid out: With one small (hopefully fixable) casualty:
-
 http://youtu.be/1aKqfBquoSc
 -
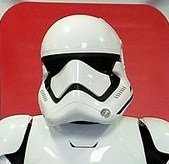
More painting updates, second coat going on the grey areas later this afternoon. I think the tear areas look more filled in now, when I take a photo from a different angle it looks like it's a little small, but it does go all the way up to the wall. With mic tips and playing with a different look on the frown. Ears are still loosely fit while I paint. Since the ATA waiting list is so long, I've had more time to think about it and I'm considering switching to an AP (or TM, depending on $/availability) based on my body frame size. Maybe I'll do ESB style with the AP helmet so I can have two different styles!
-
I'm 6' 155lbs with a 30" waist size, can I make an ATA or MTK armor fit me properly? I've looked through tons of EIB and Centurion request posts and it seems like most of the taller/thinner types look better in AP. Is that the only way to go for me to have a good fit?
-
Awesome, thanks for the feedback! I'll be sure to fill in a little more with black in the next round of painting.
-
Started to paint today (with lots of help from my artistic wife). It's just the first coat, so I'll clean up and extend the frown a bit more when I do the second pass.
-
Also, pro-tip: Exacto blades and box cutters are sharp! I've already cut myself pretty good two times, ouch!
-
Here's my progress so far, I'm not super happy with the ears due to some gaps. Instead of dwelling on that, I'm going to go with what I have so far and do some painting and see how I feel about it afterwards. I want them to be perfect, but those ears are pure evil! At least the kit came with 2 sets of ears, so I can try another time to see if I can improve them. Here's my helper trying it on for me
-
I took a lot more out from the teeth and from the eyes, still need to clean it up once I get my set of files. Thanks for the feedback!
-
My ATA helmet kit arrived this week, here's what was in the box! I'm happy there are 2 sets of ears, but hopefully I will only need one. After some terrifying trimming here's what I have: Following along with pandatrooper's build thread, I used my dremel to cut out the eyes and sand out some of the teeth material from the back. I'm waiting on a set of files to come in so I can clean up the shape of the teeth. Next up I'll try to attach the face and the cap/back. The kit came with one larger screw, which I assume is for joining these two together, but I see most people use rivets. Is there a big downside to just using the supplied screw? If I need rivets, what size are you guys using?