

boomer75
-
Posts
25 -
Joined
-
Last visited
About boomer75

-
great point. i would likely troop in the sandie more once i have both to choose from. (if only because it will be the second - well, third, if you count my wife's, kit that i'll have built) so, my hope is i'll have more experience to fit it as well as possible for maximized comfort. Also, like you mentioned, i've already had to repair a bunch of cracks in the Anovos, so i'm concerned about its long term reliability. ABS paste to the rescue!
-
thanks so much. i really appreciate the feedback y'all! i'll keep it all one make. Upon further reflection, i do intend on building up the ATA as a sandie so with that in mind i don't want to go pulling parts out of that kit, so you saved me from myself. haha
-
yeah, that's what i was going for. i grabbed my wife's armor (also Anovos) for a better side-by-side. ATA belt is on the right. I agree ATA generally looks a bit more cream (in this indoor shot it looks whiter, but there is a difference regardless). i'm not sure if this is such a good idea after looking at it in more detail. I definitely appreciate the inputs and opinions. i wouldn't want this to be an issue for accuracy, since i don't have to do it.
-
Good point- here are some pics. ATA on the left, Anovos on the right. The Anovos chestplate for reference. Anovos belt and plastic on the left. ATA and Kittel belt on right. (ammo boxes are Anovos). I haven't finished the buttons yet, but i added them to this for comparison. Another image just for more context But, with inside lights, it slightly changes the white appearance. The ATA bucket is again on the left, Anovos on the right. The anovos ab section again here for reference. thanks! boomer
-
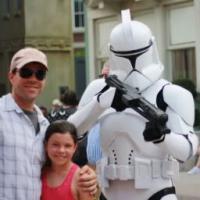
Hi, I have a full set of Anovos armor that I built up and used for 501st application submittal a few years ago. This is what i've been trooping in thus far. However, back before the Anovos kit was available I put myself on the ATA wait list. So, while I waited for the Anovos and ATA armor to arrive, i built up the ATA helmet kit. When the ATA armor arrived, I'd already started on the Anovos kit, so the ATA still remains in the box, untouched. (sadly) I recently upgraded to a Kittel belt, and when i did that, I decided to use the ATA version of the ammo pack since it's much thicker and sturdy. Will this mixing of Anovos/ATA have any impact to EIB or Centurion status? (I'm very nearly ready to submit for that). I'll also want to use my ATA helmet for those submittals since I like my self-built bucket over the Anovos version, and I put great care into making it 100% accurate. thanks!
-
 TK-32775 (approved just today) requesting 501st access! http://www.501st.com/members/displaymemberdetails.php?userID=21571
 -
Thank you. Joseph, I see what you're saying. looking at the parts again, I think what happened is the halves overlapped slightly in the picture so the right side looks wider at the bottom. Thanks for the advice on the file- I wouldn't have thought of that and it does seem easier than sandpaper. Jeff- if I need to trim the length at the wrist, I would assume you would tailor the length so a rectangular embossed feature isn't cut through?
-
Hi everyone, Assembling and trimming my ATA forearms, and I have a question. I've lined them up at the elbow, and the wrist isn't lining up on the left arm (right arm is aligned at both ends). My question: do i trim at the wrist side, and do i follow the line i've drawn? Thanks!
-
i actually got the chills watching this. The star destroyer.. woah
-
Boomer's Bucket Build (ATA)
boomer75 replied to boomer75's topic in Build Threads Requireing Maintenance
here's the finished* product *never really going to be finished, interior, fans, microphones, tweaks etc... -
Boomer's Bucket Build (ATA)
boomer75 replied to boomer75's topic in Build Threads Requireing Maintenance
Got started on the tube stripes. I used the templates from Pandatrooper (thanks mucho!) I used the "hand painted" template http://www.whitearmor.net/forum/topic/14867-tube-stripe-masking-templates/ I printed them out, verified the scale, laid masking tape on a plastic cutting board and clear taped the paper to the top of the masking tape. you can't see the clear tape covering the whole thing here, but after I cut out the template holes, I was able to lift the tape off the top and peel the masking tape away from the cutting board to then attach to the side of the helmet. I don't have an air brush rig, and was concerned about bleed under the mask, so I opted for tracing with pencil to hand paint the stripes. using the 'ol 5/0 size brush, I went to town with le French blue. although i finished this side with one coat (I will need two), the paint did start to "gum" up as I worked. I'm using the Testor's Model Master paint. I have read that Humbrol takes considerably longer to set up which in this case is an advantage. Are there others who use the Testor's paint with this method, and if so, how have you dealt with the rapidity of the paint drying? I ended up recapping the paint and shaking it again every three stripes or so, which got me through it, but I have some slight brush stroke texture on the stripes. mark -
Boomer's Bucket Build (ATA)
boomer75 replied to boomer75's topic in Build Threads Requireing Maintenance
sure thing. glad to be of help! -
Boomer's Bucket Build (ATA)
boomer75 replied to boomer75's topic in Build Threads Requireing Maintenance
I used a 5/0 size brush for the details. For traps and tears interior lines, I used the technique gazmosis showed in his ATA helmet howto thread. Basically use a fine point sharpie to lightly dot the lines in place. When I brushed the paint on, it was just connecting the dots. I used masking tape on the top and bottom for the clean cutoff. I dragged the paint from the masking tape first, then onto the line to minimize bleed under the tape. To get the fine outlines on the tears and traps, i first painted the black, with only really minding where i was toward the outside edge. Once that was dry, I cut in the gray with a wide brush as well, again, just minding the outer edge. really made it easy to get a fine outline, since you have a few chances to go over again (but with a slightly thinner outline each time) if you get an unsteady bump. -
Hasbro E-11 Blaster Conversion from Miami
boomer75 replied to illusionz_09's topic in Build Threads Requireing Maintenance
blaster looks great. I will be working on mine after I finish my buckets (doing 2 of them) while I wait for armor, so thanks for posting all your progress. it will definitely help! -
Boomer's Bucket Build (ATA)
boomer75 replied to boomer75's topic in Build Threads Requireing Maintenance
Thanks! I recoated the vocorder with semi-gloss and now it has a better "matte-ish" finish to it.
