

illusionz_09
-
Posts
998 -
Joined
-
Last visited
-
Days Won
1
Content Type
Profiles
Forums
Gallery
Articles
Everything posted by illusionz_09
-
 I cut and cleaned the sniper plate Front strips (20mm) all done for both the shins. Now to work on the back of the shins. For now I'm going to use velcro (maybe later i'll add the screen accurate straps clips) In order to get more surface area for the velcro to adhere, i created a slip where underneath the back shin strip I will have some open space for the velcro to sit flush. I started working on the right shin to save the sniper plate for last lol. Now that it was cut (and then i lightly sanded edges) I cut out the back strip (25mm) and Zap a Gapped it. I also have the 25mm strip cut out for the left shin. Ahhhhhhhhh I'm so close to finishing lmfao. As I mentioned on top, i'll take progress pictures tonight. My shins should be complete lol. That way I will have my full armor complete, just need touch ups.
 -
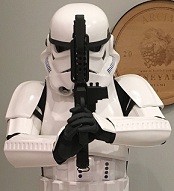
Lmfao Jason. I know i know.... I'm so picky. I'll take full body picks tonight.
-
If you intend to be both a Stunt TK and a HWT, then I suggest you have to belts. That way you can switch them out from one look to the other. They are drastically different in the belt system.
-
lucnak's ANH Stunt Build (ATA)
illusionz_09 replied to lucnak's topic in Build Threads Requireing Maintenance
Looking forward to your build. I myself am almost done with my ATA armor. Take your time, it will definitely be worth it. I'll keep on eye on the thread to see if you have any questions. Good Luck Trooper!!! Great choice going TK! Oh and btw, since you can't glue just yet, i suggest you start with your bucket build. It requires no glue, just manual labor and love -
Almost there lol... I admit I am being pretty meticulous though At least once i finish my shins i should be done. Unless there are any touch ups I need, but thats more preference.
-
With E6000 I glued the ab button in overnight. Support with painters tape and Magnets. Left overnight. The magnets messed up the buttons a bit, i just touched them up the next day. Final result. Started working on strap/elastic for thighs. Glued with E6000 (3 inch wide elastic) to the inside of the thighs. Then sewed the tips to be able to slide into the belt (after trying it on multiple times, i got the position where i wanted it) And glued extra support spots to make sure it holds the position firm. Finally started working on my shins (last things i need) First took on the right shin... the front part of it. I am going to finish the front then size the backs after i have both. The left shin is cut, just need to put it together.
-
Eventually I will get the Latex hand guards and glue them on, but in the meantime this is how the ABS plates look. Also wanted to point out, that since i tried on the armor i noticed the butt plate was flared too much so i cut some excess on the sides to even out with the armor look Showing final arms assembled with hook. Then tackled the ammo pack for thigh. Cut and created holes where they would go. Installed, i used split rivets since the smaller snaps were a mission to hold the pressure of the ammo holding in place. Then did some painting. All the rivets on the left side i painted white and the rivets on the right knee ammo pack. Then painted the ab buttons accordingly and left overnight; i smudged a couple. I need to touch them up a bit again.
-
Anovos anh first time build
illusionz_09 replied to gazzadavis8's topic in Build Threads Requireing Maintenance
Good Luck on your build! -
Best pads for a bucket?
illusionz_09 replied to gromitsdad's topic in Boots, Soft Parts, and other Accessories
It's whatever you feel comfortable with. Those pads are not screen accurate (they used the starshaped foam), but you do not see it anyway. Supposedly those are very comfortable since you can adjust based on position you like. So up to you. -
I put the snap in place for the cod strap I also put the "furry" part of velcro on the clips for the TD to avoid armor scratching Then cut a couple pieces to finish them up (hand plates, ab buttons) I decided to finish the hand plates. So i put some ABS strips on the inside to get a better spot to put the straps. Glued the hand straps. Then decided to tackle the bicep clips. Just using some force and pliers i was able to get them where i wanted. E6000 glued overnight I decided to finish my belt and install the holster Based on the guidelines with location, i marked where they would be Installed them with split rivets (back and front view) I have a question though, after i installed them i noticed many people didnt use rivets for the holster. I found some screws (I think they are chicago screws) that i had from when i received my holster. Should I take out the split rivets and install the holster with these screws instead? All this work and i dont want to have something stupid like the holster look weird. All i have to do is install the ab buttons and i'm done from the cod up. the thighs are assembled, just need to install the ammo pack on right thigh and then shins & sniper plate. Light at the end of the tunnel!!! lol
-
TK-25377 Requesting ANH EIB Status [ATA] [509]
illusionz_09 replied to Chemalakita's topic in Request Expert Infantry Status
Looks great! congrats... -
I cut out the 3 covers for the belt. and then glued them in place overnight (with E6000); taped up for support Then started working on drop boxes. Cut the strap to length and placed them where they go. (both sides) Measured where they should sit with the drop boxes and put the holes. I used split rivets to install the straps. front/back view of current stage of belt. I glued the drop boxes in with E600 and taped them overnight. And also put in some velcro where the boxes will hang to keep them in the correct position area. And then wanted some self progress shots of armor to see what needs to be touched up. The biceps/forearms are connected, however i do not have the bicep hook to hold them up to the shoulder bell yet; so its just held up by pressure from the strap so its a bit loose here. I need to connect the cod strap to the back. and also after this pic was taken i adjusted the shoulder strap connecting the chest to the back to shorten them to fall correctly. I forgot to take pics from the sides and back to show what i meant.
-
Skul's ANH Stunt Build (ATA)
illusionz_09 replied to SkulShurtugalTCG's topic in Build Threads Requireing Maintenance
you do not need rivets for the bucket. The originals just had those screws/washers. -
Skul's ANH Stunt Build (ATA)
illusionz_09 replied to SkulShurtugalTCG's topic in Build Threads Requireing Maintenance
Oh and i suggest you lower the brow, high brows like that are more for Sand Troopers than Stormtroopers. But its up to you... -
Skul's ANH Stunt Build (ATA)
illusionz_09 replied to SkulShurtugalTCG's topic in Build Threads Requireing Maintenance
ATA comes with all the pieces you need for the bucket. You should have the needed screws in the box. -
I put the split rivet, with strap on the cod piece. For accuracy I am leaving it brass. Male snap installed on the right side of abdominal plate I am gluing the internal strap above to the opposite side with E6000 as mentioned by everyone i have seen. So i used a clamp and tape to hold it in place while i glue it overnight. (outside and inside view) Then tackled the belt. Scored to proper configuration on ammo belt. I actually removed some extra above and below to get it thinner (no pic) 45 degree cut on corners Then made the holes in their proper spots. Aligned with Canvas belt to make the 3 adjacent holes and installed snaps to corresponding area on the ab plate. Then installed the ammo pack to the canvas belt using split rivets. Snapped the belt to place I still have to add the 3 covers, drop boxes, and holster. I need to put it all on to show the progress on me lol. Soon...
-
So i put most snaps in place so i can measure the kidneys. Now that i know where the kidneys will land, i cut the proper 22mm box on the lower edge of both sides of the kidney plate. (I did not mean for those pics to be that big lol) Anyway, while I was working i also put the 2 snaps in place on the butt plate. then marked the aligned 3 dots on the left side of ab plate for where the rivets will go (10 mm from edge) and about 2 inches apart each. Aligned those dots with the same process for the kidney and then using a soldering iron created the whole. I then cut out some elastic for the straps that will connect the split rivets. I then did one side at a time to install the rivets accordingly. First I opened them up with a paint can opener lol, then i hammered them down. I think it worked great... You have inside and outside view here of the ab plate with the rivets installed. I did the same process to install the kidney plate to attached. Here is the connection view of the ab plate to the kidney. I still might add some strong elastic, just to reinforce it and make sure there is minimal gap while wearing it.
-
I sewed together my strap system belt to hold up my thighs. I used a 1 inch buckle and 1 inch woven elastic. sewed in and adjustable. started the internal snaps to connect the chest plate to the abdominal plate Same for the kidney/butt plate. Everything has sanded. and then i cut cut out the ammo pack as well for my thigh. My goal is to finish my snap system this week.
-
ATA armor build in progress
illusionz_09 replied to Squimspickle's topic in Build Threads Requireing Maintenance
I love that mannequin pose!!! Looks amazing... -
Have fun! The helmet is the best part...
-
Looks great! Really nice job...
-
I cleanly trimmed the kidney and butt plates. I'm fairly thin and i cut about 1 inch off each side of the kidneys; I'll trim the rest when connecting to ab plate. based on what i have seen, i made my drills at the points where i will be putting the snaps for the belt. I also drilled the same whole but for the cod piece. Will i need to get a special rivet for the cod or will a snap work? I might have made the hole a little tad big, realized too late lol. Anyway, i installed the snaps (which i need to tighten up a bit, they are loose because of the angle i was installing them). Then aligned the chest and ab plate to see where it would fall to put the snaps behind it. I made a whole bunch of snap plates to install the snap system method throughout the inside (I don't have pics of the snap plates/snaps)
-
*First Time Build* ATA Helmet Cap/Face Alignment
illusionz_09 replied to Beaubeaux's topic in Hard Armor (General Discussion)
much better! good job -
Jamo's ANH-S TK (first) build [MTK]
illusionz_09 replied to jamo's topic in Build Threads Requireing Maintenance
Since this is your first build, be careful with that Zap a Gap lol. It seals really strong, so if you mess up you have a tiny window to "fix" it... Good Luck! i look forward to seeing your build come together. Have fun... -
lmfao!!!! my goal is to have it ready for pics at the end of the month. I still have quite a bit of stuff to work on lol. TIME!!!!!!!!! horrible. I went to bed at 3 am yesterday; its the only time i have to work on it.
