toybiz
-
Posts
361 -
Joined
-
Last visited
-
Days Won
2
Content Type
Profiles
Forums
Gallery
Articles
Everything posted by toybiz
-
Wielding that knife....I should call you TK-Rambo First Blood!
-
Just remember to not over trim some critical areas like the thighs. Unless you have arms like Popeye, there is plenty of leeway on the arms and shins. The ab/kidney also have lots of leeway too and should accommodate a waist size up to 37" without adding shims. The thighs I found if trimming off the "wrinkled" area it was almost too tight on my legs. So word of advice is fit WITH your under suit then mark the front/back thighs. Then wait and try fitting it again before cutting. This gives you the chance to center the overlap on the rear. Keep us posted.
-
TK-24336 Requesting ESB EIB Status [MTK][405]
toybiz replied to toybiz's topic in Request Expert Infantry Status
Everything has been done, just waiting to take the pics for resubmission. Hopefully soon Thanks for the words of encouragement and direction! -
TK-24336 Requesting ESB EIB Status [MTK][405]
toybiz replied to toybiz's topic in Request Expert Infantry Status
Thanks Steve and both Jason(s), I'm currently working on the rank stripes and adding the shoulder horizontal straps but placing them so that they are not so obvious. Will retake some photos afterwards and post up. Stay tuned for the update... -
TK-24336 Requesting ESB EIB Status [MTK][405]
toybiz replied to toybiz's topic in Request Expert Infantry Status
Thank you Mathias, Ian and Evan for the info. Simple enough to paint the additional ear ranking bumps and I can attempt to add the horizontal elastic shoulder bell straps if needed for EIB. However based on the CRL for my build the horizontal shoulder bell strap should not be visible, however due to my relatively short arms they will. Unless I use a thin 1/4" or 1/2" (13mm) and run it just below my arm pits. So question is risk the additional strap showing or not to install it? Thanks again for your valuable insights! -
TK-24336 Requesting ESB EIB Status [MTK][405]
toybiz replied to toybiz's topic in Request Expert Infantry Status
Thank you Mathias, For ESB I did not see those are required for the build. But here is a pic showing my attachments from the forearms to the top of the shoulder bells. If there is anything else, please let me know. Thanks -
TK-24336 Requesting ESB EIB Status [MTK][405]
toybiz replied to toybiz's topic in Request Expert Infantry Status
Thank you Steffen. Coming from someone who has already achieved EIB, that means a lot to me! -
TK-24336 Requesting ESB EIB Status [MTK][405]
toybiz replied to toybiz's topic in Request Expert Infantry Status
Helmet Continued... Hand guards Clam shell type Blaster details - note the blaster weathering was toned down in the last two pictures TD back side showing bracket to end cap gap and black screw heads Holster attachment ESB over straps Neck seal Action shot Me..all smiles Some items to note and I can provide pics if required - Arms are fully strapped including forearms. Belt has since been repositioned higher slightly covering the lower Ab buttons and the left ammo belt pack has been moved outward and secured with stitching on the straps to the canvas belt. The belt ammo packs have full backing on them as that is part of the MTK kit. Thank you and I look forward to your assistance for my EIB certification! Adam -
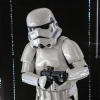
Well, after reading the June 2014 newsletter, I thought I might as well get off my duff and apply for my EIB! I built my MTK armor with the intention to meet EIB at the minimum and will go for Centurion if I'm close. You know, I'm more nervous applying for EIB than I was building armor for the first time. Thanks to everyone who's builds helped me get this far and in advance for all the help along the way. So here it goes and fingers crossed that I won't need too much work.. Armor Maker = MTK Helmet Maker = MTK Blaster Type = Hyperfirm ESB E-11 Height: 5' 8" / 174 cm Weight: 165 lbs / 75 kg Inseam: 30" / 76 cm (pants length) Arms: 32" / 81 cm (top of shoulder to finger tips) Waist: 34" / 86 cm Chest: 39" / 99 cm Neck: 15.5" / 39 cm Hat Size: 7 Boots: TK Boots size: 8 Canvas Belt = Trooper Bay Hand Plates = Clam shell - Costume Junkie (needed a lot of trimming) Gloves = Nomex flight gloves Electronics = iComm static burst, Aker amp, Echo fan bracket with own wiring and battery set up Neck Seal = Darman zipper type Holster = Darman ESB 4 oz. Undersuit = Starter brand compression top and pants (I had the photos taken at work for Star Wars Day and this was the only decent background. If need be, I can retake photo set and resubmit) Front : Back: Left Side: Right Side: Abs: Sniper knee plate Ammo pack knee Cod and Butt Plate attachment Interior strapping Helmet all angles including interior
-
Thank you Diana for looking and sharing! That's so exciting to see so much Star Wars themes @ Disneyland! Last time we were there, I must have rode Star Tours 6 times in a day just to catch the different video themes. Since you write fandom stories, perhaps we could all star in one of your fan fiction stories with some live action photos to go with your story. The PG portions of course.
-
Helmet update: I only "trooped" in my armor for about an 1 1/2 hours at my son's school for an anti bullying event with TK3942 along with the local school district's Child Assault Prevent (CAP) Training Center. It wasn't even a strenuous event, just some walking and plenty of "high-fiving" with the kids. Unless there is a cross breeze, it get's plenty toasty when wearing plastic. I didn't invest in any fans yet as I was still un the research phase. I decided on Echo's wonderful helmet fan set up. I opted for his bracket, push button switches and personalization only as I found some 50 x 50 x 15 - 12v fans I wanted to try. Like my armor build, I read about the battery challenges some others mentioned and figured I try another power source approach. I appears that most other were using the default AA battery holder x 2 default set up. Measuring the space in the "neck bump" area that would be behind the fan bracket, those would fit OK but probably should be secured so that they don't accidently fall out during a troop. So after researching into optional power sources and voltages these were my findings: Rechargable CR123A lithium ion batteries (3.7v @ 1200 mah each) - I was concerned that the 12v fans would not start up using just a single CR123A but they did and was a consideration due to their relatively small size of about 1 1/4". First problem was finding a battery holder. I did not want to hardwire (solder) the battery to the wiring. Second, was at 3.7v for a single battery, the amount of air pressure from the fans was very low. I put two in series (Neg to Pos / end on end) to increase the voltage to 7.4 and the fans really came alive. Almost too much in terms of noise. So onto plan B. The next plan was to use one of those emergency battery packs that has a USB connector. These are typically 5v - 800 - 1,000 mAh output and a capacity of 800 to 5,000+ mAh. These are usually sold as a portable emergency charger for your cell phones. They come in different shapes and sizes and since I had one laying around doing nothing, I figured I give it a try. Since I was wiring my own fans I found an old USB cable laying around and spliced it into the fan harness. If anyone else plans to follow this, there be four colored wires. The white and green are data wires, you can ignore those. Using the red (Positive) and black (Negative), I soldered the wiring together, protected the joints with shrink wrap tubing and zip tied the harness to the bracket. Placed some Velcro to the battery pack and the helmet and secured it in between the MICH helmet pads for a form fitting and out of the way clean wiring set up. This battery pack is rated at 5volts / 2,600 mAh, in comparison to four x AA in series, the voltage will provide 6v (1.5v x 4) but the capacity is harder to figure out, what I could find was alkalines are about 1,800-2,600 mAh. However, since the fan will be drawing less voltage (and anyone more versed on this part please correct me if I am incorrect) the USB pack should net a similar run time performance. The USB battery pack only adds 3.75 ounces, plus the fans and bracket, somewhere in the neighborhood of 7 ounces total. When I tested the fans using 4 x AAs, the air pressure (fan speed) was notably higher but noisier as well. I will need to field test this set up, as the air volume seems to be enough but won't know until I give it a try.
-
Overwhelmed with Build Information
toybiz replied to jbfatcats's topic in Getting Started - Read this First!
+ with what Ian said. Whole kit would make a better choice for one reason in my opinion really. Color match. Even though all our armor is "white', you will soon learn to see subtle differences in the shades. This is normal from batch to batch even from the same armor maker. I know a fellow TK in my local garrison who's armor is made up from several makers and in photos, I never knew until I saw it in person that I was able to see the slight shade difference. There is of course the big step of which armor builder to choose from. This post by Mathias is great to identify the lineage of your chosen armor maker http://www.whitearmor.net/forum/topic/26479-armour-family-tree/ Good luck and being 5'6", you shouldn't have a problem... -
Wonderful newsletter and great tip for ear trimming. Would have saved me at least half the time!
-
TK-51410 requesting ANH Stunt EIB [MTK][365]
toybiz replied to Jim13csulb's topic in Request Expert Infantry Status
Congrats Jim I know I'm late to the congrats but you deserve it. I followed your MTK build to help me finish my MTK. I just need to be brave enough to apply for EIB as well. -
Agreed, the cover strips can/should vary slightly to maintain some proportion. Good call there. I too had to do some reshaping of a left bicep because the casting was oval. So I understand where you are coming from. Keep up the good work and yes, its ALWAYS a good idea to wear eye protection when using any power tool. Consider yourself lucky and not needing to switch to a one-eye pirate costume! Can't wait to see your progress but don't rush. Mine took me almost four months.
-
Can't wait to see another MTK join the ranks!
-
Great! Just remember to do your fitting on your thighs while wearing your under suit. There is a difference in fit! Also remember to consider the taper to the knee. Not that it would keep you from basic 501st approval, but after going to WonderCon in April, I was able to see a good number of other TK builds up close and noticed the knee opening wasn't addressed on quite a few. This will add to your overall fitted look and you could potentially avoid some armor clank noise when walking.
-
Can't wait to see the story continue to unfold! Have you finished all your trimming?
-
Jaren, I had the same overlap on the side of my faceplate and I too was disappointed with the somewhat sloppiness of the vacuum molding process. What I did was sanded the bump until it was almost flush. It couldn't be 100% flush because it would split since it would be paper thin at that area. Polished it slightly with 1200 grit wet sandpaper and then pencil marked the ears to make sure it would cover. Since the ears can be angled slightly forward or back you could make sure the imperfections were hidden.
-
Thank you Jaren. If feel free to ask questions. That's what we are here for!
-
Congrats Jared on your journey. Unless you are a modeler by trade or with plenty of experience it always feels like a monumental task to complete the armor, but you can and WILL make it. If I can and by all means I am no one special can do it so can you. I too completed my first set of armor which too was supplied by MTK. Check out my thread in the ESB build threads. I didn't do a complete step by step because there are so many on cutting and gluing already. I did how ever highlight some of the challenge areas of the MTK armor and what I did to change it. Just make sure you have all the necessary tools and I can't emphasize more to invest if you haven't already in a set of Lexan scissors. I wish I did for the first few pieces. Best of luck, take your time, and you come to the right place to build your armor. Adam
-
Warning! Loctite Blue Thread Locker will crack your TK!
toybiz replied to bzb's topic in Assembly, Mods, and Painting
Thanks for sharing but sorry to hear of your armor damage. I simply use nail polish to lock together nuts and bolts. Works great for holding but not for high strength applications like automotive where high stress or vibration is a concern. Adam -
TK24336 requesting authorization to come aboard. Fresh recruit from the Golden Gate Garrison. Passed basic training and approved by 501st Command. Profile access available here www.501st.com/members/displaymemberdetails.php?userID=17053 Thank you Adam
-
Yay! I just got my 501st phase 2 email! TK-24336 (which translates to my son's name Aiden) reporting for duty... Thanks for all the support and to everyone who shared their build experiences in the past.
-
Thanks for the confidence Ian! Going to take it as far as I can reasonably go. I just repostioned the belt higher to just under the lower AB buttons and moved the right shoulder bell slightly forward. Need to take some close up photos of the sniper knee plate glued on and knee ammo pack split rivets.