gmrhodes13
-
Posts
31,206 -
Joined
-
Last visited
-
Days Won
1,069
Content Type
Profiles
Forums
Gallery
Articles
Everything posted by gmrhodes13
-
Looking forward to seeing the progress, you can find some helpful info in this thread Good luck
-

ANH TK Stunt Armor Modifications
gmrhodes13 replied to JSchmit's topic in Hard Armor (General Discussion)
No brand, generic snaps and elastic, you can usally tell if it's an industrial elastic, thicker and tighter woven compared with other elastic. Soldering iron or glue around the post hole does help. I've had no issues with "too tough" connection, I dress myself so it may be easier for me to do it as I'm actually in the suit, ever tried to dress someone else? it's not that easy from the outside. Angle also makes a difference, snap can get quite loose the more angle there is. That was an example of boot connection to shin, I prefer elastic as it has some give. Some use velcro in other places on their builds but again doesn't have any give. -
ANH TK Stunt Armor Modifications
gmrhodes13 replied to JSchmit's topic in Hard Armor (General Discussion)
I purchase mine from Aliexpress, most purchase Line #24 snaps, with either industrial velcro or doubled over for extra strength. Some great info here, using a soldering iron (or heating something metal and sharp) can seal the hole and prevent pulling through. You can also add a drop of glue which also helps prevent pulling through -
ANH TK Stunt Armor Modifications
gmrhodes13 replied to JSchmit's topic in Hard Armor (General Discussion)
Looks like your stud is upside down, normally I use 2 snaps facing upwards on the shoulder elastic and 2 facing down on the shoulder strap elastic, if you also add the holes further to the front it will help pull in the shoulders after you move your arms. Doubling over the elastic from chest to back plate is also a good idea to make it tighter and less likely to pull outwards. When attaching the snap is pushed upwards which is easier to hold. This elastic is industrial which is tighter and tighter woven than regular elastic so less stretch The other issue I'd like some advice on is my thigh pieces. As I walk in my armor, the thigh pieces shift and become out of alignment with the shins. This becomes most prevalent with my left thigh, as eventually the piece shifts and the bottom clashes with the sniper knee as I walk. The bottom of the thigh and the sniper knee begin to audibly click as I walk, and eventually the thigh piece shifts to the point where my left leg locks as the top of the knee meets the thigh bottom. I'm wondering if it might be a good idea to place pieces of foam in the interior of the thigh pieces in order to restrict lateral movement. Any advice to any of these issues would be greatly appreciated! Your belt is sitting low in the image, can't quite see the tops of your thighs, raising the belt and thighs could help, also raising the AB section will give you more room at the tops of the thighs. Tighter strapping my help to keep your thighs up, doubling over can also help as it increases tension. Adding foam inside leg pieces can help keep them in alignment, I have a block of foam on both sides of my thighs as I have skinny legs. You could add a loop of elastic on your boots, attach snaps and secure them inside your shins, this will stop them moving around and also make them pull down to the boot after moving. Also adding a block of foam behind the front of the shin can keep it away from the thigh. A good idea is to add velcro to foam pieces so you can remove and wash if they get really sweaty, although I know a few troopers who just glued them directly with E6000 to the inside of the armor. A couple of builds for shin rotation, one has elastic at the back (I prefer front) Another with velcro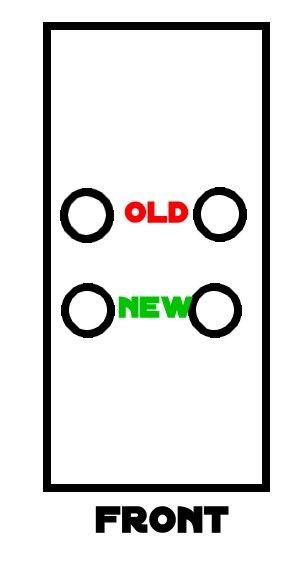
-
Leaps and bounds compared to the V1
-
WTF First Time build. Need some feed back, thanks in advanced !
gmrhodes13 replied to Woody's topic in ANH Build Threads
Can't remember if I posted this link earlier, you may find it useful -
WTF First Time build. Need some feed back, thanks in advanced !
gmrhodes13 replied to Woody's topic in ANH Build Threads
My question is are the inside of the forearms supposed to look different or trimmed to the same “u” shape. I have them trimmed to where the flash was. Normally the right and left sides are a different shape/size, same as screen suits Also, the bottom cod piece of very bland and no hard lines to see where to exactly shape it too, I have a rough pencil marking for now but curious any tips or tricks. Trim line looks fine Bicep with the thumb print goes on the left arm NOTES ON BICEPS: In the original films, many of the biceps had an indentation, or "thumbprint" (normally worn only on the left) on the inside. As the biceps are interchangeable, this is not a requirement for any level. You can take off all the return edge on the shoulder bells if you wish too Swoop on the shoulder bells goes to the front Note: For ANH S/H and ESB as mentioned in the CRL for basic approval, shoulder bells are interchangeable. However, note that many (but not all of) the originals contained a "swoop" (slight curvature on one side) at the bottoms, which should ideally face the front. Some armor makers have incorporated this detail into their molds, but some have not and many times troopers get them backward. This is not a requirement at any level. <--- Front References to other WTF forearm builds Found from searching that the left forearms have a slight curve to it while the right is more straight Left Wrist Left Elbow Sorry if I've missed anything. -
Nice work so far. Just watch out for print lines and cracks 3D printed components must have no visible print lines and must be smooth for a realistic appearance. You may also want to distress/weather your red cogs

-
If you use the "direct link" or link with the extension ie: .jpg, .png, .gif (or right click, copy and paste) your image will show in your post A good how too here
-
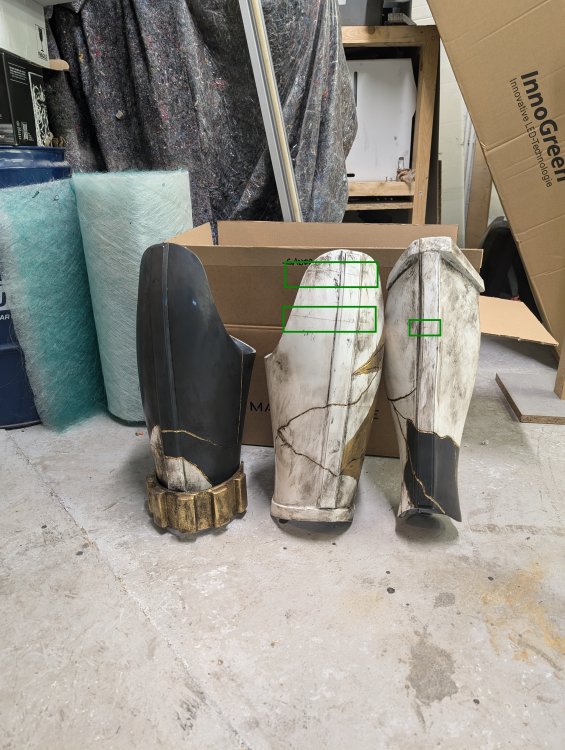
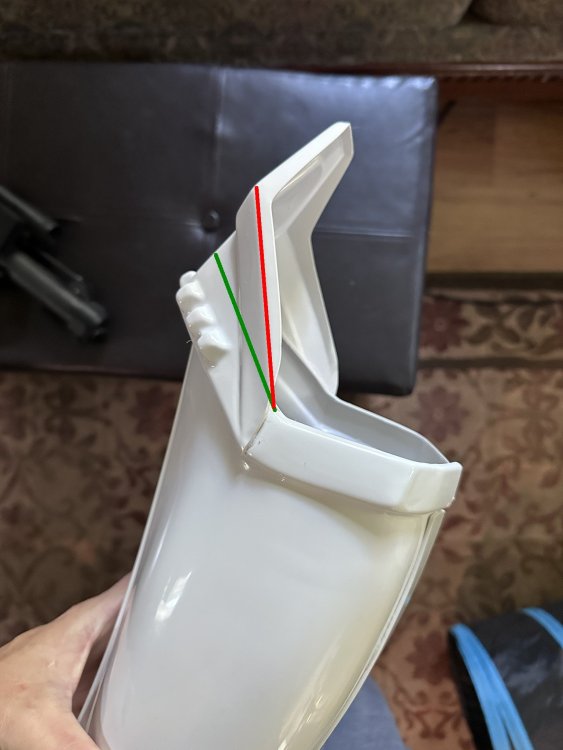
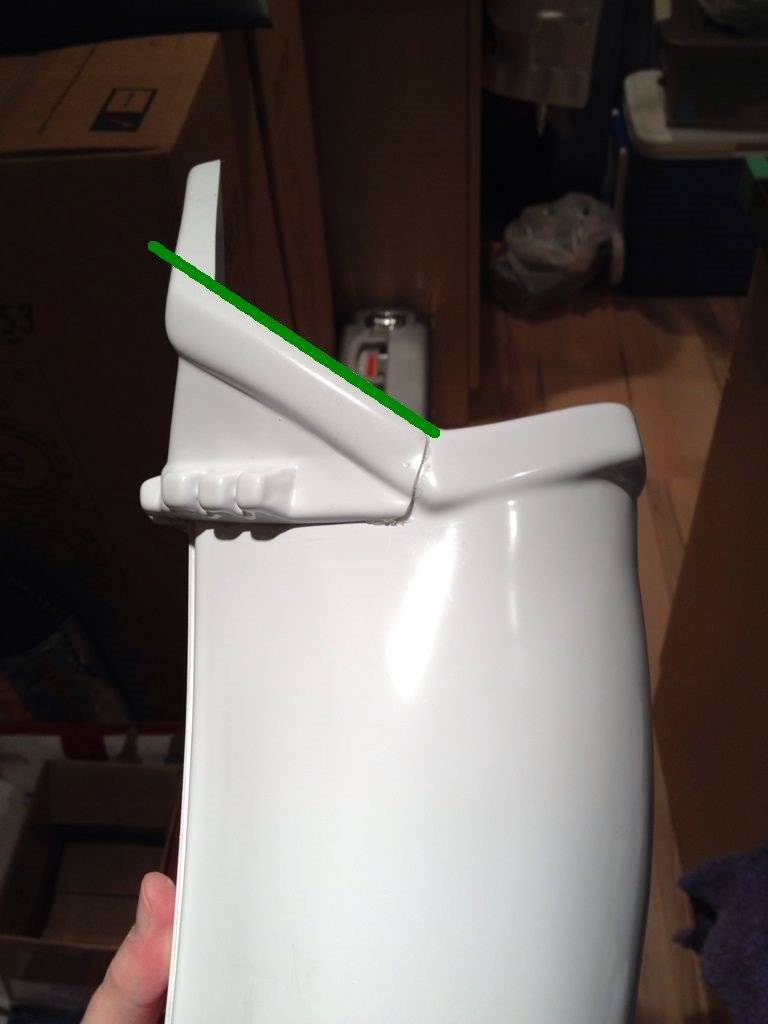
No issue for me, albeit I do like to give it a little heat so it's easier to bend. I use a heat gun, some use hot water bath or torch. Similar process to the belt I would think rough up the area inside and glue some scrap abs behind the crack, really depends were it is sitting on the thigh. Just make sure you try on some scraps, doesn't need much heat before the plastic is pliable
-
Lots of different ways to do it, check out some of the threads in this area https://www.whitearmor.net/forum/search/?q=lens&quick=1&type=forums_topic&nodes=4
-
Shim the sides (ab and kidney) per tutorial (is this required for initial approval?) Not normally but your GML can confirm, some are a little strict. You took a little too much material from the bottom corner of your thigh ammo strip, you could trim the end so it's as noticeable Agian entirely up to your GML Position of sniper knee plate On the sides the ridges should follow the inner ridge, with little gap under the front You could also add some foam behind the sniper plate to help hold it away from your thigh

-
Dylans Imperial Armoured Captain
gmrhodes13 replied to loyalImperialCitizen's topic in Imperial Commando Build Threads
You can get automotive paint in spray cans and that's what I normally use, albeit I do have spray equipment too as I used to spray cars Again it depends on what you are comfortable using, anything new you have to get used to using it and practice makes perfect, acrylic can go on a lot thicker than you would spray an enamel, but there is a fine line between enough paint and getting runs Having enough painting and drying space is essential. I also use metal hooks which are taped on with duct tape, easily comes apart. When it's too cold outside you have to improvise -
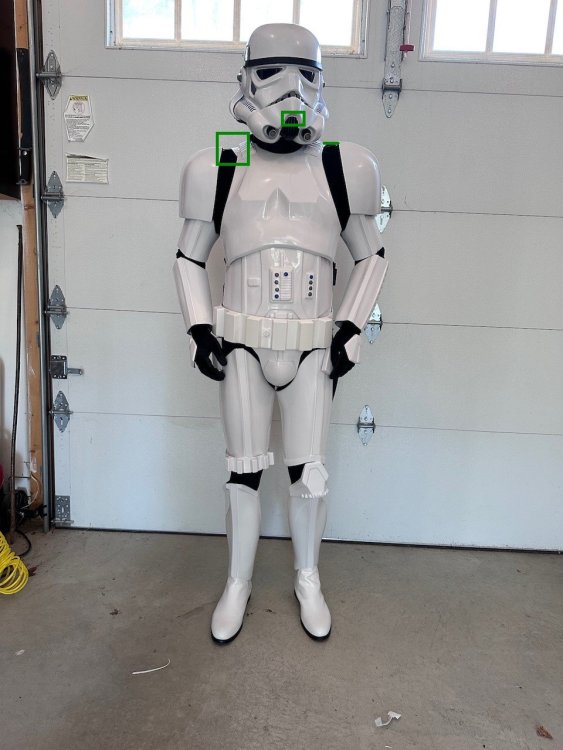
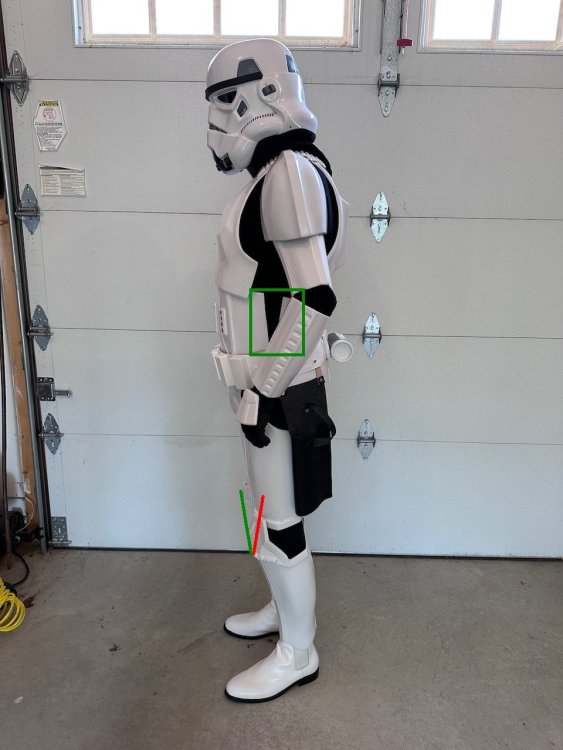
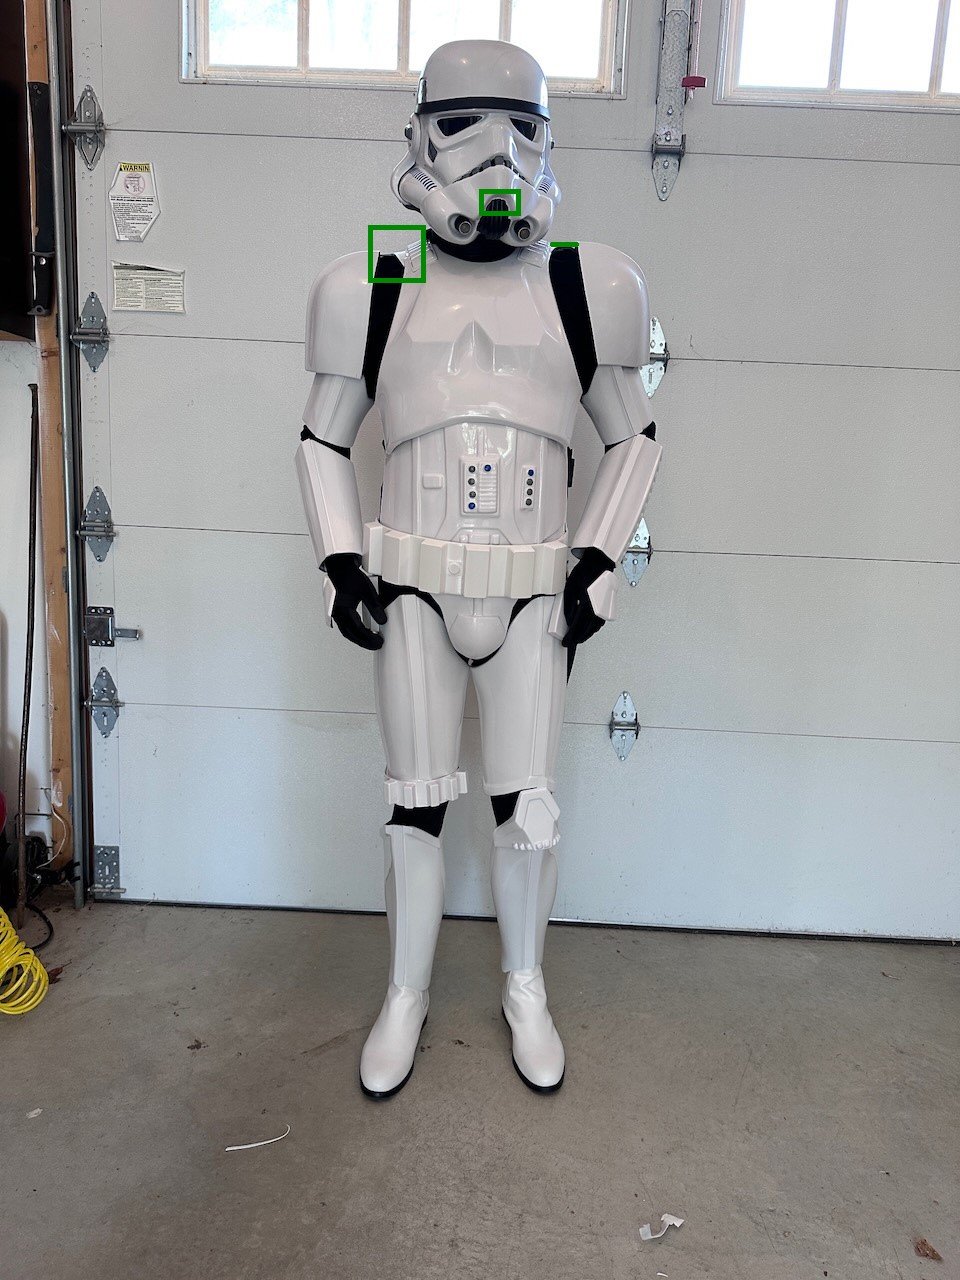
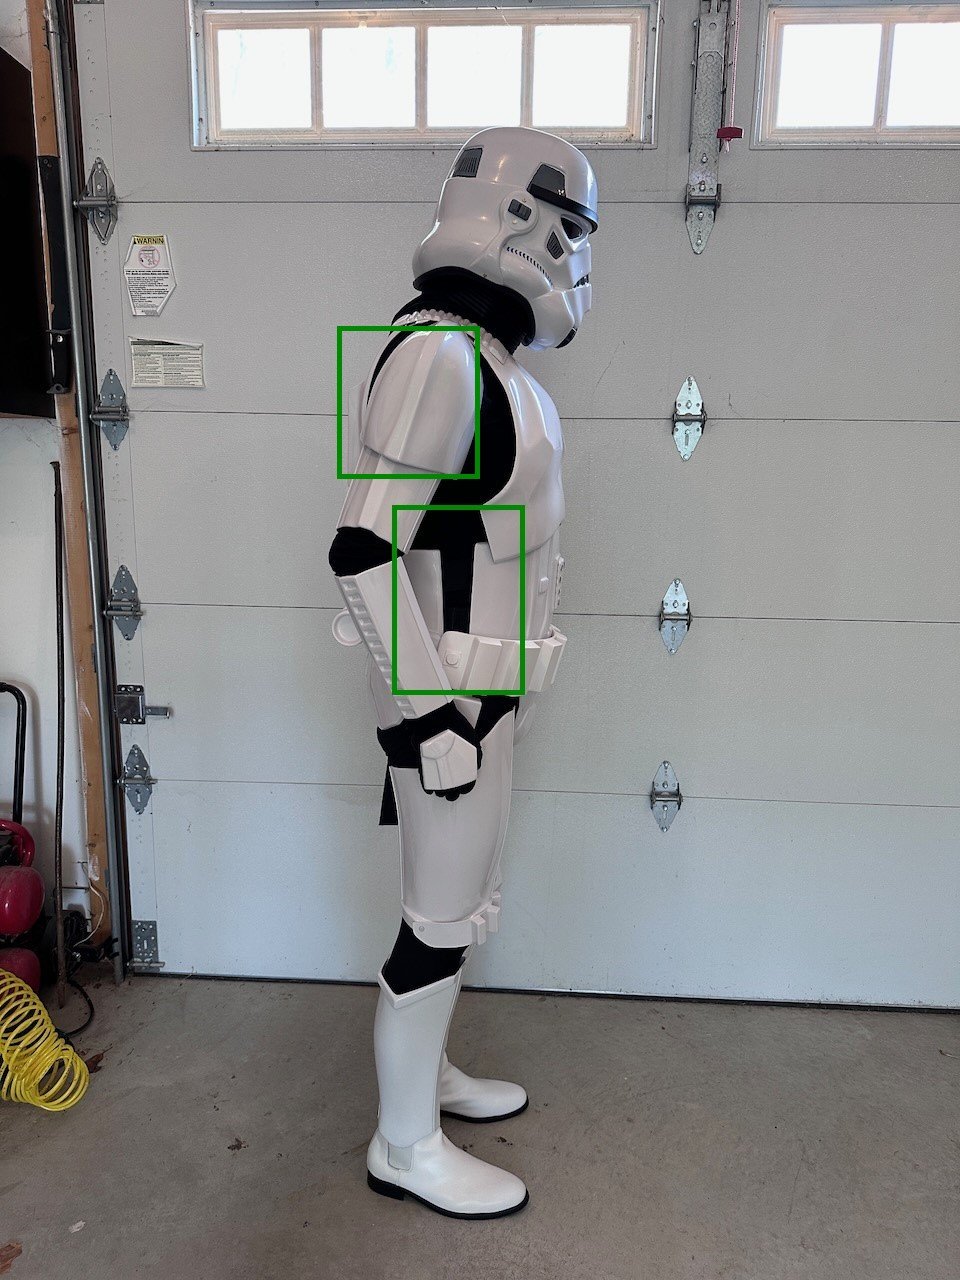
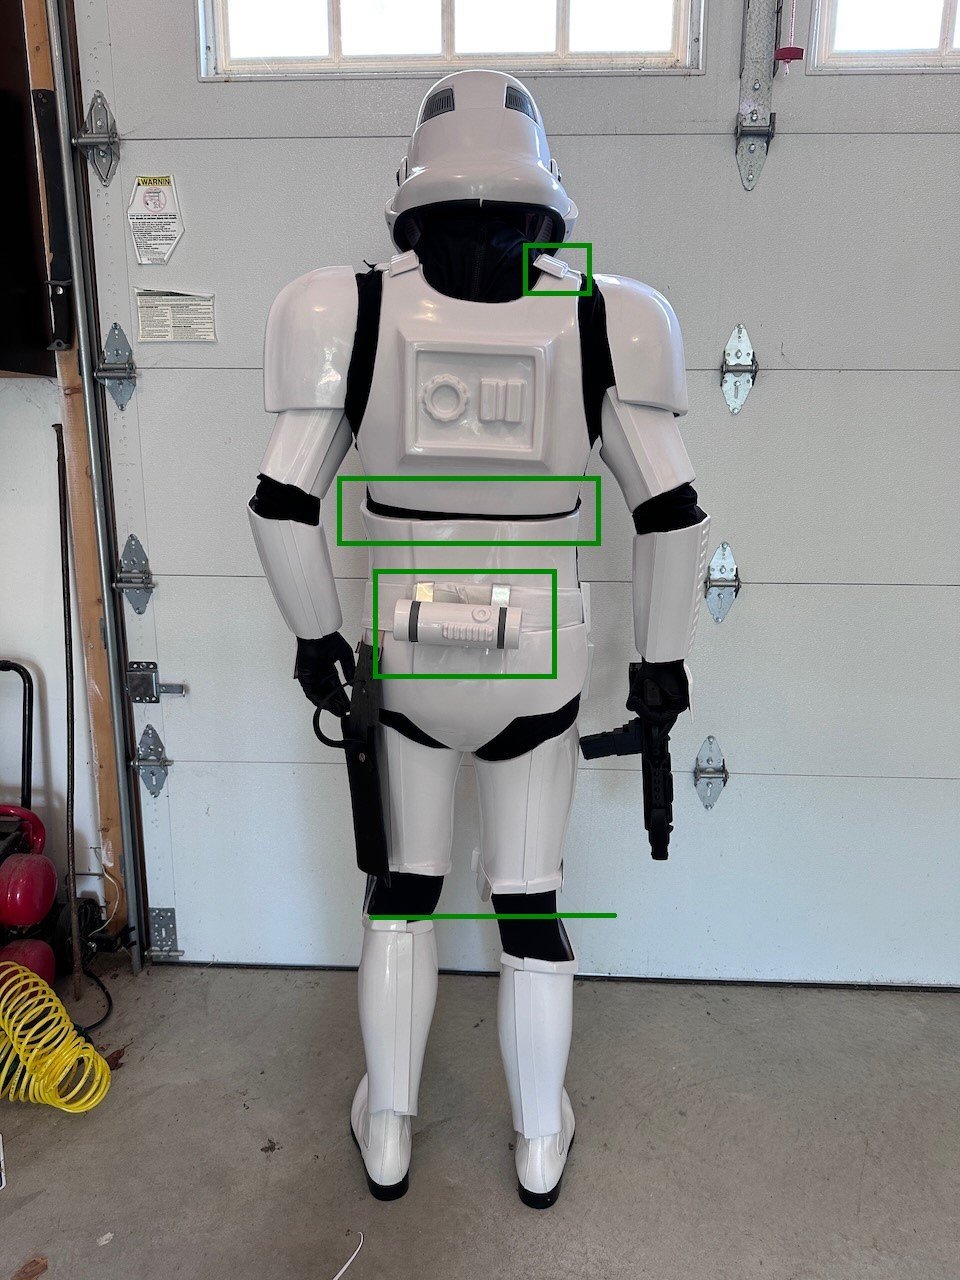
You do have quite a lot of room between your shoulder bells and shoulder straps, perhaps tighter strapping. Your white elastic is being pulled quite a bit, doubling over the elastic can sometimes help to reduce this. Looks like you could also clean up the top of your vocoder as it's not well defined When taking your back photo don't tilt your head downwards as it shows a larger gap between your helmet and back Shoulder strap not central to backplate, adding elastic can help Gap between back plate and kidney, perhaps tighter strapping Try to have your armor pieces at the same heights Detonator should sit central to the belt, too much clip showing You have quite a large area on the side between your ab and kidney, you could add side shims to reduce this Sniper plate should not be angled backwards, hitting your thigh Swoop on shoulders normally faces forward, you have it facing backwards A good how to here for side shims You took a little too much material from the bottom corner of your thigh ammo strip, you could trim the end so it's as noticeable Swoop For ANH S/H and ESB as mentioned in the CRL for basic approval, shoulder bells are interchangeable. However, note that many (but not all of) the originals contained a "swoop" (slight curvature on one side) at the bottoms, which should ideally face the front. Some armor makers have incorporated this detail into their molds, but some have not and many times troopers get them backward. This is not a requirement at any level. <--- Front These are just suggestions and not required for base approval although your GML may require them. For Level 3, Drop boxes are vertically aligned with the end of the ammo belt with minimal gap between belt and box. For Level 3, the corners of the plastic ammo belt shall be trimmed at a 45 degree angle that meets the outer edge of the cloth belt. A few adjustments (and a belt) and you should be good Belt references. The top of the ABS belt shall sit at or just above the bottom of the central and vertical ab button panels. A slight overlap is suggested, but not required. Good luck


.jpeg.085bfc6141ee1b40af44cec748cdff24.jpeg)
-
Katye's First Build Ever ANH Stunt WIP
gmrhodes13 replied to Katye's topic in Build Threads Requireing Maintenance
Welcome back, you may have noticed your build thread had been moved to "Build Threads Requireing Maintenance" this is because most of your images are missing and left with broken links, if you do have a copy it would be great if you could update your build thread A little difficult to see some details as your photos are of a low resolution but here are a few things you may want to address: Definitely looks like your thighs should come up as they are hitting your shins. Are your biceps snug or loose as they could be smaller? With cover strips they normally sit just inside the raised ridges (not all armor makes have the raised ridges), in your case you needed more room, this makes an issue as the raised areas are quite wide. In some cases people remove the raised areas and glue flat pieces, adding ABS paste and sanding/polish. If the gap between the raised ridges is not too big you can add larger cover strips, I would however speak with your GML (garrison membership liaison) as to how wide is acceptable for approval. This is an example of adding a shim after raised ridge has been removed Although these are for thighs but you can see what I mean with the raised areas, they have been removed in these threads You may need to trim your backplate so it sits above the kidney, one corner is stuck inside your kidney the other corner outside, but does look quite low. There are a few build threads which have made mods to the armor to better fit with height https://www.whitearmor.net/forum/topic/38416-crickets-rs-stunt-build-for-the-vertically-challenged/ https://www.whitearmor.net/forum/topic/38842-fragarocks-rs-stunt-build-not-to-scale/ https://www.whitearmor.net/forum/topic/42868-sha-shas-wtf-anh-stunt-build-complete/ For the posterior you may be able to add extra strapping more towards the front edges OR add some V tabs With a heat gun (or in oven) you bend strips of ABS plastic into the shape of a V, only glue one side and the other remains free to allow movement when you bend. Just helps stop the butt plate from pushing back from the back plate. A couple of adjustments you could make. Bring your belt up a little more at the front. The top of the ABS belt shall sit at or just above the bottom of the central and vertical ab button panels. A slight overlap is suggested, but not required. Looks like your gloves have folded over or it may be your sleeves, again hard to see. These are just suggestions and not required for base approval. For Level 3, Drop boxes are vertically aligned with the end of the ammo belt with minimal gap between belt and box. For Level 3, the corners of the plastic ammo belt shall be trimmed at a 45 degree angle that meets the outer edge of the cloth belt.
-
Dylans Imperial Armoured Captain
gmrhodes13 replied to loyalImperialCitizen's topic in Imperial Commando Build Threads
I stopped using Rust-oleum paint as it wasn't being consistent, no matter how much you shake the tin it would come out sandy at times without warning, make sure you shake as much as you can as well as between coats. I use acrylic automotive paints, doesn't matter if you paint gloss over gloss, dries quickly unlike enamel based paints and can be sanded and polished if needed. Everyone has their own way with painting or what paint they use so go with what ever you are more comfortable with. -
Second coat of spray paint?
gmrhodes13 replied to Colin's topic in Costuming and Builds First Order (501st Approved)
I have had lots of issues with Rust-Oleum, mainly it not mixing properly and coming out in places like sand. With primer you are normally ok to give a light sand, personally I would use a 400 or 600 to give the next coat of paint something to grip too, 2000 is normally for final buff/polish. You really have to make sure the paint is fully dry before applying another coat, I've seen a lot of issues with crazing or splitting if not fully dry. Really depends how "smudged' it is but I would not think you would have to remove it all. Definitely try to shake as much as possible between application, even if it appears to be coming out consistently. -
Dylans Imperial Armoured Captain
gmrhodes13 replied to loyalImperialCitizen's topic in Imperial Commando Build Threads
Looking forward to seeing your progress, good luck -
Captain Variant research and screengabs
gmrhodes13 replied to loyalImperialCitizen's topic in Gallery & Research
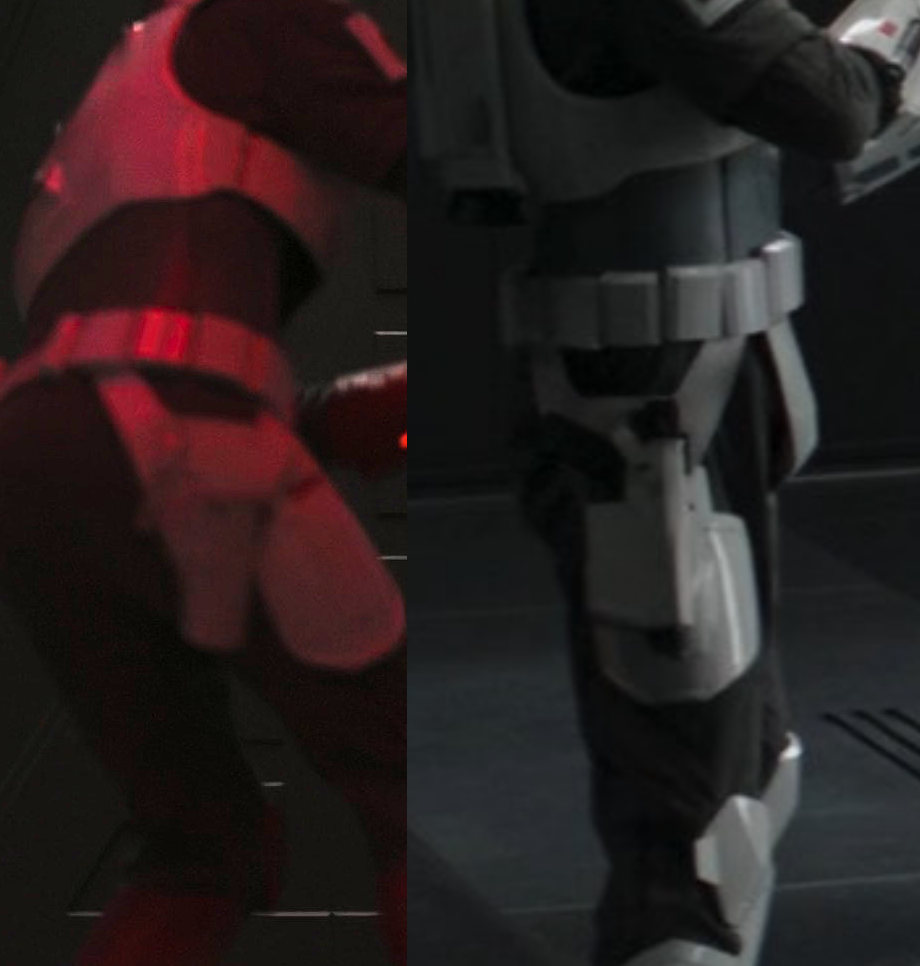
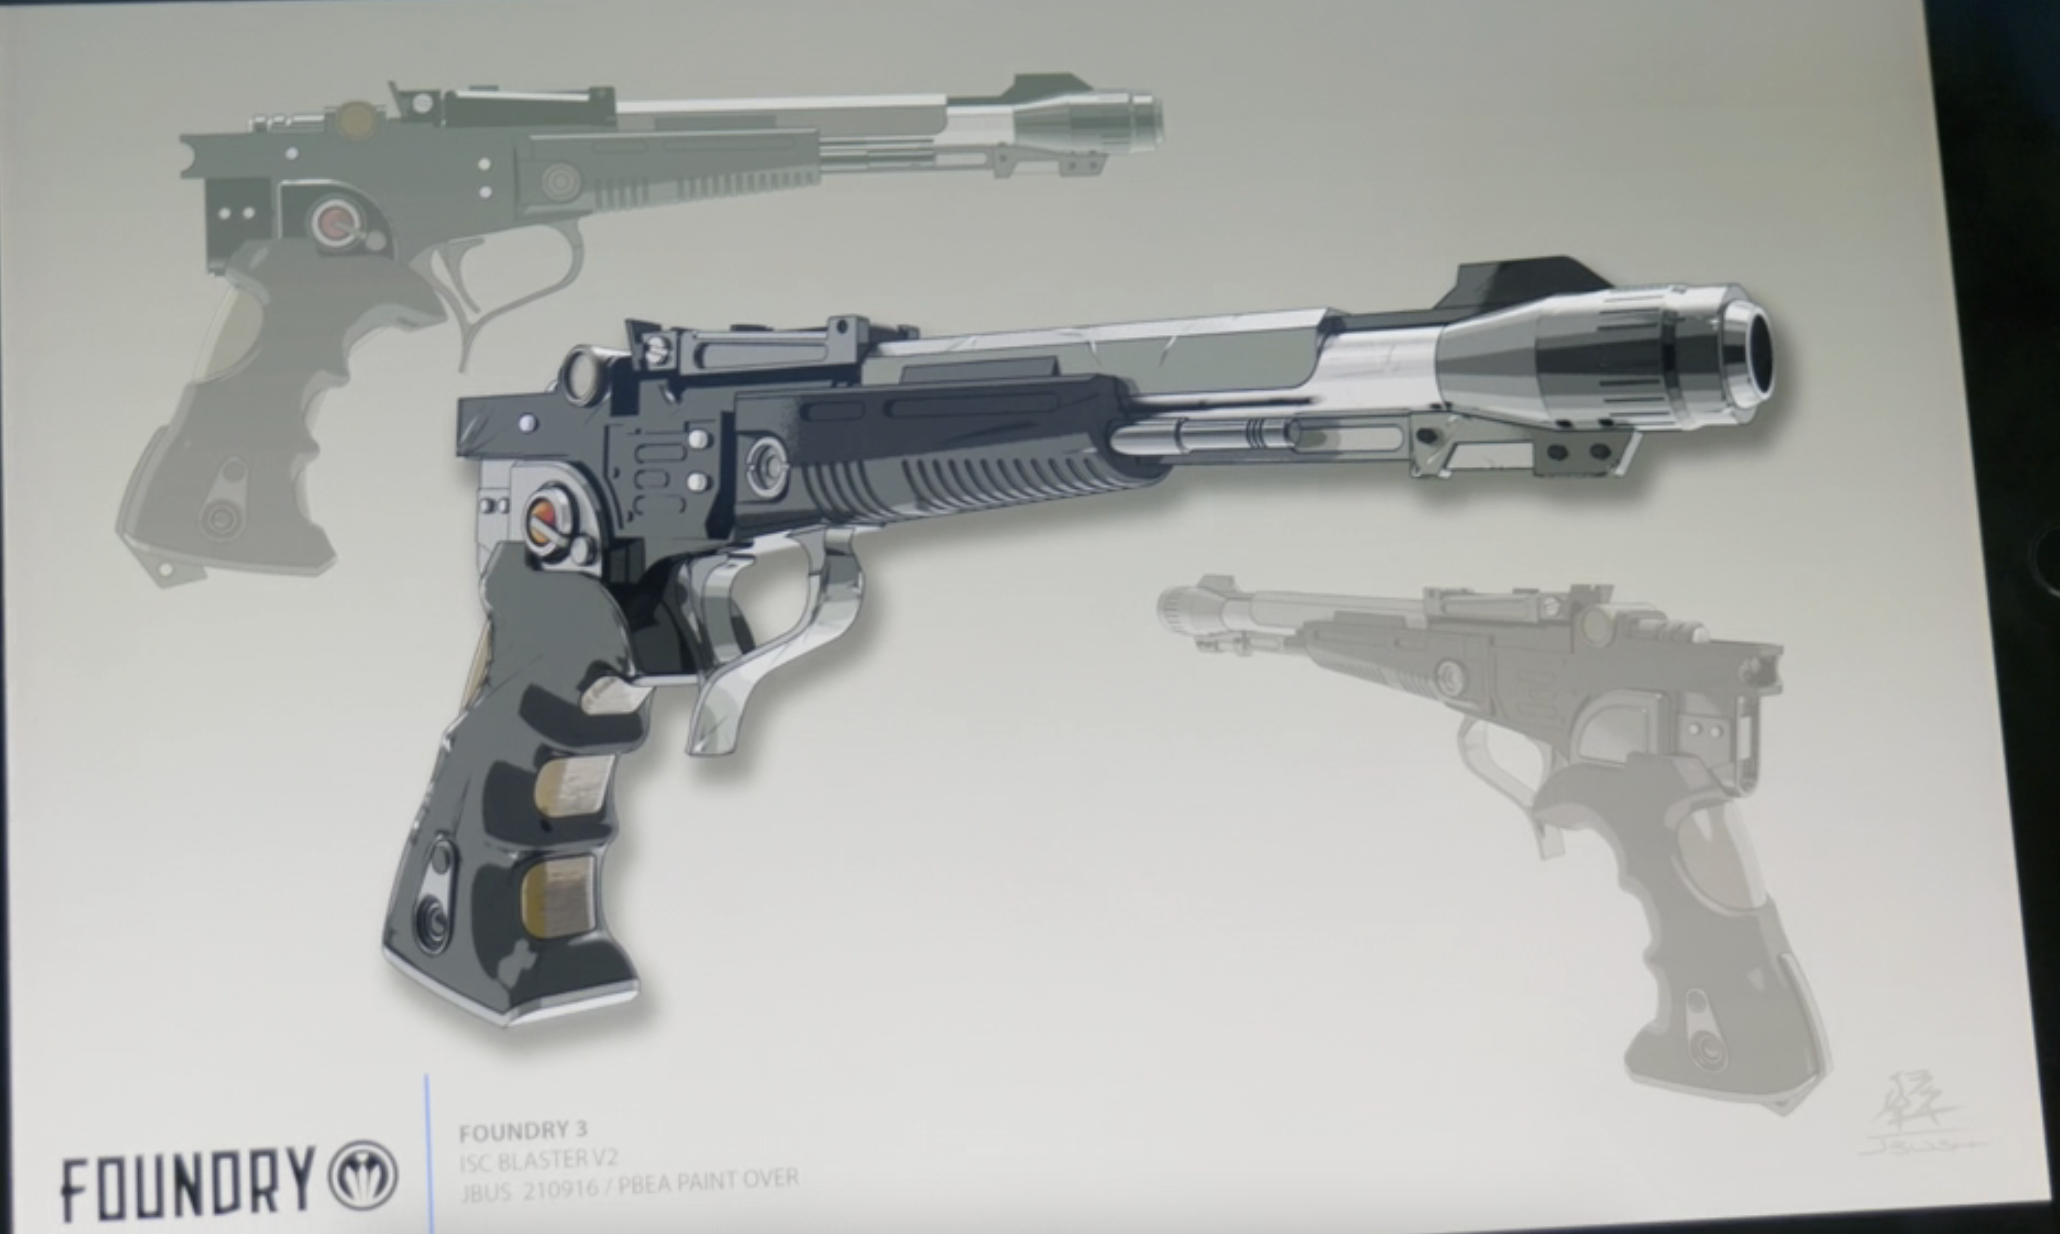
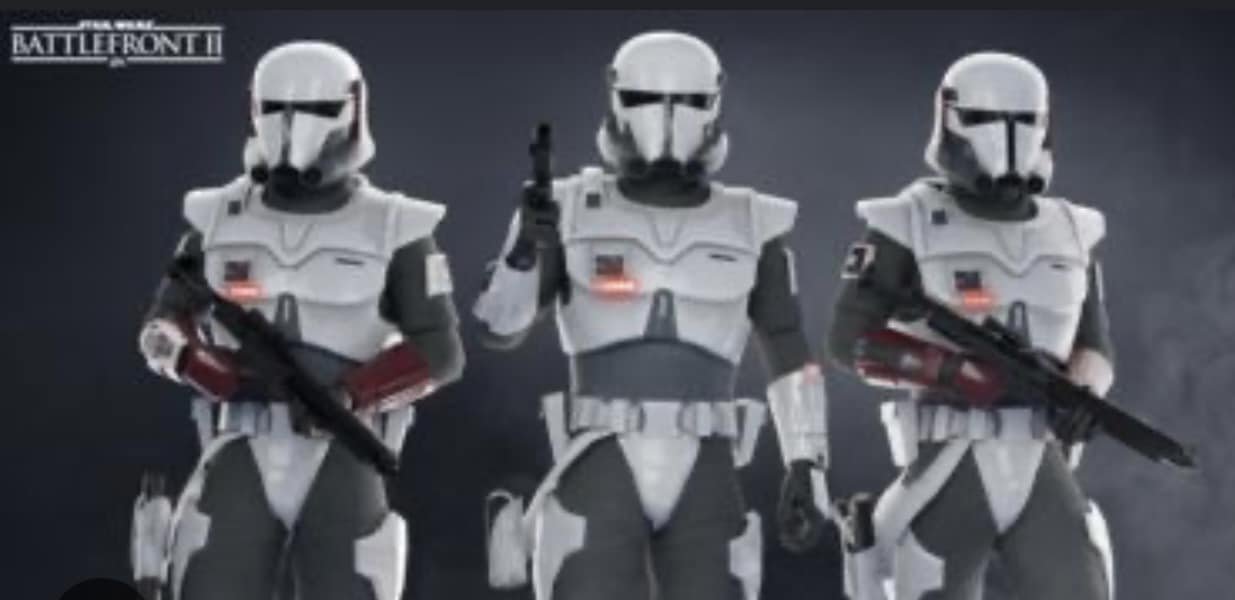
Unless of course if you include Battlefront 2 references (I don't have the game so can't supply any other references), red variants showing SE style blaster, holster and rifle
-
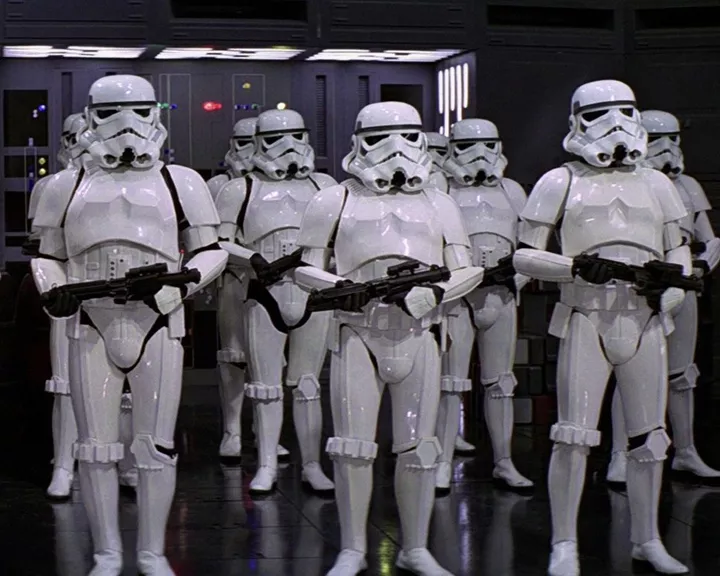
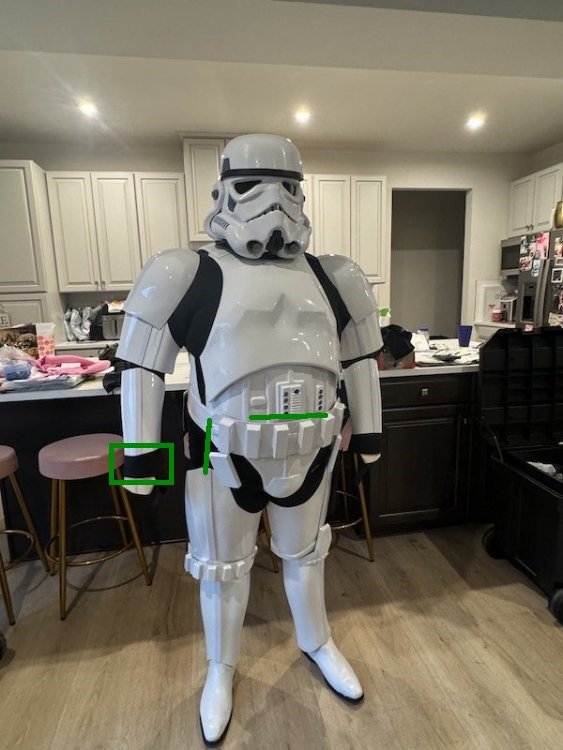
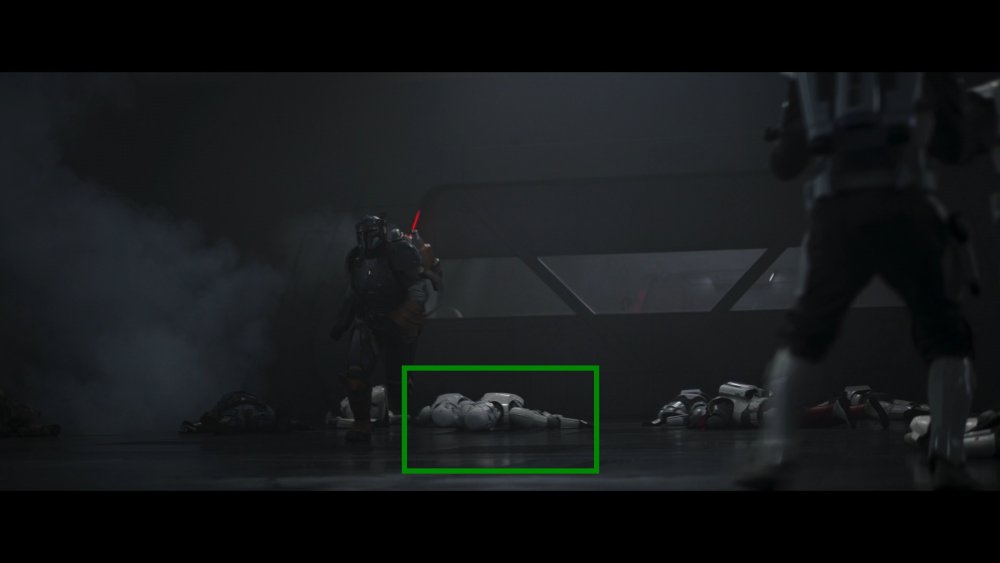
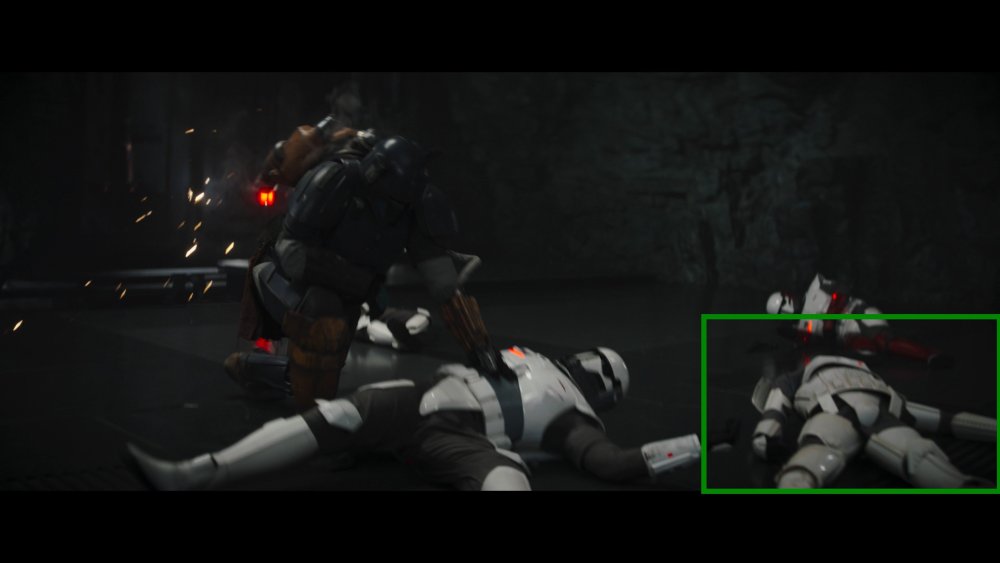
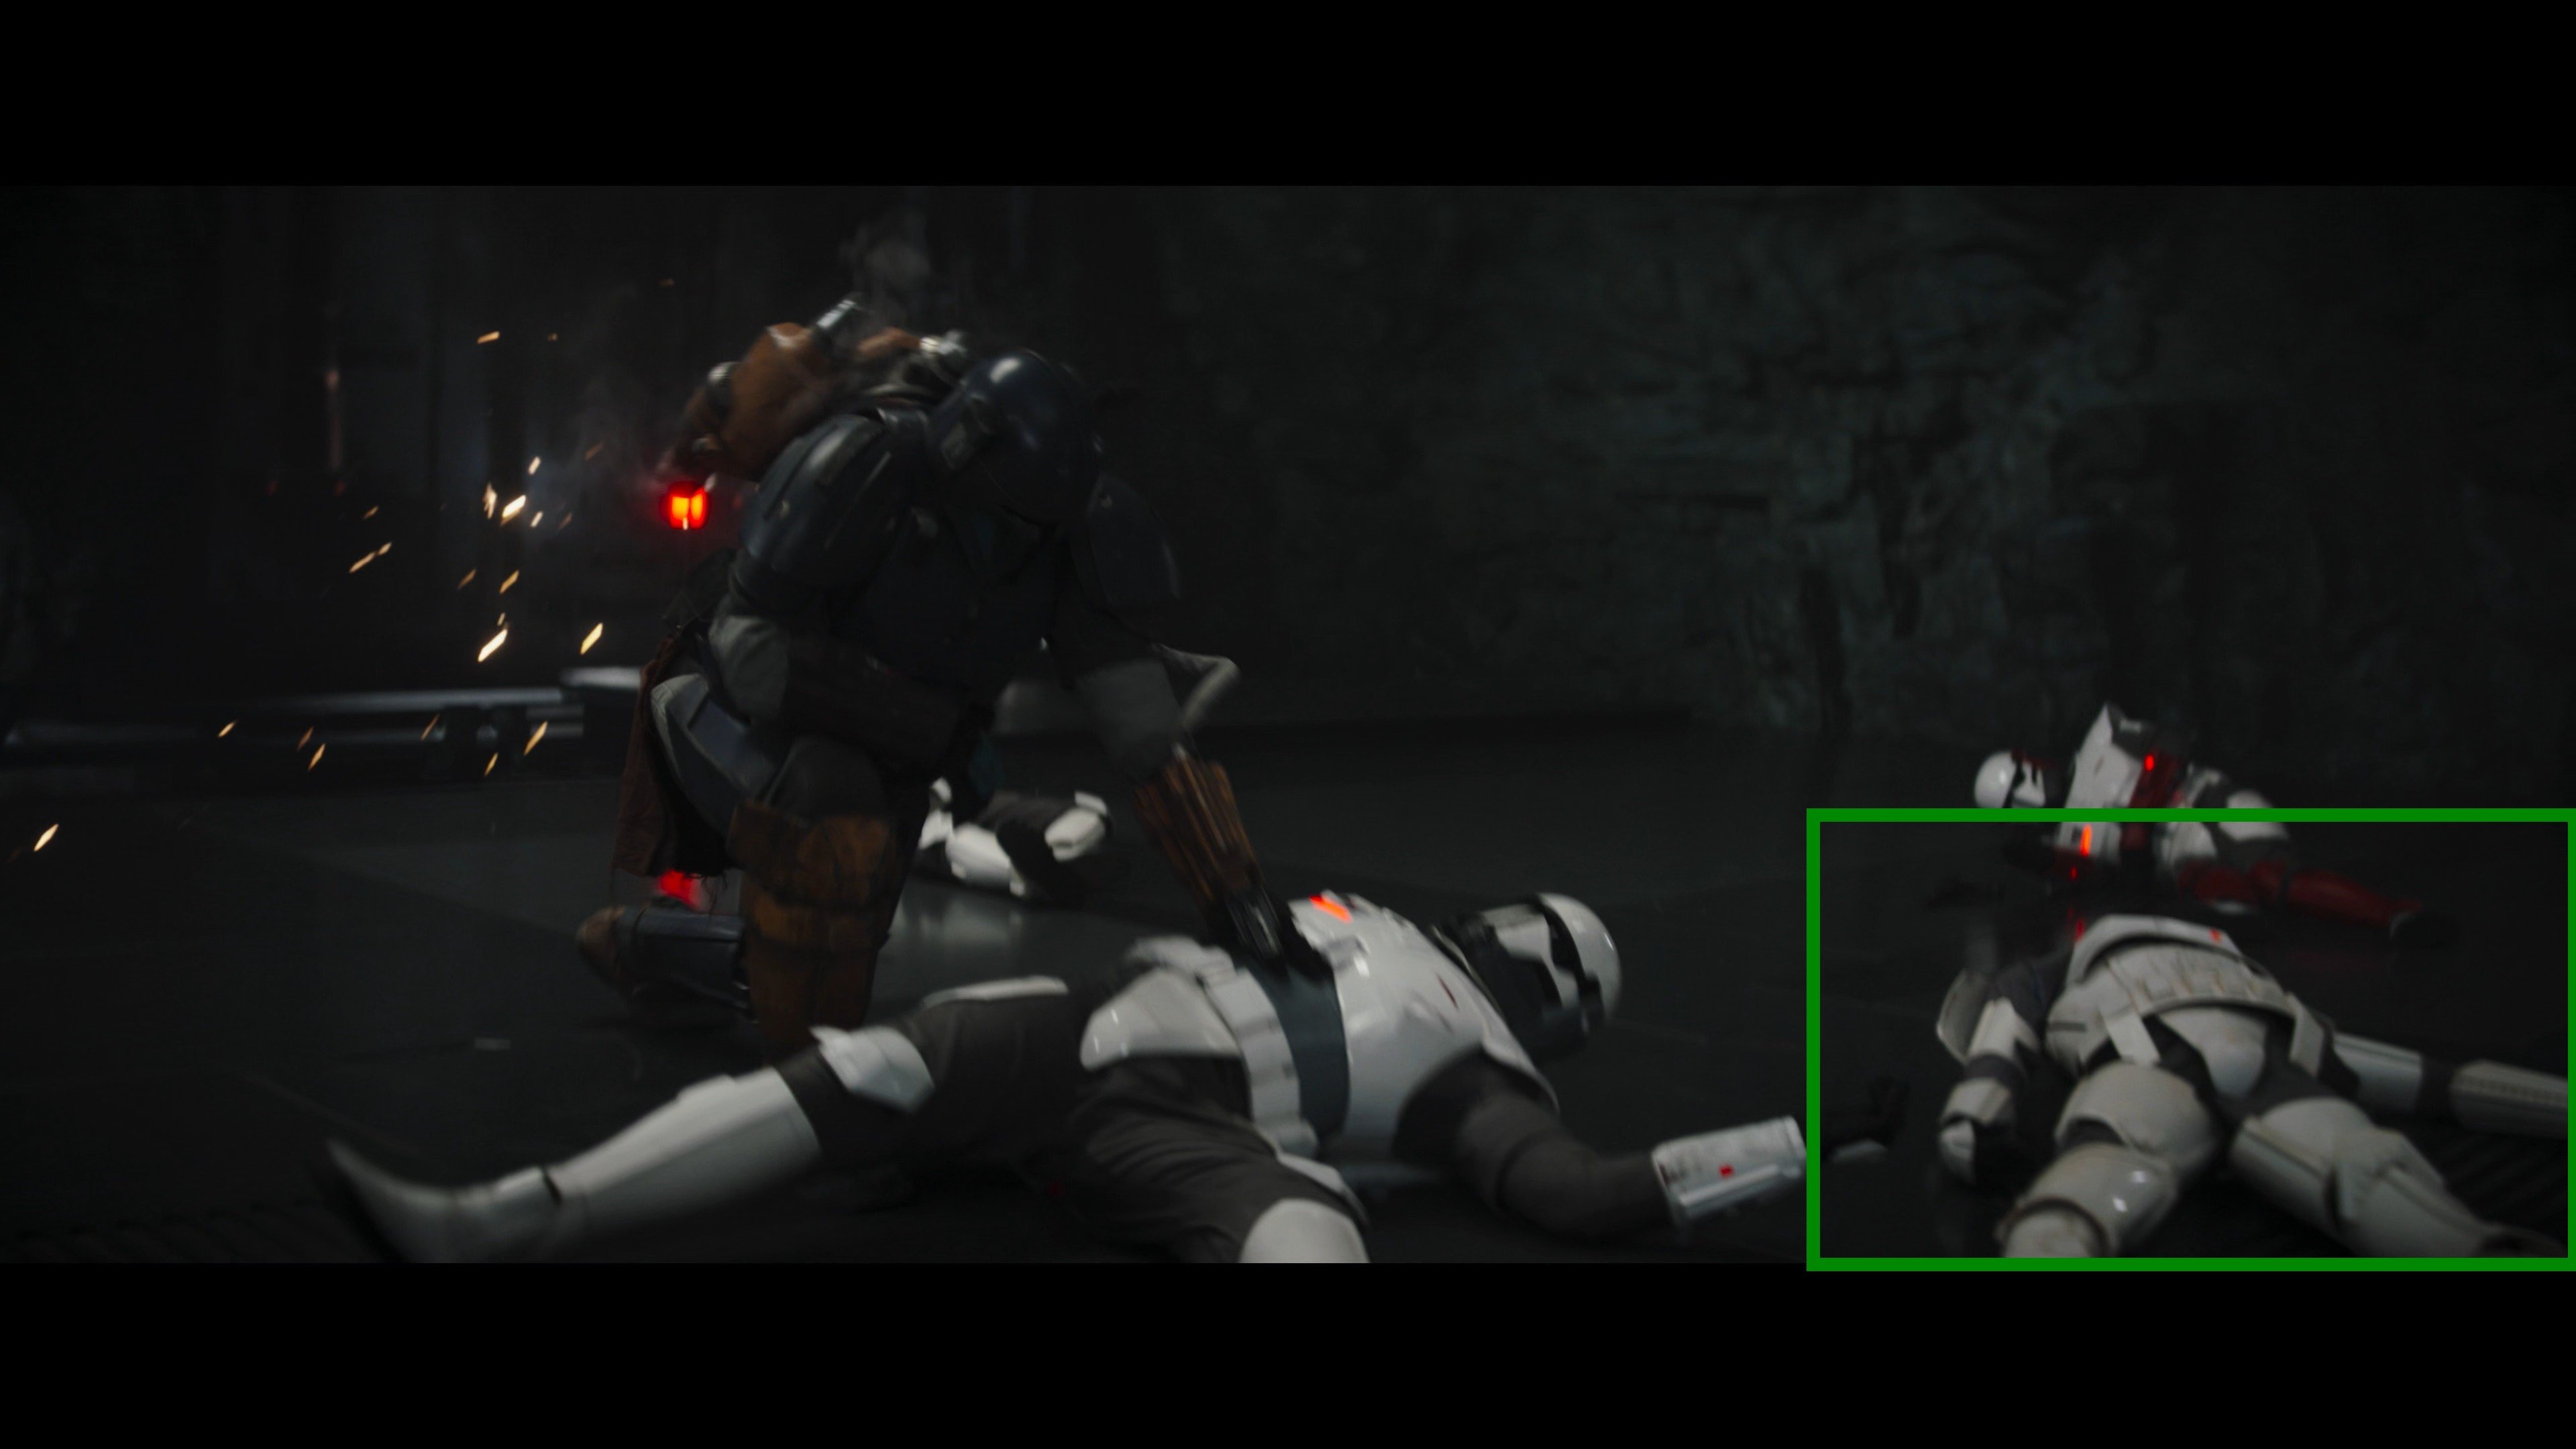
Blink and you may have missed them, there were Stormtroopers in Mandalorian Season 3 Ep 7 I gather they must not have had enough IAC troopers for some scenes so they decided to throw in some Stormtroopers "who cares, nobody is going to notice right!" Must have had enough flight suits though as the TK's are wearing grey, did someone say new CRL Pretty easy to spot them here, appears to be 3 of them
.thumb.jpg.ba041b5b0273ecf855e2cfa856c8dc52.jpg)
- 1 reply
-
- 4
-

-
Captain Variant research and screengabs
gmrhodes13 replied to loyalImperialCitizen's topic in Gallery & Research
I doubt it would be an option for the sidearm, as screen references show the pistol being used and a different holster, but yes no rifle unless you can find screen references. Really up to our DL and the LMO's to discuss whether it will be a new CRL or added as a variant, as you rightly point out many other detachments have multiple variants on single CRL's, such as IOC, Gunners etc, although Pathfinders have separate CRL's for their Shoretrooper variants so it could go either way. Taking a look at one of our own CRL's, TFA and there is additional language when using some optional weapons so that could be an option too, again up to the DL and LMO's OPTIONAL Level three certification (if applicable): Riot shield and riot baton must both be present. Pauldron, backpack, ammo pouches and ammo vest shall not be worn with riot baton/riot shield combination. -
Captain Variant research and screengabs
gmrhodes13 replied to loyalImperialCitizen's topic in Gallery & Research
Side by side comparison of the holsters
-
Captain Variant research and screengabs
gmrhodes13 replied to loyalImperialCitizen's topic in Gallery & Research
My understanding was they only had 2 of the red variants and I've not seen any on screen of more than two at the same time -
I guess you could try some eva foam
-
Captain Variant research and screengabs
gmrhodes13 replied to loyalImperialCitizen's topic in Gallery & Research
Great to get a dialogue to get the conversation started, albeit we do need a finished costume to be able to create a CRL or variant to a CRL. These troopers used the variant pistol, Mando ends up with at the end of S3E08 I would think the holster would be different too to accommodate the pistol, doesn't look as wide


.jpg.6c007d4fd3ef2c9be4cad8cc5438fe91.jpg)