Leaderboard


Popular Content
Showing content with the highest reputation on 07/22/2025 in all areas
-
Have connected with Uks and I’ll be getting mine modded from him. I’ll report back once I get it. Thanks for the suggestions and recommendations everyone!2 points
-
1 large and 4 small is fine as there is no CRL requirement A good idea is to add some material behind to add some more strength, they can crack over time. I trimmed mine the width of the ridges, then glued underneath so it can't be seen, many do the full width of the shoulder straps, as below shows.1 point
-
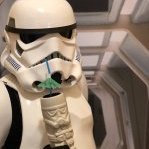
I definitely see what you mean about the trimming the sides compared to the originals. As for the number of bars attached to the plate I actually did do 1 large and 4 small glued to the chest plate, though either I need to move them forward down the chest plate a little more or I'm just bad at taking selfies lol I'll get rid of those large tabs in the back too.1 point
-
1. First Name: Hanson 2. Last name: Quan 3. 501st ID (TK number): 47826 4. Paper size: Letter 5. The name of the DO that did your final approval: Mario Thanks to all of you! Here you go Centurion. https://www.whitearmor.net/eib/certificates/47826-centurion.png1 point
-
WOO, THANKS!!!!! YOU MADE MY DAY!!! Thanks for all of the time you spent with me, as well as your patience!1 point
-
Hi Hanson, and thank you for your Centurion application! CRL and CENTURION Application Requirements: All required photos have been submitted, and on behalf of the entire D.O. staff we are pleased to welcome you to the rank of CENTURION. Congratulations! Other-Armor Fit/Assembly; In this area we review observations made by your fellow troopers and the DO team. Some observations may lead to suggestions to improve the overall look of your armor, and please keep in mind that we consider both text (CRL) and pictures (screen caps/reference images) when reviewing submissions. Congratulations Trooper, well deserved!! Don't forget to request your Centurion Certificate HERE1 point
-
Thank you!1 point
-
yeah its very much gonna be a long haul job as ive made 0 progress losing enough weight to be comfortable doing the chest rig and francis's ab section wont fit me.1 point
-
Maglight was the first torch I thought it was based off. Still have my mini mag with old school micro bulb. Hasn't missed a beat in almost 30 years, lol.1 point
-
Have a look at the 2D cell size, the traditional one not a modern LED one. Mine is red but the scale looks right: The black areas line up with the button and the 3 knurled areas, the lens, grip and battery cap.1 point
-
Sure, is this better? Also here, just in case: https://drive.google.com/file/d/17dh1paCUZwmg6lr-SDl55DDqqJ_tNa0_/view?usp=sharing1 point
-
unfortunately still not made a major amount of headway, the armour (barring the jetpack and chest) are in the smoothing stages, im hoping the maker will have them smoothed out for an august armour party my squads thinking about and i can get everything painted1 point
-
I've done @Sly11's mod on mine with this battery: https://www.aliexpress.com/item/1005007173333563.html?spm=a2g0o.order_list.order_list_main.11.57a81802P6vyNk Worked a treat for me, icomm was going strong at the end of my troop this last weekend.1 point
-
There is a single screw in the center of the icomm box in the back. Once you unscrew that, you can gently pry up the circuit board to access the battery. I buy replacements at Amazon and always keep an extra on hand. https://a.co/d/gP8btJv Sent from my iPhone using Tapatalk1 point
-
@The5thHorseman generously designed some F-11D for 3D printing and provided them to us for personal use. Make sure you pick the right one for you build. TLJ/TROS F-11Ds will require an additional Picatinny rail on the front as shown here: This will need to be sourced separately.1 point
-
Picatinny rails: Purchase: F-11D/E-11 Picatinny Rails - (justloseph63) - Link (purchase) F-11D/E-11 Picatinny Rails - (evike.com) - Link (purchase) F-11D/E-11 Picatinny Rails - (m416gelblaster) - Link (purchase) Free 3D files: F-11D Picatinny Rails - (themaninthesuitcase) - Link 3D files E-11 Picatinny Rails - (TK14082) -Link Part of Rogue One 3D files1 point
-
Sorry for the late reply , life has been hectic the last week, so the gauntlets have been the most trouble of any of the bits, as you can see by the photos the printer quality on both resin and FDM pieces is incredible , he’s really honed in the printer settings. But for whatever reason the gauntlet files if printed all 4 shells together was failing near the end , so in the end it took over a week and a half to get all pieces printed of the main shells , and 1 and a half days each when doing 2 and 2 respectively. so now just to update for myself and the team whats done , what’s commissioned ,ectr everything barring the chest and jetpack is printed , I will be receiving the resin parts and finishing them myself sometime in the next week I hope so I can get them all painted before the end of the year. the boots and gloves are comissioned and should be done now, I’ll check in as I did pay for expedited construction as I want to confirm they are how they need to be in case a return is needed (regarding centurion level accuracy ) belt is also comissioned and is 5cm roughly tall as per francais’s build. Belt boxes scaled appropriately but don’t really need to be scaled if you use his excellent and most accurate files. blaster is or should be finished printing. so what’s left unfortunately the important parts, the chest, jetpack, undersuit and ab section, all of which require (well they don’t but I’m not happy doing the kit without feeling good in it) me to be successful in my weightloss goals. I’ve spoken with Francais about the ab section a month ago when I was starting this up as even with successful weightloss I might need a larger (or I guess wider) ab mould than he has from his build , I’ll be comissioning the ab from him when he’s happy with the process so we’ll have to see how I’d fit the existing one when I’m actually in the position to be thinking about that. Regarding the holster . It uses the same y strap section as the grunt holster , but the blaster is obviously different and while I’ve tried to find actual detail shots of the holster there very much isn’t any good shots showing any actual detailing like the grunts has with the 3 raised rectangles , it seems to me like it’s a plain holster section fitted to the guns shape and glued into the y strap. So we’ll have to see if I can mock something up when the blaster arrives and if you’re all happy with it that’ll have to suffice1 point