Leaderboard


Popular Content
Showing content with the highest reputation on 10/02/2024 in all areas
-
3 points
-
Here is the complete build thread from my armor which is now the CRL reference. Below are the images of the final build along with individual parts in high definition so you can capture the details. In the next threads below, I will explain how I did end up with this final result. I will also try to share the tips and tricks for you guys to make your life easier. I based all the design and parts on the reference document I have put together (you can find it in the reference section in my post). Here's the build vendors I used : - Boots from Crowprops - Leather gloves from Crowprops - Abs section made out of urethane foam rubber molded, per screen reference. I designed the mold and it is available on https://millenniummaker.com/product-category/imperial-armored-commando/ - Suit from Keeptrooping, tailored and internal elbow stitches removed per CRL requirement. - The hard armor is mostly parts I designed myself, as current vendors were not accurate enough to meet all screen accuracy to a CRL level and most importantly not designed for trooping). A few other parts are from Big Fred Custom (only vendor that was accurate/ very close). I have/will continue to place my designed parts on https://millenniummaker.com/product-category/imperial-armored-commando/ *******update from 2025: if some parts or not on our Website, just PM me as I will be adding the whole armor this year**** more details in sections below. I do this mostly for fun so be patient to have 501st / CRL grade armor. I intend to have the full armor designed and offered in the upcoming weeks on Esty, PM me if you need them sooner. Soft goods made by my girlfriend (MW11271)- belt and holster, velcros, harness,...!) I have posted the build process of these parts in the following threads. I will show how everything was printed/ prepared, painted, assembled. Goal is to provide you info on how to build a suit that is designed by a guy who knows the pain of wearing the armor (my Sithtrooper is a though one to troop... ) Front top to bottom:1 point
-
Hi everyone, my name is Torsten and I live in Wiesbaden, Germany. Ever since I have seen ANH for the first time back in 1978 I wanted to have a stormtrooper uniform. Now with almost 55 years I can finally make this childhood dream come true. I'm very excited to be part of the community.1 point
-
Update! https://www.facebook.com/share/p/s6Lks7CngZSoCTeG/ We are more than 1000 confirmed members (Imperials, Rebels, Mandalorians, support people....). I think it's going to be amazing...1 point
-
shins pics. they're francais's files so they've got the accurate single seam and flex, as well as level 2 requirements1 point
-
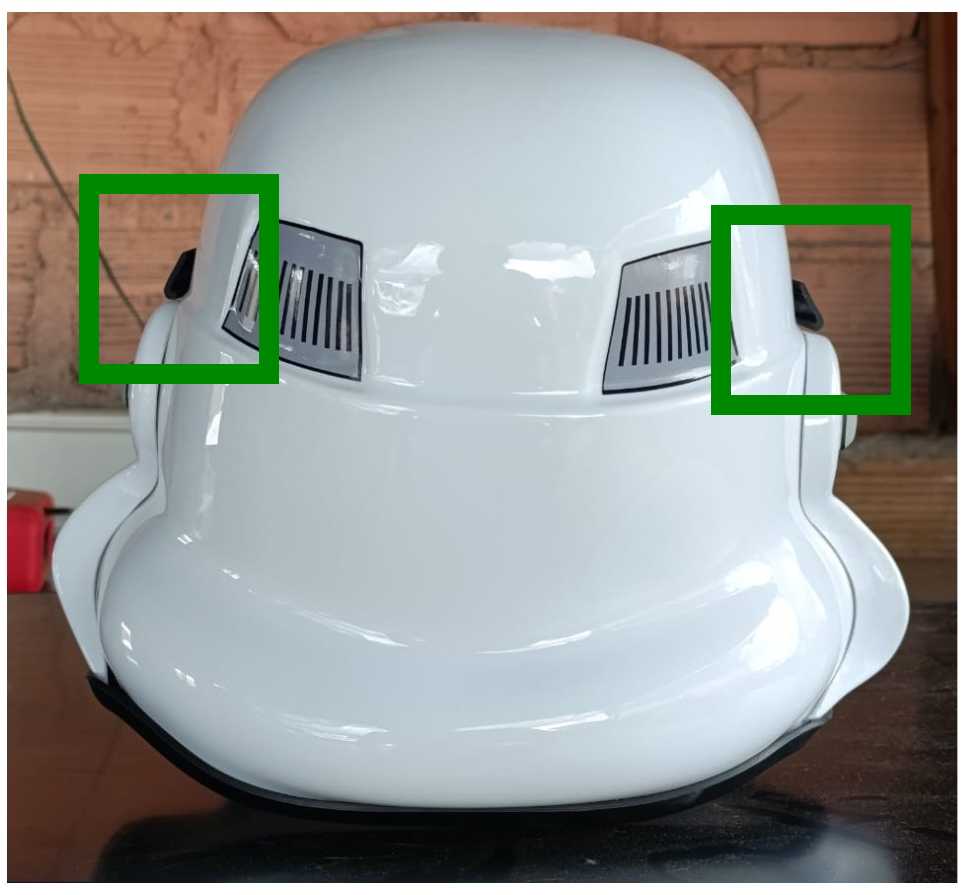
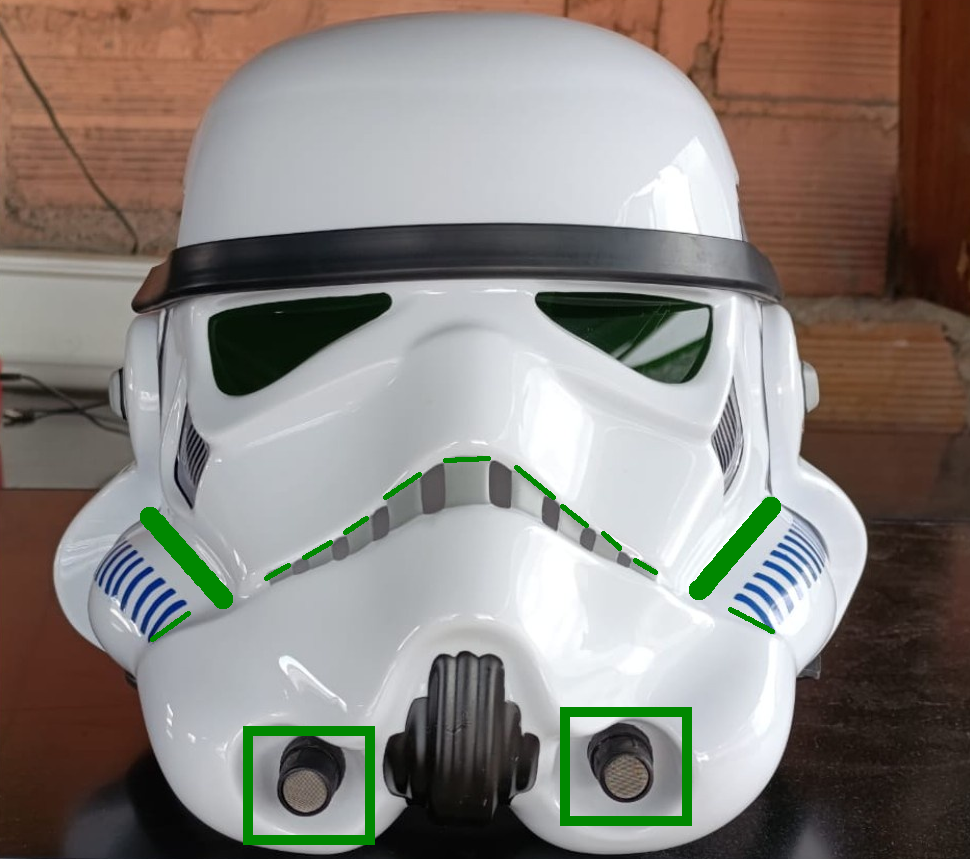
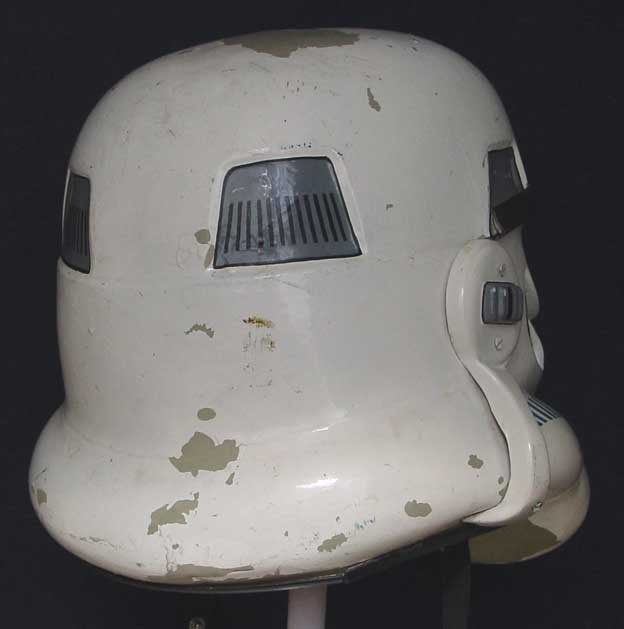
Some information and references to compare with screen used helmets http://www.starwarshelmets.com/original-ANH-Stunt-Stormtrooper-armor-helmets.htm Ear bumps and mouth should be gloss grey, note no paint on gums Also refences in our gallery Some details from the CRL, some higher level requirements you may wish to address: Helmet Frown is painted gray and does not leave the teeth area. A total of 8 cut outs in the teeth area of the frown are present. OPTIONAL Level two certification (if applicable): Ideally, the tube stripes are positioned approximately a pencil width from the side of the cheek. Fall of tube stripe tops ideally lean toward the front. Correct Aerators/Hovi-MIX tips are present. Screens used shall be of a wide type mesh, with the rim of the mic and the inside white or painted white. OPTIONAL Level three certification (if applicable): Ear bars shall have only one bump painted in black (rank stripes). Ideally, placement of ears (and screws) should closely follow the rear angle of the trap above them Rank stripe Fall tube stripes, pencil width The "ideal" ear placement is as seen below, where the screws line up with the rear angle of the trap right above it. Because some armorers design their helmets differently or send them pre-assembled this is not always possible to achieve, but it is suggested that you try to get as close as you can. Note: Top ear screws should ideally be located directly below the rear of the trap. Brow trim open at rear Hope the information is useful for you

 1 point
 -
The after looks like a totally different helmet.1 point
-
Welcome to FISD Torsten!1 point
-
Hello and welcome to the forum, a thread full of information should help you on your way1 point
-
After / Before the helmet
 1 point
 -
1 point
-
@themaninthesuitcase Yes. Sorry I will edit the initial post. HWT is eligible for a point yes?1 point
-
1 point