Leaderboard


Popular Content
Showing content with the highest reputation on 01/21/2024 in all areas
-
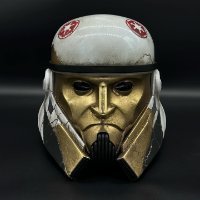
Ran into a few snags regarding the chest, but still trying to work through them! The Galactic Armory files are undersized, and I have some concerns that scaling them may result in some proportional issues. I asked him to take a look and he's responded positively. These were printed at 100% in PETG, scaling up to 118% or so to fit me at 5'10" and 205 lbs the front/back is really deep and looks bad. Pics here include some comparisons to the 850 chest in size/scale. I asked Christian of 3D Fanatics to resin print out the helmet files from Vek3d/Walsh and our discussed evolved into him doing the paint-up as well. He did a fantastic job, and he set the bar high for the rest of the build I think!2 points
-
There’s a lot going on with Enoch here. Chest sits lower, bottom is trimmed close to the sternum groove. I’m curious if the straps have more ribs to compensate and if the back is as modified as the front is.1 point
-
That helmet looks amazing! Looking a reference images, Enoch chest plate is or appears to be considerably wider than the standard R1 style chest. I realise these aren't scaled equally but the neck opening is noticeable as is the flare out at the shorter base of the chest1 point
-
So after a super busy year, and my old ATA kit holding up (with a few part swaps), I'm back on the build. Next up, the TD. Something simple that I can do while watch playoff football. Plus Dave basically builds them for you. Some slight trimming, some light sanding, and a bit of gluing. Since I was in a rush to get my first one built and I didn't know about EI or Centurion, This time I'm going to try for Centurion, but at a minimum EI. So at @MaskedVengeance suggestion, I'm following @DTKC and @A.J. Hamler build guides. So one with the pictures.... Need to let it cure and then adding the ends and clips.1 point
-
Thanks - that makes sense.1 point
-
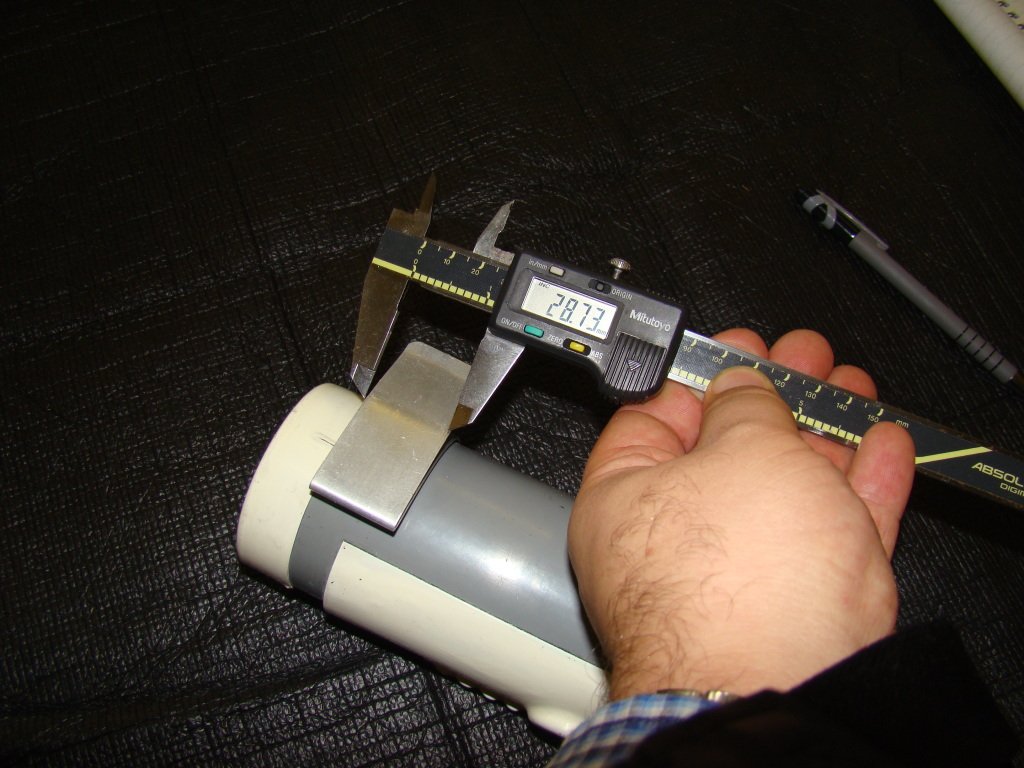
The thermal detonator is attached via metal or metallic-appearing clips, approximately 1" (25mm) wide. It's an approximate size to cover those that use Imperial or metric Here's the actual sizing
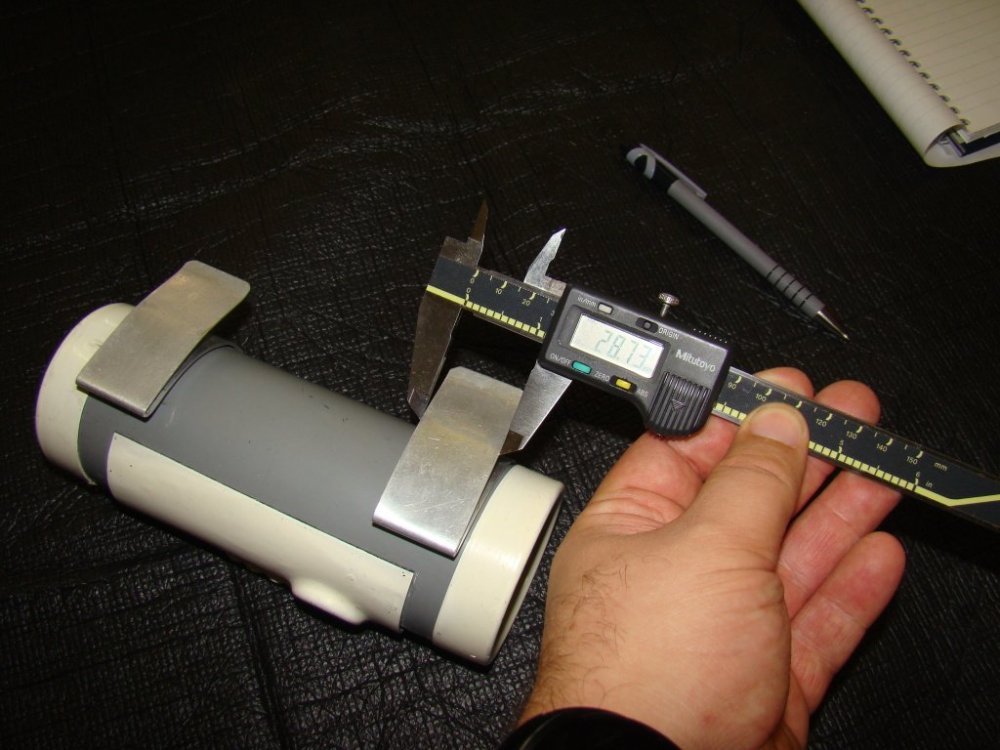
 1 point
 -
I know. I mentioned that under the picture. That picture was just to show the new hovi tips. I'm going to do all the helmet painting corrections at the same time. I have to do the gray first anyway. I also had to order the paint to match since WTF did the helmet. I hope to get the paint and stickers before next weekend. I'll also retake the TD picture when I take the fixed helmet. Just wanted to make sure what I did so for is good enough while I wait for my shipments.1 point
-
Hi Kevin, sorry for delaying. Your EIB submission has been added to the processing line. You did a nice work building your armor and your 3d blaster as well . In order to start your EIB review we'll need you to make some fixes , most of then are about your helmet as Glen noted before . 1. The Rear traps and tears : You will need to add some more vertical black lines and some of then need to go a little thicker as the references. Reference 2. Frown Paint: Just a toothpick with some Non Acetone paint thinner would do the work to refine the teeth cut. References 3. Hovi tips : You will need to change the mesh to a more accurate one and add some more white paint to the rim. CRL L2: Screens used shall be of a wide type mesh, with the rim of the mic and the inside white or painted white. References One method I used to change the hovi tips was : Using a wide mesh strainer, marker's top cover and some white paint. 4. Tube Strips. Yours are a little far from the pencil width position from the side of the cheek and will need to be relocated. 5. The vocoder paint detail. Another painting session will be needed to refine the lines as the references. References 6. The Thermal detonator. as the CRL states for Basic "The white control panel raised ribbed pad faces the rear" Your TD's ribbed pad needs to be relocated to face the rear more so the round washer control can be seen . References And finally Trooper. Your E11 blaster has indeed a great finish but as the crl states no 3d lines can be seen CRL: 3-D printed blasters can not contain visible print lines, and must be sanded smooth for a more realistic appearance. It's just a small section that show some 3d lines . I'm sure you can solve in a great manner. It looks like a lot of work ahead , but we think you can do it . Let us know if you need some help . Looking forward to place that EIB badge under your name Trooper.1 point
-
Hi. This is the requested way to add it. https://www.501st.com/members/displaymemberdetails.php?userID=34130 TK531741 point
-
More boring trimming, a busy week so not a lot else, unfortunately. I chatted with Galactic Armory and he says his Enoch armor files should be coming soon, so I'm excited to see what he has. Hoping he's open to suggestions/fixes as needed! My boots came in from Keep Trooping and fit nicely!1 point
-
I always glue/attach the inside cover strips first, and suggest making them wider than the outsides. The reason being is that there is a lot of strain on those seams from opening the calves when suiting up and that will add some extra strength to the join. Another tip is to sand down all surfaces to be glued with heavy grit sandpaper, which gives the glue a better surface to adhere to (be sure to clean them thoroughly after sanding). Be careful on the outside ridges when sanding as to not scratch your armor.1 point