Leaderboard


Popular Content
Showing content with the highest reputation on 03/22/2023 in all areas
-
I have also updated my Soft Goods Discussion post with more info and a brief comparison of the Endor Finders and TrooperBay gloves currently available for FOTKs, and my above post with my completed TLJ thermal detonator. I also finished the included solid resin Denuo Novo TD as a TFA variant using their included stickers and will figure out the best place to post that at some point, maybe even a comparison thread once completed so people can visualize the differences between the two suits. Idk. We'll see. Crossing a few items off this week and trying to forge ahead. Rainy weather and work have slowed me down lately, but I want to get this finished out soon, and still to a high standard!3 points
-
The 1500, are you ready?2 points
-
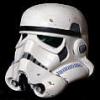
Handguard Accuracy Update I will be using a set of cast resin handguards from Dantooine Props instead of the included vaccuum-formed plastic ones. After cleaning up the mold release and some light priming and sanding, they were painted in the same Behr Gloss White and attached to my gloves using white 2" industrial Velcro. These are super clean castings and make for a great upgrade! And mounted to gloves (more discussion on gloves in my Soft Goods Discussion post)...2 points
-
Appreciate the super fast response! I don't know how I missed that the TD screws should be painted black Here we go: And man, my belt loves its heat bath curve! Held it down to get a better shot here: Thanks in advance for any additional comments!2 points
-
Exactly right, see how it feels you can always trim a little more1 point
-
Though comparing to the other photos this might work. Seems there’s no set distance just so long as it curves back enough. I will see how things are again and if need be trim another .5 cm off. I just needed to get this amount done so I could better see how things fit with my thighs after the inner cover strips have dried up. Sent from my iPhone using Tapatalk1 point
-
Yeah I trimmed to the 4.5cm mark and felt it and it was still not the best so I may trim it back just a little bit more and that should solidify it's position.1 point
-
Agreed, I'd go for the smudge, mine just covers the front with hardly any wrap under, you really want some room there for when you are messing and moving around, nothing worse than getting an armor bite down that neck of the woods1 point
-
Hey dblcross, your shin looks great, however I noticed your thighs look to be the wrong pieces. I couldn’t quite verify, but looks like you’ve already glued your cover strips on the inside of the front. You should have one tall side and one short side per thigh. This is mine (albeit trimmed down already, but you can see that one side is not the same as the other I wanted to share that with you just in case what I was seeing is accurate just so you can adjust that sooner rather than later.1 point
-
THIGHS Alright, so the first thing I noticed with the thighs is there’s plenty of length in the Dave’s Darkside Depot AM kits. Smart, for troopers of all sizes to use and adapt. That being said I’m not the tallest trooper, and my thighs are very large for my height. What’s more is the sharp angle of the thighs was not allowing me to have much movement at all as the upper curve was digging into my hips and groin any time I’d try to lift my leg. I knew I’d have to adapt the thighs then to follow the curve of my joint a bit more so I could even have a chance to move in the armor. So the first thing I did was I removed all but 10mm from the return edge of the center line. Thigh strips are 20mm so 10mm per side. I could then put them together in the front like they should be to know how they should fit there. As you can see below the high angle curve that I was talking about. So I first removed the top return edge, and know I’d need to take it down some I removed 3/4 inch from the top. I also trimmed some of the return edge around the bottom based on other images of return edges on the thighs I’ve been looking into. Now that I had this I could better size around my thighs and determine how much more to remove. This process went 3/4 inch (initially), 1/2 inch, 3/4 inch, 1/2 inch. I ended up removing a grand total of 2.5 inches before I could size them around my thighs and be able to comfortably move in them. Marking and trimming from inside out is best I wish I had longer legs because I do really like the long leg thigh, but alas we deal with what we are dealt. You can see here some of the angle adjustment I made so I could actually bend my leg without getting gouged in the groin/hip every time. It’s not perfect yet as I haven’t yet formed how the angle from the top to the bottom will go. But based on my legs I’d expect I won’t be trimming much off the back of the top thighs and will trim a better chunk from the bottom. This will help fix the kingdom hearts shorts look and make it look more angled toward my knees. I’ve also added an inner cover strip to the front of the thighs and started gluing it down so that I can be able to have those ready for me when I work on doing the sizing and trimming of the rear later. Digital caliper to mark mm widths is so much better than the non mm focused rulers Update on Thighs, I sized my thighs a little more narrow near the knee and wider near the top to allow them to sit better and look more angled toward the knee than barrel thigh. I then marked the center line down the outside flap (the side facing away from my body) Score and snap From here I reset the sizing of the thigh to a line marked internally and marked the new seam line on the inner flap, score and snap I took the sizing in to account and set the inner cover strip in the rear seam of my thighs. I left this cover strip a little wider than 20mm due to the nature of it holding that area better. After the glue had time to cure over 48 hours I returned to the thighs and trimmed the rear so it looked more appealing Before After Sanded and trimmed any spots that were longer than their opposite half counterpart From here I’m ready to start the outer cover strip process. I actually did start it until I found I need more e6000 so I will have to get that and proceed from here. I’ve marked internally where I intend to trim comfort/movement openings on the rear as well. Don’t want to trim anything above the ridge. I haven’t trimmed those mobility cuts yet, but I did fill the seams with abs slurry Sent from my iPad using Tapatalk After that set I sanded it down some (may need some touch up later) I then attached the front cover strips and let them cure. I currently now have the back cover strips clamped down. As of this point until strapping I’ve finished the thighs. I made adjustments on the rear upper portion to make it more appealing to look at along with the rear cover strips and then I set the ammo belt on the right thigh. This was a beast of a process, but essentially I found where the ammo belt needed to sit (about 6mm in and 6mm down from the hard corner in the return edge on the outer side. I had to clamp and hold tight many times to properly measure before I trimmed the outsides and did the curves. I honestly was using both my hands so much I had a hard time getting good photos of the whole process, but best advice here, measure twice drill/cut once. Once I determined the outer hole position I was able to do 10mm in and about 8-9mm down from the top of the outer edge. I used a 5/32 drill bit and then put the long male side of a single cap rivet in. I set the inner female cap using the tools for single cap rivets and a mallet. I then followed the curve around while also having the top of the ammo belt sit flush with the bottom of the cover strip (again clamping and praying I’m holding tight enough while I measure and find the drill spot. Same thing on the inner edge. With my thighs being larger I could only get the ammo belt mostly to the sharp rear edge but got the same measurements drilled and the snap installed the same way. Well, actually one note upon installing the second snap. Flip the ammo belt to the rear of the thigh while installing, it will make it 100% easier to fit the tools and mallet in to hammer it closed than if you try with it in front. Once snaps are installed flip the ammo belt to the front right edge against bottom of the cover strip. Finally I clamped the ammo belt to the front edge to prevent any opening and squeezed some e6000 down in the corner and let it sit to glue in for 48 hours. Now the more finished thighs I’ll sand down the rear armor cover strip area a bit more later. I’m most likely going to cut mobility cuts in the rear so for that reason I’ll do it then. Final steps. I added the belt strap (this holds the thighs up with a nylon belt I wear under the armor. Three snaps may be a bit excessive, but with the amount of pull on this part of the armor I wanted to have some good strength. Now with that done I was able to test the feel of the thighs and decided I still wanted the mobility cuts after all so I made sure to trim below the edge.1 point
-
You're off to an excellent start! Keep up the great work.1 point
-
Yeah right now the backs are just blue taped together best I could get, but I saw that and will make adjustments once I get there. I just needed to adjust the height and return edges to even get to the point I could figure those things out. Sent from my iPhone using Tapatalk1 point
-
ACTION POSE :1 point
-
Filler is one way, but you could just sand the edges smooth as well, aluminium isn't that hard to sand1 point
-
Thigh Holster Accuracy Update I had originally sourced a thigh holster from @R2Dan of Dantooine Props a while back from his first run that was fully symmetrical, but with all of the DN kits being delivered, fortunately Dan decided it was time for another run. This time, his V2 was updated to make it slightly asymmetrical, which I guess is more accurate, and more similar to the one included with the DN kit, but functional. He includes a beautiful resin riser piece, but decided not to run the wedge spacers this time either. Instead of just buying one, I organized a group purchase for my Garrison and had uhhhh... a few... shipped over from Germany for us. Because why buy something for yourself when you can make a spreadsheet and involve a dozen other people? They feature the correct 3-piece metal design and include accurate, mostly countersunk Torx w/ security pin hardware and even driver bits, as well as the M6 button headed Torx w/ security pin bolts for the side of your blaster to mount it. I was very impressed with the quality overall. The older V1 on the left, versus the new V2: After disassembling it, the wedge was clean enough that it went right into primer and paint, but I did an extra couple of coats of filler and sanding on the sides of the metal parts where they were cut to fill in some imperfections. And here it is when it's been sprayed white and reassembled! This came out beautifully and I'm super happy with it! Install soon.1 point
-
Thermal Detonator Accuracy Update I received my new thermal detonator from my printer utilizing Jesse M's files, and am stoked on it. It is significantly lighter than the included solid resin TD, and more accurate for TLJ. The carriage has been printed in one piece on a large format resin machine by @fabricatorandfiends and the tube was done in PLA filament with a relatively low infill by @supershipley . How does it compare to the dimensions of the included TD? With a spraypaint cap added for mockup... close. Very very close. Prep work began on the printed TD carriage, as even with resin there were several visible print lines and dimples from supports that just wouldn't do. Most areas weren't too bad, but some needed significant work with primer, glazing putty, and lots of sanding to get nice and level. Back in primer... And in final Behr Gloss White: The tube was part of a small run by @supershipley: And after some primer filler and wet sanding to rid it of visible print lines: And finally, in Rustoleum matte black primer: And finally, the whole 3D-printed TLJ thermal detonator, fully assembled with a bit of VHB to hold the tube in.1 point