Leaderboard


Popular Content
Showing content with the highest reputation on 10/30/2022 in Posts
-
Hello, After many months I finally finished my 3d printed Rogue One TK build up to the point where I feel it can be reviewed. My goal is basic 501st certification. Thank you Name: Steve Skidmore Height 6’1” Future Garrison : Cloud City (Oregon) Neck seal- Imperialboots.com Boots-Imperialboots.com Gloves-Imperialboots.com Helmet- Nico Henderson 3d print file Armor brand- Akira Yuming ROTK 3d print file Belt boxes- BigJasoni 3d print file E-11Blaster- 3d print file (still in work on the flashlight) 3d printer- Prusa MK3S Thanks to ROTK forum users: BigJasoni & 11b30b4 , their build threads are extremely helpful.1 point
-
Wow, the blaster looks great! It’d be a shame to hide that beautiful work, but do you have to do a mud coat on it to match the armor now?1 point
-
Looking good. Good luck on your approval1 point
-
Looking sharp Matthew! Good luck!1 point
-
Finished up the last bit of requirements and got some paint on the scope of my blaster. Now off to submit my Centurion application. Thanks, M1 point
-
Added weathering to rubies blaster. Did a silver drybrush on edges minus T tracks and handle, copper drybush on scope, and two coats of a brown wash over the whole thing. Next up is clear coat which is why I masked the scope lens. Really happy with the result added silver on the selector switch as well I made the wash by mixing some old acrylics and Vallejo pigments1 point
-
Thank you for using my model. I am honored to play a small part in your creation. It’s even more meaningful since you will be raising funds for JDRF, and as we discussed earlier, my 2 year old grandson was recently diagnosed with Type 1 diabetes. God bless you for what you do, and good luck with the auction! The blaster looks stunning!1 point
-
OK folks, so here it is (at last). I got all the pieces attached and secured and 95% of the weathering complete. Still a few tiny areas I want to tweak, but overall this is it. NOW, before anyone mentions the lack of black paint on many of the actual screws, prongs, spring and such, I left these as-is to show that they had been added. Whoever ends up with this is more than welcome to cover them with some flat black but that will be their choice. As for general weathering I am a minimalist. Yeah, I did add more "brass" on the Hengstler than normal, but I wanted it to pop a little. The lighting was not too great, so here is a better pic of the front. Yes, the word OFF and the arrow on the end of the magazine are a bit wonky. I had to use a Dremel to inscribe it and this was after 5 Mountain Dews. I really gotta' cut down on the caffeine. Also a close-up of the rear power cylinder setup. Front view of the scope/cylinders/Hengstler Front sight close-up OK, so if you remember a few posts back I was concerned that since I wanted to use a real wire spring that the inside circumference of the rear of the shroud was too tight. I was determined not to let this beat me, so I ended up going with a hole saw bit (Pic 1). I used an extension bit to get down inside, but there was a lot of the PVC pipe inside in the far end that just shredded, so I used some elongated needle nose pliers to get out the bits and it worked a charm. HOWEVER, the inside walls were... well let's just say chewed up badly, so I CA glued sandpaper to the hole bit and went to town on it. It worked. Not perfectly smooth inside, but very close and not noticeable. Took me about 3 hours. Here is the end result, and I'm pretty pleased. End cap Hengstler** Grip **As I mentioned earlier, I used my leftover curved Lexan lens from an old build. Note: The lens appears to be fogged under the 0 and 5, but that is a reflection. And finally the folding stock. I was worried that since I was using a real vintage Sterling one that it wouldn't line up correctly. But, that was unfounded. Bryan's 3D files are so accurate that it fit like a glove with no modifications! And that's it, folks! This build was both challenging and fun, and I hope you enjoyed it as much I enjoyed doing it. It will be going up for auction in the next day or so to raise funds for the JDRF, and I hope it makes money for a great cause. If you would like to see any detail pics that are not shown or have any questions, just ask here in this thread. Last but certainly not least, I would like to give a BIG shout out to Bryan @trooper96 for supplying the files (and some extra pieces) for this incredible weapon, Kevin @kmwilson343 for donating the 3d print (and extras), Brian @Bulldog44 for donating one his incredible scopes, and Andrew @Sly11 for giving me the thumbs up to auction this off here on the FISD. You all truly rock, gentlemen, and my bucket is off to you.1 point
-
Update: Well, the "hammered" finish didn't come out quite as expected, and is a lot smoother than I anticipated. I have used this product before, but you can overdo it quite fast and get puddling on the item you are painting. Still, I'm happy with the end result. SO on with the show: After gluing on the front sight guard (blue arrows are where the CA glue dried white- this will be painted) I added the tiny metal grub screw on the side. I made a new metal front sight pin from a screw by filing down the end and angling the top just like the authentic one. I forgot to take a pic of it, but the second image (borrowed from Tino) shows what it looks like. Now for the power cylinders- Starting with the correct size screws (10ba from the UK) I first cut off the heads. In looking at about 50+ reference pics, I noted that in most (but not all) cases they were present on the front and back, but that the front ones had a bit more of the bolt sticking out. I added an insanely tiny drop of CA glue (with a needle) to keep the nuts from coming loose, drilled holes in both ends and secured them in. I also added the large metal grub screw on the side of the magazine receiver and the infamous red cloth wire*** in the rear. *** The plate that I made earlier that goes in the side was secured in, but I still have to paint/weather the rear of the bolt to match. I wanted a little more detail on the sides of the rear sight to closer match the original (pic 2) so I cut off the ends of 2 pop rivets, drilled a hole in each side of the sight and glued them in. When disassembling the components of the trigger/grip I snapped off the base of the selector switch. Oops. I drilled out the center and epoxy glued piece of a bolt. It will be secured back in with epoxy putty. My apologies, but due to this it will be stuck in place and not operable. The 3D print lines are filled/sanded, so now I just have to prime and paint it before adding it. Still quite a bit to do, but I will be finishing up all the details today and posting up photos. This afternoon I will do the weathering and will be posting up the auction thread within a day or two. Stay tuned, and if you have been with with me on this journey so far- THANKS!1 point
-
1 point
-
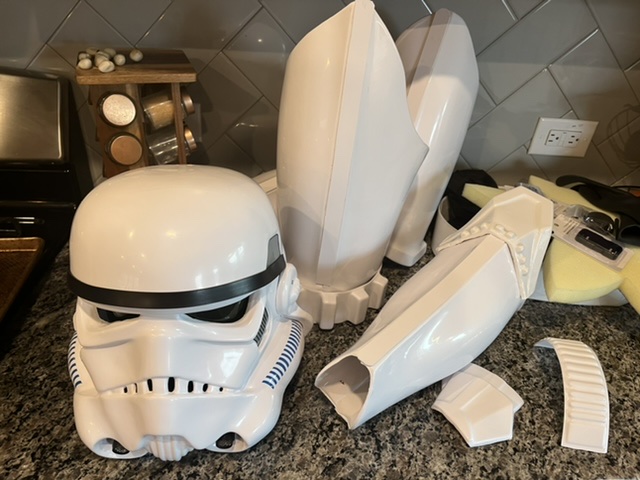
Making some progress. The ears for the helmet were A ROYAL PAIN IN THE @&$$ Still have things to clean up and fix before being approved. still have painting to do. I went with decals for now.
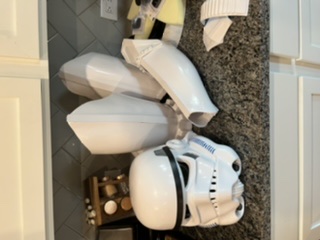 1 point
 -
Greetings fellow Troopers Today we updated the CRL model images for the ANH OT Hero CRL, with a great looking and slightly more accurate model. Congratulations to our new CRL model Jonatan, TK- 23592 (Nairy). Great build and photograph.1 point
-
Thank you so much for this absolute honor! I'd also like to thank my photographer Henrik @TK-7959, and thanks to my "stylist " Daniel @TheSwede for making sure I looked great!1 point
-
Update time! SO, between building a new workshop and digging 133 holes for my new fence I managed to get some things done on this. The scope- Please note that there is minimal weathering on this part. Some brass showing is good, too much and it just looks awful. To get it like I wanted, I dabbed my finger in the brass colored (Model Master 1782) paint, smeared it around on a piece of paper, rubbed most of it off and then applied it with the same finger. This way it doesn't have any brush marks. Screws installed on the front. I also made/painted a new aluminum scope rail. SIDE NOTE: The front and rear lens holders have threads which hold the lenses in place quite securely. If you are using one of these particular kits and feel the need to add an adhesive do NOT use CA (super) glue. It will permanently fog up the glass lenses. Opt instead for a tiny drop of plain craft glue. Reference images So, at this point some of you may be wondering "What the heck is that strange thing you put on the top of the scope"? This thread (link here) will answer that question. Folding Stock- The folding stock that was included with the kit I received is insanely accurate, but I wanted to kick it up a notch so I will be using a genuine vintage Sterling L2A3 (reconditioned by me) one which (thanks to Bryan's design) fits like a glove and will add a little "heft" to the finished product. Before you ask, yes, those weird things on the side of stock were on the originals. ** I will be doing some final weathering on these (and the stock) before completion. ** I mentioned before that I wasn't too happy with the way the weathering on the Hengstler counter looked, so that was repainted and touched up in the same way that I did the scope with that "worn off" look. The photo makes it look more severe than it actually is, though. I also installed the curved clear Lexan lens over the counter (and yes, I touched up the bottom of that last 7 before doing so, lol). Next up: The power cylinders, magazine mount and the main body!1 point