Leaderboard


Popular Content
Showing content with the highest reputation on 09/06/2022 in Posts
-
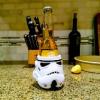
Uploaded! This vid was before I "dialed in" the voice amps and adjusted the condenser mic position in my bucket. It is a bit better now. And also setup my trooper chatter from an mp3 player to the voice amp in my ab plate along with wireless reciever for bucket audio. More pics and vid to come.3 points
-
Greeting all Please all join me in congratulation TK61490 TheRascalKing (Justin) on achieving two awards in this last week. Firstly he has completed the requirements for our first level Armorers award And secondly a 3D contributors award for his efforts in assisting with the development and refinement of some 3D printable First Order TK greeblies. He was also instrumental in getting these files offered up to our members free of charge, so please visit our 3D section and check them out.2 points
-
I’ve sent a message off to Jimmy asking about his full kit, I eagerly await his reply. The R1 crl will be printed out and put in a binder when I get the chance. That way, easy access when it comes time to build.2 points
-
I've been collecting parts for this for a while. Time to start a thread for my pile of tupperwear! The bulk of what I've gathered up so far! 1) Garage Boss drain pan from amazon 2) Pack of Pop It!!! tupperware boxes 3) The Michael's photo box radio thing 4) All the little rubber feet anyone could need in a lifetime 5) A nice set of leather ammo pouches from ebay 6) Pauldrons! Because pauldrons. I prefer the black but the CRL has orange. 7) A rubber DLT-19. 8) Joseph's beautiful Electrobinocs Heh. Unsure about this. Such tupperware. Very plastic. Wow. Also, my wife is eyeing this pile of tupperware. Wants it for the cupboard and says I should just 3D print the boxes. My leather goods. In need of de-whitening and de-chromification. Question: Is this set of pouches approvable??? I ask because I haven't seen the center pouch for the chest on any HWT troops in many submissions, but it's on the CRL images. It's not in the game. I can cut it off, but really like it... Rubber DLT-19. It's really nice. A score from etsy. Back of the pouches are all angled. Gonna need some work. And just to show it off because I like it so much. To do: Everything.1 point
-
Just remembered I have bicep armor already from a different build I was going to do. So I guess I’ll have some biceps to work on while I research and wait!1 point
-
Oh my, Christmas came early!1 point
-
Honestly, I'm in awe of how far this has come, thank you to everyone who contributed and appreciated Next step, get these onto the FISD Instagram (maybe? possibly?)1 point
-
Same haha, I loved watching the mortar in action. Part of me wants to make a functional mortar tube that actually launches the detonators but..... I have a feeling that would end badly in so many ways.1 point
-
Great to see you have this started Steve, very exciting times ahead.1 point
-
This picture right here from the thread you linked helps lots with the helmet. I see the indents and everything of the R1 helmet, symmetrical.1 point
-
Looking forward to seeing your build. I would recommend looking more towards the Rogue One CRL as there are some definite differences between the Remnant Trooper and Artillery Trooper, the later being more Rogue One style, helmet and armor than Remnant.1 point
-
Let me know if you continue to have trouble finding the smaller round wipes container, Adam. I have at least one spare from the triple pack I bought two years ago, which I could send you. Same thing happened to me two years ago. Those files are amazing, and I hope to be able to implement them someday. His and Bradley's thread are my two favorite HWT resources. Although yesterday I noticed the images were missing on the latter thread, so I've now compiled it into PDF form with restored images.1 point
-
congrats and welcome1 point
-
Will do, thanks so much1 point
-
Nothing wrong with being eager, happens to us all, take this time to research EIB requirements and make sure you have all the photos needed1 point
-
Hopefully! Don’t want to appear impatient at all, just keen to get inducted, trooping and onward to EIB/Centurion levels all being well!1 point
-
Hi @justjoseph63 no problem... here there are: thanks1 point
-
Well darn. That's a bummer. I will find a way.1 point
-
NICE! 501st Stormtrooper[TK]1 point
-
As this doesn't show any consistency I would agree that yes both ways should be allowable. It's clear that the dressing department didn't take any notice or had a specific direction on this point.1 point
-
Normally the process from the legion side is pretty quick after the GML has finished their review. Hopefully you'll have your TKID soon1 point
-
Appears not, Imgur is a little weird with videos and can have problems with sound, most use Youtube1 point
-
Now I'm gonna have to rush back to my HWT build to see what I used... hopefully not a sharpie! UPDATE: I DID use a G2 pen, and didn't color the threads on the rear! PTL. But I guess time will tell if it still wipes off on the front.1 point
-
Thanks guys. I felt embarassed and stupid for letting the OCD get out so it feels a bit better knowing I'm in good company with that. I took some time to breath and let it settle down so I could see the bigger picture again. Bart1 point
-
Big Brown Box day will soon be upon you, congratulations on wedding and your purchase.1 point
-
Awesome photo and welcome to FISD! I'd ensure RS knows if you're going for higher levels of Legion approval, as they do a couple things on their commission builds that don't jive with the DOs here on the forums, and we want to ensure you're fully happy with your armor. Best of luck and let us know if you have any questions!1 point
-
Pockets you say? I freakin love pockets. 1) Pants - In the US we have Dick's Sporting Goods. Is that in Canada? If not, get a US trooper to send you some pants. The DSG house brand has a cell phone pocket that hides perfectly under our thigh armor and the belt holster. https://www.dickssportinggoods.com/p/dsg-mens-3-4-compression-tights-with-pockets-21qyfm34cmprssntgdsg/21qyfm34cmprssntgdsg 2) Chest - I have a travel wallet E6000'd onto my inner chest. I keep my actual wallet in there most troops. Easy to slip in before I put the torso on. https://www.amazon.com/gp/product/B017BPN6GQ It was this one. It shows sold out, but anything about this size works. 3) Drop boxes - Extremely useful for keys on parking lot changes. 4) Thermal Detonator - I keep stickers and toys to give to kids in there. It's magnetic and elastic, so it closes back up by itself each time I reach back to open. And there's more storage options if you really need to carry stuff around on a troop. I taped my holster shut at the bottom and filled it with lego minifigs for a hospital visit. It was perfect.1 point
-
Hold my beer. I'm still in the somewhat shell shocked mode of this. Can't believe I ordered armor. Small panic attacks because I ordered armor.l That sort of thing. I've ordered a blaster now and boots. I'm getting the neck seal arranged so all these little things that can happen are happening There will be a big gap now until things come in which will be hard. I've forward looked into 2023 and events that will be happening near me that, fingers crossed, I'll be able to be one of you and involved with them. That's a bit scary to think about, but also exciting. I'm still picking through a lot of this board just trying to get more of a feel for the vastness of it all and to not be a total noob at some point. So yeah, scary, exciting, expensive, crazy all wrapped up into one right now. Bart1 point
-
Finished! It was difficult to figure out this weathering technique, but it worked in the end. I wanted to replicate the weathering of the troopers in the Kenobi show on Mapuzo, the ones in that truck/transport scene on the mining planet. They had this great dusty-wiped-clean-to-white look. Some were more heavily dusted, and others less (see reference pics). The trick would be to make a permanent paint look. I had some detailed close up pics from a stunt performer on the show, who said I can identify him here on these forums: fellow 501st Legion member Ardeshir Radpour @equuspolo (again, sorry but they are not able to be shared here). The photos showed some of the “dust” effect was beading up, like acrylic from an airbrush would on glossy paint. After a test, my hunch was right. I used some Vallejo acrylic airbrush paint (black and US earth brown), diluted with some Liquitex acrylic airbrush medium. Sprayed from a distance, at 10 PSI, this got the faint dusty look. I tried quickly wiping it with a soft rag with alcohol, but that smeared it. I had to remove a lot of that first coat with rubbing alcohol, which left a patchy residue (but that added to the overall grime texture). Next I tried the same mist. Let it dry a few minutes. This time used water and a coarser rag (a piece of khaki twill pants), and wet the area and scrubbed the acrylic paint off. Acrylic, though dry in a few minutes, on a glossy surface is still sort of removable with water and light scrubbing for a few hours. Using my fingernail behind the wet fabric I could make a line or scrape area. Bit by bit, I hit the high points and any other areas, removing brown. This technique was not easy, a little frustrating, because if you scrub too hard, you remove it all in a patchy way, but you want to just get some of it. It is a fine balance. Finally, some brushed on acrylic black marks on high points here and there like it looks on the references, and a few patches, which is done much like movie clone armor has. To weather the black parts, I used some grey Fuller’s earth dust on the corners of the lenses, in the cracks on the vocoder, and hovi tips to give those black areas some dust in the recesses. Wiped it off with a rag, and because these are going to be hard to contact, they are not permanently bound to the surface (they should just stay like real dust would). Finished! Here are the results, shot in sunlight to compare to the sun-lit scenes on Mapuzo:1 point
-
My gosh. Last update was October 4th. I feel like the FISD's prodigal son. Regardless, I'm back and ready to get back to work. So a lot has happened since my last update, but honestly I've spent the majority of my time making costumes for other people. I have been trooping, but they've looked like this: While that last pic is kind of cool, and I've had a blast doing all of this, what's been absent through it all has been me in white armor. Additionally, when I received my racing shirt a couple weeks ago and posted this picture to the FISD Facebook page, I started feeling like it was time to get back on track: Thanks @jsilvius again for the awesome swag. Back in October, I was stuck in an apartment waiting for my new house, which kind of precluded me from doing any good work. At the most, I was tinkering around with things, but during that time I started doing a lot more research into the New Generation Stormtrooper armor. In doing this I started noticing things in my armor, that while it looked good, I just felt it could be improved. Trust me, it's very difficult to improve on Jimi's gear, so if I'm going to try, I better do it right... and to the Centurion standards that started this whole thing. At the time, I had printed some bicep and forearm armor, but after I got into the new house, I started experimenting with different resins and expanding my SLA printing capabilities. I spoke to a few people and learned that I could mix flexible and abs like resin. Following a lot of trial and error, I finally got it down and truly started pumping some stuff out. So, here we go: First, I made a couple adjustments to my belt boxes and got some really good sculpts printed. I'll be molding these soon and putting the resin casts out there for the community: Drop Box Mid (trapezoid) box. Of course, these are still available for download here https://www.whitearmor.net/forum/topic/50811-rotk-ammo-boxes/ as are the reference photos. However, while the belt boxes are cool, this is what I'm most excited about: So, I've already heard the detractors saying "but it's resin. If you drop it, it's going to shatter." Lol. Remember what I was saying about ABS like and flexible resin... let me share a short video I made tonight: Yeah. Not too worried about dropping my armor. Please forgive the mess in my garage, but if you pause the video at the 31 second mark you'll see a Mando helmet I printed in the same stuff. This is a little more difficult process, but not totally out of the scope of possibilities for this build. However, I do like the helmet Jimi provided with the kit, plus I already put some hours into it, so for the time being I'm not planning on making a resin TK bucket. But I do have this on standby in case I get bored: Thanks Nico. So, that's enough show and tell, I do have plans of getting some work done this weekend, so I decided to survey what I have and start making some adjustments based off some of the stuff I've found. Since I said that I like my Jimiroquai helmet, I decided that I'd do a little work on that first. However I also realized that it's been a while since I looked at it and of course I found a couple cracks, pinholes and flaws. When I noticed this, I started looking at other pieces and found them elsewhere. It's not bad, but it is going to take a little more prep to get this all ready for paint. Also, I neglected to mention it earlier, but here's the pic of the shoulder straps I engineered when I was in the apartment: These were printed in TPU and were initially intended to just be a trial version. While the system seemed like it was going to work well, after going on a bunch of troops in my ICAT/ Mudtrooper armor, I decided that this system was better suited here: A couple weeks ago, after more reference photos started surfacing of the New Generation armor, I started modeling, molding and casting rubber straps and came up with a couple designs. First, these are the standard straps that are similar to what comes with most of our kits: However, during Celebration @TheRascalKing sent this picture to me: So, I busted out Fusion360 and got back to work. What's interesting to me is that the trapezoid appears to be separate and recessed into the chest armor. Additionally, the straps appear to be vacuum formed, but I can't confirm that. I do have access to a Vacuum forming machine, so I might try it out, but I'm not touching those trapezoid pieces with a 10 foot pole. Regardless, I just sculpted a new set that matches the screen used armor and I plan on molding and casting them next week: Also, in order to facilitate these straps, I'm going to have to cut out the rear traps which I'm not looking forward to: For reference, I want to share a picture of my ICAT back so you can see how this works: I may not emulate this exactly, but it'll be close. Ok, so on to some more screen accurate additions: I'll just touch on this real quick. Justin also sent me this picture from Celebration: Notice the recess on top of the forearm. The first thing that came to mind is the "small indent" on the front of the hand plate. While the hand plate indent was obviously added intentionally, since it's been emulated in other costumes, I'm still trying to figure this one out. Regardless, after I received this picture, I looked at my freshly printed MPSB forearms and noticed that Paul didn't miss this detail, which means it's present in the Shoretrooper armor as well: To me, that's either an intentional addition, or a flaw in the original mold. So, do we include it in the next CRL update? What are your thoughts? So here's my work for the night. When the ROTK CRL was updated back in October 2020, some of us were left wondering what the tabs on the kidney plate are. The exact verbiage in the CRL, listed under the Centurion requirements for the abdomen armor reads: The abdominal armor back cover plate has two protruding tabs along the bottom that rest inside the back hard belt. At the time, I think some of us didn't know what this meant, but around that same time, TK wardrobe malfunction pictures from Solo, Rogue One and the Mandalorian started surfacing that gave us a little more insight. Again, I went to my Shoretrooper files, pulled the kidney plate out, started fooling around with the scaling and came up with this: Even though I got everything scaled correctly, it just wasn't fitting and stuck out about a 1/4": I started fooling around with it a little and just realized that the little lip on the bottom was hitting the back armor. So, I marked my edges and started cutting: Have you ever had one of those "ah ha moments" where something just makes sense? Keep in mind that I changed the overall size of this plate to match Jimi's kit. This meant making the plate a little taller, and a little fatter. However, after I trimmed about an eighth of an inch off on both sides, the entire plate snapped perfectly into place. Honestly, I almost couldn't believe how perfect this fit. Also, after seeing how it works. the entire abdominal section just made sense to me which is still blowing my mind a little bit. A lot of the time, we make these costumes and just accept the chunkiness and general uncomfortable feeling of the gear. So, when you get something like this that just falls into place, it's like a small miracle. Currently this plate is printed in PETG, but I'll likely print it in the flexible resin I showed earlier since it matches the flexible fiberglass so well. Anyways, I'm back on this kit and will try to get more done this weekend. I'll keep you all updated and let you know if anything else jumps out at me. Thanks for viewing1 point