Leaderboard


Popular Content
Showing content with the highest reputation on 08/17/2022 in Posts
-
I have been asked a few times about some areas which may require some work, filling, painting, FIRSTLY check with your GML as some may allow some items/details, others may not, also note the TLJ CRL is being updated and some text/images may change. Back/Yoke There are no visible seams on the back/yoke (front and rear pieces need to be glued, filled and painted). Note the overlap, this would need gluing, filled and painted Abdomen Section The abdomen section must wrap around the wearer's body without a visible seam (would need to be joined on both sides, filled and painted). Biceps Biceps have one seam that faces forward, and a seam on the inside of the arm. The rest of the bicep must be seamless (joined on sides, filled and painted). I haven't had a close up of these, I think they may be ok the way they have molded them and won't need to be filled as previous version were. Forearms Have the wrong shape at the elbows for TLJ, they are more TFA "Finn/Stunt" style (triangles pieces of plastic could be added, filled and painted). Thermal Detonator TLJ detonator center section is an inserted piece of pipe, top ridge and control panel are cut out showing the black pipe inside. This may be for higher level clearance. CRL Update discussion thread can be found here Also recent yoke discussion here
 3 points
 -
Hello there! I am modifying a Black Series “Rogue One style” Stormtrooper helmet to make it more like the screen props. This originally was a few Instagram Build posts, but posting here because the FISD is a better place for tutorials, as well as expert feedback. I have two of these helmets, but I had let this one sun-yellow (and treated it back to white a few times with the Trooper Bay peroxide treatment) and was ready to just paint it gloss white, but since I was already going to paint it… why not do all of the work to move it from a toy to a replica prop? When it’s complete, I plan to paint it and weather it like the troopers on the truck in Kenobi, I love that dusty grey weathering look! There are a few threads on the modifications you have to do, involving: filling in the speaker and battery case lines, replacing the Vocoder with actual solid tubes (with a gap behind), extending the lower “jaw” edge, lowering the brow, darkening the lenses, replacing the Hovi tips and rubber gaskets, and a few other minor adjustments. I ended up doing a few more as I went. But here are some of the things I planned to change: Reference: I took it all apart, removing all electronics (the “voice changer” feature on this helmet is renowned for how useless it is), remove all of the inner walls and screw posts, and separate it into the three parts to work on it. I removed the rubber edge "gaskets" and the rubber Vocoder, and cut out the Vocoder spot. In the vocoder place and along the lower front "jaw" area, I made a Sintra “backer plate” to help the other plates have something to glue to. Patterning was tricky, involving several cardboard mock-ups to get the shapes, and some heat forming to get the plastic to all fit in place, but it worked out. Filled initially with Plastic Weld epoxy putty, then sanded, Bondo Glazing and Spot Putty, and sanding again. There is more filling and sanding to get this flush. There are some minor seam lines I also sanded and filled, and I added the base for the “eye bump” that the modern helmets have as a nod to the more pronounced one on the Original Trilogy helmets. I will sand it down a little more to keep it subtle. Continued below...2 points
-
Thank you sir, Now, just a couple of fixes and we go for centurion. I am truly thankful for the support and assistance from everyone. The EI honor gallery photo is awesome, thank you for that. Regards, Will2 points
-
It's the same this side. I used Google photos and had the same issue. Changed to Imgur.2 points
-
2 points
-
Continued: I had seen someone posting a FB build group this photo, wondering about why you can maybe see some light coming through the tear/cheek vents in this behind the scenes photo: I guessed that they were likely some kind of mesh fabric. I asked my contact who has intimate knowledge of the helmets, and they confirmed my suspicion. While I cannot share the photos or reveal my source [my source has said I can identify him here on these forums: fellow 501st Legion member Ardeshir Radpour @equuspolo ], they showed me detailed pictures of the inside, including the black breathable fabric that is glued behind these vents (and they are also behind the top vents, but were covered with helmet padding which blocked airflow in this helmet). They also showed me more details of the grey helmet details which confirmed they appear to be a separate piece. So I cut some "frames" to give my inserts something to hold on to, and then used CA glue to attach some mesh fabric (from one of my wife's socks) stretched taught behind it. (According to my source, what my black frames are doing in this build was instead integral to the helmet as a recessed ledge, and painted black, and then the mesh fabric was simply glued to the inside of the helmet over the hole, but the result is the same and looks identical): I cut the backer plates for the other vents and traps as well: Meanwhile, I did a final wet sand at 600 grit to the repairs, and painted the frown teeth and attached ear button with primer grey, and taped them off. I primed the whole helmet with white primer, and then gloss white the next day. I had a few minor rough spots, and sanded those in preparation for a gloss coat. It appears some of my paint, despite warm dry days, did not fully cure. According to Rustoleum, it should have at least 48 hours (not 20) before applying a gloss coat, and it instantly crazed up. Back to sanding... Vocoder tubes: I needed the vocoder to make a harder angle right out of the top holes, without kinking, and I had an idea to insert a piece of rod with a right angle bent into it. It looked like it would work, but the lower end of the rod (2.25" for the long ones) showed a bulge where it ended, so I would need to curve it back and grind it away so there is no hard corner at the end of the rod. The irrigation line can't easily make the 90 degree bend [UPDATE: it was hard to get the irrigation line to make the 90 degree bend, but I used a simple graphite bottle to squirt some graphite down the tube, lubricating the rod so that it more easily could make the bend, eliminating the hammer part which mashed up the tubes. Graphite bottles can be found at any hardware store, and are used to lubricate old locks and things], so I hammer the bend, and then hammer it back to 45 (bent to 90 first to sort of weaken it, making the second time easier), insert the rods over the tubes, and then re-hammer the 90 degree bend. It chews up the end of the tube a little, so this has to be done with the least amount of hammering (thus the pre-weakening of the bend). Using the graphite makes the second hammering not necessary. It might work with lubricating oil too, but that oil may make gluing it more difficult. After waiting two full days, wet sanding with 600 grit and then 1,000 grit, my helmet was ready for painting... again. I warmed my paint in the sun, shook it for over 5 minutes, set up the parts in the shade but on a warm dry morning, and tried again. Success! No need for a gloss clear coat, this white is glossy enough: Next steps over the next few days are assembly...2 points
-
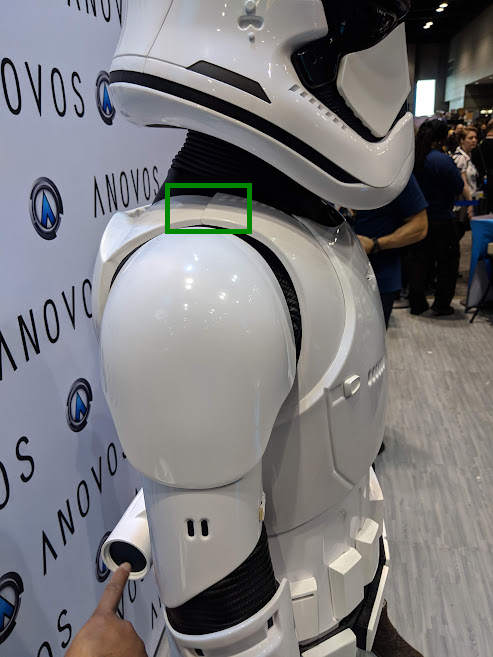
Hello. My name is Daryl, and I’ve been a Cloud City Garrison member for about 6.5 years. I’ve built several armored costumes (ANH stunt, ESB Snowtrooper, Dengar, AT-AT driver), but this my first experience with the FOTK. Here's my parts list, so far armor: Denuo Novo (ordered Anovos 1/9/2018) helmet: Denuo Novo standard (ordered Anovos 1/9/2018) boots: Imperial boots http://www.imperialboots.com/product/trooper7-boots-gloves/ gloves: Imperial boots http://www.imperialboots.com/product/trooper7-boots-gloves/ metal holster: R2Dan on FISD shoulder brackets: Ukswrath on FISD fabric mesh/gaffers tape: Ukswrath on FISD I plan to use the Denuo Novo instructions a little bit, but I’ll also be following other pinned builds here on FISD. Supplies: Lexan scissors Painters tape Clamps Magnets E6000 80 grit sandpaper 220 grit sandpaper 400 grit sandpaper 1000 grit sandpaper 2000 grit sandpaper Behr Paint+Primer Gloss White Behr Paint+Primer Satin Black Acetone Headlight polish Novus scratch remover 2 & 31 point
-
All good, working now1 point
-
@TKSpartan @gmrhodes13 Could you check if it's good now?1 point
-
More trimming. My cutting confidence is back, so I was on a roll. Hand plates before: Hand plates after: Test assembled arms: Onto the legs. Calves before (partially cut before picture) Calves after: Shins before: Shins after: Thigh backs before: Thigh backs after: Thigh fronts before: Thigh fronts after: Knee plates before: Knee plates after: Spats before: Spats after: Test assembled legs:1 point
-
1 point
-
That would be because you uploaded them Appears you are using Google? does not work on this forum you need to use a photo host
 1 point
 -
Unfortunately some of your photos don't appear to be showing, many of us use Imgur a free online image host, upload your photos there then copy and paste the links into your post1 point
-
Thank you both for the encouraging feedback. I'm hoping to have some time over the next week to make some progress. I'll be sure to post updates.1 point
-
It's here! It's Here! It came mostly ready-to-wear, but it's going to need some tweaks, my build thread is here:1 point
-
I have been approved as of 8/16/2022. I removed the antenna and the greeblie and sent separate pics with the update. Sent from my SM-S908U using Tapatalk1 point
-
Hope you don't get Covid. I escaped it for a long time then a friend basically walked it into my house. I had a mild case that lingered for two weeks and ever since then my allergies have been much worse than normal. Bart1 point
-
Yeah I wouldn't be in the 501st by the time the Imax re-release happens. That's closer at just 2.5 hours away. There won't be much in the way of opportunity locally unless there is a sudden shift in interests in the immediate area. The trick for me is figuring out how to maintain my interest in between the 3 or 4 events I can get to any given year. Bart1 point
-
Amazing thread!!! I've got a Black Series bucket sitting on a shelf waiting for this very same treatment. I'll be following your steps exactly. Thanks!1 point
-
"Rustoleum" I hat the bl__dy stuff, have had so many issues with blockage, thick dry spray (even when shaken during spraying), in the end I stopped using it, I don't know anyone that hasn't had issues before with it. I do prefer using automotive acrylic spray paint, I just find it gives a better finish and can be sanded/polished if you finish with clear coats. Does look fesable that there would be a mesh backing to the vents other wise there wouldn't be the black section on the inside of the helmet. Funny what you see when you take a second look, good old gaffa tape used again, not sure what the red colored section is just next to that, maybe strapping. Must have some big gaps in those thighs too, drop box has fallen behind
 1 point
 -
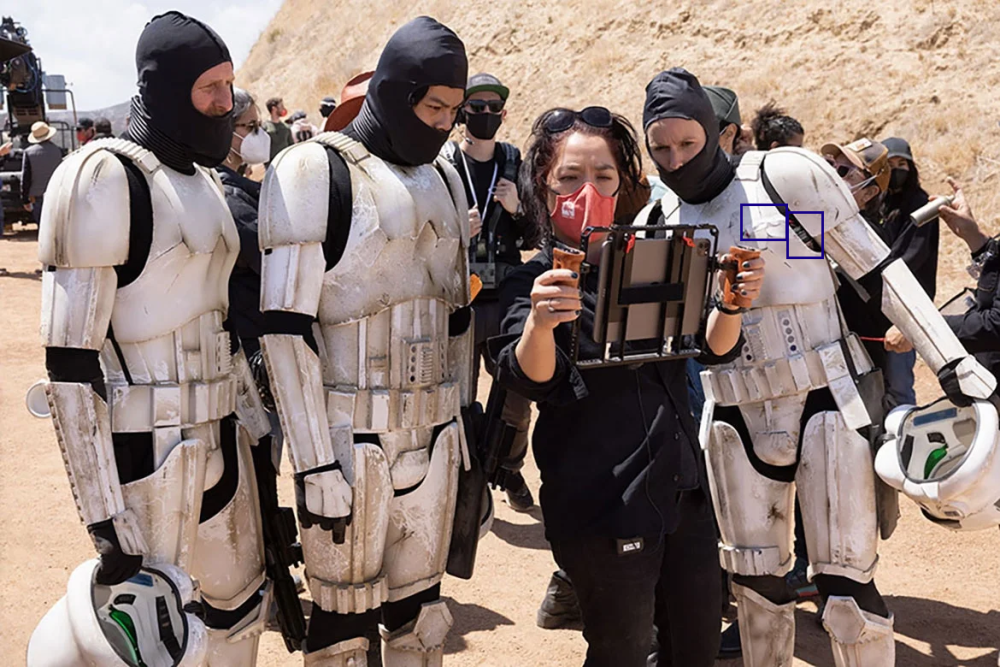
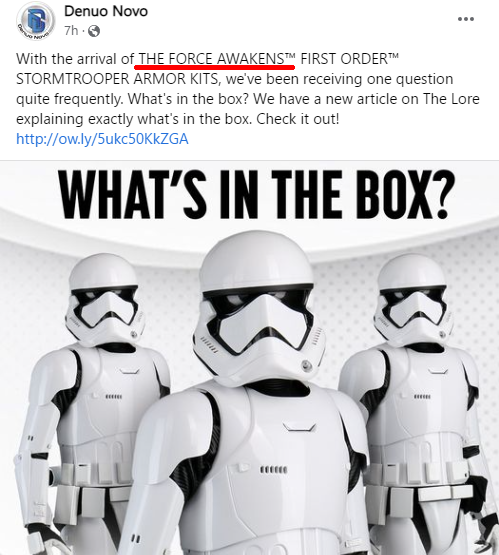
Still selling the kit as TFA, maybe use a different helmet then Denuo NoGO Link to what's in the box https://www.denuonovo.com/blogs/the-lore/stormtrooper-armor-kit-whats-in-the-box All together you should have enough to cover the essentials to start your build into the becoming a stormtrooper. In our next piece of this series, we are going to cover The Gotta Haves vs Nice to Haves - excerpts pulled from some professional Stormtrooper builders out there who have done and seen it all themselves! WOW wonder who the "professional Stormtrooper Builders" are, so excited to find out, maybe there's a group you can go to that can help you build and have lots of screen references
 1 point
 -
more work on my Black Series Stormtrooper helmet accuracy modifications: Looking at the close up photos of the Rogue One style helmets (the modern Stormtrooper suits used in The Mandalorian, Kenobi, any current shows), the gray traps and vents all appear to be a separate piece of grey, placed into a cutout in the helmet, with a black backer. [UPDATE: I was able to verify from someone who has had personal knowledge of these helmet props that not only are the grey pieces seperate, with a recessed area rather than a painted border, the vent ones actually go through the helmet and are backed with black mesh fabric, to allow for air flow. I have seen photos, but am unable to publicly share that reference]. The Black Series helmet is more like the original trilogy helmets, painted with a black border (and some slight texture). I searched for a file for these, but I couldn’t find those pieces alone. So I built them! Took photos of the Black Series helmet vents, and then made those precise shapes in vector. I imported those into Blender and scaled them to the exact size, and then extruded them. I added them to Thingiverse for the next builder doing this. Thingiverse stl files for the vents and traps Printed in resin, and then I cut out the helmet vents (cutting just inside the grey with a Dremel, to leave room to file out the final precise shape). I used those cutouts as shape bucks, and slowly heated each vent with a heat gun, and held them to the curve so they would fit. The cheek vents have almost a propeller twist, so keeping by those cutouts as a guide was vital. I slowly filed the cutouts until they just fit the new pieces [UPDATE: Based on some new reference, I plan to sand my grey inserts a bit more so that there is a bit more of a gap between them and the helmet) I also cut out the tube vents like the modern helmets have: I also "lowered" the brow base by adding to the bottom with Magic Sculpt. I did a few more filling and sanding passes on the back battery cover, which took five total treatments to eliminate those lines. Finally, for the Vocoder, I found what I thought was some ideal material, satellite cable, but my satellite cable was 1/32” too wide, when I added it up, 7 of them side by side would be about 1/4” too wide overall. Luckily I had some 1/4” irrigation tubing, which appears to be a perfect match to the screen used props. Next up: Adding some steel rod inside the vocoder tubes to help make that sharp curve at the top (without kinking), priming and painting the helmet, fabric covered backer plates for the grey plates.1 point
-
Denuo Novo FOTK Assembly Instructions TLJ-FO-Armor-Kit-Instructions-08-16-22-sm.pdf1 point
-
The sheet has been cut, sewed, and dyed and is now the cape! Velcro on the shoulder straps to secure it Test fit Now I gotta muddy the cape1 point
-
Looking forward to seeing the progress1 point
-
Another week down. Back pain is much more manageable now and almost gone. Crohn's pain gone. Workouts are going well.1 point
-
No joke that did work out well, good work making it work1 point