Leaderboard


Popular Content
Showing content with the highest reputation on 05/29/2021 in Posts
-
We had some sensational entries in this years Anniversary coin design competition, so thank you so very much for all those who submitted entries. Staff voted on their favorite designs through a Poll which included all designs. The winner with a total of 7 votes is Etrooper70 (Eric) Congratulations for a fantastic design Trooper, well done and thank you for your submissions Here is your winning design. We now have some more work to do to get this design approved and turned into reality so keep an eye out for future updates on how this is progressing. Thanks again to all those who took part in creating some of the best coin designs we have seen to date.1 point
-
Requesting access please https://www.501st.com/members/displaymemberdetails.php?userID=29499 TB 77504 / DZ 77504 / TI 775041 point
-
I finally found the other picture. It was in the middle of 11b30b4's ROTK vs. OTTK thread from last year: It's that "Original Prop Blog" picture that shows a layered belt construction. The boxes are overhanging the thin strap but still have some backing from the wider base strap, and again the rounded edges terminate around the drop box.1 point
-
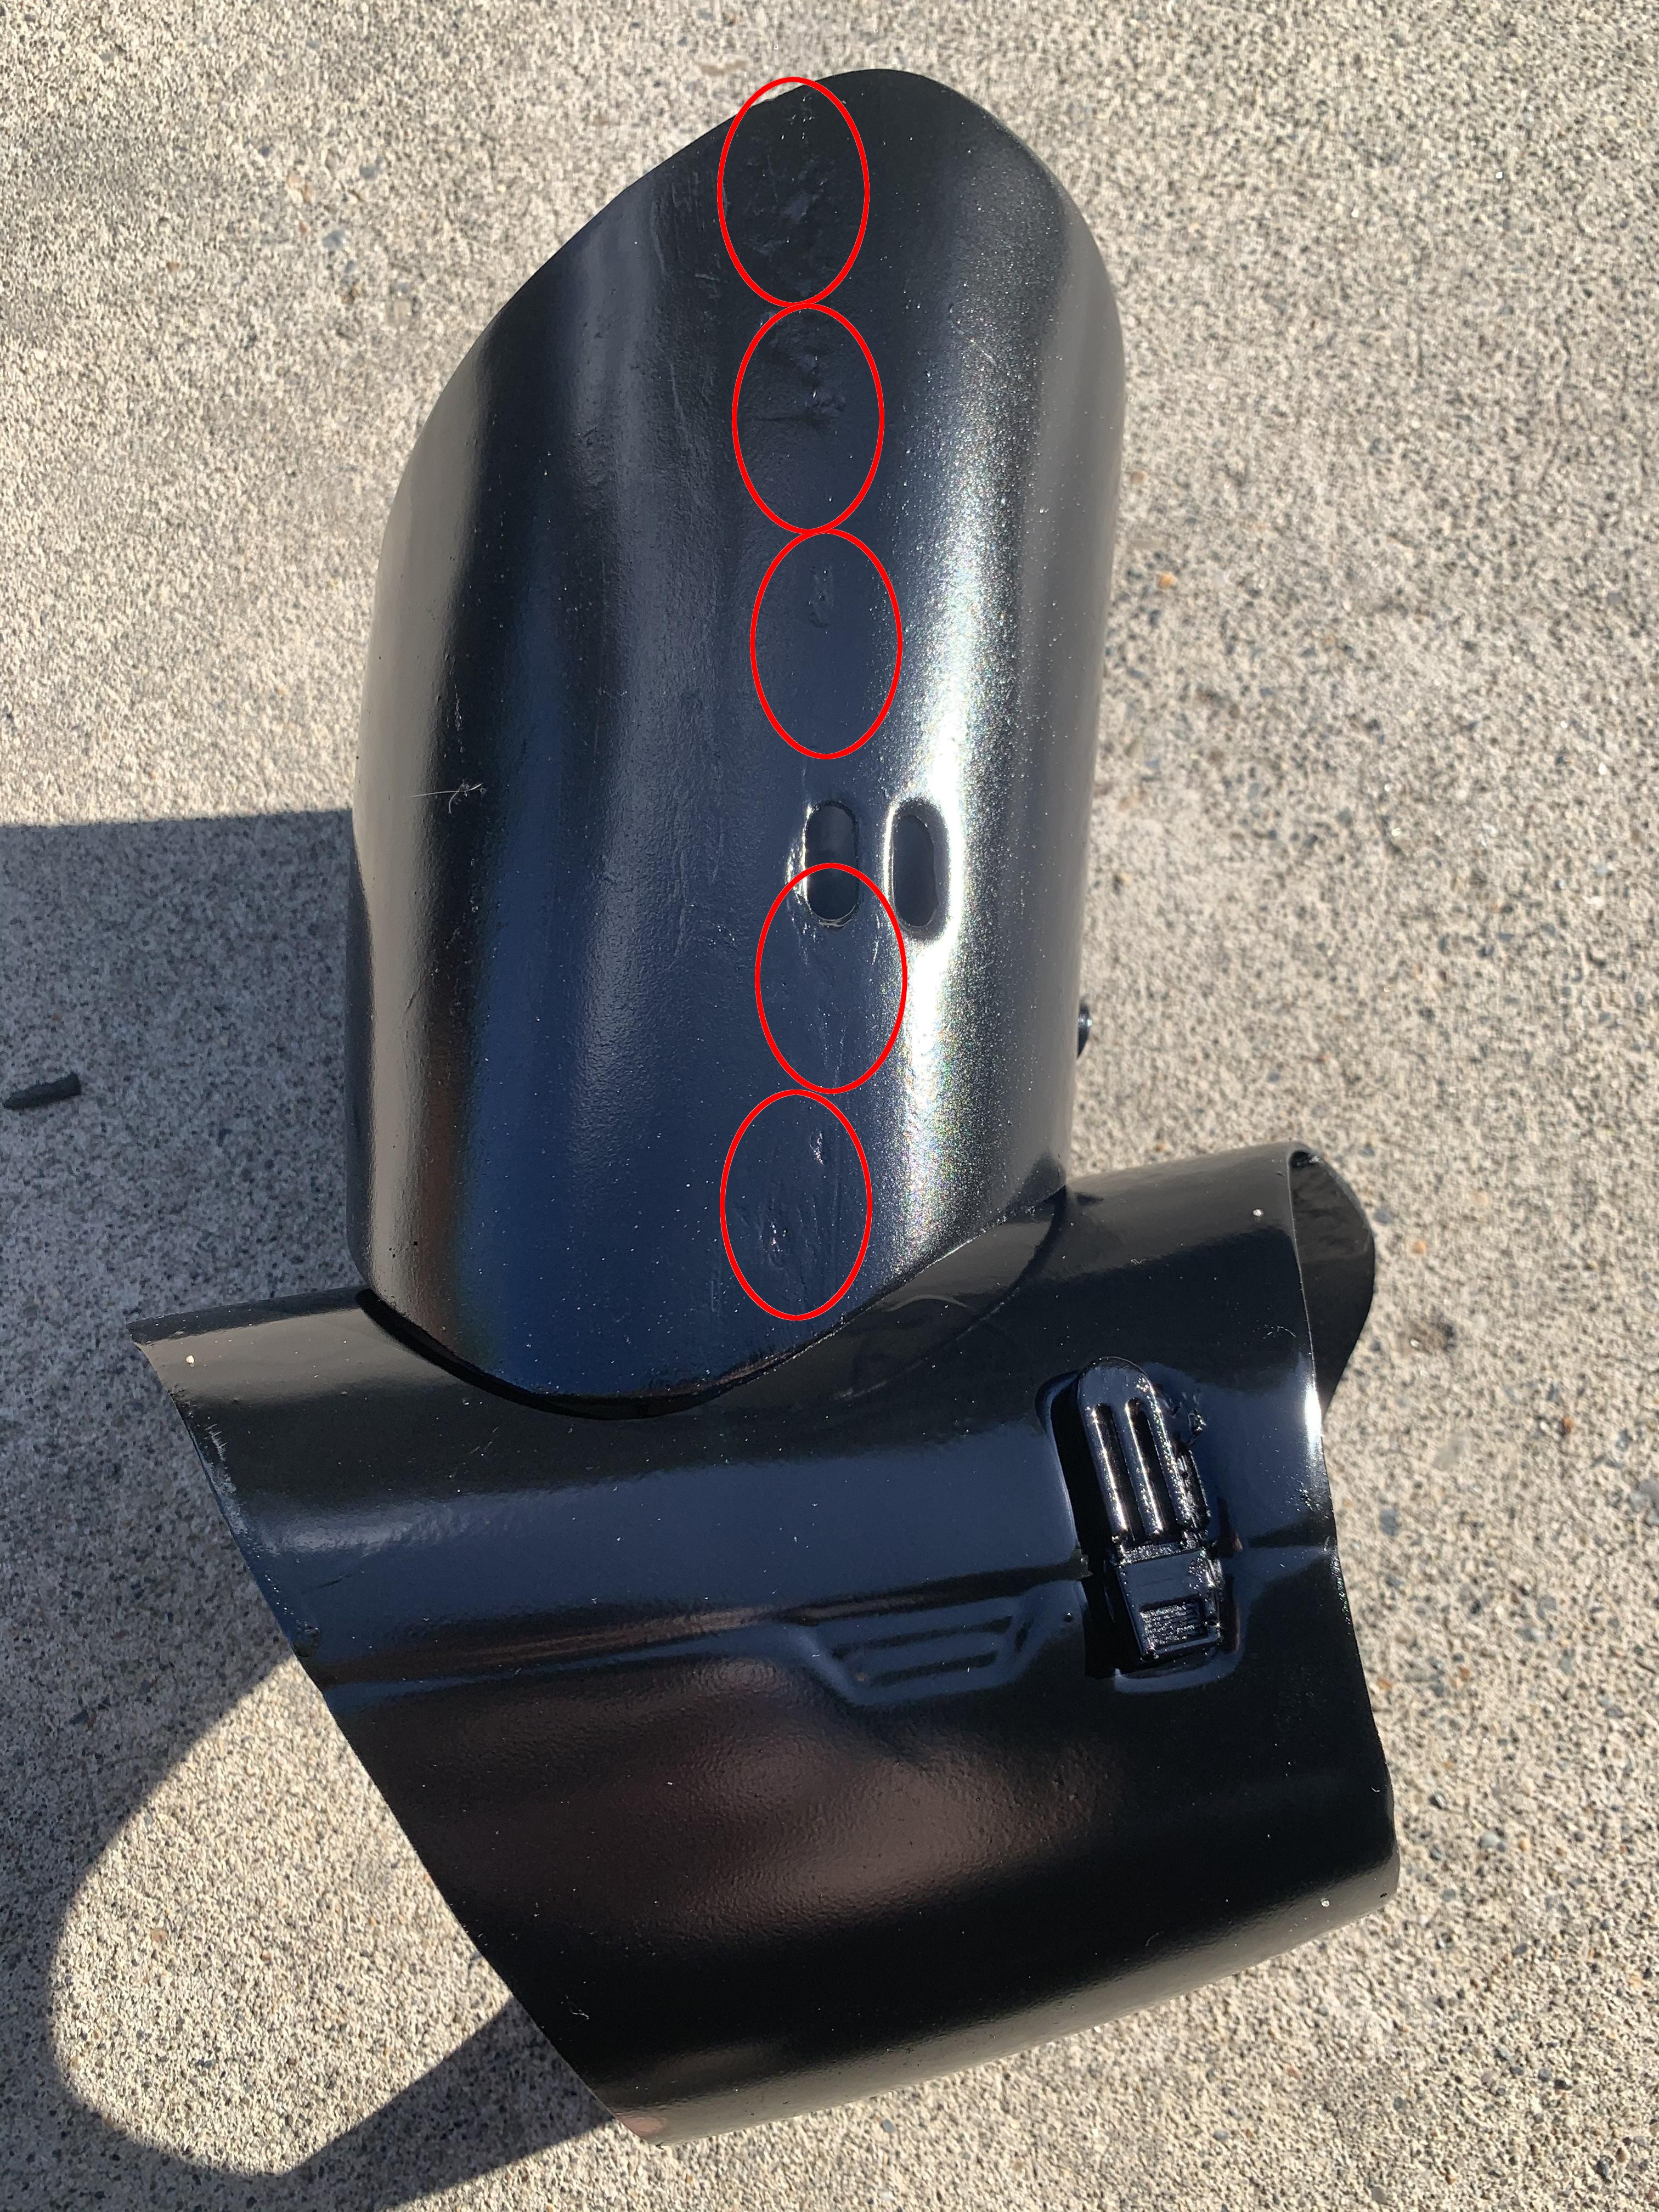
Thanks, it is my first (ever) build and hope its correct and helpful. So, I had some time again and could continue to work. I puttied the left shin. With the upper body I tried to achieve more mobility and to optimize the overall appearance. The chest and back are fairly tight and chafe as you move. I attached some foam from the inside (temporarily) to prevent this. The TD will be glued on and then the seams filled (grammar?) The belt boxes are cut to size and (in my opinion) finished so far. Maybe adjust a bit? A lot of time was spent filling and sanding...1 point
-
Just looking through a few of your images and there are a few areas which will need some more sanding, perhaps filling too. With Phasma the base needs to be as flat as you can get it as every blemish will show in the final stage. When sanding filler you can wrap sandpaper around a small block of wood, helps to sand flat raised areas or you can purchase a rubbing block from an automotive store Once your armor is finished and you have sprayed a few coats of spray putty or primer/filler you can then give a light mist spray with black, this helps when wet sanding (or dry sanding) to show high and low areas, any areas with black remaining will need more filling. https://www.renownauto.com/blog/entry/what-is-a-guide-coat A couple of videos on guide coat and block sanding
 1 point
 -
Understand, just figured I would submit in case someone wanted to reach out to her. Sent from my iPad using Tapatalk1 point
-
Welcome aboard! You can never have too many plastic spacemen! Jim TK-508991 point
-
Coming along nicely Garrett. I'm making headway on that pike you delivered to me as well.1 point
-
Good luck with your build.1 point
-
I am back on this now. The armor I had received from MIMIC was too rigid and cracked....of course after I painted it red. I have new armor coming from KB and will be able to complete once I receive. I will still need the cape, red boots, and red gloves....as well as the helmet confirmed (TFA or TLJ). I stand by TFA since that falls in the timeline of the book and he originated prior to Phasma joining the First Order.1 point