Leaderboard


Popular Content
Showing content with the highest reputation on 04/12/2019 in Posts
-
Here is mine, hope it helps. You will see the top line of the plate does not follow the shin top, just not possible in my case. Note that the plate was thinned, this was to help stop it catching on the thigh. Make sure you attach with removable glue, you might need to re-position a couple of time after trooping.2 points
-
Well they will consider refunds once they are in stock: "We will continue to honor any existing refund requests made prior to this policy change as business permits, and will still consider future refunds for customers after a product is in-stock and ready to ship, but only on a case-by-case review." So essentially if you have a pre order and want to cancel you may not receive funds unlit after the pre order is in stock, even then it's on a case by case basis.2 points
-
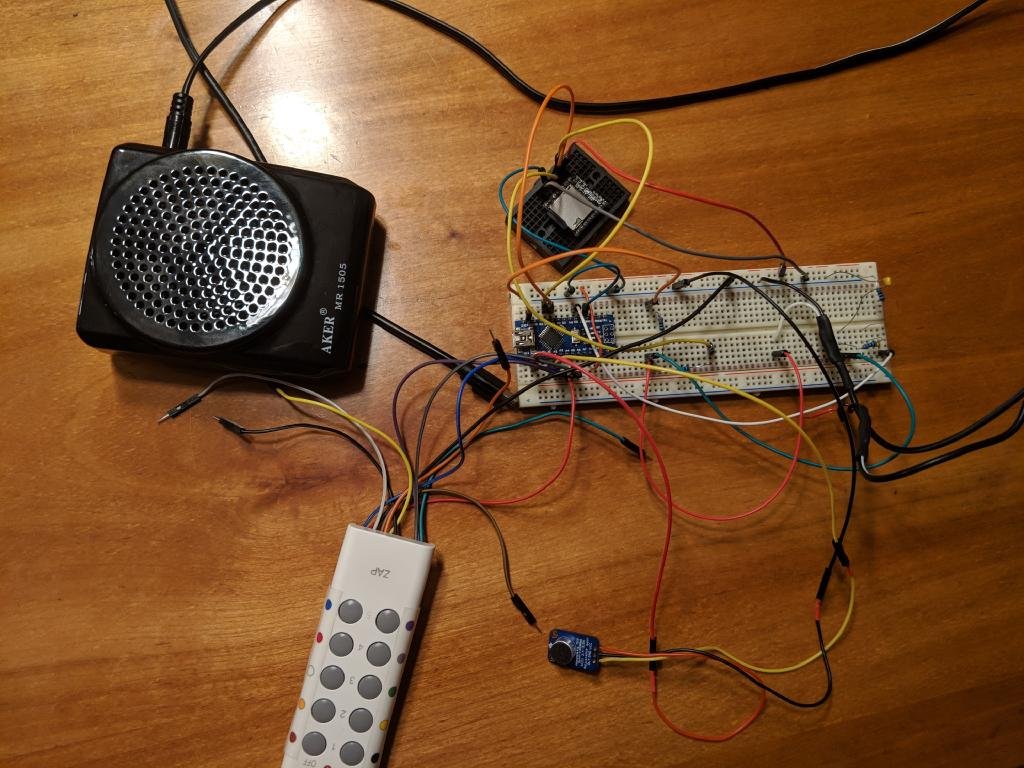
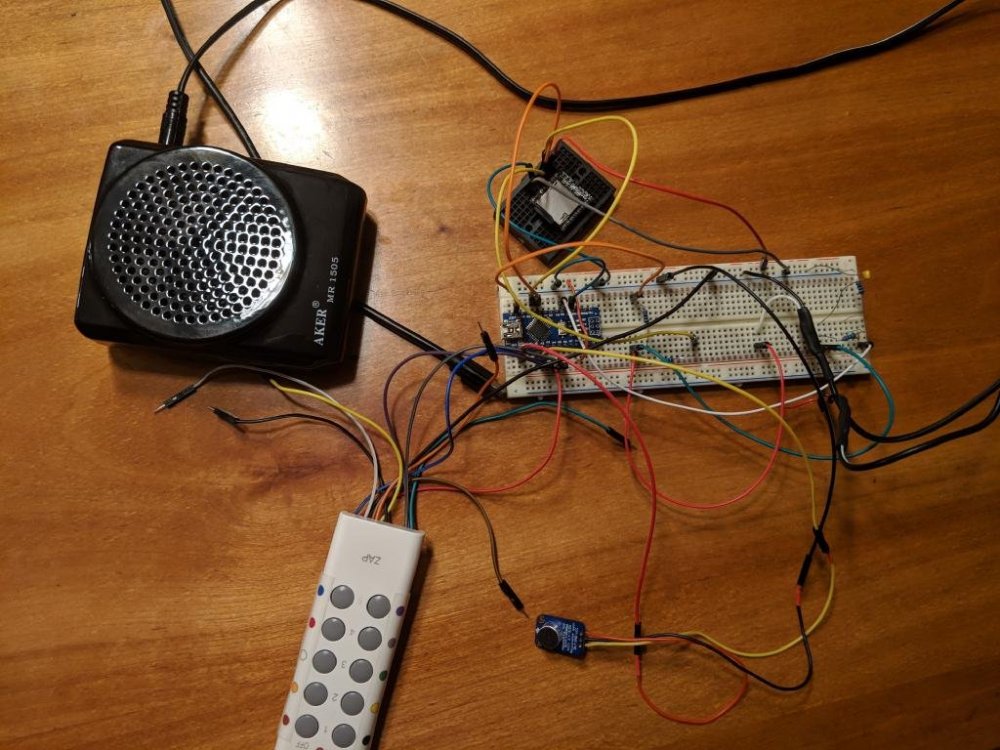
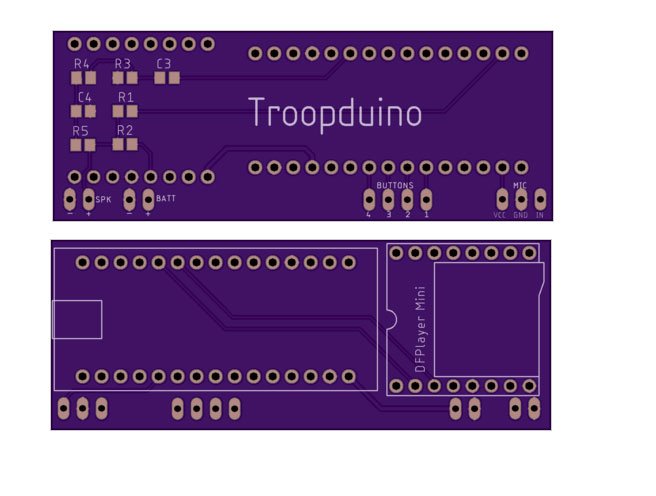
I'm just getting everything together for my first build and while I'm waiting for everything to arrive, I decided to make a voice changer. When I started researching voice changers I considered making a TKTalkie because the creator was kind enough to share his design , but I figured I'd take a crack at making my own first. I managed to find the amp on Amazon, that I think most of you are using. The system uses an Arduino nano with a DFPlayer mini. You can turn on a bandpass filter to make the voice sound more like a CB. There are bitcrusher and reverb settings to degrade the sound and add echo, respectively. I might add a ring modulator and other effects down the road, but they wouldn't really be applicable to a Stormtrooper. Maybe some blaster sound effects too. The button controller isn't what I intend to use. It's just an old RF remote that I converted for use for Arduino development instead of putting a bunch of pushbuttons on the breadboard. I'll most likely be using the glove button method like TKTalkie.
 1 point
 -
Hi, Last year with the presence of 501st members at Solo and Tokyo Comic-Con, it gave me the final push to pursue my own armor and membership. I've spend two month obsessing over the forums, CRL, and Youtube to decided to order a trimmed AHK TK kit from Authentic Props. Being a Canadian living in Tokyo provides some challenges but I have found support from local members already which has been great. I'm a very detailed and nervous guy, part of my profession, so it will be measure twice, write it down, measure again, question the accuracy of measuring concept, then maybe ask everyone to confirm my measurements. This might take a while. Armor : Authentic Props Arrived Soft Hand Guards : Authentic Props Arrived TD Clips : Authentic Props Arrived Holster : Authentic Props Arrived Gloves : Authentic Props Arrived Belt : Authentic Props Arrived Neck Seal : Trooperbay - Arrived S-Trim : Trooperbay - Arrived Comms: Ukswarth - Arrived Boots : IB - Arrived Undersuit : Uniqlo E-11 Blaster : 3D print project - Started assembly Fans: Still researching Mark from AP endured many emails from my timezone to his and was very helpful and supportive. The BBB has started the journey and with email updates set on the tracking number I will follow its progress up to the minute. I figured once I had the tracking number I could start this build log and have some of you wait along with me in anticipation of a show.1 point
-
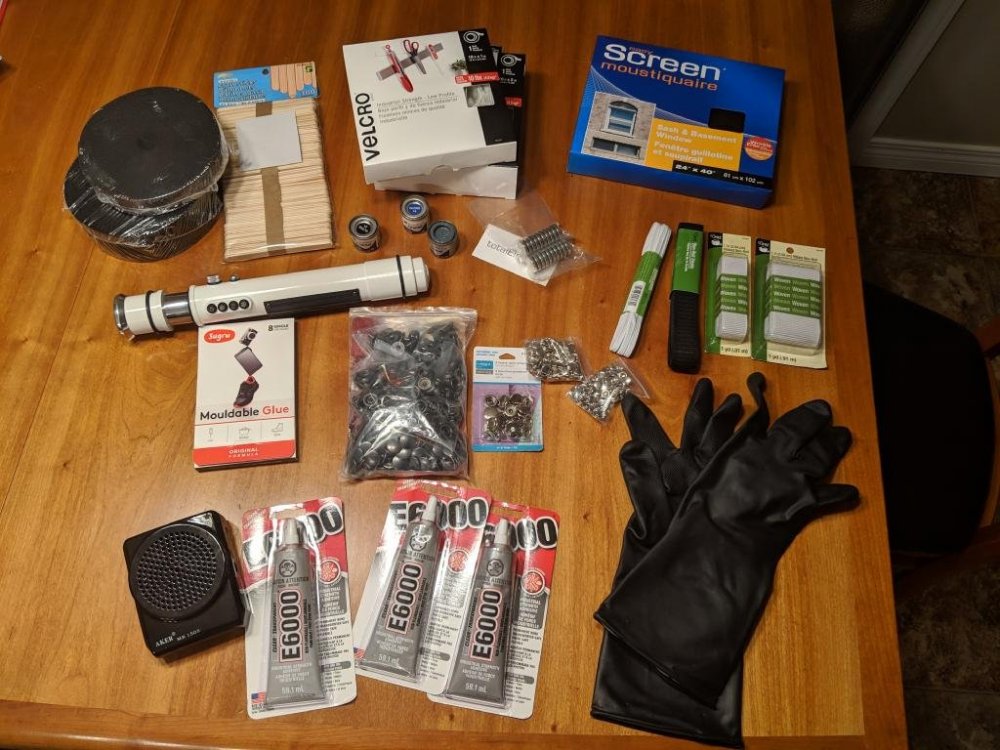
This will be my first build on my journey to hopefully being someday accepted into the ranks of the 501st. I have everything on justjosheph63's TK supply list. Luckily I had all the tools, so I just needed the stuff specific to this build. I'm just waiting on the big items. Armor: Authentic Props - Received Boots: imperialboots.com - Received Blaster: QuestDesignCanada - Received 2 things I don't have are the neck seal and the lenses. I think my wife and I will try to make the neck seal. What do you recommend for lenses? What colour and material? Bubble or flat? I've started on my voice changer while waiting for everything to arrive.
 1 point
 -
Now for today... I am beginning the part that has me the most anxious. Trimming! I have my guide printed (@ukswrath) and am going to trim it all out before beginning the sizing. Once trimmed I'll post pictures of the pieces for feedback and directions. I know there are parts where there should be no return edge (i.e. the wrist end of the forearms), but if someone is able to list all the parts and which ends of each part, should not have a return edge for the Centurion level, it would be of great assistance!1 point
-
I have a doopy E-11. But I want to take my time on that build as I would love to make it as real and functioning (lights/sound) as possible. The completion kits and sound kits will require some more purchases, but for now that will be my afterwards project. In the meantime I ordered and just received my E-11 from Praetorian Blasters. A bit of nerd out time occured as I walked around the house with it and then watched a show while using it to point to things for my wife and daughter. It's well made and if you didn't know some of the parts look like real metal! This appears to be L3 ready.1 point
-
My other accomplishment has been the installation of the electronics set-up from @ukswrath. Let me say, if you need anything like this I am quite impressed. Hearing assist, hovi mic speakers, cooling fans bracket. Added a Bluetooth transmitter and Bluetooth earbuds to keep me from being "plugged" into the bucket with traditional earbuds. Here are the hovi mics from the speaker system. The plastic ones simply unscrewed from the bucket. I had to then drill a slightly larger opening for the speaker posts, but was very easy to put in. Aside from the sound ability, I believe these make my hovi tips Centurion rated. The original ones were going to need some interior painting if they remained in place. Interior electronics. I wish I could make them look a bit more organized. Good news is no one really looks inside except when I'm showing it. After playing around trying to fit it to my ear. I remembered that this could be mounted in the bucket. That's what I've done here and I much prefer that set-up.1 point
-
Thank you everyone! Since the last post I've accomplished tow projects. First is the Husky Storage bin. It was time to move the kit from the BBB and into its new home. Here is the before and after pictures. Yuu can barely see the top of one of cat's head next to the bin on the far right. Open box seems to be an invite to them! Found this foam at Wal-Mart. Depending on how much space is available once the kit is trimmed, I am considering adding another 1/2 inch of foam on the bottom. The fabric came from Jo-Anns Fabric (3 1/2 yards long for those like me who are fabric shopping challenged). After measuring the interior we (my daughter is my official build-assistant) cut the foam to fit. In hindsight, cutting foam with a retractable razor on your dining room table is not smart. After a small cut line on the table, all work shifted to my portable workbench! We then used the foam to cut the fabric to size. The Fabric was attached to the foam using spray adhesive (see below picture). This was bought at Wal-Mart. Cost less there than the fabric store. It starts drying quickly so had to spray over the foam surface and then we placed the fabric on the foam holding it tight and then smoothing out wrinkles. You definitely need to do this outside as the spray makes everything it touches tacky, plus has a somewhat strong odor. Attached velcro to the back of the foam on all four corners. The top, and front/back sides also have velcro in the middle along the top edge and bottom edge due to the overall length. Here is the final product. And with the tool box (soft goods holder) inserted. All in all rather happy with how this turned out!1 point
-
Thank you for all of this information. Very helpful! I'm about to upload some new photos of the recent activity I've been up to. In it will be a few more bucket pics. I'll hold on the tube stripes for now.1 point
-
I was thinking the exact same Once I get my hands on one I'll definitely be looking into it.1 point
-
I did not cut the back of the sniper plate. Maybe thin the front plate some first?1 point
-
They mean that any return requests made before April 11 will be processed and refunded, but from now on there will be no refunds. So any "existing" requests made "prior" to that date will be refunded.1 point
-
Thank you. I'm going to try an inch on the front and the back.1 point
-
Thanks for those, Fabio! Boy, you're quick! Before we can get things rolling, we also need one more updated photo: Hovi Mic tips with more accurate mesh. It should be fairly easy to pop out the fine mesh screen and put in something that resembles the mesh in the green circles as shown below. Once we have these new photos, we should be able to get started on your review. Thank you!1 point
-
It's nice to e-meet you, fellow Californian! And a tall one too! I think I'd like to also stick with ABS and am going to go with a KB kit. I will have to get the helmet separately like you too, probably a Thorsson . What's the best way to get in touch with him/get a quote? This is super helpful - thank you!! I would love to do a little lift (Gwendolyn Christie is 6'3, after all ... and I love a good heel anyway ). I'm thinking I'll be doing a TLJ Phasma, so the lace ups may not work for me, but I'll do some research on it. I appreciate you reminding me to avoid using lifts in a shoe with no room to rise up! I definitely am interested in compression shirt and pants ... I figure it will help with the heavy costume etc. I think I saw GeekyPink also sells the shiny shorts to put over it too, so I'm thinking about doing that too. I've seen people mention Jessica, but I'm not sure where to get in touch with her - could you possibly point me in her direction? Awesome, thanks! Definitely checking out your ESB TK build! Thank you so much for the help already!!1 point
-
Why yes, there is. Stands for Padmé. If she's good enough for Lord Vader, she's good enough for me. You sure will I'll be replacing my ab/kidney before submitting. Decent bit of work there and much busy-ness resulting in no timeline. Looking forward to it, though! Thanks for the congratulations, everybody! It's a real party over here in my head In fact, yesterday is now a recurring event on my calendar - TK Day!1 point
-
Got some help and had another opportunity at the photo booth today.1 point
-
Happy St. Phasma’s/Patrick’s Day You fierce Lads and Lasses! ~May the sun shine warm on your bucket! Sent from my iPhone using Tapatalk1 point
-
Shoulder bells: (Left - unfinished right - finished)1 point
-
EIB Approved! #900!!!!1 point
-
Here’s how I made the cod plate:1 point