
Leaderboard


Popular Content
Showing content with the highest reputation on 12/30/2018 in Posts
-
Hi Tino, thanks for explaining! I try to stick to the blaster reference as much as possible, so now I read the corresponding sections carefully before each step. Just wanted to make sure I would get the counter position right the first time. Getting the details right is quite addictive... Best regards, Patrick3 points
-
Not to worry - I imagine most troopers have knit. It's really much easier to find. And cheaper. Everyone's going to want to replace their elastics sooner or later anyway! Generally speaking, knit elastic has a much "looser" or "gentler" stretch to it than woven does, due in part to the looped construction technique itself being stretchy to begin with. The fact that it's made from one continuous length of elastic (not the multiple opposing threads of a weave) makes it a little more fragile, too, as one point of failure can rapidly spread. There. Information. I knew being a textile nerd would come in handy someday!2 points
-
This should be fun….demonstration some other day2 points
-
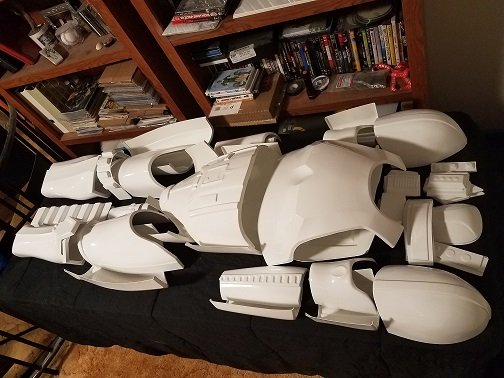
Well my BBB is now set out on the table ready to start. My Helmet and E-11 are finished. Hopefully I can get some progress on this to post for review. I have stared at it for a week too chicken to start anything.
 1 point
 -
Odds 'n' Ends -- Part II Now that I'm nearing the end of the main build, I'm finding lots of smallish things I also need to do, so I'm peppering them in as I think of them and need a break from the main build. (Truth? The next part of the main build would have involved spending the day running around my workshop in my undersuit, but I forgot to turn on the heat in my basement workshop. Yeah, time for some odds 'n' ends instead...) One of the things I wanted to do with my armor is to arrange an alignment method for the right side where the Ab and Kidney meet. No issue with the left side, since that's riveted with a rigid ABS/webbing hinge, but the right side will be closed with straps. To keep the alignment correct and prevent one side or the other from sliding up or down, I decided to use a "tab-and-slot" arrangement that many of you have used. I made the slot plate with a length of white ABS scrap (the 3-1/4" length allowed it to fit nicely between snap plates), raised at each end with smaller squares of ABS glued in place. The opening of the slot matches the thickness of the tab that would go into it. For the tab plate, I used some black ABS (scavenged from the black plastic case one of my DeWalt drills came in),and cut it into the tab shape with a long gluing surface matching the length of the slot plate. I made this with black so it'd blend in with the undersuit, rendering it invisible through the seam where the Ab and Kidney meet. Not how I scored the gluing surface on the back of the tab plate. I then closed up the armor and put both pieces in place on the right-side closure between Ab and Kidney and traced where they needed to go. Starting with the slot plate on the kidney side, I glued it in with E6000 and clamped it up. While that was drying, I did the same thing with the tab plate on the opposite Ab side. You have to be careful when gluing these in, and make sure they stay on your traced lines when you apply clamping pressure. Parts glued with E6000 are notorious for sliding all over hell and back until the glue sets. I let both sides set up for several hours, then removed the clamps to test the fit. Perfecto! Up next, heat the damn basement and pick up where I left off with the main build.1 point
-
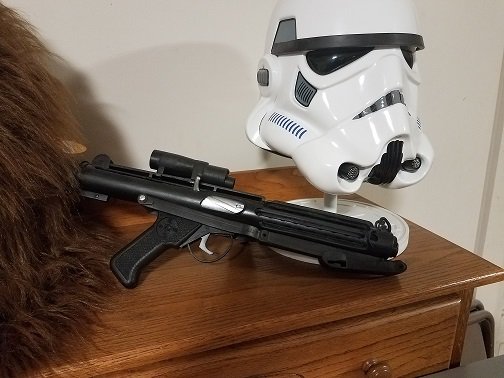
Plasti-dip is now dry so cleaned it up and put the head-gear back in. Before After1 point
-
lmao this is profile picture material!1 point
-
Made some decisions today. Decided to plasti-dip the Anovos helmet. Decided to start the clean-up of the KB helmet between layers and started by cutting down the excess from the mold. Already cut most of it in this pic. Decided after cutting it down to keep the grove of the mold as battle damage, Just going to sand and paint. Decided to have some fun. Also decided to make a new CRL for a new Stormtrooper variant - aka the Duck-Trooper.1 point
-
Thanks Brian! The 3D printed front muzzle will indeed be used to hold the clear acrylic tube with the LED strip. And having acces to both sides of the tube will definitely help to get everything in place. Best regards, Patrick1 point
-
Thanks for the helpful feedback. I'll get to work on those improvements.1 point
-
Nice work, just to really make you look the part you may want to change your shoulder elastic to a stronger one or try doubling over, you can see your elastic being pulled sideways, almost touching the shoulder bells. I would also suggesting trying to bring your mic tips down, they look to be pointing upwards. This can be achieved by adding some rubber tube, if you cut one side straight and the other on an angle (like a wedge), you can then add to the base of the mic tip and rotate to get them to point a little better. Good luck with approval1 point
-
looks good. i will suggest what I always suggest: - the helmet (bucket) is honestly the first, middle, and last thing the crowd sees. the Tk bucket is THE iconic face of the franchise. with that in mind, make it perfect. - with regards to comfort: ensure cover strips do not extend beyond that which they are covering. trim them so they are flush-ish. in both cases, I always suggest finding a Centurion Application thread for your armour, and compare photos. More work done out of the box, less anguish later undoing or redoing small things. as far as basic approval, you should be fine :-)1 point
-
After a long time out, I've been able to get some help and will again start offering the ANH E11 kits based on castings of my expertly cleaned (thanks @usaeatt2 !!!) parts. Casting is currently ongoing. The kit is all based on a CNC machined 38.1OD Aluminium tube made especially to be as accurate as possible while taking into account this is for replica, and not a real functioning Sterling. My original sales thread is now archived but if you want to see some history: Many molds needed to be redone as they were showing their age and this is still ongoing and I expect to have these finished in the next few weeks. Straight from the casting floor. Once I"m ready I will reopen a new sales thread and let people access a sign up link. Kits will be shipping within 2 weeks of order and orders will go out in waves, so there will be no long waiting list or line between payment and shipment. MTFBWY1 point


