Leaderboard


Popular Content
Showing content with the highest reputation on 05/27/2018 in Posts
-
If you use clamps or magnets to flatten them it will be fine. Remember that the back part of the strap will be held down with elastic. I don't see where this would cause many issues.2 points
-
Hello, I'm currently building a doopydoo E11 blaster. I keep seeing people mention a T Jay's completion kit. I can't find anywhere to buy this or what it has to complete the build. Any info would be really appreciated as to what's in it and a location to buy. Thanks. Sent from my iPhone using Tapatalk1 point
-
ImperialIssue belts can be ordered to size, with Troopebay you are stuck with 52”. I have one of Rob’s (ImperialIssue) belts, and a second on the way, and they are very well made.1 point
-
I personally got rid of my return except the chest/cod/back area where you can use it for strapping. As for what other people who will be in your garrison do I wouldn’t be too worried. I highly doubt (very highly) anyone especially Pandatrooper will be concerned with your return edge, it’s just great to have another trooper in the white armor flock. So don’t beat yourself up over it, do what makes you comfortable and if you don’t want to make return edges, don’t, personally I see your point of view. I didn’t do anything to my armor unless I was 100% I knew how to do it. Sent from my iPhone using Tapatalk1 point
-
I think the bottom screws will pull it in more and you should be ok. It looks good Sent from my iPhone using Tapatalk1 point
-
sweet man you’re almost done! mine’s coming around slow, but it’s finally starting to come together. I still need to do shoulders and biceps, then do the bucket.1 point
-
ok got it, thanks Rat! yep, I was finally able to get some elastic for the back.1 point
-
Continuing on.... Next up is the shins. Here's what the untrimmed AP shins look like: The shins were pretty easy to trim up. I used lexan scissors to cut off the extra plastic and went back to the table top belt sander to sand down the curves. Then finished up with a sanding block or dremel if I needed a rounded edge. I did a rough trim first and then sized the shin to my leg. Keeping room for the 20mm cover strip on the front and 25mm for the back. I'll be using velco for the back. I LOVE Cricket's magnet solution for the shins, but I think it's probably not a good idea for a "first-time-builder". When it came to the strip on the rear of the shin piece, I used every clamp I had... I made sure that the rear cover strip attached on the outer side of the shin half and used industrial Velcro with the loops on the cover strip and hooks on the shin portion. I've heard this way the hooks won't grab your undersuit. In this photo I've lifted the outer lip over top of the cover strip to give the adhesive time to dry. Lastly I had to wrestle with the sniper knee plate. I used the "offset" technique of gluing the right half of the shin slightly higher than the left half so that the knee plate isn't lopsided. Then I gave the knee plate several hot water baths to shape the right side (when viewed from the front) so that it better fits the shape of the leg piece. I think it's pretty good. The bottom doesn't really fit snug against the shin but I think all AP kits have this little issue. No one is going to see it anyway because they're never looking "up" at your knee plate. I've started working on the thighs while I wait for the glue to dry. Mark1 point
-
And Now assembled with the clips and black screws !!!1 point
-
Thanks Daniel !!!1 point
-
Received my pouches from Blaster 8266 (MEPD) and did a full suit-up, the helmet isn`t ready but I still put it on as I didn`t want to give Dan another scare1 point
-
Your Torso fits you well in that mock up! You should have a great looking suit when you're done!1 point
-
I'm going for Centurion. So I did a bunch of rough cuts making sure everything lines up well. Here is what I have done so far he real question I have now concerns the forearms and biceps. The forearms fit but they're hard to get over my hands. Now they are just rough cut so I can remove some material to make them a bit wider at the front if that's acceptable. There are no return edges on ANH forearms that I'm aware of. My second question is the exact shape that the biceps should be. Everything seems to be going pretty quickly. I did use the standard 5/8th's for the arms and 7/8ths for the legs.1 point
-
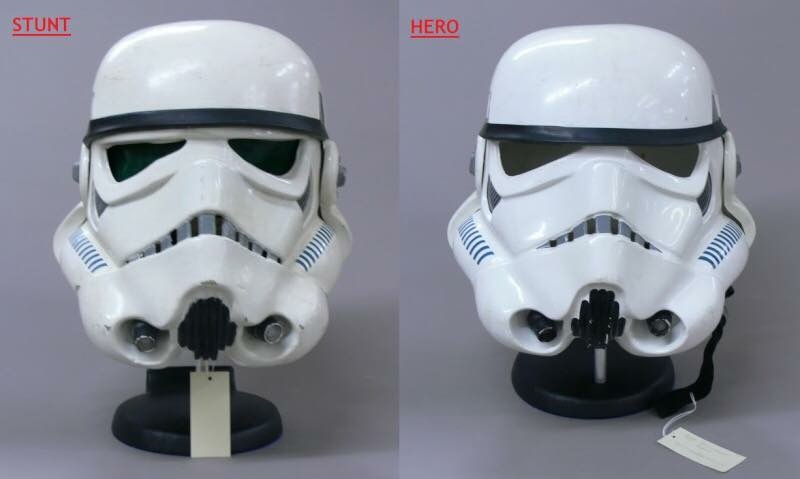
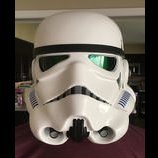
The torso looks good to me. you should be able to get at least two fingers in there. I find the AP kidney a little wide for me. I plan to reshape (hot water bath) on my next build to make it fit the shape of my torso better. Anyway, you don't want to short change yourself for romm in the kidney-ab area. The AP green lens is actually pretty close to screen accurate, but, it is thin. And this may have been ok on the movie set, but a darker lens is usually needed to keep people from seeing our eyes when in person. I bought a thicker and darker lens from Trooperbay. I just attached it with the screws that are already installed by the ears. Painting the inside or using Plasti-dip looks pretty nice but may cause some minor issues when you go to add adhesives for electronics. On the plus side, it darkens the inside so it is harder for people to see your face. Just a personal preference for the most part. The helmet will be tight. You don't want to trim any more off the bottom than you absolutely have to. I have to do the 90° turn trick to get mine on - and it is snug even with that. But if you want to trim it, I would trim only a couple of mm off at a time to see how it fits. I opened mine up a bit from Mark's original trimming - but just a couple of mm. Oh yeah, and the cod piece... whatever is comfortable. You don't want it too low or else it will rub on your thighs (more) when you walk. I think it is the graphics on this site - a lot of us seem to have that grey tinge in our hair. Great work so far!1 point
-
I'm trying to fit the torso pieces. I've trimmed everything and tapped it up. My question is about the fit. I'm wondering if I need to take more off the ab and kidney around my middle? I cut to the "original movie prop size" as marked by Mark from AP. Should I take it in a bit more? I'm also wondering about how high the cod should be. Does this look about right? And yes, I'm always more bald and gray in pics than I recall... : )1 point
-
Thanks everyone for the comments. I will looking into upgrading the mag. Either scratch built or 3D printed. Just a few more events to do with R2 before I can jump into and dedicate more time to this. Cheers!1 point
-
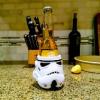
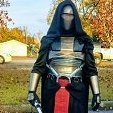
Ok…did some fine tuning on part locations and stability, added foam inside calves and forearms, and did some home trooping. I also wore it to the local firewoks show in my town. I went out the back way and hopped a fence, walked 1km to the park and really made a few people happy there. AND yes I hopped a fence in the armour. It’s a 3’ wooden fence so not terribly difficult. The next day I did some more touch ups and was wearing it around the house, played my guitars in it, cooked dinner (well…helped), and lounged around with my kids. Here’s a few pics from dinner day. NOTE: I don’t wear my detonator in the house and only have the blaster for some pics. Weapons free house. https://photos.app.goo.gl/GQNwNTMnpWMnhNKc81 point
-
Yes I actually followed ukwraths build for centurion. My plan next week when I get back from vacation to submit my request. Just need a few more pics (cod and sides) then I was going to submit for EIB.1 point
-
Hi Michael Good choice - it’s an excellent kit (from a lovely fellow). Here’s the link. Best wishes Dan1 point
-
I forgot to mention, I made a little modification to my clamps. I cut small strips of wood and hot glued them to the end of my spring clamps. This way the clamp pushes down on the cover strip with less chance of pressing on the sides of the armor. The was especially useful for the forearms where the large surface area of the clamp would have hit the sides and not clamped down as well. And now on to the thermal detonator.... This is the untrimmed TD from AP.... And here is after the initial trim... As other people have mentioned, the end caps are a very tight fit. I tried sanding down the main tube a little but that didn't really work. The material that the pipe is made of doesn't really take well to sanding. I found it almost "soft" and difficult to sand. Maybe that's just one of the properties of pipe? It wasn't "hard" and wouldn't sand "smooth" after a course sanding. Luckily I only did less than 1 cm from the edge of one end before giving up on the idea. It turns out the caps DID fit OK, it's just a tight fit and any angle at all will cause them to not slide onto the pipe. After a test fit I found the pipe a little long. My understanding is that the entire TD should be 7.25 to 7.50 inches long with the end caps installed. So I needed to chop a little off the pipe. Luckily (again) my dad's old tools come into play. He had this interesting mitre-box style contraption that holds the saw blade level. Perfect for chopping down the pipe. I followed Ukswrath's build for masking off the areas that will be glued before painting. Then I did the final sanding of the end caps and panel to get everything the right size. As I mentioned in my E11 build....I picked up a (fairly) cheap airbrush off of Amazon. One that hooks up to a tool compressor with a pressure reducing valve. It was only my second time using it but after some tweaking with adjustment screws, I managed to get a reasonably nice flow. Much better than the first time I tried. I was getting a lot of "spitting" of larger drops previously. This time after adjusting the needle I wasn't getting that anymore. This air brush stuff is a lot more complicated than it seems. WAY too many adjustment screws with pretty much no instructions. :-) I thinned down some Humbrol #5 Dark Admiralty Grey Gloss and sprayed on a few light coats. Next I glued on the panel... Then I glued on the end caps. I purchased the TD Clips from Ukswrath. I opted for his "version 2" clips. I posted this on my local garrison and PandaTrooper pointed out that the clips look a bit tall. I hadn't noticed that but now that he mentioned it, they do look a bit tall. The "version 1" clips actually aren't as tall, but they also don't have the bend at the bottom for the belt. I'm not sure what I'll do. For now I'll assemble the rest of the armor and see how I feel about the clips. I may end up replacing them if they still appear too tall once everything is complete. Mark1 point
-
Also you want a good read and worth the 24$ Star Wars “stormtroopers beyond the armor” so worth the money and a awesome read ... Amazon
 1 point
 -
1 point


.thumb.jpg.ee449555c0122db250a94b412c07cd87.jpg)