Leaderboard


Popular Content
Showing content with the highest reputation on 05/02/2018 in Posts
-
One more piece to the E11 puzzle.. the trigger guard.. stamping look great now i can move forward completing the frame.3 points
-
--------I grabbed a HFX Productions E-11 and also a holster from Darmans props, really loving the blaster already and the holster is a solid fit. I’ve been spending a lot of time getting my droid up and running for some Tripp’s this week so Armor building has stalled but I want to push on next week and make as much progress as quickly as I can. Sent from my iPhone using Tapatalk2 points
-
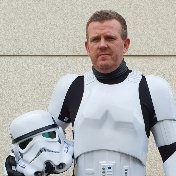
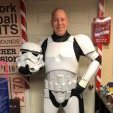
Greetings Troopers! I've been a member of the Rebel Legion for about a year now and I built an R2-D2 that I "finished" almost 2 years ago. I've been wanting to join the 501st since I first heard of it and should've jumped in years ago! I've been building for a few months now but I've only recently started stepping things up to try and get done for some personal events and to start trooping as a TK for a change instead of always having to drag R2 to events. I've got a WTF kit, I actually bought a helmet about a year ago and just got a full B kit so I have two helmets now. My helmet is nearly complete, I just need to Plasti-Dip the inside and figure out how I want to add the fans and battery pack, I've been researching what I want to do about other electronics as well, sound, Tramp, hearing aids etc. This pic was before I painted the screw heads white and I still need to glue my mic tips in, I tried the highlighter method but couldn't get them to stay in place because I think the screen I have was already cut too small. I used Trooperbay decals for the traps and tears and hand painted the rest. I'm still trying to figure out or decide if I want to go for Expert Infantryman or Centurion and I've been toying with doing a Sandtrooper or becoming a Heavy Weapons Trooper but I think it would be best to just start off basic and then decide if I want to spend the extra money and take the time to change something out later. So for now I'm starting with ANH Stunt and then we'll see how it goes.
 1 point
 -
There has been a lot of negativity surrounding FISD and our former DMBO lately and I thought I would inject some positivity instead of the mudslinging that the Legion boards seem to have (sadly) devolved to. I don't know Wyatt. I've talked with him via PM in my role as an attache a few times at most. Regardless of charges or what you think of him, he has poured everything into the Legion and this detachment for over a decade, from handling nearly every merch run on FISD to running Imperial Gaskets. I know I've only been a Legion member since November, but Wyatt... thanks for everything you have done for us here.1 point
-
I stand corrected. Thanks Wook. I think I got confused with the screws needed for the holster. Sorry, my bad. Glad I'm rebuilding my belt.....gonna chuck those Chicago Screws now.....lol1 point
-
I've ordered the doopydoos kit E11. I'll have a look at all the parts and how they are assembled. And use the experience of building the resin one to make a nice scratch build one from mild steel or ally. Sent from my SM-G960F using Tapatalk1 point
-
One reason well quite a few really the main reason is the money you pay for this e11 and you get a really piss poor blaster 1 poorly made and things that should be there that are not there ie cocking handle,D ring rivet for a front sight folding stock in three parts with screws showing front of mussel different size to the plastic tube and wrong size Allen bolts to the front the only thing that’s only ever good on this blaster is the box that the thing came in like dan and Chris have said there’s better ones out there or build your self one there’s a lot of satisfaction in building it and under standing the way it’s built Sent from my iPad using Tapatalk1 point
-
GilFran007, thank you. I like the fiberglass. I think it’s more forgiving than High Impact Poly Styrene, which is what I vacuum formed my Mandalorain armor is with and often TK armor is made from. As far as dust, it is heavier than the HIPS and heavier than most roto-cast helmet plastics I have used. Most of my sanding is wet sanding so that cuts down on the dust considerably. I did not wear a respirator while working on this helmet, but to be fair, there was not a lot of “serious” sanding to be done on it. I expect when I get to the armor, the respirator will need to be employed. I hope this helps answer your question. Themaninthesuitcase, thank you for the information. I was aware of the doopydoo’s scope form the Rogue One E11 thread here on FISD and over on RPF. I originally wanted an all metal E-11 and I still may go that route in the future. The HFX is nice but I prefer something more “functional” looking. I do not like the absence of a buffer spring in the rubber guns. I have been considering a 3D printed E-11 from Blaster Master and modifying it to meet Rogue One CRLs. The idea of the metal scope was to have something that I can actually look through and the one pictured at the top of my build thread is affordable. Regardless, I have a ton of stuff to work on for this build before I revisit the E-11. The T-21 I am hoping to build after the Jedah Crystal Pack will most likely be my primary weapon.1 point
-
I used rapid rivets. It seemed most other threads I read at the time recommended rapid rivets or 1/4" pop rivets - which I bought but then realized that they were too short for the AP belt and thicker ABS, so I used some rapid rivets I had on hand. I would use rivets to make sure the belt stays together. Mind you, I have no plans of cleaning my canvas belt. Hopefully this link works. Here is an original. Looks like a single cap rivet. This is not required for any level - just a screen accuracy thing.1 point
-
Congrats! Looking forward to all the madness1 point
-
Over the weekend I had some troopers at an armor party receive armor in that was missing parts and rather than get upset I've been on a kick to preach inventory as first step in the build process. I heard a comment from another veteran that had a similar mind as mine and was wondering why there were no checklists etc, was his first experience receiving hard armor. A lightbulb kicked on in my management set mind and I created a community shared document with various armor makers and a list of what should be included. I invite the community here to help contribute to the document and hope it helps as something that is helpful during BBB days and helpful to any makers. Please if you make any edits just note what you did below on each tab (there is tab for each maker) The link to edit is : https://docs.google.com/spreadsheets/d/1G7usSreG_5YJ7t6MQUvHhqmAfzB6zzehsRPnhbH45aw/edit?usp=sharing1 point
-
Hey guys, thanks to your tips, it worked well with the ABS paste and filling! I have taped the holes, so that I had to sand down only a bit. Unfortunately, after sanding, the ABS does no longer shine. Can I made it shine again?1 point
-
You`re good to go and one can use single cap, double cap or split rivets but not pop rivets (L2, L3 not specified for L1) Here`s a few examples to help you decide and also check the advanced tactics here for inspiration1 point
-
T track lengths will need to fit from the front bi-pod mount up to the antiaircraft site ,and from there to the raised shoulder in the barrel so they will be determined by your build , the one's on my measure 127mm at the front 183mm at the rear .1 point
-
Yes it is and up to Expert Infantry (CRL below) if you choose to go for Centurion they need to float in the back so I say wait before you glue it, you might not need to. The chest and back is connected using an elastic or fabric (canvas is popular) strap and by using the latter in combination with the Centurion required white elastic it should hold those bridges in place Shoulder Straps These shall be securely mounted in front and may free float in back. They may be affixed with rivets, Velcro, or adhesive. The rear tab of the shoulder strap is optional and may or may not be present. OPTIONAL Level two certification (if applicable): No visible rivets are allowed. OPTIONAL Level three certification (if applicable): These shall free float in back. These shall be glued in front. The plastic shoulder straps need to be held down in the back via a white elastic band to the white fabric that connects/bridges the chest and back piece. Chest Armor Chest plate overlaps the abdominal plate. OPTIONAL Level two certification (if applicable): OPTIONAL Level three certification (if applicable): Chest and back shall be connected with a white fabric or preferably elastic strap at the shoulders.1 point
-
Yeah I mentioned that in the thread... I may touch it up with white or something to get them rounded.1 point
-
I'm feeling the love! It's been a pleasure serving you. (most of you) I've had lots of emails from members in support of me. People are just too afraid to get involved. I can't say I blame them; The new sheriff shoots first. It also looks like the deputies are in charge of this one and are calling the shots for him. I also want to mention Mrs.tk4205. I lost count of the sandwiches she has made for troopers at events. Cookies too. The old timers can tell you about bantha patties. The Mrs. took food to almost every major event our garrison did for many years. Few people know that these days, as so many of our old-timers have been ousted. I myself have only trooped once or twice a year for the last couple of years due to the unwelcome feeling we get from our CO and his little group of noobs. We'll see what happens this year, but there is always next year to look foreword to. I'm not going to let a few egomaniacs turn me off of what I love. I've been through a few bad commanders in my years and I always seem to outlast them. I've gone up against worse too. You guys are worth fighting the good fight for.1 point
-
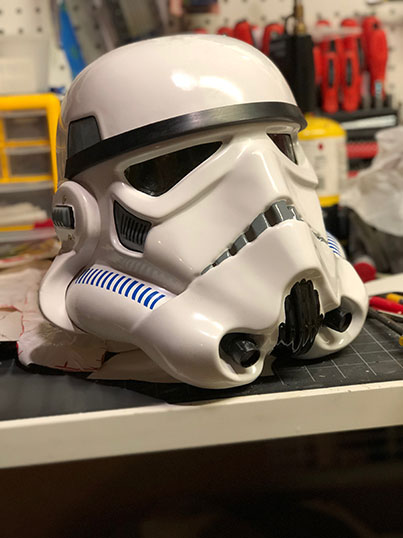
Hello everyone, I got some work done this weekend on the helmet. After I had rough cut all the holes in the helmet, I used the dremel and some mini files to finish out the holes. Here is a shot of the back vents after they have been cleaned up. Next, I took some think HIPS and cut it to fit then heated it with a heat gun and fit the parts inside the helmet. This is how it looks from the outside. Next, I sanded the whole helmet with 250 grit and primed it. This made an impression of the vents on the vent covers. I then removed the vent covers and traced outside the vent area with a sharpie. I will be cutting out the traced area then gluing in breathable color matched fabric. I took a trip to JoAnn’s fabrics and found this polyester/ spandex that is a very close match to the painters tape blue. I will be using some black polyester fabric for the other vents. I have not decied if I will make the vent covers removable or not. I am concerned that the fabric will become soiled after some time and need to be replaced. Next, I started sanding with 320 grit to determine what needed to be filled and cleaned up. Unfortunately, I realized that the glazing putty I had was three years old and dried up and there are no auto body paint supply stores open on Sunday so I will need to wait till this week to continue to work on the helmet. And that is the update so far. Thanks for the interest.1 point
-
I think, because of the "symetricalness" of the R1TK a lot of the parts will work either way. what you will want to consider is how the joints look and what will be most visible. Like when you put your shins together - depending on what you use to fasten them, you will want the closed overlap on the outside front, so that the "open" edge is towards the inside of your stance. I hope this makes sense. I trimmed the thighs from the top and that helps to make then get smaller as that is where they are largest. If you just start trying the armor on, I'll think you see how it goes together and you might not be as overwhelmed. I dragged my feet quite a bit because I wasn't sure where to go next, but once I just started doing stuff, it's sort of straightforward.1 point
-
Hang in there, Stefanie! When filling those holes in with the ABS paste, put some tape on the backside beforehand. Also, try not to overfill the hole too much. this will reduce the amount of sanding you have to do afterward.1 point
-
Decided to start on the helmet until I can get some feedback on the armor parts. Tonight I rough cut all the openings. I have decided to cut out the tears and back panel lines as well. I will back them with a black breathable fabric and hopefully it will improve ventilation. This weekend I will file the openings and make them uniform. Thanks for the interest.1 point
-
I’ve got the legs started, both shins are done except for trimming the cover strip on the front and the backs are still open for now until they’re properly sized. The thighs are trimmed and taped up for sizing, I know I need to size them with my Under Armor on but this gives me a good indication. I’m pretty sure 7/8” cover strip will work but it may be tight. We’ll see how it goes tomorrow. Sent from my iPhone using Tapatalk1 point
-
VERSION 3 NOW AVAILABLE! TKTalkie is a DIY voice effects project that you can build. Version 2 of the TKTalkie software has been released with some significant improvements. The goal of this release was to allow you to be able to configure and tweak settings WITHOUT having to edit and recompile the source code. Added support for text config file that holds all settings. Added serial interface that lets you LIVE edit settings so you can test in real-time. You can save and load different config settings files, allowing you to create custom configs for different applications of TKTalkie. Added Calibration Wizard that helps you find optimum settings for Voice Activation. Added support for background (chatter) loop. Version 2 source code is here. If you are using Version 1, see how to upgrade. Original Whitearmor.net topic is here. Visit www.TkTalkie.com for more information including tutorials! UPDATE: Version 2.2 has been released with some additions! Please go to www.tktalkie.com for updated code and the new tutorial.1 point