Leaderboard


Popular Content
Showing content with the highest reputation on 07/23/2017 in Posts
-
Hi! Sick of photobucket being a slow, bloated piece of bantha poodoo (that now apparently charges you insane amounts for external hosting)? Wish you could just upload some images to your build thread to show off your sweet-an impolite person testfit of your armor after you've done all the strapping and not use 50% of that time closing popups? FEAR NOT! PSA: Keep a backup of your images! No one can predict the future, Imgur may not always be around (or may hold your images hostage like Photobucket). 1) CLICK THIS TO GO TO IMGUR.COM (Or you could click the mouse wheel, which opens any link in a new tab) 2) Make an account: 3) Fill in your stuff or use Facebook/Google whatever: 4) Go to your images: 5) Find your awesome picture: 6) Drag and drop your awesome picture right onto Imgur (or use CTRL C+V): 7) Click your newly uploaded picture: 8) Click the Copy button on the BBCode section: It will flash green and stuff, welcome to the future! This baby's almost ready for paint! Pretty painless! It also has albums, ability to auto-resize, you can even select several pictures from your folders and just drag them all onto Imgur. Pictures are hosted on imgur, and you are merely linking to them by posting them using this method. If you remove it from imgur, it will be removed from anywhere else you posted it using the link. Here's what all the sections do: Image Link: Links to the image, but on Imgur. [EXAMPLE] Direct Link: Links directly to the image, and nothing but the image. [EXAMPLE] Markdown Link: Formatting for Reddit comments, disregard this one. HTML: For embedding your picture onto your website. HTML Code. BBCode: For embedding your picture onto forums (like FISD and 99% of all other forums). Linked BBCode: Same as above but with a clickable picture that leads to the picture on Imgur. [Example below, click it!] HOW TO RESIZE YOUR PHOTOS FROM YOUR SMARTPHONE/CAMERA IF YOU HAVE BANTHA POODOO INTERNET CONNECTION (WINDOWS ONLY): If you're like me, you have a sub-par internet connection and a "regular" smartphone. Smartphones takes pictures with a large file size and it is not optimal for us with a bad connection wanting to upload it for web viewing. 3.5mb takes a long time to upload, so let's shrink those files while still keeping it high quality for the web. 1) Open up the pic in MS Paint Right clicking the image and clicking edit should open up the selected pic in Paint. If you highlight multiple images and do this, it should open an instance of paint for every selected pic. 2) Resize in Paint Click the "resize" button in MS Paint. You'll see this: Click TAB once and it should highlight the number, making you able to type into the field. I usually resize my pics from my Samsung S8 by 40-50%. Press OK (or just hit enter) and it should resize. Now you can go to File->Save/Save As.. or simply just press CTRL+S to overwrite and save to the file you opened. Now it only takes a few seconds to upload a picture, instead of a minute. Time saved that you can use on removing excess E6000 glue from your coverstrips If you have any questions i'll do my best to answer them. Ensi out!1 point
-
Better to leave it that lenth and see how it fits with the rest of the armor. Then you can tweak things a little if need be.1 point
-
Just checked out your build thread mate....Looking good1 point
-
Try it on a piece of scrap first. I did and the flexible fibreglass did NOT like it.1 point
-
Started to fit the magnetic fastenings to the rear of the left shin, whilst the pieces match up at the top I've left a gap at the bottom to make the greave fit over the boot better, this gap will be hidden with the external cover strip. I realise it's not screen accurate but it's the only way I could sort this without buying another greave, anyway we will see what it's like when finished, if I have to start again it's not the end of the world Internal magnetic strip Taped on the inside of the greave The magnets that will be fitted to the outer cover strip have been placed on top of the inner strip so I can trace their outline Recess marked Used the dremel to cut the recesses for the outer magnets, did top and bottom first then the rest in between All done, Repeat for the following side, these will be the recess hidden under the outer cover strip Glued the inner cover strip with the magnets on to the inside Decided to practice making a return edge with my heat sealing iron, I still need more practice but hay it's easier than using a normal iron Trimmed the drop nosed, sniper knee plate and ab buttons. I just scored the side of the drop boxes with the modelling knife and broke the excess off.... the thing is doing this when I first started this build, terrified me, now it's really easy..... I suppose I shouldn't get over confident I guess the lip showing in the next pic needs to be removed And finally my rough trimming bits Oh and I connected the right thigh together at the front Another step in the right direction I hope1 point
-
Pinned Awesome.!1 point
-
Couldnt of done it without Q's expert help.1 point
-
Thank you so much. Have a nice weekend.1 point
-
You definitely want to try and reinforce certain pieces on the Anovos armor. Having done several troops in Anovos Armor. The parts that seem to need reinforcement in my opinion are the Shoulder Straps. Even though they are not supposed to bear a load . They are supposed to free float without actually attaching to the back armor. These are still too thin and rigid, they really need to be reinforced. Very easy to crack. Other areas, Butt, Shoulders, and Front of Chest and Top Back piece. All very small stress cracks, but definitely worth looking at. I had a feeling the shoulder straps would crack easily. I preemptively reinforced the straps with extra abs. Here is a picture. The other small cracks I have just put a dab of SuperGlue behind them and it has seemed to fix the problem. The Butt plate is the part that I'm having the most problem with. It has cracked in several places. I will be reinforcing mine very soon with some sort of epoxy and fabric tape combination. Lastly the Helmet does have some really thin areas. I went ahead and reinforced parts with extra ABS. I'll try to post some pics. Shoulder Straps - Reinforced To make this - Cut paper to fit inside the straps. Use the paper as templates for the ABS pieces to fit inside the straps. Then heat up the ABS reinforcement strip in boiling water and bend to the same shape as the shoulder straps. Once you are happy with the shape and fit. Glue with E6000 into the shoulder strap.1 point
-
I'm looking forward to seeing this as well!1 point
-
This is what I see. --------------1 point
-
Didn't have much time this week to work on my kit due to a impromptu trip to the beach (and a shirt I needed to make before next week), but I did get to spend a few hours today with my TK mentor and we made some good progress. Arms are pretty much done except the shoulder straps to attach to the torso. 95% of the sanding is done, so things should come together pretty quick when I can get with him again. I have some homework to do on the bucket, which will probably be mostly what I'll work on this week, time permitting. Oh... and here is the shirt I made. We have Hawaiian shirt day at work next Wednesday. (Note: All the what parts glow in the dark. )1 point
-
Build it and they will come, watch that is1 point
-
I'm a swear by chin strap person. Tried with out it and every time I went to look down bucket would pop up and need adjustment. Downside, it will interfere with a normal mic that goes over your head. Solved the problem by mounting direct to the helmet and using a wireless transmitter. Using the MICH/ACH helmet pads. 3/4" that came with the set for the top was too thick, bobblehead effect as a result. Ended up using a 3/8" foam cut in a circle and then glued black automotive carpet to go against my head. Back side glued Velcro w/ e600. Works great.1 point
-
I have an Aker 10 amp I use for my gunner and will put in my TK. Probably won't spurge on an i-Comm or the like for awhile. The cheapest way to emulate the static burst is to kinda make a "Chh-" sound with your mouth at the end of speaking.1 point
-
You might also want to check these two threads for a DIY fan install: http://www.whitearmor.net/forum/topic/36631-how-to-diy-usb-helmet-fans-no-more-9v-or-aas/ http://www.whitearmor.net/forum/topic/37808-how-to-make-simple-dual-5v-usb-powered-fans-for-your-bucket/1 point
-
I went to my local electronics supply store and got some advice on what to pick and how to wire stuff up. A paper diagram and some supplies (5v fans, wires, battery packs, switches, and heat shrink tubing) were all I needed. I already had a soldering gun. I made some bases for mounting out of extra ABS and some misc. nuts and bolts, and rubber washers. It's all held in with Velcro to make it all removable if I need to. Pics are in this thread...http://www.whitearmor.net/forum/topic/34886-fans-for-tk-helmet/1 point
-
Hydration, and helmet fans make a HUGE difference. Order in some fans and install them in your bucket; you'll notice a big change in climate In there. I personally get hot quickly, so I made & installed fans in my chest and back plates too. This was a game changer for me. No more sweaty under suit. Comfortable for as long as my batteries will take me.1 point
-
Hydrate Hydrate Hydrate.......cannot stress this enough. and fans1 point
-
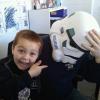
Glue fumes are fine! No big deal.<br> Hey John, did you know you got a wookie growing out of your back?<br> Anyways, gotta run, these light fixtures are laughing at me again.1 point
-
Today is some final detail work. Glued on ab buttons Painted screws I also did another hot water bath on a few pieces after a final fitting revealed a few needed to be shaped not to my anatomy. Mainly the posterior and left & right calves as well as the whole right arm. The arm was a little too oval and needed to be more round. The right calf needed to be MORE oval and LESS round. The left calf just needed to be closed up more after my repair mentioned earlier. I ran around for several hours with the legs on as I was doing other bits just to get an idea of what a troop would feel like. I almost forgot to mention that I took some 1" and 1/2" foam and padded up some key places. Mainly the legs and arms. Other than adding the stirrups in the calves and making my "trooping gloves" I think I am done and ready for basic approval. Wow. Feels weird to say that. Jim1 point
-
I was originally going to go with a pad system similar to my Army helmet I wore in Iraq. I was having issues with getting the padding the right thickness so I could see and keeping it in place on my head. After much debate here is what I did. I used a hard hat liner but instead of going the Velcro route I went a step further. Since I had bought a whole hard hat (about $7) just to get the liner I was looking at the connection points inside the helmet and thought, 'why not use those to hook in the liner?' So that's what I did. I first roughed out the area to cut out. I also marked them to keep them straight. They are probably all identical but I didn't take the time to analyze that. I then cut them out and sanded them all roughly the same shape. Here is the connection point I was interested in preserving. Connection points installed. This took a bit of fiddling and will have to be adjusted for the individual. Clip in the liner aaaaaand done! Getting the bucket on is a bit awkward but then again what bucket goes on and off with out a little effort? Jim1 point
-
That is high praise indeed. Thanks Walt! Not just for the praise but for providing a great kit at a great price and customer service that is beyond what I was expecting. I'll be looking to get at least one more kit from you but I'm waiting on some of those projects you have up your sleeve! Jim1 point
-
Wow. . This IS pin worthy!!!!!1 point
-
Time to install the torso strapping. I made my own brackets. And elastic First the back. Snaps and straps for the posterior and cod. Now the front. Left side closure. I borrowed russel2d2's idea of using tool box matting for a more durable closure that won't stretch out. It was a pain to get the split rivets to spread out because the matting is pretty thick. Jim1 point
-
I was too going to go "full screen accurate" but instead I stuck to the things others would actually see. Stuff inside the armor I'm modifying for comfort. If it doesn't effect my future shot at a Centurion application I'm not going to worry about it and make what works best for me and my comfort. After all we will spend a lot more time in our armor than actors in SW did. Jim M.1 point
-
There is extra material there but it goes from nice and smooth to a little bumpy. It may be because my armor was pulled in early March. Walt said they had a late snow this year so it may not have been the best of their pulls. Their vac table was in the unheated garage at the time. It's since been moved to the basement with a little more consistent temps. I also may have gone just a bit too far on the trimming. It's my first set and if I was going to trim too much somewhere, this is the area to make that mistake as it's easy to fix! Also I am not complaining about Walt's or the kit what so ever. I like everything about Walt's Trooper Factory and their kit is awesome! I really get the feeling I'm working on an original set of armor from the 70's. Which to me is what it's all about. Jim1 point
-
As soon as I got home from work today I grabbed these and put them to the test. The hooks are a little tricky to get on but after fiddling with it for a minute I got it. I'm thinking that if you didn't sew through both layers of elastic, like I did, you'd have a little loop you could stick you finger through to make this a bit easier..... Here's the result of my hybrid calf closures: Here's them hooked but not situated in the tabs: Here's them between the tabs, pretty clean I think! I'm happy with the result. I think I'm calling these done! Jim1 point
-
Taking a page from RusselR2D2 I wanted a way for the calves to line up consistently and not have a big gap on the outside, but I want to use the traditional strapping method. So the full length second inner strip won't work. Here is what I came up with: I added two approx 1 1/2" to 2" tabs to the inner edge between where the #1 & #2 strap and the #2 & #3 straps will be placed. Here's some other views: I tried to place them where it's relatively flat so I didn't have to worry about putting a curve in this small tab. The result is this: They hold together rather nicely, we'll see if I can get all three straps to connect once those get installed in the next day or two. Fingers crossed!1 point
-
Ooooo, the pot of water is finally starting to boil after almost a hour. This is about a 5 gallon canning pot. My stove being a ceramic flat top takes a while. My calves are fully assembled. As mentioned earlier I used CA glue so the hot water won't be an issue. I didn't snap any pictures while in the water as I didn't want to accidentally leave them in too long while fiddling with my phone. I used the timer on my microwave to make sure I didn't go past 30 seconds or so. The pot wasn't quite large enough to fully immerse the calf. The right calf: I started with the lower half and got it to almost touching. Then flipped out around and did the upper half. Here is before and after on the left calf: Result!1 point
-
I got a bit carried away on the first side. [emoji52] It's my first time working with this stuff so it just means I'll have more sanding to do. *By the way ABS paste should be the consistency of somewhere between, whipped butter and cream cheese. (I also have a culinary degree so food consistencies are something I know!) It'll be a little stringy, like marshmallow fluff (another food reference), and the strings will start to harden almost instantly but they are easy to deal with so don't stress about them. **Just remember that anywhere "wet" ABS paste touches your armor you'll have to sand, buff and polish out. SO BE CAREFUL!** Second side a little more in control. Here's a preview of the sides. Overall this added about 2" around. I will iron down the edges, top and bottom, to match up, I will then clean up and sand the notch and sand,buff and polish the sides once the ABS paste is set in a day or two. I'll show those results in a later post. Now that I have this part (almost) completed, in hind sight, what I should have done is tape the Ab and kidney around my belly and measured the gaps before cutting and gluing any ABS shims. I instead just held them in place and looked at them and thought to my self, "Self, looks like you may need to add about an inch to both sides." This would have made sure I didn't do all this work only to have it not fit. Well there is always next time and my luck on this, my first build, continues.1 point
-
Here is some more references that I used. This is filling in another one of these duplicate posts. This addresses what the size of the cover strips should be.1 point
-
Here is a great visual on how you should shim the kidney if you need more circumference. Basically the cut out or notch needs to stay aligned with the he posterior. Due to Walt's armor being a little "bumpy" as the kidney reaches around I trimmed some of this bumpiness, actually a bit too much if you've been reading my thread and had to add some back on here. It worked out for the better as the ABS on my pull was a bit inconsistent with thickness and I was worried about durability in regards to holding the rivets over time.1 point
-
This is a good reference pic too but ignore the darker blue. French blue is the current "correct" color.1 point
-
And here is the "Jim M." Helmet all together. Bonus! My boots from Imperial Boots showed up today too!! Jim1 point
-
Next it was onto the lenses. I decided I wanted to be able to take them out easily if the they get scratched up. So here is what I did. I found these little guys at Lowe's, a big box hardware store kinda like Home Depot but less warehouse like, for those that don't have these near you. I think these cost$.14 each so much cheaper than the hockey helmet screws I almost bought. Then I made up some little "brackets" out of ABS scrap so the threaded end pokes up through it the thickness of the lens material. I made another bracket that I could slide the top of the lens under, by stacking 7 layers of my scrap ABS together and CA gluing them together. Glued them in their respective places. Then drilled holes in the tabs on the lenses and fitted and screwed them into place. Lenses done. Edit: Made the lenses by making a template out of card stock then traced them onto the strip of lens material provided with Walt's kit. Managed to fit 4 so I have some backups. Jim1 point
-
Next I finished up my stripes on the cheeks and traps. Free hand of course. Almost forgot to add the ear pics. (I forgot to take pictures as I was going last night, so these were after I got it together today. Those pics below.) Jim1 point
-
My trooper should be 501st approved anytime now so here's the final pics. He's 6'1" @ 175lbs Note: I'll be changing out the pop rivets for more accurate cap rivets after approvals and post the change. As Germain noted earlier cap rivets are more accurate. At the time of the belt assembly I didn't have any and my trooper was anxious to get in his armor and get through approvals. Brackets are shown with the additional ABS support pads. The support pads are not screen accurate and are not required. They we're installed to help prevent chronic stress cracks in the armor due to the wearers height, which was putting a lot of strain on the mounting screw to armor connection. This concludes the build portion of this thread. The following pages are questions, comments, corrections, suggestions, general chat, etc. Thanks for following and hope this has helped you with your build.1 point
-
Here it is guys! I have a few minor fit issues I'll rectify, some things that still slide around some, but I need to wear it once or twice first to see how things sit and if anything needs trimmed further. I'm also not going to crazy until I get the cloth gaskets (on the list already). My boots and gloves are in transit from Imperial Boots but for now I'm using my old TK ones and then Anovos gloves. I don't have weapons yet, but I have an F-11 and baton on the way. For now I'll just call for backup all the time hahaha Or point menacingly ... Just gotta wait for my GML to approve it, hope I didn't miss anything lmao1 point