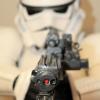
Brent Posted March 20, 2012 Report Posted March 20, 2012 My armor arrived last week! I've unfortunately been fighting off a cold that put me out of commission over the weekend . It's hard to force yourself to rest with all that shiny white plastic waiting for you . My plan is to build to centurion standards and use the original strapping system. The helmet is preassembled by Paul. I also ordered a strapping kit, belt, holster, and a pair of his new latex hand guards. It all looks amazing. Thank you Paul, for a wonderful job on the armor and for the great details on the helmet! For reference on how to assemble the strapping I'm referring to joey's pictures and TK 4702's RS Props build, as well as LFL archive photos. It would be helpful if anyone could point me to more threads that discuss the original strapping system. The obligatory out of the box photo: This is my first armor build so I have been nervously looking at each piece and comparing them to reference photos, but haven't dared to make the first cut yet. I'll start marking out the return edge and hopefully will get the chance to start trimming tomorrow. I have lexan scissors and an exacto knife ready to go as soon as I'm comfortable with where to use them. I'll try to post plenty of pictures along the way. Please provide me feedback as I go. I'd like to stay as accurate as possible so I'm looking for the help of the experienced eyes on the FISD to keep me on track. Quote
Locitus[Admin] Posted March 20, 2012 Report Posted March 20, 2012 Nice! You sound well prepared, and if you even use half the talent I've seen on your hasbro frankenstein conversion then this is going to be awesome. Don't worry too much, TM is quite easy to build contrary to popular belief. The parts to together like a dream! Quote
Cardiac[TK] Posted March 20, 2012 Report Posted March 20, 2012 (edited) Awesome set of armor you have there Brent, use it in good health trooper. Edited March 20, 2012 by Cardiac Quote
LadyInWhite[TK] Posted March 20, 2012 Report Posted March 20, 2012 EXCITING! GOOD LUCK! After you make your first cut, it's okay to throw up. But honestly it gets easier as you go! Start with something you can probably replace easily, like hand plates (replace with latex molds) or cover strips. Once you get the feel you'll be fine. Quote
Eldrik Posted March 20, 2012 Report Posted March 20, 2012 I bet you will enjoy your first build like I enjoyed my first build and I also got the luck to start with a TM build Maybe you will find parts of interest in my TM thread with original srapping linked in my signature. Quote
Arnie_DK[TK] Posted March 20, 2012 Report Posted March 20, 2012 TM is an awesome kit to assemble. Take your time, and enjoy the build. Just remember the wise words: Measure twice, cut once But its better to cut too little than too much Quote
troopermaster Posted March 20, 2012 Report Posted March 20, 2012 Just remember the wise words: Measure twice, cut once But its better to cut too little than too much Wise words indeed. Ask any questions if you are unsure about anything. You have everything in your kit to build a really nice screen accurate replica and I would hate for you to make any mistakes. Best use Joey's thread for reference as it is the same kit and was built using everything you have with your original strapping. All the bracket placements, straps, rivets are all in their correct places and you won't go wrong using that thread and the LFL archive photos to double check. Good luck with the build and enjoy it Quote
vecspeed12 Posted March 20, 2012 Report Posted March 20, 2012 Ive had so many sets of TK armor and new animated clone armor. This 1.5 TM is still my favorite. I cant stop staring and it never gets old. You'll love it. Quote
SW1 Posted March 20, 2012 Report Posted March 20, 2012 Look forward to seeing this come together do like a Accurate TM Build nice one Brent. Quote
Griffin-X[TK] Posted March 20, 2012 Report Posted March 20, 2012 Best of luck and look forward to your progress! Hope you feel better soon. Quote
Brent Posted March 22, 2012 Author Report Posted March 22, 2012 Thanks everyone for the encouragement. I'm still fighting off this cold so I'm not making much progress. My head felt clear enough this evening for me to take the plunge on the first cut though. I started with the back plate and tried curved lexan scissors. I found that they were really hard to maneuver in the inside curves, and I couldn't force it to cut in as tight a diameter curve as I needed. I backed off from using the scissors and switched to my dremmel using a sanding wheel at low speed. Personally I felt like I had a lot more control with the dremel, so I'll probably use the scissors for rough cutting and use the dremmel and sandpaper for the rest. I'm basing the return edge depth from TK9477's post and I'm leaning toward the larger dimensions, figuring I can always sand it down further later. During my convalescence I've spent some time watching the Star Wars blurays and it appears that the normal amount of return edge is on the smaller side, so I'm guessing I should sand this one down another 2-3mm on the sides. Maybe I'll wait until I've made more progress before I nitpick at that sort of detail. Quote
troopermaster Posted March 22, 2012 Report Posted March 22, 2012 You only need to leave a larger return edge where the original strapping will fix so you have somewhere to screw the brackets to. Everywhere else can have a minimal return like you have at the top of your back plate. The places where you need a larger return edge are: -Lower back -Upper kidney -Lower kidney -Upper butt -Upper abdomen -Lower chest These are where you strapping brackets will be fixed to. You can make these edges 3/8" or less and the rest of the armour 1/8" or less. PM me when you are ready to attach any of the strapping system so you get it right first time. Quote
SW1 Posted March 22, 2012 Report Posted March 22, 2012 You are going in the right direction Brent for having a really screen accuratte suit ,i just love the TM accurate builds , have a look also at the LFL archive photos if you havent already just to see how the origanal suits really are , and also Joeys ( Vacspeed ) Tm kit ,really helped me out when i built my RS suit ,Keep up the good work and look forward to your progress Quote
Brent Posted March 23, 2012 Author Report Posted March 23, 2012 I made some more progress trimming. Return edges had me pretty worried before I started. You see a lot of mentions of specific numbers of millimeters for different parts in build threads, and until I had the pieces in my hands it was hard to get a real sense of what needed to be accomplished. When it comes down to it, comparing to screenshots and archive photos seems to be the only way to get the right feel for the edges. I narrowed down the back and finished the rest of the torso pieces. If anything I'm probably still leaning on too much return edge, but I can always tweak it to be thinner later. I've started working on trimming the arm pieces. I've got the biceps to the point I can start trying to figure out the fitting. Quote
Daetrin[Admin] Posted March 23, 2012 Report Posted March 23, 2012 Dude, I so can't wait to see this in person. I only have a TM lid - you'll be the first in the garrison to have his armor now. You're making me wish I still lived up in your neck of the woods. Quote
Brent Posted March 24, 2012 Author Report Posted March 24, 2012 Dude, I so can't wait to see this in person. I only have a TM lid - you'll be the first in the garrison to have his armor now. You're making me wish I still lived up in your neck of the woods. I can't wait for you to see it out on a troop . Ok, I'm slowly piecing things together and planning my next moves. I've laid out the torso pieces and am verifying I know what to do for the rest of the steps. Here is my rough layout of how I will assemble to torso: Brackets are 3/4" from the top of the butt, bottom of the back, and bottom of the chest. The rest are either centered, or aligned with those positions. My plan is: 1. Drill holes for brackets using dremmel and attach brackets 2. Attach rivets 3. Glue on straps and shoulder bridges Here are some questions I have about these steps: Attaching the rivets: Do I need to pre-punch a hole in the elastic? I'm guessing just a leather punch from a pocket knife would do the trick, but I don't want to do anything that will cause the material to rip. My kit came with 8 split rivets. I know I need 6 for the side closure. Joey's suit appears to have one on the cod holding the strap. Is that the same type of rivet? I can't seem to find a reference photo clearly showing that area (not a popular camera angle I guess). I think that leaves me with one spare rivet. Gluing the straps: May plan is to suit up and tape them in place to figure out the exact placement. I'm going to use E6000 for the straps. Does anyone know how permanent that will be? If I need to tighten or loosen the torso later is it possible to break the glue and reattach? Quote
troopermaster Posted March 24, 2012 Report Posted March 24, 2012 For punching holes in the elastic, I just use scissors. If you have a leather punch then that would be better. Just make sure you use the washers behind every rivet. 8 split rivets. 6 for the sides, 1 for the crotch and 1 spare. E6000 is semi permanent adhesive. It will stick to your armour as good as any other adhesive but can also be pulled off with force and leave no traces on the plastic. It's very good stuff! Quote
Brent Posted March 24, 2012 Author Report Posted March 24, 2012 Attaching the brackets. I have a feeling this will take a while. Comparison of my placement to archive photo: preparing to drill first hole (between 3/4 and 1" from edge based on previous comparison): Hole drilled. Second hole measured using the bracket, then the bracket put in place. I'll do these for all of the brackets before adding the rivets. Then I'll come back and undo all the brackets to put in the strapping. Quote
Brent Posted March 25, 2012 Author Report Posted March 25, 2012 Ok brackets attached I pre-punched and the drilled holes for he rivets I'm now ready to attach the side elastic and rivets One question though. I'm assuming that the elastic should hold the two pieces flush together with no tension, no overlap and no gap. To achieve this, I'm folding over the elastic in half and punching a hole through both sides where the rivet goes and the center of the elastic is on the edge of the armor. Is this correct? I'm worried about attaching it too loose so that when I put it on it forms a gap. When I test fit it the ab and kidney peices are able to touch edge to edge comfortably around my body. Quote
Brent Posted March 25, 2012 Author Report Posted March 25, 2012 Ok. I confirmed with TM that the elastic should be neutral. On with the riveting! I used a screwdriver and hammer and they went on pretty easy. Next I just attached all the elastic loops for the rest of the torso and it was time for a test fit. The goal of the test fit was to figure out exactly where to place the shoulder straps, ab closing strap, and cod strap. I think they are correct, but feel free to interject if you see any fit issues. My next step for the torso will be gluing those straps as well as the shoulder bridges and ab buttons. Quote
Brent Posted March 29, 2012 Author Report Posted March 29, 2012 Minor update today. I had a little time to work on things so I finished off the rest of the torso gluing. The only part I haven't attached on the torso now is the groin strap. I'm waiting until I can do a proper test fit since it will be fairly permanent once I attach the rivet. When I get a little more time I'm going to try tackling the limbs in earnest. I want to give myself plenty of time to make small revisions as I trim down. I've been nervous about that part because I've been unsure about how to do the fitting properly. My understanding is I basically want to go as narrow as I can, where I still have mobility and keep the proper shape. My plan is to use 15mm cover strips for the arms and 20mm for the legs and 25mm for the back of the shins. Where there is a raised portion I will try to get the proportion that is covered by cover strip as close to the LFL reference photos as I can, which should dictate how much trimming to do on the fronts of the shins, thighs, and forearms. That would mean any adjustability would have to be in the backs. Is that the right approach, or should I try to make sure I trim an equal amount from either side? Maybe I'm overthinking it. Quote
troopermaster Posted March 29, 2012 Report Posted March 29, 2012 Yes, that's right. Just don't try to go too narrow with the parts. Try and have a nice taper on all the parts (especially the forearms) even if they feel a bit too wide on you. I doubt the original suits were tailored to fit the actors and assembled 'as is'. If you make some parts too narrow they won't as good as they could, so best keep on asking the questions and do some test fitting before you do any cutting. Quote
vecspeed12 Posted March 29, 2012 Report Posted March 29, 2012 Taper looks better. My first set of armor, i just trimmed straight down and it looked like i had big thighs. My TM is tapered and it fits way better and looks better too. Quote
Brent Posted April 7, 2012 Author Report Posted April 7, 2012 I've been slowly working at trimming at assembling the limbs. Here's what's done so far: I've trimmed the shins and plan on trimming the thighs soon. I'll show a test fitting when I get a chance. I think there are still many little adjustments to make, which I would appreciate feedback on. I made a bit of a mistake when gluing the shoulder bells. One turned out well, but I screwed up and attached the snap elastic upside down on the other. It's not a huge problem, since it peels off easy and I can just flip it; but it does leave unsightly E6000 residue on the strap. You will only ever see it if I take the shoulder bell off, but I'll know its there. I'm trying to peel it off, but its pretty tough. Does anyone have any tips for removing E6000 from a strap? I'm hesitant to use any solvents since the strap seems more likely to be damaged then the glue. Lots more to do today, so I'm getting back to work. Quote

Recommended Posts
Join the conversation
You can post now and register later. If you have an account, sign in now to post with your account.