Sonnenschein Posted July 6, 2011 Author Report Posted July 6, 2011 I wonder if there is some kind of black latex (or similar rubber) that can be brushed into a mould and reinforced with lycra? I tried this with some strechy cotton fabric, but it lost some flex. Can you not make a bowl shaped negative plaster mould and pour latex into it - leave it for a while - then pour out the contents to leave a skin? That's the way it is usually done. But with the ribs, some air gets trapped. You woud have to rotate the mold constantly for about 30 mins to get a skin of about 1 mm. BUT wait a minute...how about a combination of the two? Make a thinner skin for the other surface to get the look, then reenfore it with fabric... YES THAT'S IT! THANK YOU SO MUCH! So I will make a seal for a 17" neck, which fits between 16" and 18" Quote
TK bondservnt[501st] Posted July 6, 2011 Report Posted July 6, 2011 I just pour latex into the mould from a distance into one corner I'd make the mould flat and open on the back. if you mix paint acrylic paint into latex it works wonders. and making the latex shiny can be done with acrylic sealer. Quote
Sonnenschein Posted July 6, 2011 Author Report Posted July 6, 2011 Thanks for the tips Vern, but I will use black latex use for clothings and stuff, and polish it with special latex polish oh, and discard my current mold, and build a new one. Before I do, there is still a question remaining Is the neck part tapered like scuba neck seal, or should it be straight? Can't really decide. Until now, I agreed with Juan for the neck part to be straight.... Quote
Sonnenschein Posted July 6, 2011 Author Report Posted July 6, 2011 I'd go for straight. I hoped you'd agree. Makes sculpting a lot easier. And I'd rather make the bib a complete circle. Then, when you shred it, it will follow the contours of your body. Quote
Rich330[TK] Posted July 6, 2011 Report Posted July 6, 2011 Exciting project, Karin. I have nothing to contribute ... except my encouragement! Quote
Sonnenschein Posted July 6, 2011 Author Report Posted July 6, 2011 Exciting project, Karin. I have nothing to contribute ... except my encouragement! ..and that is highly appreciated. Thanks, Rick! Quote
SW1 Posted July 6, 2011 Report Posted July 6, 2011 (edited) Hi Karin , as Paul says i to would go for straight as seen from some photos thats how i belive they were good on ya girl for pursuing this project cant wait to see the prototype . Edited July 6, 2011 by SW1 Quote
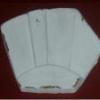
Sonnenschein Posted July 7, 2011 Author Report Posted July 7, 2011 thanks, Steve! Did some experiments yesterday. After about 6layers brushed on the mold it was strong enough without backing. You can speed up drying with a hair drier It will take ages for a finished seal, but it is worth it. and I have to use a new brush or every single layer. Enforcing with fabric after 2 layers gives a strong skin, but you have to be careful not to trap airbubbles. With all the edges of the ribs, this will be complicated and frustrating. In the meantime, I work on the "master" rib which will be duplicated for the first proto. Thanks for all your encouragement! Quote
tk0000[501st] Posted July 17, 2011 Report Posted July 17, 2011 I think this is a great project. I found this link about hangman burn from latex neck seal. http://www.newt.com/wohler/diving/dry-suit-neck-seal-burn.html It might be if relevance to some. Could it be a dive suit neck seal that is folded over over itself several times to make the ribbed effect? Does anyone know for real what they really used in the movie? Who would know? Quote
Sonnenschein Posted July 17, 2011 Author Report Posted July 17, 2011 (edited) I think this is a great project. I found this link about hangman burn from latex neck seal. http://www.newt.com/...-seal-burn.html It might be if relevance to some. Could it be a dive suit neck seal that is folded over over itself several times to make the ribbed effect? Does anyone know for real what they really used in the movie? Who would know? Thanks for the link! But I don't think the "burn" will not be a problem if you wear a balaclava. Besides, I does not need to be "air tight". It is rather lose if you look at the pics. I don't think it was folded. Looks like a real ribbing, with alternatig "positiv" and "negative" ribs, almost like a sinus curve. I'll soon have to proto ready! Edited July 17, 2011 by Sonnenschein Quote
ZeroRoom[TK] Posted July 17, 2011 Report Posted July 17, 2011 (edited) Have a look at John's foam cast neck seals here. I've had one of these for a week now for testing and it has no heat problems at all. The foam rubber stuff looks like real rubber but breathes much better and is very very much lighter. Edited July 17, 2011 by ZeroRoom Quote
tk0000[501st] Posted July 17, 2011 Report Posted July 17, 2011 Looking forward to the pictures. I've had all the leather, Lycra , plastic, shiney and such. It's great you are taking on the challenge of improving the accuracy. Thank you! Quote
Sonnenschein Posted September 6, 2011 Author Report Posted September 6, 2011 This not dead. I've been working on it.. slowly. I found there are 3 adjectives when you want to build a prop: 1) fast 2) cheap 3) accurate You can't have all 3 at once, just 2 Example: +) Fast and cheap won't be accurate +) Fast and accurate won't be cheap +) Accurate and cheap won't be fast Get the picture? I've been slowly working on the ribs for the past 6 weeks (among other things) Sure, I could have bought several yards of some kind of tubing etc, but I would have been quite pricy. Besides, I couldn't find anything which was accurate for me. So I made my own out of aluminium, bondo and resin. Stay tuned! And please, share any more info/pics/comments you have! Karin Quote
tk0000[501st] Posted September 6, 2011 Report Posted September 6, 2011 Yeah! I vote for accurate and cheap lol. Quote
Sonnenschein Posted September 9, 2011 Author Report Posted September 9, 2011 I vote for that, too. But you have to wait a litten longer then :-) Quote
1970si Posted September 29, 2011 Report Posted September 29, 2011 Can't wait to see pics - This sounds awesome! j Quote
1970si Posted September 29, 2011 Report Posted September 29, 2011 After looking at some pictures I have a question? Is the original a one piece neckseal from a vintage dry suit or did they add ribbing on to an existing dry suit neckseal? I put some pictures below - the first 2 are just dry suit neckseals I saw in ebay. The 3rd picture is from ANH - (Sorry for the scan quality of this photo) 1) if you look at the strormtrooper on the right - his ribs have a seam line (running along the left side of the neckseal) and the top of the dry suit neck seal seems to be sticking out under his chin. 2) The second trooper in from the right has ribs that are uneven as they go up (some larger and sticking out, and some smaller and inset). 3) Also these neckseals seem to be very differnent in size - the 3rd stormtrooper from the left and the stormtrooper in the center have very large neckseals while the 2 stormtrooper on the right - there neckseals seem smaller and tighter. 4) The center stormtrooper's neckseal seems to be cut several times going up twards his neck - probably for an easier fit (this could be happening on the other troopers but I can't tell from the angle of the photo. Quote
1970si Posted September 29, 2011 Report Posted September 29, 2011 The above picture comes from book "The Making of Star Wars" the definitive story behind the original film by Rinzler 2007 - on page 215. Sorry about the scan - it's not the greatest - is some can get a better scan from the book to show what I'm talking about a little better - I would appriciate it. thanks, j Quote
Sonnenschein Posted September 29, 2011 Author Report Posted September 29, 2011 I'm trying to answer your question. I don't think it was a neck seal from a dry wet suit. Something similar, inspired from it. Neck seals a VERY tight, those in the pics look rather loose. 1) It could be be seam line, but also a reflection. Not sure about that. If it is a seam line, it will make my life a lot easier. What to common opinion about it? 2) I think those differences is because the ribs are crunched (becaue they flexible) 3) there are def, different sizes 4) all neck seals were "slashed" to better contour the body, shoulder. Any, Jack, many thanks for your input! This might help mget my lazy an impolite person off the chair. Unfortunately, my flat is about to get renovated. Getting a new kitchen, bathroom and balcony. My workshop (kitchen) already emptied, I only have a small place left to cast hand guards. It might take 2-3 weeks until I can finish the prototype. In the meantime, let's do some research again. Any help is aprreciated! Karin Quote
1970si Posted September 29, 2011 Report Posted September 29, 2011 You know I would almost be willing to say - the ribs might be black rubber tubes that were attached to some neckseal at just one point (obviously the seam where the ends meet). If they were rubber and attached at just one point - they would stretch with the neckseal as the person put it on and it might explain why some of the ribbs are sticking out on some of the neckseals and why the neckseal is poking out under the chin on the trooper on the far right. I also noticed on ebay that neckseals are sold in differnt sizes - so maybe the guys with really large neckseals are wearing an XXL neckseal and the guys with tighter ones are wearing a small or extra small. j Quote
1970si Posted September 29, 2011 Report Posted September 29, 2011 Maybe TM has some insight on this - he has an excelent eye for detail. j Quote
Sonnenschein Posted September 29, 2011 Author Report Posted September 29, 2011 I already had some discussion with TM. Maybe he has some new info. Are bluray caps out there? there are some nice pics of the seal in the raid scene. J, I didnt quite your last post, esp the chin and poking part. Quote

Recommended Posts
Join the conversation
You can post now and register later. If you have an account, sign in now to post with your account.