Search the Community
Showing results for 'Geeky'.
-
Got some more painted this weekend and was able to assemble almost all of the upper pieces. I am going to need to figure out how to keep this scratching easily. I will take Glen up on the advice of putting the foam pieces under the yoke to abs so it does not scratch so easily. Since these are fiberglass, it does not give as much. If this keeps happening, I might need to go with the ABS yoke and abs. I am ordering the boots and gloves for Giovanni. Cape will be from Geeky Pink, once I get clarification on the border (silver or no border). Biceps will be next, I have some rework to do on the seams first (need the etch in the lines better and fix my overlap issue).
-
Anyone know who else other than Geeky Pink can make the cape?
-
Garrison: Ohio Garrison TKID: 84881 Name: Bryan Labaki Profile: https://www.501st.com/members/displaymemberdetails.php?userID=32854 Armor Maker: ATA Helmet Maker: ATA Blaster Maker: Doopydoos Pipe Kit Boot Maker: Imperial Boots Canvas Belt: Imperial Issue Hand Plates: Trooperbay rubber hand plates Neck Seal: Geeky Pinks Phantastic gaskets Holster: Trooper Bay The Armor: TD: Gloves, Boots, Neck Seal: Helmet: E-11:
-
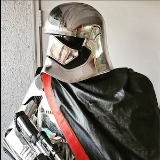
Sea_Marshall: Captain Phasma TFA
Sea_Marshall replied to Sea_Marshall's topic in Captain Phasma Build Threads
Had a solid session today and made some great progress on a few things: My wife carried on with cape progress and I sanded until I developed a blister and filed my nails to the skin lol I removed the tape from the fiberglass resizing job and was pleasantly surprised. Not bad! I just took a dremel with cutting blade and sheered off the excess and sanded it down with some 80 grit. I couldn't tell if I was dressed for the grocery store of for working fiberglass... small victory following a three day fiberglass job. This was a learning experience for sure. Confidence boost x100 This is officially the largest bondo job I've done. I've only ever spot filled in the past, but this was a good learning experience as well. Bondo's got like... 5 minutes of work time once you add hardener? You can see the left thigh is super goopy where the right side is considerably better. I found that smaller batches of bondo application is preferable. I ended up wasting materials because it would harden on my plate. Pro tip for other first timers out there. Following the literal slap-dash application of bondo, I sprayed plasti-dip over the interior work and its as if the fix never happened. I made sure to layer the fiberglass to be close to the original thickness. Pleasantly surprised. You can kind of see where the checkered cut is. Not too shabby. The whole time I was just hoping this thing would work out. No going back. Some 80 grit sand paper took the excess bondo off and a 220 grit smoothed out the rest of the thighs. In the end I sanded both thighs down to 220 because I had the clear coat already on these (before I decided to resize, which I'm SO glad I did despite dreading the work). Then a fresh coat of filler primer went down and is drying over night. 1k and 2k wet sand tomorrow. (disregard the splotchy paint job. it's getting cleaned up in the next step) I superglued the abdomen boxes down a while back, but I found that stretching the corset around my body requires some flexing of the parts, so I worried the boxes would just pop off (because super glue is brittle) so I drilled screws into them and called it good. Unfortunately, I bought those screws for my belt boxes, so I'll have to get another set. Might plasti-dip the interior again to cover up the screws. Yay, and now, cape progress! Pockets and straps cut to size. My Mrs has made some notes on her cape build (her first one) and I will add those notes to this WIP once she's done. We're using the TLJ measurements (since TFA does not mention sizes, only location) and you can see those noted on the corresponding item. And then my Mrs. mentions she can't make any additional changes to the cape until she can see me in it, with armor and boots on. So... I did my first partial suit up! This is the most I've been in costume since I've started this build. The chest was scheduled to be re-sanded, and it was done following this image. There was some misting going on from the clear coat, so it doesn't look as nice in this image. (but them shoulders! mmm hmm) Also a back image of Phasma from Disneyland for reference. Also realized the abdomen area needed to shift over a bit, so it's unaligned. Ah well. There's some work to be done on the cape. The middle panel is going to be reduced by a few inches on each side to bring the seams closer to my back. To note: The CRL (level 2) states "the cape is three panels with seams on either side of the back plate." Well... there's seams on either side of the back plate... but every reference photo I've seen is closer to the backplate than mine is, so we're going to bring it in a bit more so the pockets line up. There's also some length issues going on but we didn't hem anything until this test fit. We've found that the Geeky Pink measurements weren't quite what I needed, but it was a great help and landed us in the ball park. The cape was remeasured and will be tailored to hit the marks in another session. (More seamstress notes to come!) Lastly, the red textile paint showed up. Huzzah. That's going to be a fun session when the time comes. I think tomorrow is just surface prep on helmet, chest, and thighs. Then Unicoat can go down. Again. If the gloss coat isn't beautiful, it'll be magnified by the chrome. Like many before me, I'm stumbling through this step and any failures results in a clean sanding to try again. Cheers to a new day. -
Mandatory Information Name = MisterTK ID = 42185Garrison/Squad = The Outer Rim GarrisonForum Name = Mr Fahrenheit Armor = Authentic Props Helmet = Authentic Props Blaster= 3D printed EIB submission link Optional Height = 5' 11" Weight = 205 lbs Boots = Imperial Boots Canvas belt = AP Hand Plates = Silicone AP Neck Seal = Geeky Pink Holster = AP Armour Photos Full Body Front - hand guards aren't a yellow-ish tint anymore. Right bicep was lowered so the forearms line up better. Full Body Back - filled in the gaps at the bottom of my thighs. Full Right - Dropboxes are lined up with edge of the belt Full Left Abdomen Detail - updated button paint. Removed a bunch so it's not touching the ab plate itself. Cod and Butt Plate Attachment Interior Strapping Helmet Detail Photos Front Sides Back Hovi tip detail Lens Colour - Though it's not as vibrant as the ones from Trooperbay, I used this one from amazon. It's darker, but green. Rubber S-trim Ammo belt Holster Attachment (front and back) Neckseal Blaster left side Blaster right side Blaster back (ring) Thermal detonator (all sides) Boots Ammo Rivet Sniper Knee (all sides) Gloves Shoulder Straps Chest Attachment Shoulder Straps Floating in Back and Elastic Attachment Forearms - shaved down the return edge Thanks all! Fingers crossed!
-

Sea_Marshall: Captain Phasma TFA
Sea_Marshall replied to Sea_Marshall's topic in Captain Phasma Build Threads
I've enlisted my wife to take care of the captains cape, because I can't cut a straight line or spool a bobbin. We're following Geeky Pink's pattern from the Phasma's Facebook builder's group. The measurements on the diagram are a bit confusing with the lengths. I suppose so long as the left side lands near my ankles, we're good. We ordered 7 yards of fabric, about 5 was used on these three cuts with enough to rework the longest panel in case we come up short. We'll be referring to the CRL Level 2 for the construction, pocket sizes, straps... and I picked up some plasti-dip to achieve the thin rubber-like medium. I should have a test swatch up soon with fabric, coating, and red stripe. -

Sea_Marshall: Captain Phasma TFA
Sea_Marshall replied to Sea_Marshall's topic in Captain Phasma Build Threads
woo. not much to look at here, but the 2k wet sand is done for most of the kit. Gauntlets, hands, and blaster will get the 800 and 2k treatment tomorrow. I'm glad I managed to get this done in small sessions instead of entire days, as originally planned. Each session has been 4-8 hours, so that's basically a full day... it really is a marathon. On another related item, the black canvas for the Captain's cape has arrived. Same stuff as Kylo's tunic and sleeves! I'm going with this Colonial Red for the stripe, painted on and decorative stitching to be added. My wife is a seamstress wizard so I'll be following her work on the cape and will do my best to document the process here as well. I found the patterns on the Phasma builders group on Facebook via Geeky Pink. Weehoo. Getting to the fun stuff. -
Mandatory Information Armor = AP Helmet= AP Blaster= 3D Printed Optional Height = 5' 11" Weight = 210 lbs Boots = Imperial Boots Canvas belt = AP Hand Plates = Silicone AP Neck Seal = Geeky Pink Holster = AP Armour Photos Full Body Front Full Body Back Full Right Full Left Right Side Detail Left SIde Detail Action Shot Abdomen Detail Cod and Butt Plate Attachment (edited, removed white paint on crotch rivet exterior) Interior Strapping Helmet Detail Photos Front (edited, removed paint overlapping upper gums on several teeth) Sides Back Hovi tip detail (edited, added white paint to rim of Hovi tips) Lens Colour (edited, took different photos with different lighting) Though it's not as vibrant as the ones from Trooperbay, I used this one from amazon. It's darker, but green. Ammo belt Holster Attachment (front and back) Neckseal Blaster left side Blaster right side Blaster back (ring) Thermal detonator (all sides) Boots Ammo Rivet Sniper Knee (all sides) Gloves Shoulder Straps Chest Attachment Shoulder Straps Floating in Back and Elastic Attachment (edited, added different angle to see white strapping under shoulder) Forearms (edited, added a few shots of the wrists. Wasn't sure exactly what was needed here so I took a few shots from different angles)
-
Welcome to the FISD and congrats on the purchase! Where are you in Western Canada? If you are in Alberta, Sask, Manitoba, NWT, or Yukon - be sure to reach out to the Badlands Garrison. BC is the Outer Rim Garrison. Look up Geeky Pink's Phantastic Gaskets for a neck seal - she is located in western Canada (AB) and makes great stuff.
-
Hi all! So I've been researching a bunch on TK neck seals and per Joseph's thread, I was able to see all the vetted vendors of neck seals. I wanted to do research on all of the seals before I buy one. Darman's and Geeky Pink have many glowing reviews but I haven't been able to find a ton of info on Trooperbay's neck seal. I assume they are good because they are on the vetted vendor's list but I figured I'd ask around here. What do you guys think? Thanks! Luke
-
Well the day has arrived BBB day. The kit has arrived now the fun begins. This is my first build and I am new to fiberglass so gonna take it extra slow and any advice is welcome. Like where to start...lol. Build List: Bucket: Jimmi Armor: Jimmi Boots: TBD Gloves: Nomex Flight Gloves Neck Seal: Ordered from Geeky Pink Gaskets: Order from Geeky Pink Under Suit: TBD Cape: TBD Belts: Ordered Belts of the First Order Blaster: TBD Extras: Acker 1505
- 1 reply
-
- 1
-

-
Teresa sells them https://www.whitearmor.net/forum/topic/40849-geeky-pinks-phantastic-gaskets-and-so-much-more/
-
I have armor coming from MIMIC in the UK. The armor itself is made from a high quality fibreglass cloth with a perfect gel coat surface. All parts will be painted. I will still need to fit it, add the strapping, belt, boots, under armor, etc.... The new Episode VIII helmet will follow about 1 month behind. I should be receiving the armor in a couple of weeks. So I will probably start acquiring the soft parts. NOTE: After a year of waiting, I still have not received the second half of the armor. THANK YOU KB PROPS for working with me and others that got taken advantage of by MIMIC and getting us armor at a great price. So this armor will be a mix of MIMIC's Fiberglass and KB Props ABS. Below I am going to list what vendor I am purchasing all of the items from: Hard Armor: MIMIC (First Half) KB PROPS for second half of armor. https://www.facebook.com/KBProps Helmet (TLJ): TKD Props - https://www.facebook.com/TDK-Props-537706609725029/ Helmet (TFA): Anovos Gaskets: Geeky Pink's Phantastic Gaskets - https://www.facebook.com/GeekyPinksPhantasticGaskets/ Boots: Crow Props - https://www.facebook.com/groups/108653819216581/?ref=br_rs Gloves: Crow Props - https://www.facebook.com/groups/108653819216581/?ref=br_rs Belt: Premium First Order Belt Kit (Darren aka JAFO) visit http://www.whitearmor.net/forum/topic/36882-premium-tfa-fotk-belt-kit/ Cape:
-
Greetings everyone! My name is Alex and I have been a member of the 501st for about 3 years. I currently own a ROTJ stortrooper and a magmatrooper! I've been wanting to do a FOTK for a long while so when an opportunity came for me to get a kit I jumped for it! This is the first time I have started a build thread so I will do my very best to be as descriptive as I can be so my thread can be helpful for future builders! Body Stats: Height- 5'6" give or take a half-inch Weight- 166 lbs Body Style- Average I know I am bit on the shorter side so I may be looking into getting inserts for the boots. Goal: I'm just going for basic approval for this build. Parts Origin: Helmet: Still haven't obtained one (Taking suggestions) Helmet Audio: Still haven't obtained (This isn't as important as other options but I would like to speak one day) Armor: KB Props FOTK Kit Gaskets: Still haven't obtained (Thinking of Geeky Pink's as I have heard a lot of good things!) Gloves and Boots: Still haven't obtained (Pretty sure I am going to go with Imperial Boots for both) Belt: Still haven't obtained (Taking suggestions) Blaster: Still haven't obtained (Taking suggestions but would like a kit that could have electronics added) Build Chapters: (These will link to later posts.) Foreword Out of the Box 1. Trimming 2. Assembly 3. Painting 4. Strapping 5. Test Fittings I look forward to the build and for everyone's help and advice!
-
Welcome to the forum! Fairly new here myself. I have a TLJ KB kit. There’s a pretty active group that have been tons of help for me. Wouldn’t be near where I am in my build without them. Just a couple of suggestions where you didn’t have a lead.. these are only my suggestions based on my recent purchases from them. Belt- Belts of the First Order (Darren is super active on here and has a really well put together kit for the belt. I also have the TrooperBay belt and did not use it due to it not being as good of quality.) Gaskets, Harness, Shiny Shorts and Neck Seal- Geeky Pink (Teresa is simply awesome. She’s very responsive via messenger and does great work. I have everything she offers for the FOTK.) Electronics for helmet: Speakers, mic and amp, shoulder bell brackets, hearing support mics- (Ukswrath on this forum who sells on eBay. Also super active on here with a detailed build thread you have to read. I have everything he offers for the FOTK. Super fast shipping and also very responsive.) Helmet- Search eBay for an Anovos helmet. Best deals you can find plus you don’t have to assemble or paint it! Sent from my iPhone using Tapatalk
-
Tee-Bowls' First Order Trooper TFA/TLJE Build (KB Props)
Tee-Bowls replied to Tee-Bowls's topic in TFA Build Threads
Thank you for the tip about the boots! I just ordered the ammo pouches so I'm making progress! Need to order: Boots (CrowProps) waiting to hear back Ordered but waiting on: Armor (KB Props) Cardinal Gloves (Imperial Boots) Gaskets (Geeky Pink/Teresa/Soulart) Cape (Geeky Pink/Teresa/Soulart) Canvas Ammo Pouches (Trooperbay) In my possession: Helmet (KB Props) Holster (Dan) 3D Printed SE-44c (Germain's Files) 3D Printed F11-D (Germain's Files) Undersuit (stormtrooperundersuit.com) Belt Kit (JAFO/Darren) I feel like I'm making progress but I agree Jonah it's hard to do anything without having the armor. I don't think I'm leaving anything out from my list but if I am let me know lol. I don't want to overlook anything and then need it. -

Roukies 850 Armor Works R1TK WIP
TheRascalKing replied to Roukie 1's topic in Rogue One Build Threads
My dude, it's not just a neck seal like ANH... It's a whole undersuit if you do it right. Here's a photo of mine on a mannequin from Jimmiroquai. Lotta late 90's industrial goth club vibes happening: Mesh makes it cooler and I wear a moisture wicking t-shirt underneath, but you get the idea. Jim's undersuit was excellent and only needed to be taken in a bit for me. The only people I know making them are Jimmiroquai, maybe Darkside Closet, and maybe Geeky Pinks. Ask around and let us all know! -
StarTrooper's TFA/TROS FOTK Build Thread (KB Props)
StarTrooper replied to StarTrooper's topic in TFA Build Threads
Hey! Good to hear another new FOTK! For the gaskets, I managed to pick some up at a local Joann’s which happened to have some in stock from this link: https://www.joann.com/cosplay-ribbed-pleather-fabric-black/16228017.html I’m not sure if there are any near you, but it’s definitely worth a check. Unfortunately you can’t order it online, it seems like they are no longer making it. If not, it might be a good idea to message jimmiroquai on the RPF (Replica Props Forum) or Geeky Pink here on whitearmor.net. Hope you find a solution! -
Progress report: So far I have pretty much roughed all pieces together. Going through some sizing and fitting mock-ups. I have placed my order with Geeky Pink for the harness, seals and shiny shorts. Picked up a set of gloves from Imperial Boots. Got my compression undersuit. I’ve also added fans to the helmet, and started to make the snap pieces to attach the cod and butt to the torso. I’ve constructed the belt also. Just need to find a way to keep the back part of the ribbed rubber strip attached to the belt webbing. It’s tricky because it needs to be able to be adjusted for size, so I cannot permanently affix it to the webbing around the back and side near the clip. I’ve tried Velcro but it doesn’t stay attached to the rubber. I’ll have to do some more research. Also, I’m already starting to get some cracks in the sides of the torso and the shoulder areas of the yoke. I’ll have to re-sand, fill and paint again. So far the major flaws in this kit is that the parts that will be flexing the most, from just putting the armor on, are also the parts that have been pieced together and are structurally weak points. I wish that the torso and the yoke was one single piece of material for each. I’ve still got a lot of work ahead of me.
-

StarTrooper's TFA/TROS FOTK Build Thread (KB Props)
ukswrath replied to StarTrooper's topic in TFA Build Threads
By the looks of it you could stand to remove a bit more return edge in some areas, this may free up some room for your gaskets. Speaking of which if you're interested Geeky Pink sells great looking gaskets here and through FB. -
Looks like they got some nice pulls on the parts from what my untrained eyes can see. I am definitely glad I got Dans holster and other parts from him. And it was nice that they threw in some extra ABS. My magnets came today as well. Went ahead and ordered a bunch as suggested in the Magnets 101 thread. Should be getting my MP40 ammo pouch for the shoulder today. Waiting on my blasters from 3D Props (still no reply to my email asking for an ETA). And lastly just need Dan’s items and my gaskets from Geeky Pink. Again, this is my first build so if anyone sees anything missing or something that needs attention, feel free to let me know. I’m open to any and all advice. Sent from my iPhone using The Force
-
EIB Approval link: Costume Information Mandatory Information Armor = AP Helmet= AP Blaster= E-11 Quest Design Canada Optional Height = 5' 10" Weight = 190 lbs Boots = Imperial Boots Canvas belt = AP Hand Plates = Silicone AP Neck Seal = Geeky Pink Holster = AP Electronics = Troopduino (A voice changer and sound board of my own design.) Armour Photos Front Back Left Right Left Side Detail Right Side Detail Buttons I'm trying to show that the buttons are not painted past the moulded edges. The AP buttons are not very sharply defined, so it is difficult to see. Butt/Kidney - Fixed NO Hand Plates Shoulder Bridge Back Shoulder Bridge Front Back Chest Connection Thigh Pack Attachment Knee Plate Drop Box Back and Belt Cod and Butt Plate attachment Interior Strapping Kidney Plate Notch Wrist Side Forearms - No Return Edge Helmet Details Front Left - Ear adjusted as instructed in EIB application. Right - Ear adjusted as instructed in EIB application. Back Hovi Mic Tip Detail and vocoder painted adjusted as per instruction in EIB applicaton Lens S Trim Blaster Details I did some light weathering. The T-tracks and grips were buffed to give a more plastic appearance, but no silver was applied to them. Right Left Blaster D Ring Neck Seal Thermal Detonator Holster Attachment Boots
-
I did specify a TLJ armor kit without helmet when I ordered. I’m pretty sure they adjust the kit for which one you order. I’ll post pics of all of the parts in the coming week once I get my BBB. The main item holding me back on Centurion right now is rubber gaskets. Seems they’re not available. I’ve ordered a set of gaskets and neck seal from Geeky Pink for now. Sent from my iPhone using The Force
-
Just got a tracking number from KB Props.. looks like I made the first shipping run! Says delivery for this week. Sending in my Geeky Pink gasket and neck seal order tonight. Aside from those two items I’m just waiting on my shield, which will be here next week. My leather MP40 ammo chest pouch from IB. Holster and misc other parts from Dan. And my blasters, which I have yet to receive a reply email concerning time frame. Won’t be long! Sent from my iPhone using The Force
-
No big updates as I’m still waiting on a few items. But my boots finally arrived from Gio! Only took a month total. I ordered Saturday 10/26, he emailed me on Monday 10/28 asking my measurements. And then emailed me on 11/21 asking to confirm my shipping info. You can definitely tell they’re handmade. There is a little wiggle room, but seeing how they’re pretty flat and stiff, I’ll probably add some comfy insoles. In other news.. KB Props seems to be holding up to their promises and are shipping out BBBs starting next week! Should be arriving second week of December or so. Haven’t heard anything from 3-D Props yet on my blasters, but I know he’s super slammed with orders. Also need to talk with Geeky Pink about her gaskets.. she’s probably busy catching up on orders as well. Do you guys recommend Armor first and then order gaskets to fit? Or order the gaskets first? I know she has measurement forms for both. Sent from my iPhone using The Force

