troopermaster
-
Posts
3,638 -
Joined
-
Last visited
-
Days Won
12
Content Type
Profiles
Forums
Gallery
Articles
Everything posted by troopermaster
-
 Best to place a rivet roughly 10mm in from each end of your belt and one in the middle, then add the rivet covers. Placement for the snaps is roughly behind the last box section on your ammo belt. I would use some small machine screws or split pins to temporarily attach the ammo belt to your canvas belt then mark up where the snaps should go. It's better to get the snaps fitted before the ammo belt is riveted in place as it could be tricky getting them attached properly.
 -
Yes, that's correct. They are the exact same thing though
-
They are the same, just pulled in thicker plastic and maybe over trimmed a bit at the wrists. I'd make your moulds sharp and only use the originals as reference. Those photos will help you get the sizes right.
-
Those are photos of TE2 ESB hand plates I was sent as reference for my sculpts. These were cast from a real ESB MKII suit that came from Cameron Oakleys original suit.
-
These might help you out- ----------
-
size of side rivits on ab?
troopermaster replied to PGHtrooper21's topic in Boots, Soft Parts, and other Accessories
This is the suit with the flower shaped rivets-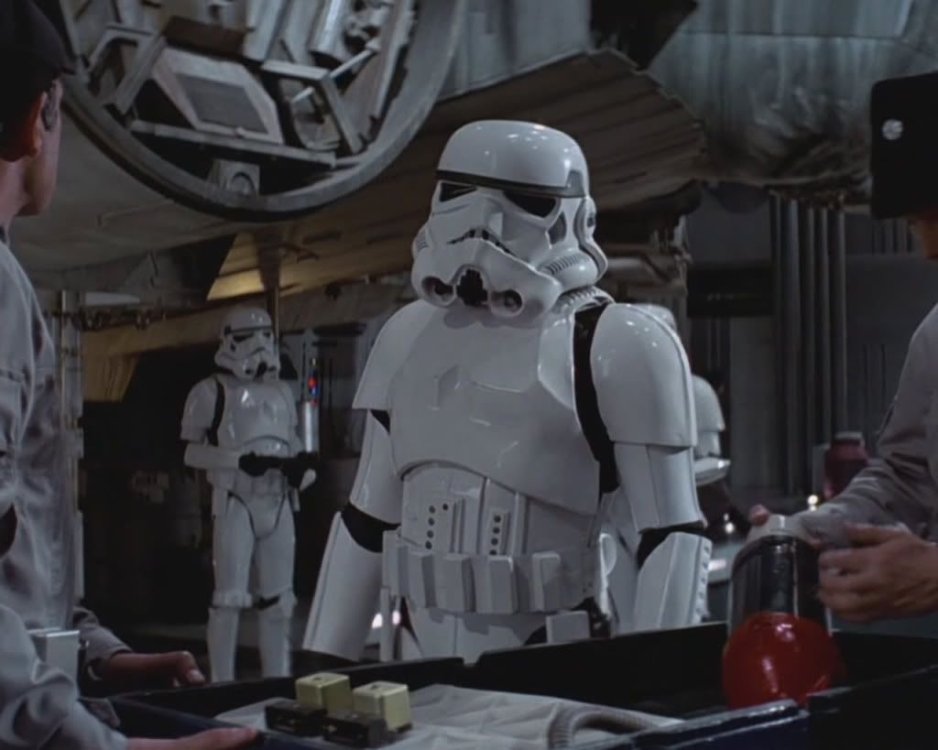
-
Looking good, John! But, the originals are not exact mirror images of each other and you could try blending in the strips so they don't have a hard edge. You can see the hand plates taper up to the top strips rather than being rounded and have the strip on top. They are not shaped how you would expect them to be.
-
size of side rivits on ab?
troopermaster replied to PGHtrooper21's topic in Boots, Soft Parts, and other Accessories
Just an FYI - the rivets do not go on the cod section as in the photos above and should be kept on the abdomen only. If you are going to the trouble of having the rivets then I think you should put them in the right place -
HDPE HELP PLEASE, colour available for UK
troopermaster replied to tk7713gra30's topic in Assembly, Mods, and Painting
There are a few that look close, but I found the Warn Grey to be the best. The colour is a lot darker in real life than what is shown on the reference chart. -
HDPE HELP PLEASE, colour available for UK
troopermaster replied to tk7713gra30's topic in Assembly, Mods, and Painting
I was using Plastikote Grey Beige Super Satin for HDPE base coats on my helmets. It was a good colour but they no longer produce Plastikote products (they went bust apparently). I am looking around for another option now. I was shown this paint to use from Stuka, but haven't tried it yet: ----- I'm not sure what he said the best colour was though? -
Have you looked on EBAY
-
Glue or rivets for the knee plate ?
troopermaster replied to Quebectrooper's topic in Build Threads Requireing Maintenance
No rivets or screws on the original ANH armour....just glue. -
What thickness ABS to use on side shims?
troopermaster replied to matt black's topic in Assembly, Mods, and Painting
I've got some scrap pieces of 1mm ABS that you can have. PM me your details -
The worst financial decision in Star Wars prop history?
troopermaster replied to andy19422's topic in Off Topic
I thought so -
The worst financial decision in Star Wars prop history?
troopermaster replied to andy19422's topic in Off Topic
I don't think airsoft was around in those days Karin. MGC's are cap firing, shell ejecting, full scale metal replicas - MGC E-11 I used to have an MGC M4A1 -
I always use E6000 to glue the lenses in. There is no heat involved to do any damage. Only down side is the dry time, but it's worth the wait
-
Promotional Stormtrooper
troopermaster replied to Veedox's topic in Build Threads Requireing Maintenance
Here you go: NECK SEAL -
TM/SDS The Glory of an HYBRID
troopermaster replied to LEGENDDAN's topic in Build Threads Requireing Maintenance
If your armour is identicle, you have a TM. -
My First Big Brown Box
troopermaster replied to SapaWanmdi's topic in Build Threads Requireing Maintenance
I wouldn't worry too much about it. Drill out the rivet and insert a new one, making sure you are using the washers inside the helmet to make the joint secure. A bit of superglue will sort out the crack, but it really won't affect anything as the crack won't go past the rivet hole. -
My ESB promo trooper outfit
troopermaster replied to Rich330's topic in Build Threads Requireing Maintenance
Top notch job Rich. The whole suit looks fantastic! -
TM/SDS The Glory of an HYBRID
troopermaster replied to LEGENDDAN's topic in Build Threads Requireing Maintenance
Great job Daniel! You've obviously put a great deal of effort into this build and it shows. Well done -
Your right. I got many people to help me with measurements from their replica suits. I also got photos from them too. I still have the emails from around 2004 from all the guys who helped me out (some are from original armour too). I got the idea about making trooper armour from studiocreations. Since trooper armour was something I had wanted since 1977, I thought I can do a better sculpting job of what was on the website, so I decided to give it a go. It's been a long road and I am far from coming to the end of it. In fact, the best stuff is just around the corner
-
All photos I had are gone now unfortunately. They were all on my yahoo site but I never got around to making a new site when they changed to whatever it is now. If anyone saved them, feel free to share. I often hear things like "these must have been photographed during the sculpting stage" but that is not the case. I used to do my sculpting in my Grandmothers attic which I turned into a studio, and didn't get much time to work on my project back then, so I didn't bother with photos. I had only just started with the internt back then too and never even knew about forums like this, so I didn't know I 'had' to take photos to show anyone. It was my hobby and my project. I used to show off whatever I made on the RPB years ago and it has just escalated ever since. I did take some photos along the way. They are out there....somewhere.
-
Cut away all of the return edge at the wrist area first, then tape the forearms together and see how they fit. 20mm is a bit wide for the arms. But, if that what you need, then so be it.
-
WTF