TheRascalKing
-
Posts
1,440 -
Joined
-
Last visited
-
Days Won
34
Content Type
Profiles
Forums
Gallery
Articles
Everything posted by TheRascalKing
-
 Hope some of this helps!
 -
Hey man - it looks like you got the BIG Clorox wipes container if I'm seeing your photos right. You DON'T want the "standard" 70-count wipe 4.5" container, you want the slightly smaller 35-count wipe 3.4" container (*or another similar sized container) to be more in line with the dimensions acceptable to the CRL. Hope this helps! https://www.amazon.com/35-Count-Disinfecting-Wipes-2-Pack-Bundle/dp/B00FY52DJ2/ref=sr_1_23?keywords=clorox+wipes&qid=1567544362&s=hpc&sr=1-23
-
Some of our own in the new Mandalorian TV show??!!!
TheRascalKing replied to Ericnathan811's topic in Off Topic
I suppose this isn't really a spoiler to the show, so... The overwhelming number of suits worn were Anovos, with a few RS, RT-MOD, ATA, AP, and others mixed in. Not all were ANH-S and there was one EARLY GF kit, but I don't believe there were technically any FX. Some 501st extras were very likely cast because they had worked with LFL on other projects previously, not for the quality, accuracy, or fit of their armor - we had some Centurions and some who probably wouldn't pass approval if they tried to submit again. LFL chose. I'm very confident we will be visible in our scene, but obviously unsure if we will be close enough/in focus enough for anyone here to tell the difference in armor or blasters, let alone the average fan. There is also some info we CAN'T share that will make the variation in armor make a little more sense once the show is out. Until then, it's all kinda moot. I doubt there will be anything that warrants a change to any existing CRL or creation of a new one. The studio suits are the same "Anthology"-style OT TK suits we've seen and I'm sure will continue to see in any modern depictions from that era... Also, a friendly reminder to everyone posting in here - there is stuff we can share, and stuff we shouldn't/can't. Be careful when asking or answering questions! The Mouse has large ears. -
Much more will come to light when the show airs and we are able to share! There are some details that will help make everythingggggg make more sense and should make any CRL concerns pretty straightforward. For now, everyone please understand that we SHOULD NOT be sharing many details from set!
-
Some updates! This may be a long one... Realized that I don't think I ever posted my helmet... but here it is! Arrived safe and sound. The detail is impressive and while it is decently sturdy and very lightweight, I will definitely be reinforcing it - I don't think it would take impact or a fall from any height well. I also mentioned having had my undersuit tailored... well, here's some pics of that too! It fits much better now that a lot of the slack was taken out. It's still a bit loose so I have good mobility, but we'll see if I end up needing to have it taken in more once there's armor on top. I'm wearing a black t-shirt underneath so you can't see where the mesh is that well, but the internet didn't need to see my back and stomach lol I also went and dug around until I found the velcro-based strapping kit that I pulled out of my Anovos suit when I switched to snaps. I will likely use it to help start mocking up fitment for the suit. Sure, I'll waste some Velcro, but I think it'll be worth it to learn and size the kit properly. I will also likely let any of the other group build members try mine on so they can adjust and mark theirs for trimming, if needed. Mine may need some off the top of the barrel, and I will likely be splitting the back of the thighs at the cover strip to overlap them and size them down a bit. The kitten's name is Zero and at 10 weeks old, he was terribly curious about what was going on. I also started playing around with coatings and ended up spraying the back of one of my handguards with Flex Seal to test it out. I was pretty pleased with the finish and it stopped the itchiness that the armor still caused, even after a thorough washing with a red Brillo pad. I'll probably be spraying the entire inside of my kit with this stuff after I have reinforced it (still figuring out how to do so). I was also pleased to see that industrial Velcro still stuck to the finish and was able to attach the handguard to my Endor Finders gloves securely. The gloves are awesome and the lining is very comfortable, if likely a bit warm for us out here in CA. Finally, I started trying to mock up and assemble the forearms and biceps - it's been a topic of much debate how we want to end up attaching the pieces together, but I decided to give 1", regular (non-industrial) Velcro a try. I wasn't super stoked on how it came out - it's pretty visible, though mostly from the back. I may try to reposition it further from the edge and see if that does anything. The thickness is also somewhat concerning, but we need to be able to get these apart, as I confirmed that there's no way my hand will fit through the hole at the wrist without opening them up. I'm hesitant to use glue pretty much anywhere on the suit as a result. There's some discussion of Boba-gauntlet-style magnets, but we'll get to that. Can anyone also confirm that this is how the pieces are supposed to sit? Feels kind of awkward for sure. From the elbow down: And from the wrist down: I also realized that when we distributing all the pieces after the bulk shipping, I ended up with two of the same outside bicep, when I need with a cover strip on each side for it to assemble properly. Gotta figure out which of the 7 other guys has the same problem and switch with them! D'oh! Anyways, more test fitting with some assistance coming soon. I mocked up the chest how it should assemble (except the shoulder straps will go UNDER the chest plate - I just couldn't get it to sit like that for the photo), but I think I'm going to hang the cod, then use that to help position the barrel, then fit the chest OVER that. Gonna need some extra hands though, so not today. Aaaand finally, I was able to take the kit to my paint guy Andrew "Bondo" Babish with Paint by Bondo - he quoted $500 flat to surface prep, prime, and paint the whole kit with flexible automotive quality paint, handpainted color details on the helmet and ab, and clear coat on top. Not too shabby and this is likely the route I'll go. Just for fun, he sent me a pic of a helmet he painted for the big 501st TK Helmet art exhibit they had a while back. At the time, he was painting for West Coast Choppers, so there's Jesse James next to him if anyone remembers that guy. Pretty cool. Plain white paint and a couple helmet details should be no problem for him, I daresay. More updates soon, but things are moving and we're problem solving as we go!
-
I just wrapped my styrofoam ones in electrical tape to keep em from crumbling and they've been great. Seen guys with balsa wood painted black too.
-
Boom. Just no antenna anymore. Sourced from @justjoseph63 in this thread. I've seen a fair amount of variation approved, but we should strive to standardize and I believe those sizes look best. Hope that helps! Also, both because they were cheaper and because I specifically DIDN'T want to look like I had Sandy pouches, I went with the ones from Joseph's first post. Dealer's choice.
-
No idea, but I'll keep you posted if I find out! Sorry for the lack of updates lately - I've been mentoring a couple guys in my Garrison, helping them finish AM ANH-S suits, so I haven't been working on my projects as much, butttttt... ready to submit one of my mentees for basic approval today! Now that he's done, time to focus on my stuff! Taking the armor to my paint shop today to get a more precise quote to have it automotive-quality painted. Our build group meetup got rescheduled, but I picked up my undersuit from the tailor and it fits much better now. Been messing around with Plasti-Dip and Flex Seal as well... More on that later...
-
I haven't, but I haven't looked. I made a few of my own from the PopIt! containers and had Sean pull the rest of mine out of ABS. Very pleased with them and they're the right size and shape obviously! Another great option.
-
Thigh super-shimming... opinions?
TheRascalKing replied to suttontech's topic in Assembly, Mods, and Painting
I was concerned at first, but MAN, those look great! Awesome job! I've done some big-boy shimming for friends before, but I went the lazy route and didn't add in the rear lip/ridge like you did - props! --------- -
StarTrooper’s ATA ANH Stunt Build (Aiming for Centurion)
TheRascalKing replied to StarTrooper's topic in ANH Build Threads
Hey Jayke! Dug through my phone to try to find some more helpful photos for ya. I've been making straps for people fairly often these days and have found some tips and tricks by trial and error haha So this photo of a buddy's Sandy strap setup gives you a good idea of how I've kinda translated the Billhag diagram over into the real world. It works great and I've got about a dozen guys and gals wearing my kits without any issues. I definitely like the double-snap system for the body connections and have never had reports of it failing during a troop. I actually set the male snaps into a piece of nylon webbing instead of ABS like the tutorial you saw (which is great otherwise!). Personal preference, but the nylon bonds really well with E6000 to the armor and can adhere to the curves of the armor better - it's tough enough that it'll never accidentally come apart, but if you REALLY needed to remove it to adjust things, you can pull em off with pliers. A lot of guys will CA glue the ABS squares in, but... then they're pretty much never coming off clean ever. Also, if you're going to do ABS squares, I would leave a lot more ABS around the snap - right now, it looks like you're bonding the actual metal snap base to your armor, which isn't ideal and kind of negates the ABS. A larger, rectangular tab or nylon like mine would bond better. It also helps to scuff up the armor a bit before gluing anything - glue sticks better to a rough surface than a perfectly smooth one. It's also worth mentioning again that anywhere a snap or rivet has been drilled and sunk THROUGH the armor, I never attach a strap there by itself - you don't want them to be load-bearing, because that leads to stress, which leads to cracks. Here's what a full strapping kit more or less looks like when I make em! Another view, and a Shadow Trooper kit, but you get the idea. Here's one showing how I do the sew in snap. If you switch between holes on this side, the visible side comes out really clean. Plus, I integrate my Centurion elastic tie-downs into the shoulder strapping so they stay in place and never get lost. Super easy to do! Anyways, hope all this helps! Hit me up with any questions and keep working away - it's looking great! -
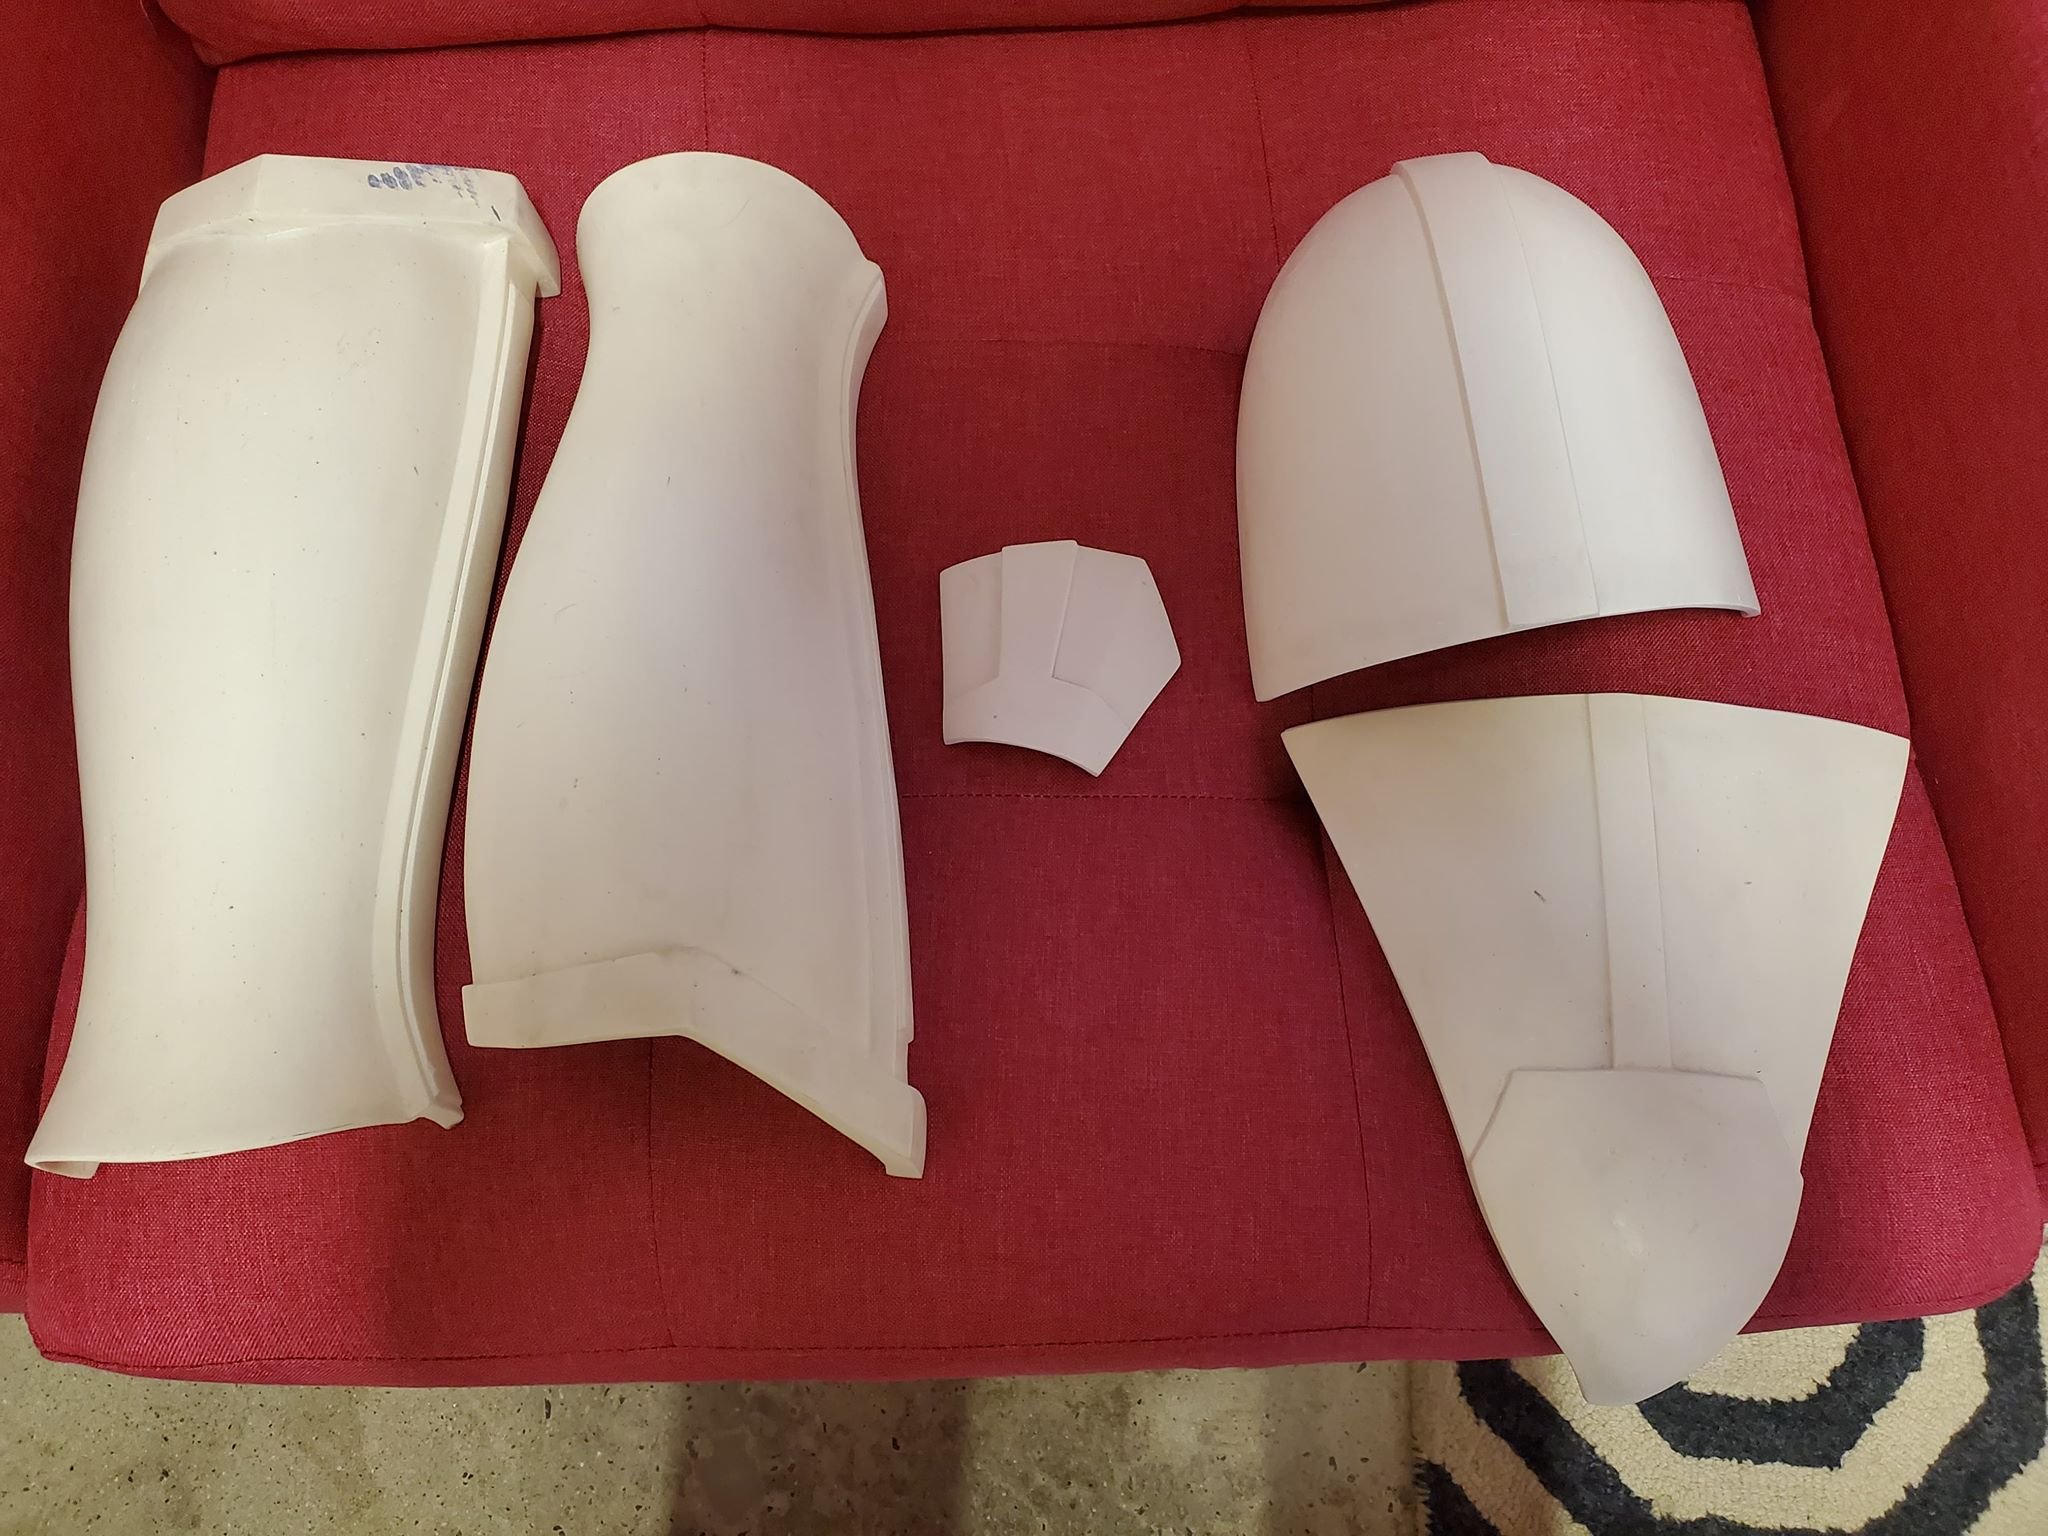
Next steps: - I picked up a 5 yard spool of 1" velcro the other day ($$$?!?!), so my first test "assembly" will be soon. - I will be dropping my undersuit off for some tailoring this week (it came a bit big, but better than it being too small!) - I found a place somewhat near me that specializes in fiberglass and has a showroom/dealer area. I'm going to bring a few pieces of my suit in and see what the pros recommend for reinforcing the kit in key areas. I don't want any cracks and the kit is light enough that I won't mind adding weight. - My gloves are already in, but I'm helping coordinate a group buy from Imperial Boots for some FO boots - we are even bringing other folks from our Garrison in so we can all save a few bucks. Our build group is meeting up this weekend to go play "The Void", the virtual reality Star Wars experience in Downtown Disney, have a few brews, and strategize, so I'll have more to share this weekend and I'll try to post some more pics too. This will be part instruction thread, part just random info and documentation of our adventures - thanks for coming along for the ride!
-
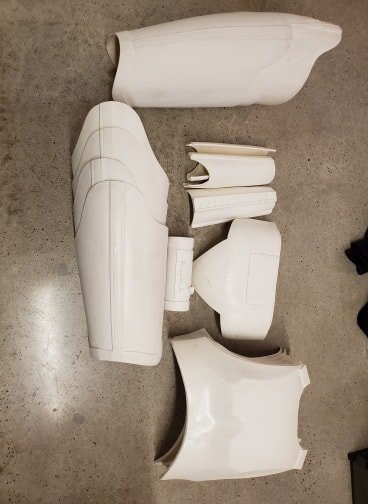
Got around to snapping a pic of all the parts! Got a couple of the belt boxes mixed up, but otherwise stoked!
-
Question about Rubies FO TK helmet
TheRascalKing replied to Thrawndike bar's topic in Hard Armor (General Discussion)
Yup the BS mesh for the "lenses" is pretty tastefully obscured as well XD -
Question about Rubies FO TK helmet
TheRascalKing replied to Thrawndike bar's topic in Hard Armor (General Discussion)
If we're talking about the same one, yup. https://www.rubies.com/deluxe-two-piece-adult-stormtrooper-mask.html -
Questions about a ANH-S build
TheRascalKing replied to Rookhelm's topic in Hard Armor (General Discussion)
Definitely trim. Looks terrible when people forget. AM kits are 'pre-trimmed', but almost everything needs a couple mm taken off. Make sure to trim your Thermal Detonator pieces and handguards down a tad as well, those are also easy to overlook. -
Question about Rubies FO TK helmet
TheRascalKing replied to Thrawndike bar's topic in Hard Armor (General Discussion)
I've seen it done for Galactic Academy with the 48" Battle Buddy conversion, but for an adult? Nawwwwww... -
HOWTO: Talk like a Stormtrooper!
TheRascalKing replied to Thrawndike bar's topic in Tutorials, Tips and HOWTOs
Some of my favorite "out of character" jokes and one-liners when taking photos include: "Smile and say Star Trek!" "Make sure you get my dark side..." "Oops, I think I might have blinked in that one!" People don't expect us to be funny, but read the room - sometimes it's just what people need! -
So it begins - ROTK Build
TheRascalKing replied to CommissarGurke's topic in Rogue One Build Threads
Great idea, at least in theory! Test it out and let us know! -
Sweeeeeet! My EF gloves here yesterday too! They feel amazing cuz they're lined, but I hope they're not too hot here in SoCal... Did yours come with a string connecting them, and with opposite velcro on the backs of the hands (one hook, one loop)? Just curious! And of course the thing I want most (helmet) is delayed... hahaha
-
I would recommend placing the mounting tab right underneath the "pec" ridge and running the longest straps you made (that will still of course have it hang right). This give you a bit more ability to have your chest plate be able to slide over your ab when you bend forward and will increase your range of motion. I would bring your back to kidney straps in a bit and use three (or move them out at least) between the kidney and posterior. You can also trim quite a bit off the cod and posterior tabs at the bottoms for comfort. Shoulder bridges definitely need to be bent so they're rounded too. Would have been easier to do before attaching... Shin coverstrip looks too wide as well - should be 20mm. Back of shin is 25mm and only half glued on. Just to confirm, you're following a build thread, ya? Hope all this helps, glad to see the progress man!
-
So it begins - ROTK Build
TheRascalKing replied to CommissarGurke's topic in Rogue One Build Threads
You're a madman! hahaha jkjk. I may get dirty after getting approved clean, we'll see... I do like capes... -
So it begins - ROTK Build
TheRascalKing replied to CommissarGurke's topic in Rogue One Build Threads
I plan to Velcro both sides so I can open it all the way up without bending when I put them on. I don't think I'm actually going to glue anything structural together on this suit at all! Plus I may add additional fiberglass to some key stress areas before coating with Flex Seal and painting. -
So it begins - ROTK Build
TheRascalKing replied to CommissarGurke's topic in Rogue One Build Threads
Hey Isaac! I'm also building one of Jim's suits currently and our group build will have threads up soon (we just got 1/4 BBBs yesterday!). Have you already checked out Jeff and Johan's threads? TONS of info in there. Since you're going to be painting over it, you'll definitely want to use a filler and paint that has some flex to it, otherwise it will crack your paint. We haven't quite arrived at an answer yet, but let's keep each other posted if we find something that works. We're looking into like a fiberglass automotive bumper filler currently. I've been told to stay away from Bondo... Jeff also used a Flex Seal brand product to coat the inside with good results - only caveat was that velcro wouldn't stick to it.