

SlyFox740
-
Posts
509 -
Joined
-
Last visited
-
Days Won
3
Content Type
Profiles
Forums
Gallery
Articles
Everything posted by SlyFox740
-
 It's difficult to tell without more reference. This image of the R1 sandtroopers doesn't show either Ab buttons or Sniper plates. Though I would assume they are meant to be the same as R1 literally takes place directly before ANH. Yes I'm aware both the R1 helmet and armor are much more detailed than the OT. We are discussing the difference between R1 TK & TD Ab buttons and Snipers Plates
 -
WOW! Well that settles it. CRYSTAL PATROL DUTY it is, I didn't think of that one. I've heard some good guesses; Medic Pack, Long-Range Radio Communications, Explosives Pack/Thermal Detonator Holder but looking at the Norwegian grenade case it does have the appearance of "Vac-Sealed Armoured Canisters". Considering the history and significance of Kyber Crystals in not only the Rogue One plot but the Star Wars universe in general I'd say this makes absolute perfect sense! They would definitely have been kept in "well-secured backpack" once confiscated by the empire, at least temporarily until ready for "delivery to Eadu" to be refined into fuel for their super weapon. On a side note, this also makes perfect sense as to why we first see one of these packs at the Kafrene Trading Outpost which is not on the planet Jedha. The Empire would definitely deploy "standard stormtroopers" with these "field specific kits" at the nearby trading outpost in order to capture and confiscate any crystals from citizens attempting to trade them on the market. This also explains why the pack was on a "standard stormtrooper" at Celebration Europe and NOT a sandtrooper. The pack at CE looks like it has mud splashed on it from walking and being set down on the ground, but the stormtrooper armor is standard shiny white like he just stepped off a star destroyer, not to mention the standard Ab-buttons and Sniper Plate.
-
On the other hand that article in the visual guide doesn't actually mention the packs whatsoever, the paragraph focuses on the armor itself. There is also the fact that we see the pack for the first time at Kaffrine Trading Outpost before they even go to Jedha, which means the pack is not exclusive to that planet.
-
Is that from the Rogue One Visual Guide? I guess this means it's supposed to be some kind of variation of a Sandtrooper Pack. They look so different from the Sandtrooper packs in ANH which takes place Directly after R1, I thought that's what the other pack we've seen in the teaser was supposed to be but I wouldn't have guessed this pack was for a TD. The armor on the display at CE with this pack was shiny clean which was deceiving but I guess that means nothing, they often dress those mannequins incorrectly at celebration. Kylo Ren's belt buckle was upside down last year. I thought it was interesting that the article starts with the words "On Jedha," as If the pack is specially designed for the requirements and temperatures of that planet specifically.
-
I ordered mine custom from Katarra8 but it's been added to her list of options now so it's easier than sending photos & detailed instructions. eBay: http://www.ebay.com/itm/361514294420 Etsy: https://www.etsy.com/ca/listing/150178963/classic-star-wars-stormtrooper-shoulder?ref=shop_home_feat_3 It's the same diameter as the surgical latex tubing; 1/4" or 6mm, although I left mine a little longer than the suggested 12mm when cutting the bottom off but that was just personal preference. I can still easily make it shorter, but we don't really know what the exact size is for certain.
-
My pack was on CTV News Toronto at the Canadian Premiere, If you watch the video scroll to 22:25 I'm the trooper on the left with my Jedha Patrol pack. The movie was awesome by the way! Disney was gracious enough to give us free passes and all kinds of free Rogue One swag. http://toronto.ctvnews.ca/video?clipId=1011653&playlistId=1.3203954&binId=1.815894&playlistPageNum=1&binPageNum=1 Here are some screenshots from the video Walt Disney Studios Canada posted this photo on their facebook page if you go here: https://www.facebook.com/WaltDisneyStudiosCanada/photos/?tab=album&album_id=10153902118261599 The photos below were taken by another member of the Canadian Garrison; Steve A.K.A 'Squeaky' he goes by the same name here on the forum. He liked the pack a lot, now he really wants to build one of his own and join the Jedha Patrol squad. The Sandtrooper on the right is my friend Chris A.K.A Knockerbot, he started his build as a TK here on FSID, but then switched to TD and had it approved with MEPD. It's actually the exact same AP kit that I'm wearing on the left which coincidentally were both sent out to us in the same shipment from Authentic Props.
-
I modified the button from one of these pens. Inside the button is a white plastic insert which is the part that activates the business end of the pen, I modified that and the black button/cap by cutting them down a little, then super-gluing them together. That piece fits on the fishing rod very tight and does not require glue to be held in place but I have added a small dab of glue for safe measure. Then antenna is very flexible and bends easily when walking through doors ways, it seems the plastic cap can take lots of abuse without breaking or coming off.
-
Hmm, well if it is on the same way as mine then that really is strange, it must be different. All I did was pull the Snap and the Buckle through the base of the hook and that's it. Interesting thing is the other shoulder strap that's actually meant to be on my left shoulder has even more excess strap to play with!
-
Paul, Don't put it under the bottom strap directly against the shoulder strap, it actually goes one layer above that. After you pull the popper through you also need to pull the male end quick release buckle through as well. Then re-assemble the nut & bolt and bushing.
-
Here's my 'Jedha Patrol' pack, I will be trooping the Canadian Premiere of Rogue One in downtown Toronto, Ontario at the Scotiabank Theater December 14th, 2016 and I received special permission from my local garrison's GML to wear my R1 pack with my OT armor. I also had this Rogue One Pauldron custom made in time for the premiere. Extra rows of stitching across the orange colored area & white fabric bottom. Here's me wearing the Pack & Pauldron, more photos to come...
-
Nope, no longer strap, no modifications or anything crazy, just pull the hook up as high as possible under all the quick release strapping. That's all. Here's a comparison shot I threw together with the images I had available, my pack is on the left, CE pack on the right.
-
This is correct and exactly what I was referring to earlier. As I said before The Quick Release Buckle itself needs to be pulled through the base of the RAF hook, NOT just the Popper! This requires the nut and bolt and bushing to be temporarily removed. When done like this the hook hangs in the exact same way and protrudes outwards on the same angle, I'm 100% positive this is how the hook is attached to the shoulder strap, try it for yourself and see.
-
To hang your RAF Hook on the Shoulder Strap in the same fashion as the CE pack you must slide the male end of the quick release buckle through the base of the RAF Hook, this requires the nut & bolt and bushing to be removed temporarily. Use a socket and the proper screwdriver to avoid damaging the hardware on the hook. Using the CE method to attach your RAF Hook also prevents the possibility of it falling off and getting damaged or getting lost during an outdoor troop, I wouldn't trust hanging my expensive hook from a small snap like that.
-
Thanks Aaron! I really appreciate that, not sure if anybody else will ever notice them but I'm happy with them and that's all that matters. Yes I have made lots of progress since my last post, it's just a matter of finding time to upload photos and update the build thread. But I wanted to document the entire process from start to finish just so It's always there to refer back to, and if nothing else just a small keepsake to remember how much fun I had assembling this kit. It really is quite enjoyable if you like these kind of projects. Thank you, very much appreciated!
-
Abdominal Button Painting I hand painted the Ab Buttons using Testors 1138 Admiral Grey and 2715 French Blue.
-
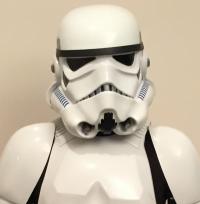
Helmet Painting Ultimately I decided to hand paint my helmet instead of using decals because that's what they originally did on the screen used helmets in ANH. Decals were not used until ESB. I used this paint chart, I'm in Canada so the Testors colors are more commonly available than the Humbrol. I opted for the French Blue as I feel it's more accurate and it just looks better, It seems to be the most common choice used among troopers.
-
Helmet The original screen used helmets had a single sheet of thin green acetate film for both eye lenses that was mounted to the ear screws. I want something thicker and dark green for my helmet to help hide my face. Also I would like a more ideal way to mount the lenses inside the mask which allows for easier removal/replacement. I found thick dark lens material at Trooperbay.com; https://trooperbay.com/dark-green-lens-material Before trimming anything or applying any Plasti-Dip or paint I started by preparing screw sockets for the lenses. To do this I used JB PlasticWeld and some small T-Nuts/Furniture Nuts. The ones I used are 8/32 thread x 9/32" and they seem to be perfect size depth and width to go around the perimeter of the eye sockets inside the mask. http://i889.photobucket.com/albums/ac99/henrybartsch341/image_zpskbb1dxv8.jpeg The first step is to prepare the surface for the PlasticWeld by sanding/scuffing the areas where the screw holes will go. Many people use 3 or 4 screws per lens but too many screws actually doesn't help, the key in is the placement of the screws. If done correctly only two screws per lens are required and you will end up with a nice tight seam all the way around the lenses and the eye holes inside your mask. With the mask face down looking at the curve of the lens I place one screw at the lowest possible point both directly above and below the eye socket. This will pull the flexible lenses down to these low points making a nice tight seam between the lens and mask. http://i889.photobucket.com/albums/ac99/henrybartsch341/image_zpsf7ksk5az.jpeg The Mic Tip area is pretty thin on these stormtrooper helmets so I reinforced it with some PlaticWeld before drilling out the holes to mount the Hovi-Mix Pa2 aerators. http://i889.photobucket.com/albums/ac99/henrybartsch341/image_zpsubpili04.jpeg I've read that it's much easier to paint or Plasti-Dip the inside of your helmet before trimming than it is to mask the eyes and teeth, so that's what I did next. I start by lightly scuffing the inside surface of the mask and dome with sandpaper, then applying the Plasti-Dip according to the directions. http://i889.photobucket.com/albums/ac99/henrybartsch341/image_zpso3r6746r.jpeg Assembling the helmet is quite easy, the hard part was cutting out the eyes and teeth and trimming the ears. I started by very carefully drilling small holes around the perimeter of the eyes and each of the teeth, then I connect the dots using a pair of curved lexan scissors. Last I use a file set to get the final shape for the eyes and teeth. There are also 4 holes on either side of the mask and dome that must be drilled out, these are marked with small dimples. For the ears I just followed the mold lines as best as I could and they turned out well. http://i889.photobucket.com/albums/ac99/henrybartsch341/image_zpsluowmcqs.jpeg http://i889.photobucket.com/albums/ac99/henrybartsch341/image_zpshkyh4gvc.jpeg http://i889.photobucket.com/albums/ac99/henrybartsch341/image_zpsrjxsg2nk.jpeg http://i889.photobucket.com/albums/ac99/henrybartsch341/image_zps72dq9txh.jpeg http://i889.photobucket.com/albums/ac99/henrybartsch341/image_zpsuldh721l.jpeg http://i889.photobucket.com/albums/ac99/henrybartsch341/image_zpsnumtuipv.jpeg I ended up removing more return edge from the eyes after these photos were taken, I suggest taking your time with this. Use photos of screen used helmets for reference and ask someone experienced for a second opinion about the amount of return edge to leave remaining in the eyes. For level 3 Centurion the seal around the neck opening must be an "S-trim" type profile, I have replaced the U-trim included with the AP kit with S-trim from Trooperbay.com https://trooperbay.com/trooper-helmet-s-neck-trim I have also replaced these included AP Mic Tips with more accurate 3-piece replicas from SWPropMan which are no longer available. Below is a comparison photo of average resin cast mic tips on the left, and the plastic ones from Robert on the right. Notice the vent slits in the plastic mic tips are actually open just like the real thing, that's accurate! Notice the precise detail in the writing of the words (Hovi-Mix Pa2) is actually legible just like the real thing, that's accurate! The walls on these plastic mic tips are also thinner exactly like the real thing, the resin versions have thick walls which is not accurate. The real Hovi mic tips don't exist anymore but they were originally made of plastic, these too are made of genuine plastic. Only the original Hovi tips were white plastic painted black, instead these are cast in black plastic so no is paint is needed. However these are probably the absolute closest thing available to a set of real Hovi-Mix Pa2 tips. http://i889.photobucket.com/albums/ac99/henrybartsch341/Mobile Uploads/image_zpsjwupegc7.jpeg These Mic tips are made up of several different pieces to achieve the most accurate appearance possible. Once they're assembled they look very realistic. Inside The Helmet, I used adhesive velcro around the frown, and the mesh itself is stitched to sew-on velcro. This provides a very stable solution that is also easily adjustable/removable. The helmet padding is also held in place with adhesive velcro. I still need to install a set of USB powered fans, I heard RC batteries work great but the chargers are not cheap.
-
Rubber Handguards/Gloves For Centurion level approval the handguards must be "latex or latex-like" according to the CRL. I have opted for a glossy white silicone rubber for multiple reasons. First of all; the glossy surface has a plastic-like appearance which I like because it matches the shine of the ABS armor. Not only the shine but the color is also a very close match to the armor as well. Secondly these will not chip, I know for some troopers the paint chipping is desired but not for me. I like more of the idealized appearance which is why I went with AP to begin with, the smooth shiny dome instead of the bumpy textured dome. Same with the leather boots, I'd rather have clean matching white leather boots than painted black leather. The paint just wears off similar to the handguards, again this is desired by most purists but I'm more of an idealist. I used clear silicone caulking to affix the flexible handguards to the gloves, I prefer this because it is semi-permanent and can be removed when the gloves need to be replaced. Some troopers use Super Glue with a Primer Pen for a more permanent solution.
-
Thermal Detonator / O2 Canister The thermal detonator is fairly straight forward, however I have seen this done somewhat incorrectly many times. It is to be approximately 7.5" total in length, It can't be too long! The clips must be mounted with little to no gap between the end caps, the screws used to mount the clips should be black slotted pan head machine screws. -The control panel should be trimmed down to about 4-3/4" long and should sit flat against the pipe with no return edges, -The pipe itself should be exactly 6-1/2" long and painted with Testors 1138 Admiral Grey model paint. -The end caps should be trimmed down to be exactly 3/4" wide which makes them only 1/4" deep on the inside, -The gap between the control panel and the end caps is exactly 1/2" -The clips are 1" wide and the top screw hole should be near the end of the clip. Also ensure the clips are mounted with little to no gap between the end caps. Before drilling, mark the correct screw locations by holding the clips in place and marking the holes with a pen or pencil. I use the soft side of adhesive backed velcro to prevent the thermal detonator clips from scratching my kidney and posterior armor while wearing it.
-
Belt & Drop Boxes Next I trim and assemble the belt and drop boxes. I attached the Canvas belt to the ABS using Chicago screws so that it can be removed for washing. I also used Chicago screws to attach the leather holster, for ANH Stunt belts only two lower rivets are to be used to attach the holster according to the CRL, as opposed to hero belts which require 4 rivets. The corners of the belt are approximately an 11mm cut at 45 degrees, which should make the side edges about 3" wide matching the canvas belt. I attached the Drop Boxes using 25mm white elastic and single cap rivets/speed rivets like the originals, there is to be little to no gap between the belt and drop boxes. The inner drop boxes are held in place with velcro. I also taped the ends of the elastic down with white tape similar to that of the original RS suit as seen below. I've placed some felt on the back of the Chicago screws to prevent from scratching the abdominal plate. I use regular Line 24 snaps to attach my belt to the abdominal plate, this is fairly common in the 501st now. The original snaps are still available but I feel this will hold it on a little better which is ideal for trooping. After the belt is completed the male snaps can be installed into the abdominal plate, to do this I simply use the china marker to mark the bottom edge of the female snaps and press it against the ab plate in the proper position in order to transfer the pencil markings onto the armor for correct snap locations. Then I drill holes just big enough for the male snaps to fit through. Here's where things can get a little tricky; finding a stable hard surface that will fit inside of the abdominal plate in order to place an anvil for hammering snaps. Place the armor over the anvil and ensure the snap is centered and stable for hammering. Now the male snaps are securely installed in the abdominal plate in the correct locations. This will ensure the belt goes on the armor straight when wearing it.
-
Abdominal Plate The mold lines are fairly defined on the AP except for the side seams which Mark at AP has done an amazing job at extending by 3" on both sides for those bigger troopers out there. But in order to be screen accurate size those extra three inches must be trimmed off, however if you don't fit into screen accurate size armor you can still reach Centurion level. The CRL allows for the Ab plate to be as wide as you need, although removing anything less than 3" would not be screen accurate size. Here's a photo of the Abdimonal plate before I removed the extra 3". After removing the extra 3" of ABS I located and drilled the holes for the three required split rivets on left side. It is important that these three rivets are spaced evenly and align with the other three rivets on the kidney plate. The heads of the rivets wil be painted gloss white later in the build. Again these split rivets do not have to be functional but as I said before mine will be, so I reinforced the edge of the abdominal plate the same way I did with the kidney plate. After fastening the split rivets I filed them down to be flush with the top of the male snaps, and the female snaps will also need to be hammered "extra flat" with the snap setting tool. As per the CRL a single male snap is required in the upper right corner of the abdominal plate. It does not have to be functional, it may be purely cosmetic. However I will be making mine a functional snap so I have reinforced the plastic again here with a thick piece of ABS. As per the CRL a single split rivet is required in the lower cod piece, this rivet DOES NOT get painted gloss white! It is to remain unfinished. This rivet does not have to be functional, it may be purely cosmetic. Mine will be functional so I have used it to fasten a male snap to the inside of the cod piece. I very carefully trimmed my Ab buttons, sanded the edges to size and glued them in place. There should be a small lip remaining around the edge of the center ab buttons. The Ab buttons will be painted later in the build, also there is some additional harware required to snap the belt on to this abdominal plate but that can't be installed until after the belt is assembled.
-
Chest Plate Next I started on the chest plate, when tracing the mold lines with a China marker I noticed there are not really any mold lines present in the arm openings of the chest plate. This is a Hero suit not Stunt but it's still a good reference for the correct amount of return edge in the arm openings on the chest plate. I used a heat gun to bend the shoulder bridges into shape until they form comfortably over my shoulders. When trimming these AP shoulder bridges out just be sure to leave as much excess as possible, I find cutting them out from the back with a utility knife or xacto blade helps conserve the most material around the AP shoulder bridges. There's really not much to work with, but in order to be accurate there's supposed to be a small lip remaining on the edge of these shoulder bridges. Then I did some measuring and glued them to the chest plate using E-6000 as evenly as possible, bearing in mind that this entire suit is far from symmetrical due to the original hand sculpted design. I also glued the double snap plates into the chest plate in the same fasion as the back plate.
-
Back Plate Moving onto the next smallest piece of the torso, the back plate. Again I start by tracing around the mold lines with a china marker, then carefully trimming around the lines. Usually snap plates are not located & installed until the armor is test fitted to your body, but these shoulder snaps are fairly standard so I went ahead and did these ones first using the double snap method. Keeping the snap plates close to the edge I used clamps and magnets to hold them in place while the E-6000 cures. I used 25mm Nylon webbing in white instead of black for a nice clean look. Many people use ABS snap plates but I find the Nylon webbing conforms better to the curves of the inner armor for a stronger bond. If you decide to go with webbing use Nylon not Polypropylene, It's a much better option to use for snap plates.
-
Kidney Plate The next smallest piece of the torso is the Kidney Plate. again I start by tracing around the mold lines with a china marker. For the kidney notches I decided to try something new, I wanted return edges in my kidney notches similar to that of RS or TM. To do this I start by leaving some excess plastic behind when trimming the notches out. I ended up taking a little more than this off for less of a return edge but these images show the basic idea. After trimming I made a small snip along the bottom corner edge and folded a small tab upwards using a heat sealing iron. The tabs can later be glued to the inside return edge of the kidney notches with ABS paste or super glue. Then using a heat sealing iron I VERY CAREFULLY bent the extra material inwards to form the return edges in the kidney notches. I realize this is all completely unnecessary and that the kidney notches are not even visible under the canvas belt, and furthermore the kidney notch requirements in the CRL have recently been changed and updated. However the kidney notches ARE screen accurate and even though the 22mm x 22mm requirement has changed I still want mine to be screen accurate and I'm still holding myself to those standards seeing as how I started this project that way so that's how I'm going to finish it. Therefore the edge seam on my kidney plate sides will be trimmed exactly 22mm from the kidney notches, I use this measurement to locate and draw my cut lines. Having said that if you are a bigger trooper the AP kit will still allow you to reach Centurion level with the new kidney notch CRL; the height of the notch still has to be 22mm but the width can now be as wide as you need so you can trim your side edges as far from the kidney notches as you wish and most importantly the butt plate will still align with the edge of the notches. Mark at AP has recently done an amazing job at adding an extra 3" to both sides of the kidney plate in order to accommodate those bigger troopers out there. This seamless extension works in conjunction with the new Abdominal plate which Mark has also extended by another 3" on both sides, more on that later. I then added the required 3 split rivets along the left edge of the kidney plate. Be sure to space these evenly along the edge of the armor. Always measure twice and cut/drill once. I ended up placing my split rivets 65mm apart, but the distance from the edge of the armor is to be exactly 10mm as required in the CRL. The heads of these rivets will be painted gloss white once I begin the painting process on the Helmet and Ab buttons. On the inside of the armor I decided to make the split rivets into functional snaps. This is not a requirement at all, the split rivets may be purely cosmetic. I just wanted the ability to completely disassemble my kit for storage and traveling purposes. Since mine will be functional I reinforced the edge of the plastic with an additional strip of ABS, I did this mainly because the holes are only to be a short 10mm from the edge and there will be some tension on those snaps. Notice the split rivets inside the male snaps are holding them firmly in place. When using this method the split rivets must be filed down completely flush with the top of the male snap. Additionally the female snaps on the elastics used for these connections must also be hammered down "extra flat" to work well with the split rivets. If done carefully & correctly this method works great with no issues whatsoever. (NOTE: Using this method for the Kidney/Ab split rivets requires extremely 'short' elastics as the male snaps will essentially be only 20mm apart. This makes for a tight seam line which is actually ideal)
-
Posterior Armor (Butt Plate) So I figured I should update the build thread with all the progress I've made since my last post. I started on the torso with the smallest piece first; the butt plate. I start by tracing around the mold lines with a china marker/grease pencil. Then I slowly and carefully trim around edge of the the mold lines taking special care not to cut into the armor piece itself. I find the curved lexan scissors work best for this. Then I added the required two male snaps into the bottom crotch section of the butt plate. Always use proper snap setting tools for this. Strapping all the armor together with elastics & snap plates will come later, these snaps are just a standard requirement for this armor piece.
