-
Posts
369 -
Joined
-
Last visited
-
Days Won
2
Content Type
Profiles
Forums
Gallery
Articles
Media Demo
Everything posted by russellr2d2
-

ATA Armor Build_My First TK
russellr2d2 replied to russellr2d2's topic in Build Threads Requireing Maintenance
OK What gives!? I ended up with the LEFT thigh having this lifted back side to it. Like one side was molded differently then the other. I will iron this down and fill....see next post Here is the rest of the thigh just after taking all those massive C clamps off....It holds! It was a real struggle to get the two halves to go together so there is a lot of messy glue all over. Cleans up easy enough and the strip area gets sanded flat then the cover strip glued on top. -

ATA Armor Build_My First TK
russellr2d2 replied to russellr2d2's topic in Build Threads Requireing Maintenance
WOOP hoop! This is too much fun! I am supposed to be doing yard work but who can do that when there a TK to be built! Sent from my iPhone using Tapatalk -

ATA Armor Build_My First TK
russellr2d2 replied to russellr2d2's topic in Build Threads Requireing Maintenance
On to the building! Finished the Left thigh! Tried it on and it fits well. I can pull it up high on my leg. 20mm cover strip in front... 25mm cover strip on the back... Are these going to be OK for a future Centurion approval? I saw this method of heat bending the knee belt. after heat bending it retains a nice bend. -

ATA Armor Build_My First TK
russellr2d2 replied to russellr2d2's topic in Build Threads Requireing Maintenance
BRRRRAAAHHHhAAAA!!! oh yea! waaaahhhpppp!!! Mostly they are that big because I needed to reach to the middle as much as I could. But it took CA glue to close the middle. Now waiting for about 3 days before I undo the clamps. I want to make sure the seams do not tear open. -

What are your other passions besides stormtrooping?(Hobbies)
russellr2d2 replied to Polar's topic in Off Topic
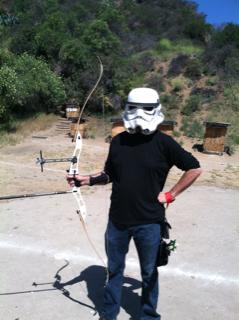
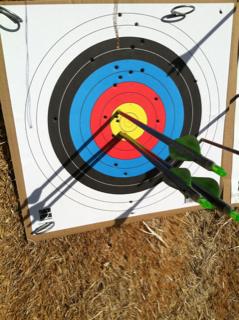
I shoot target archery. I am also a level 2 archery instructor. Our archery club here in Pasadena CA provides free archery classes every Sat. Morning. Google Pasadena Archery for information. Come on down to the range and I will turn you into an archer! Sent from my iPhone using Tapatalk -

ATA Armor Build_My First TK
russellr2d2 replied to russellr2d2's topic in Build Threads Requireing Maintenance
More thigh closing: For heavens sake! This thigh really did not want to go together! The plastic did not match up and there is a lot of pressure on the seam. It was even lifting after gluing in the inside strip. I had to use some CA glue to close it and keep it from popping open. A couple big C clamps and magnets needed. A bit messy with CA glue poured into the opening seam. Some sanding will clean it up and it is all hidden under the outer strip. Hope the seam stays closed after I release the C clamps!!! -

Insidi0us1's First Build (ATA TK armor)
russellr2d2 replied to VGTrooper's topic in Build Threads Requireing Maintenance
Yea just a teeny bit more. Remove all the "flange" or flair at the edges of the holes. Just a little more. No gums. I have ATA too. Your doing the right thing not hacking away at it (like I did with the left side). You can always take off more but you cannot put it back on. [emoji16] Sent from my iPhone using Tapatalk -

Sharpie fine point paint marker for helmet details?
russellr2d2 replied to usaeatt2's topic in Assembly, Mods, and Painting
I think it will rub off and I read that polish takes it off. Paint is forever. I have used sharpies on things and have it wash out. Sent from my iPhone using Tapatalk -

ATA Armor Build_My First TK
russellr2d2 replied to russellr2d2's topic in Build Threads Requireing Maintenance
Thanks everyone for the comments! thats why I post to check my work and to help others along their way...and for fun! NOTE the two knee plates in the photo Germain posted. one of them is glued to the front of the shin down low..... and the other is glued up high where we do them on the molded edge of the shin. I will be doing mine up high like everybody here does them...right onto the molded ridge at the top of the shin. -

ATA Armor Build_My First TK
russellr2d2 replied to russellr2d2's topic in Build Threads Requireing Maintenance
Woo hoo! Thanks! I was pouring over other threads looking if I made the right choice. Sent from my iPhone using Tapatalk -

ATA Armor Build_My First TK
russellr2d2 replied to russellr2d2's topic in Build Threads Requireing Maintenance
Buttoning up the back of the thighs and some small part cutting... Finally decided on the fit of my thighs was OK with 25mm wide cover strip on back. They fit nicely and are loose enough to rotate a bit on my legs. Cutting an inner strip to size and fitting... Inside cover strip glued in with CA glue. E6000 for the final glue up. Glue up with E6000 for the final seam closure. I must have tried on the thighs 4-5 times before deciding on the 25mm back strips. The shins fit great, even looser with this wide back seam. Lots of thick magnets needed. The two ends of this seam did not want to stay together. Cut and sanded the sniper knee cover....look OK? -

Insidi0us1's First Build (ATA TK armor)
russellr2d2 replied to VGTrooper's topic in Build Threads Requireing Maintenance
I think you should open up the teeth some more. Most here seem to like completely square corners in the teeth but I went with small radius corners and flat tops n' sides. You are on your way to a great bucket Sent from my iPhone using Tapatalk -

ATA Armor Build_My First TK
russellr2d2 replied to russellr2d2's topic in Build Threads Requireing Maintenance
Cutting and gluing shins. Lets hope the 30MM back cover strips make these fit as well ! Bottom edges can be trimmed and aligned easy. I worry about the tops most because they have so much structure in them. The bottoms are so easy to fix up I just allow them to be mismatched. Easy to iron and sand out. I find the tape helps keep the two sides pulled tight together while the magnets holds the cover strips down hard on the glue. In this case only the inside strip now. The outside strip doesn't get put on until I know the fit. Just in case I have to pull the whole thing apart. -

ATA Armor Build_My First TK
russellr2d2 replied to russellr2d2's topic in Build Threads Requireing Maintenance
Cover strips on the thighs added and cut the backs to 30MM. Right & left thigh with 20MM cover strips. After I button up the back of the thighs I will iron out this extra area to the pencil line to even out the bottom. I went ahead and cut the back of the thighs so I will have a 30MM cover strip down the back of my legs. I realized after doing this that maybe I should have waited tell I fit my shins but it's done. I put the thighs on and held them up as high as I could and walked around for about 10 mins. I did this several times re-fitting them with tape and holding them up as high as I could get them. They are snug but not skin tight all over. I just might be able to cut them further to 25MM someday. But I will finish the legs with 30MM and be comfortable. Peeling and bending off the scored plastic flap on the back of the thighs. 30MM gives me a comfortable fit in my body suit. -

ATA Armor Build_My First TK
russellr2d2 replied to russellr2d2's topic in Build Threads Requireing Maintenance
Ok so THIS IS UP ...correct me if I am wrong. AND I should cut off that rolled over return edge on my pencil line???? -

ATA Armor Build_My First TK
russellr2d2 replied to russellr2d2's topic in Build Threads Requireing Maintenance
Gluing on thigh cover strips front only still. Not ready to button up the back yet until i know the exact fit. Sanded flat the cover strip area so the glue grips well. Trimmed the cover strip to correct length. Using lots of magnets! The magnets hold the cover strip down tight on the glue and the tape holds the strip in position. The off-set bottom return edge can be ironed out easy enough. NEED HELP HERE ! WHICH END IS "UP"??? -

ATA Armor Build_My First TK
russellr2d2 replied to russellr2d2's topic in Build Threads Requireing Maintenance
Thanks for the advice! I think I will end up a lot more loose after trimming the up to 2" of overlapped plastic that is there now. It is being held together with masking tape. Also, I have almost 1/4" wide return edges I can sand down and get myself some more room. I think I will trim at 30MM and test fit and then decide if 25MM is OK just to be safe. Thanks! -

ATA Armor Build_My First TK
russellr2d2 replied to russellr2d2's topic in Build Threads Requireing Maintenance
A test fitting of my thighs. NOTE: I do not yet have the back of the thighs glued up. There is overlapping plastic of the untrimmed edges. This makes them a little tight with the overlapped plastic in back and all the tape sticking them together. But a good first look I think. I feel that if I leave a 25MM cover strip joint on the back of the thighs they will fit well even more loose than they are now because there will be no overlap on the back. a) The plastic is snug on my thighs. Is this normal or do you guys have air space all over the front and sides of your thighs? These are skin tight on me and there is no space between the plastic and my body suit. Air flow around the front and inside of the thighs? Virtually none. I am guessing this is common and part of the suffering we TK's go through for the empire. Also I notice the thighs like to turn out to the sides and the cover strip will be offset to the side and not facing dead center forward. Common? How to prevent this with the straps? -

Kidney Plate Orientation and trim
russellr2d2 replied to R4ZORBL4DE's topic in Assembly, Mods, and Painting
I am at the exact same place with my ATA build. Which way is UP ? Sent from my iPhone using Tapatalk -

ATA Armor Build_My First TK
russellr2d2 replied to russellr2d2's topic in Build Threads Requireing Maintenance
Trimming the back plate: To me this looks like the "TOP" or BOTTOM ???? PHOTO #1 TOP OR BOTTOM? At each side of this piece the plastic curves up. I plan on ironing this down flat after the piece is trimmed. Should this be flat here ??? Should that flap be ironed flat down and become the return edge? -

ATA Armor Build_My First TK
russellr2d2 replied to russellr2d2's topic in Build Threads Requireing Maintenance
Thanks guys! I'll think about the top notch shape first if it is not a requirement or a popular item. These magnets are just right! Not bites yet from them but have already chipped a few because they snap together so hard. It is hard to keep them apart. Then once stuck together you have to slide them apart. -

ATA Armor Build_My First TK
russellr2d2 replied to russellr2d2's topic in Build Threads Requireing Maintenance
THIGHS: Starting on the LEFT thigh the right side follows same procedure. Marking and scoring with an Xacto knife. Then "walking" a wide pliers across the score line rocking it back and forth to split the plastic. The pencil line down the front of the thigh leaving 10mm to each side for a final 20mm cover strip. After this line is scored and split off with the pliers I like to even up the line using this method with sandpaper flat on my table and scoot the piece back and forth to sand the cut line perfectly flat. This makes a really nice seam between the two halves of plastic. This makes the seam flat and helps the cover strip lay flat. The magnets I am using are great! 1/2" x 1/4" I use CA glue to attach ONE SIDE of the inner strip to speed things up. THEN I glue the halves together using E6000. This way if I do have to pull things apart I can pull the inner strip off one side and get at things. The inside cover strip goes in with magnets all along the way. I will not put on the outer strip until I fit the thigh to my leg and close up the back with it's inside strip. When everything fits well I will glue on the outer cover strips and it will be final. Cant have too many magnets! I have a dozen of the 1/2" dia ones. Get thick magnets 1/4" ...not the 1/8". Here is the thigh with the front glues up on the inside only. I'm loving the flat seam! Here is a quick fit test. I think I will need 25mm in the back these are tight against my leg (not squeezing though). I have to hold it up a bit or it slides down but the fit is flush to my body suit. It is hiked up as high as I can get it. *Do you guys recommend cutting in the top notch shape for Centurion or is it necessary?? I can get two fingers laying flat under the plastic, Knee length. I cannot really pull them up any higher...is this OK??? The slight mismatch of the bottom edge will be ironed out later. Its fairly skin tight but not squeezing. -
On the other side of the spectrum is the sandpaper at Harbor Freight. Cheap as dirt and lasts about 30 seconds. Sent from my iPhone using Tapatalk
-
Love those little Humbrol paint buckets. That paint is really nice. It flows out nicely and dries slowly to shrink flat with no brush strokes.
-

ATA Armor Build_My First TK
russellr2d2 replied to russellr2d2's topic in Build Threads Requireing Maintenance
On to the chest & back pieces. Drawing a pencil line where I think I should cut....hope its right! I want to leave a bit of a side to the chest/back pieces so they "look real" or have some depth. More than just a return edge though. I can always trim it off later if needed. Here I have about 1/4" or so on the sides. I did the same for the back and then scored with my x-acto knife. SNAP! I don't know about you guys but pretty much ALL of my final shape and line is determined by the sanding. The score and snap deal only gets roughly there. I like to snap off the plastic outside of where I want to end up and sand down to my final line. Loads of plastic dust hits the floor here! Sides look like this. I round off the edge and corners so they are soft to the touch. Looking up under the chest piece at the bottom edge. The neck cut out. Neck line.


