

russellr2d2
-
Posts
369 -
Joined
-
Last visited
-
Days Won
2
Content Type
Profiles
Forums
Gallery
Articles
Everything posted by russellr2d2
-
Sand the ears to final shape. It's slow and the folded sandpaper will give you a smooth line. Sand / check / sand / check and so on. Sent from my iPhone using Tapatalk
-
Zarlon's First ANH Build Thread (ATA)
russellr2d2 replied to Zarlon's topic in Build Threads Requireing Maintenance
Watch out for the right side that you don't cut off too much. The ATA has little wiggle room to attach the face and back. Looks good so far take your time and have fun. Sent from my iPhone using Tapatalk -
Looks good to me. The face is difficult to fit especially on the right side. Brow looks ok even a little high if you ask me. I would bring it down in the front middle to be in line to where it is on the sides. The brow level is up to the individual though. Sent from my iPhone using Tapatalk
-
Zarlon's First ANH Build Thread (ATA)
russellr2d2 replied to Zarlon's topic in Build Threads Requireing Maintenance
Watch out for the trimming the face and back where the extra plastic is (wrinkled area). The right side of the face and back under the ear area (right if you are wearing it) needs plenty of extra plastic to meet up right when you try to attach the face to the back. Trim only a little and later see if you can get away with more trimming after fitting the two halves together for a trial fit. Have fun! -
ATA Armor Build_My First TK
russellr2d2 replied to russellr2d2's topic in Build Threads Requireing Maintenance
Have you decided on which type of sections attachment your were planning on going with, wire or snaps? Wire is Canon and a bit more complicated to assemble, snaps easier to work with, and both are Centurion approveable. Snaps and snap plates all over. I figure if it never shows its OK. Besides I was having fun making snaps! Thanks! -
ATA Armor Build_My First TK
russellr2d2 replied to russellr2d2's topic in Build Threads Requireing Maintenance
OK! Starting the strapping. I guess I will work my way down. My thigh garter belt is coming next week in the mail. I need all the in the know to comment on how I have the back & chest pieces oriented. Is the gap between them OK. Should it be at the very top of the shoulder? Mine looks to be a little forward. I am thinking this may be good to pull the shoulder bells forward ??? I have the neck line up to the top of my T-shirt collar, same place. On the back it goes naturally much lower. -
ATA Armor Build_My First TK
russellr2d2 replied to russellr2d2's topic in Build Threads Requireing Maintenance
-
ATA Armor Build_My First TK
russellr2d2 replied to russellr2d2's topic in Build Threads Requireing Maintenance
Starting the STRAPPING ! Oh my gosh. Is it that time already? I have been dreading this moment. Elastic, snaps, fitting are all things that I have never done before not to mention "sewing" ...no way! Well anyway here goes! (holds nose and jumps!) Snap plates for the shoulder strap and white elastic. Is this the correct elastic? To me it looks flimsy. Should I double it up? How they will fit under the shoulder. -
ATA Armor Build_My First TK
russellr2d2 replied to russellr2d2's topic in Build Threads Requireing Maintenance
Thanks! But the inside slot idea is not mine. I saw it here on the boards. One thing I did do though was to boil the shin to make the plastic close up tight and stay closed. May not need elastic. I will troop to see. I like this method because it holds the back cover strip against the raised part with no gap showing like the Velcro and elastic closures. Looks clean. Oh, and I am using E6000 on everything now. Love the stuff. I find a three day dry and it is really tough as nails. Overnight and you can take most clamps off. Sent from my iPhone using Tapatalk -
ATA Armor Build_My First TK
russellr2d2 replied to russellr2d2's topic in Build Threads Requireing Maintenance
Installing the battery packs on the thigh. First I drilled holes that were barely large enough for the rivet to pass through. I wanted the connection to be very tight. You can use an e-xacto knife to make a hole easier than a drill. First rivet in. Done! Needs clean up and some heat adjustment to get the middle box centered. Painted rivets white. Full front view of finished thigh... -
ATA Armor Build_My First TK
russellr2d2 replied to russellr2d2's topic in Build Threads Requireing Maintenance
Inside cover strip creates a channel the back of the leg fits into. I will probably hold it closed with an elastic at the top with an elastic type same as in original armor with the bra hook. The plastic back is sprung shut because of the plastic shape. It jams itself into the channel. The inside channel. The shins close themselves up tight just from plastic tension. I will instal at least one elastic inside anyway in case they want to open up while I troop. -
ATA Armor Build_My First TK
russellr2d2 replied to russellr2d2's topic in Build Threads Requireing Maintenance
Taking off the bottom return edges on both shins. I hear if you leave these on they scrape up your boots really quick. Glueing on the 25mm cover strip. Lots of clamps! -
ATA Armor Build_My First TK
russellr2d2 replied to russellr2d2's topic in Build Threads Requireing Maintenance
Boiling shins to make them close. I am forming the plastic so the shins stay closed on their own. After dippign just a few second in steamy hot water and cooling under cold water, they stay closed on their own. -
ATA Armor Build_My First TK
russellr2d2 replied to russellr2d2's topic in Build Threads Requireing Maintenance
And you have to take a little break now and then... Some single malt whiskey from Scotland... and something from my former life before I joined the empire ! Doh! -
ATA Armor Build_My First TK
russellr2d2 replied to russellr2d2's topic in Build Threads Requireing Maintenance
Shin fit and back end cutting: Cutting the back opening of the shins. This will have a 25MM cover strip opening to the inside so it cannot be seen from the side. I have left the inside flap alone for now and I might allow it to remain to help overlap inside the shin. I will use hooks to keep the shins closed My sniper plate glues on....no rivets! Adding the 25MM cover strip to the outside so the public cannot see into the back of the seam. Hooks will close it up. Do you know what those thingies holding the cover strip on are called???? if you do you win! -
I have been tracking this story here in Los Angeles. He is in the hospital now. Conflicting reports on his condition. In fair condition. The plane he was flying is a PT22 with a very unreliable Kenner engine. this plane was a primary trainer back in early days of WW2 and was replaced because of the engine and some poor flying characteristics. I have seen TWO of these planes go down just here in Los Angeles. Even though this is one of my favorite WW2 planes I would not take a ride in one.
-
Cutting ATA forearm DIAMETER?
russellr2d2 replied to russellr2d2's topic in Hard Armor (General Discussion)
Thanks all! I think i will finish up the armor complete and then judge if I really need to cut out the bottom raised section. On the big right arm only. Thanks! -
Cutting ATA forearm DIAMETER?
russellr2d2 replied to russellr2d2's topic in Hard Armor (General Discussion)
How did you re-join the cut edges and make a flat area for the cover strip? Thanks for the advice. -
Eastbay evapor...stitching is ugly
russellr2d2 replied to fuumantroop's topic in Boots, Soft Parts, and other Accessories
I bought the Eastbay pants and scrubbed the stitching and logos with a big sharpie marker. Looked great at first. Then I washed them and the stitching turned out gray. Re-did the big sharpie marker thing and they were jet-black again and then washed a second time. Now they are pretty dark, not perfect. I think one more go over and they will be black. I was thinking of thinning black paint and soaking it into the stitches with a brush. Not so much work actually. Just sit and watch Big Bang Theory and you are done. -
Cutting ATA forearm DIAMETER?
russellr2d2 replied to russellr2d2's topic in Hard Armor (General Discussion)
Thank you for the reply sir! Yes I did that and the two halves went together easy-peasy. I still have a LOT of open space at the front and back of the forearm to play with and was wondering if anyone actually cuts away at the red line section shown above to make the diameter smaller. I understand where you reference the curvature of the arm if the flat area is removed. How to make a flat to then glue the cover strip onto. -
Has anyone tried cutting out the raised cover strip section on the right forearm to make the diameter smaller? Does this make it too small?? Thanks for the comments! ---------------
-
I used two part epoxy. Can't beat it. Sent from my iPhone using Tapatalk
-
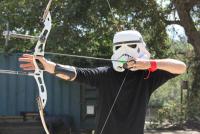
What are your other passions besides stormtrooping?(Hobbies)
russellr2d2 replied to Polar's topic in Off Topic
Razorbl4de: The force was with me that day [emoji16]. Sent from my iPhone using Tapatalk -
ATA Armor Build_My First TK
russellr2d2 replied to russellr2d2's topic in Build Threads Requireing Maintenance
Ukswrath! Your thighs look just like mine ..... Errr I mean they look like the ones I built. Ummmmm well you know what I mean!! It's good to see this is an ATA thing and I didn't goof! [emoji3] Sent from my iPhone using Tapatalk -
ATA Armor Build_My First TK
russellr2d2 replied to russellr2d2's topic in Build Threads Requireing Maintenance
Here is the work on the mismatched bottom edge-rear of the right thigh on my ATA armor. i used a hobby iron to "roll" it down flat. Then some sanding to get it tidy. It worked really nice. No evidence the mismatch was ever there! After a couple days I can sand the goop flat and polish.
