Coastertk
-
Posts
335 -
Joined
-
Last visited
-
Days Won
1
Content Type
Profiles
Forums
Gallery
Articles
Everything posted by Coastertk
-

A.P. Knee Ammo Belt question.
Coastertk replied to PGHtrooper21's topic in Assembly, Mods, and Painting
For the bottom curved edges, a little trick is to use a spray paint can to trace the curves. -
You are going to want to address the chest popping over the ab plate
-
Gazmosis Retiring - Please stand by on EIB/Centurion Approvals
Coastertk replied to Darth Aloha's topic in Announcements
Steve, you have an amazing attention to detail and have helped many of us TK's look our best and to that I say thanks. Hopefully this gives you more time to produce more of those awesome holsters. -
E6000 warnings. Read them and wear a respirator!
Coastertk replied to cm325i's topic in Assembly, Mods, and Painting
Am I the only one that likes the smell of E6000? -
Have you considered shimming the rear of the thigh? Open them up and shim the inside, fill the valley on the outside with ABS paste, sand and use a proper sized cover strip.
-
If you're not screwing it on you're doing wrong.
-
Tatertrooper's ANH Stunt TM TD Build
Coastertk replied to Scarlet Trooper's topic in Build Threads Requireing Maintenance
I used the stencil kit from Trooperbay for my tube stripes. They are adhesive backed decals. I've heard of some people painting a base coat of white over the stencil first, thus any paint bleed would be white. Then paint blue over that and remove the stencil. -
One of my Garrison mates had a perfect response to that one. Someone commented that we had bad aim and the TK beside me says, "Why don't you ask Luke's Uncle how our aim is." Shut that guy up!!
-
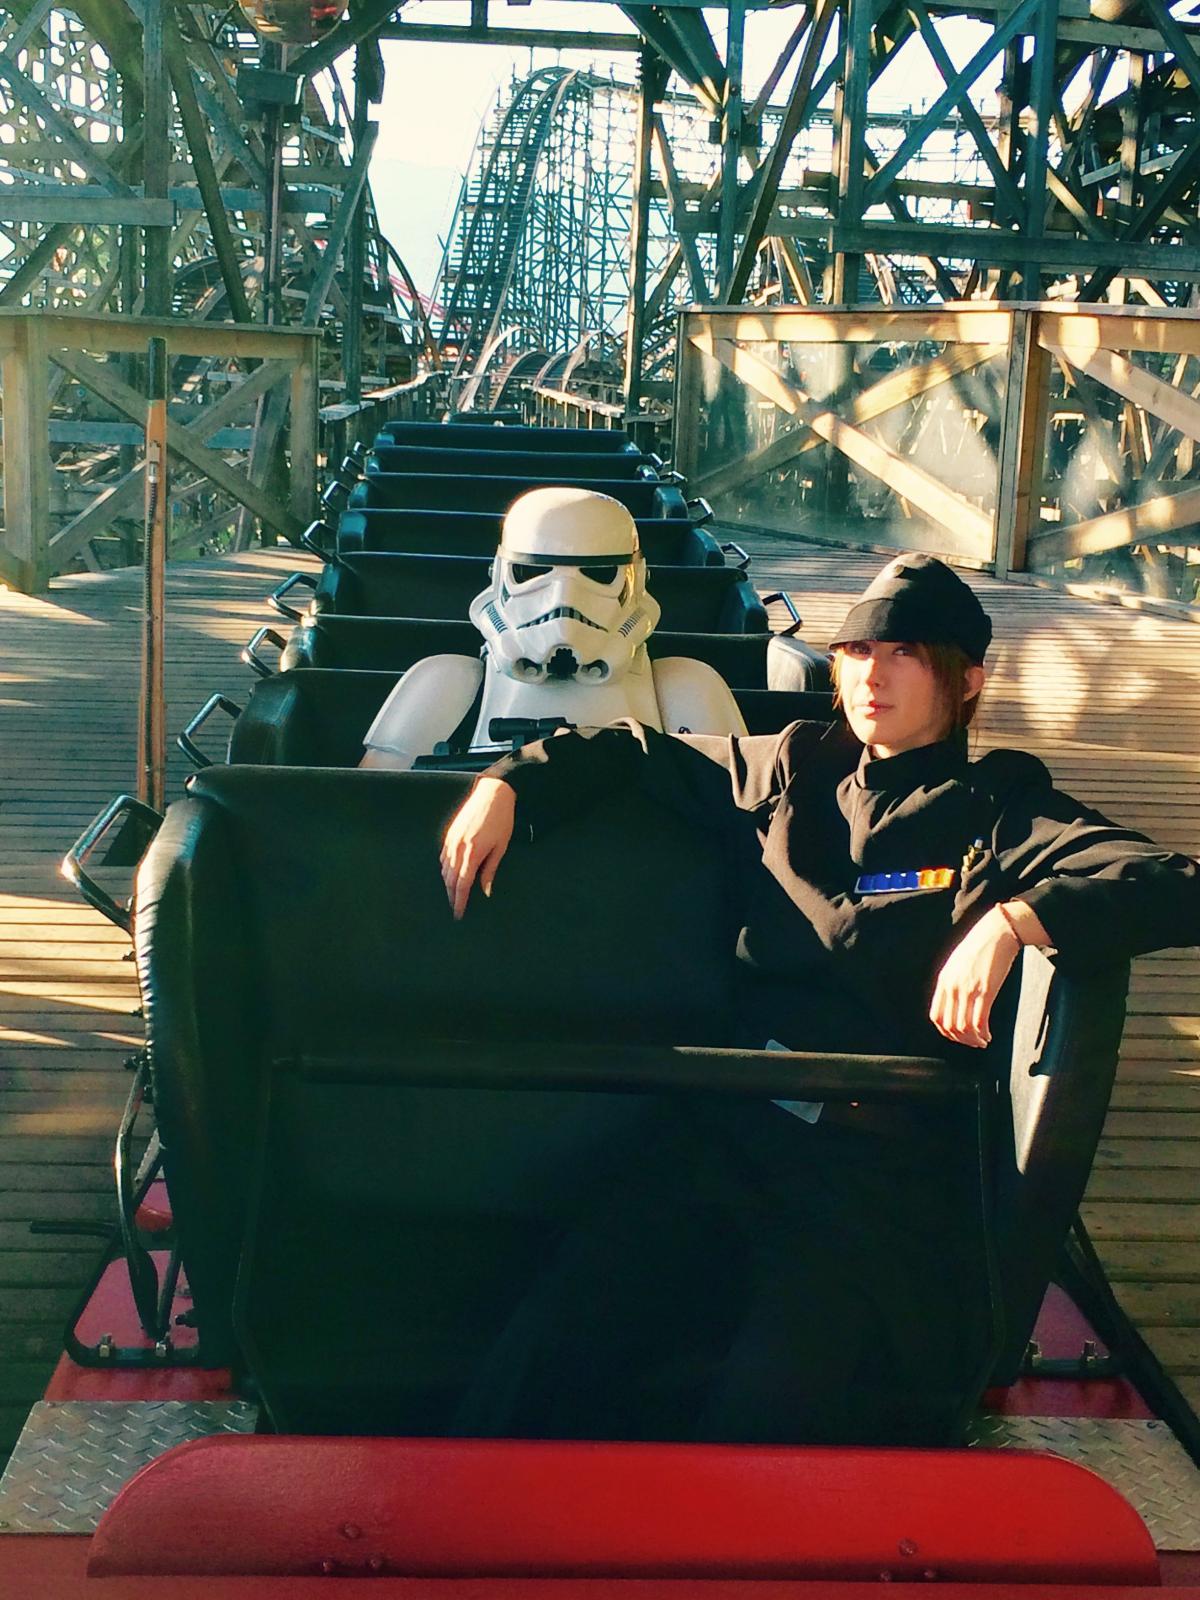
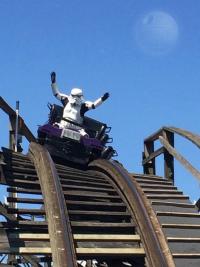
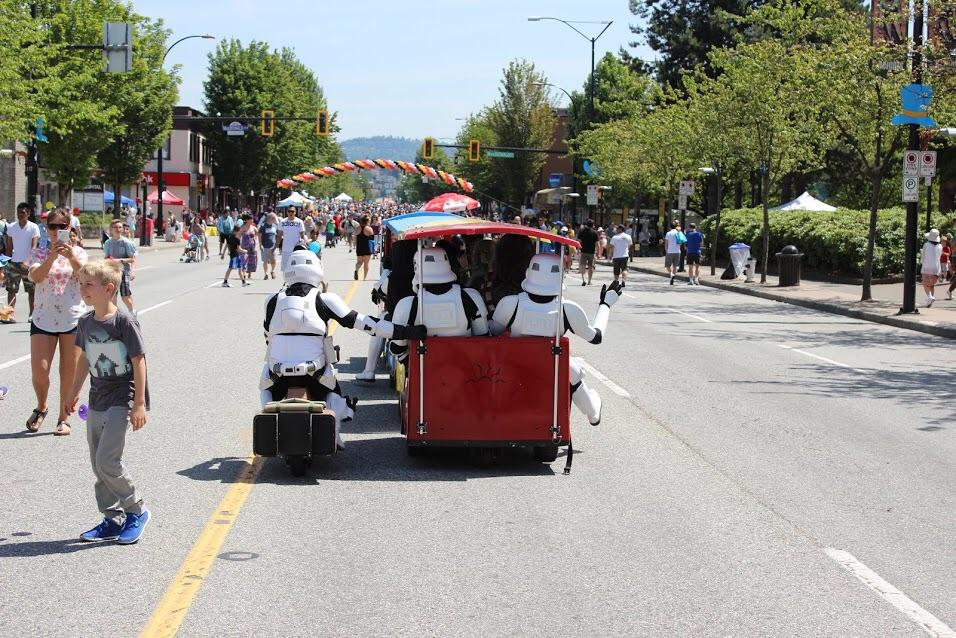
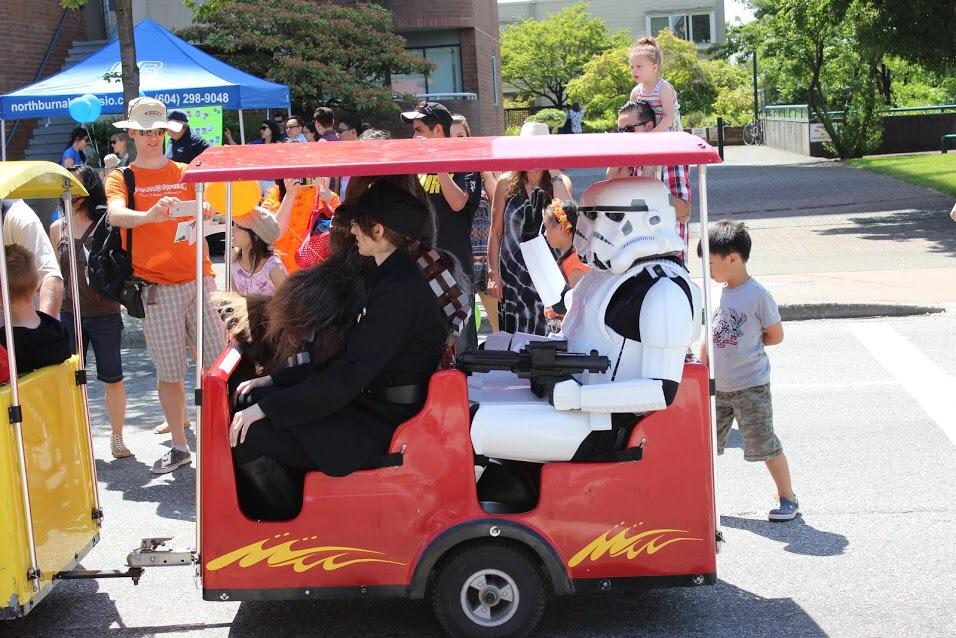
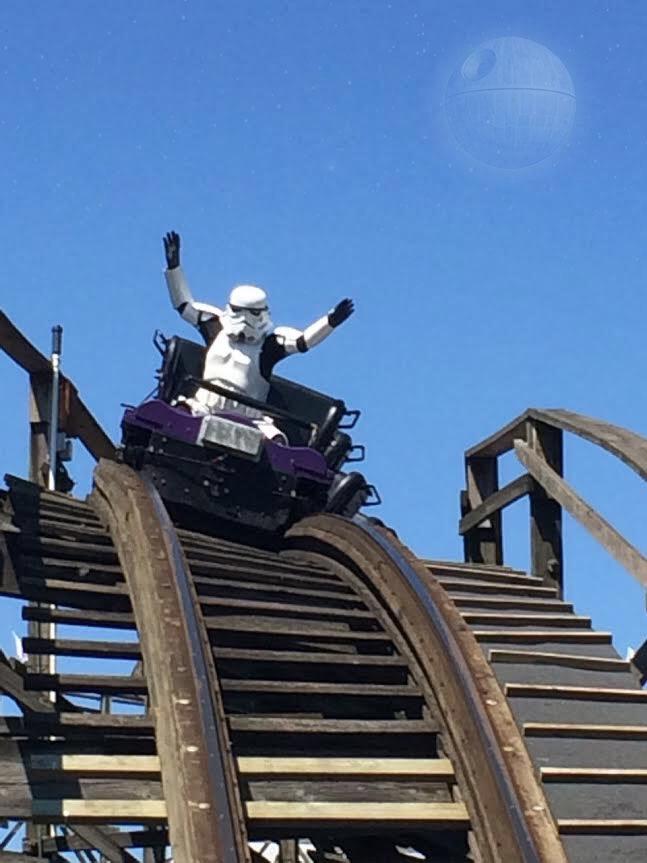
First time I rode the Coaster in armor I really bruised my back from the return edges on the kidney and back pieces. No cracking of the armor at all. I did pop a chest to ab snap though. Second time I rode I added padding between my back and the armor. Much better.Thanks to ID30791 for riding along. The only one in the Garrison able to attend for some private ride time. <br><br> This one was a tight fit however. It was our Imperial Shuttle after marching in a local parade. It was really something to see.


-
It's really not that hard, almost kind of fun, and soooo rewarding to complete it yourself. Start reading build threads now.
-
You should have no return edge on the bottom.
-
Those green things you see in my helmet are the "Thin" speakers for my "Environmental Audio System". I bought the whole setup with mini microphones and a stereo receiver. I got mine from Skyminer here on FISD in the ongoing sales section.
-
Sitting is just something you can either do or can't do.
-
Cold Weather Compression Suit?
Coastertk replied to Coastertk's topic in Boots, Soft Parts, and other Accessories
It was an option I considered, but I ended up getting a two piece suit from Costco. The polyester is mixed with Murino Wool. I haven't field tested them yet, but I'm hopeful. -
Just wondering what everyone is using for those cold days? I have the Eastbay suit I got from Trooperbay, but damn it was cold this morning. The Eastbay EVapor cold weather is only available in charcoal as far as I can see.
-
Butt joints without coverstrip possible?
Coastertk replied to Curanthir's topic in Assembly, Mods, and Painting
I believe the goal when building a TK is to try your hardest to look like the TK trooping beside you, and the one beside him. A renegade TK design will probably stand out in a crowd and create a lot of questions for your Garrison mates like "What happened to that guy?" We all build based on what was actually seen on screen, not an idealized version of it. Just my 2c. -
I would recommend scuffing them first. I used bunched up news paper. Worked great.
-
----------- Nomex Flight Gloves<br><br> $10.99 with free shipping<br> Aliexpress dot com
-
------------- Why the hell cant I upload pictures? My photo bucket is buggered up.
-
I went with a single lense application for mine. I first made a template to show exactly where the eye openings laid. Then I cut down the lense to fit like a bandit mask. This is where you can cut out the groove or notch to allow for your nose to fit in. I then cut a piece of vinyl to cover the visible (from inside bucket) side. The backside (touching helmet) is where I used Velcro along the top side to attach to helmet. Having it only attached at the top allows the bottom side to help circulate airflow and avoid fogging.
-
Snap Plates vs Brackets - Pro's, Con's?
Coastertk replied to Koyaanisqatsi's topic in Assembly, Mods, and Painting
+1 -
Velcro for Forearms & Shins
Coastertk replied to Koyaanisqatsi's topic in Assembly, Mods, and Painting
To answer your question....No Basic Approval CRL states : Forearms For 501st approval: Forearms are fully closed. All of the return edge at the wrist needs to be removed. -
Velcro for Forearms & Shins
Coastertk replied to Koyaanisqatsi's topic in Assembly, Mods, and Painting
No Velcro for the forearms. These are one piece butt join with cover strips. The backs of the shins can be closed with Velcro. Be sure to build the backs so that the rear cover strip is on the outer half of the shin. This photo shows it with overlap build but you get the point right. The idea is that people looking from the side only see armor not Velcro. Photo again is showing the overlap build but I wanted you to see the rear closure and position of the cover strip. I used a 1" white industrial Velcro and added a thin smear of E-6000 to the adhesive backing. Have not had the Velcro peel up, and anybody using ATA can understand just how tight that left one is done up. Hope this helps. -
Quality build. If I could make one comment it would be on your lack of overlap from your chest onto your ab. You seem to be riding high on the chest. If I could make two comments it would be the back of your right ear. Do you still have the spare that came with your kit? I don't think it will hold you back on EIB but if you have the option of replacing it, then why not. If you have cut up both sets of ears and still want to swap it out, send me a pm and you can have my spare set. Again, nice work, quality build.
-
I'm certain the application process is only a formality. Well done.