


gmrhodes13
-
Posts
31,219 -
Joined
-
Last visited
-
Days Won
1,070
Content Type
Profiles
Forums
Gallery
Articles
Everything posted by gmrhodes13
-

big guy with long torso
gmrhodes13 replied to mike ford's topic in TK Pre-Approval Questions & Discussion
Hello could you tell us what make the armor is? You will find a lot of armor will not fit the bigger guy and it would be a drastic amount of work to extend pieces, could be easier looking at a larger make of armor, AM or RT are your best options. -
Hello and welcome aboard, we have some great build threads full of information so take a browse through some of those. Also check out the Getting Started section, and of course you can't go past this thread full of links and info. Also check out our Gallery area, lots of screen reference there. Good luck on this journey, hope to see a build thread from you soon
-
TLJ / TROS CRL Update Work Flow
gmrhodes13 replied to ukswrath's topic in Hard Armor (General Discussion)
But there are makers that do, just like the separate forearm box in the past, KB doesn't, and there's a few KB builds with modifications to those here on our forum Not all makers are aware of this TD information, many I doubt have seen the images, that's not to say they may modify what they supply if it's a requirement in the CRL I really couldn't say. I guess the question would be, is it the job to make CRL's to what is seen on screen or on what can be provide by ALL suppliers. Also if suppliers don't provide reasonably correct pieces is it up to us to reach out and provide information. I will just concentrate researching differences and the corresponding reference material and worry about text later, no doubt there could be lots of discussion later on -
TLJ / TROS CRL Update Work Flow
gmrhodes13 replied to ukswrath's topic in Hard Armor (General Discussion)
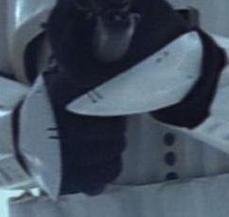
I've already been studying my TLJ detonator, it's just a case of cutting off the endcap , enlarging the opening on the detonator slightly, finding tube same size as the edcap, make an inner sleeve with some scrap ABS, glue, fill and paint, then insert, of course cutting out the top slot and control panel first. I think this is quite easily achievable so not a big issue if they aren't being supplied by anyone. I will just mention that we also have other things in the CRL which have to be sourced modified for L3 and also in TFA, such as rubber gaskets, separate forearm box, separate TD to mount plate, seam between ab boxes and ab and so on. Also L2 TLJ correct style cod which also needs to be modified/made. -
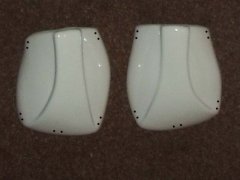
Hand plate references, sewn and elastic
-
-

From the album: Hand Plates
-
From the album: Hand Plates
-
From the album: Hand Plates
-
From the album: Hand Plates
-
From the album: Hand Plates
-
From the album: Hand Plates
-

From the album: Hand Plates
-
From the album: Hand Plates
-
TK 19632 requesting ANH EIB status RWA (1031)
gmrhodes13 replied to Goggytalks's topic in Request Expert Infantry Status
Nice work trooper, good luck with approval -
You will be ok with E6000 sticks pretty well to plastic and can have some flex too. If pieces like forearms and shins are too difficult to put on glued perhaps add elastic to one side so it will hinge open then add velcro to the other side
-
CallMeMrTibbles requesting pre approval HWT TK
gmrhodes13 replied to CallMeMrTibbles's topic in Request TK Pre-Approval
One more just for good measure Former DO Tony and a different application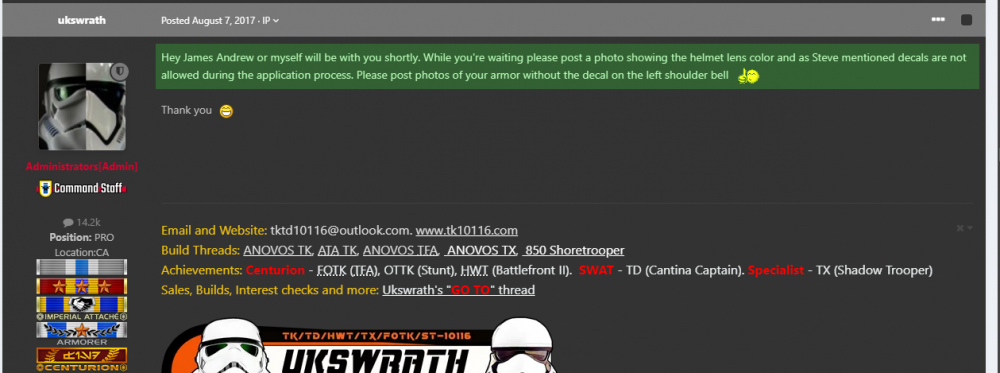
-
CallMeMrTibbles requesting pre approval HWT TK
gmrhodes13 replied to CallMeMrTibbles's topic in Request TK Pre-Approval
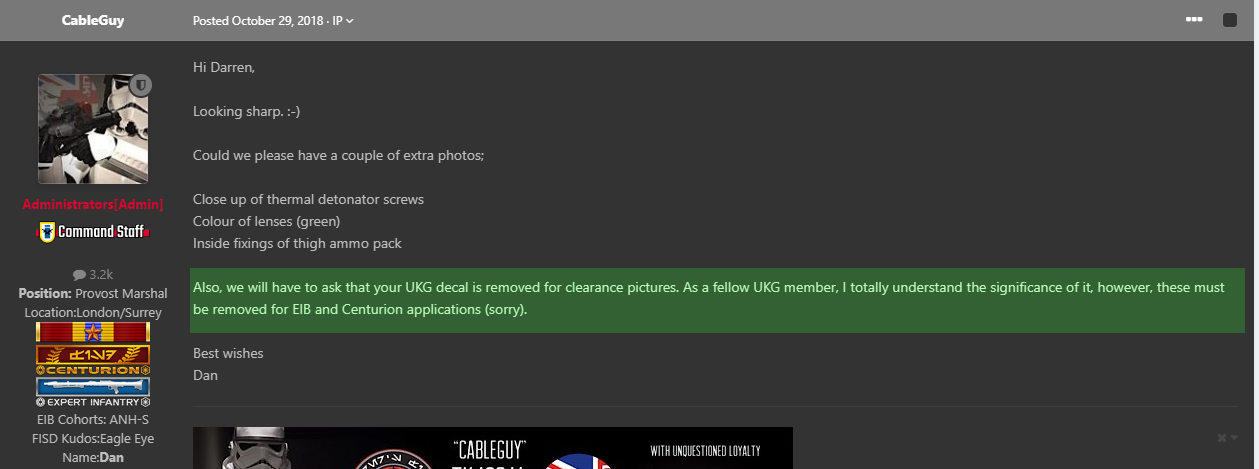
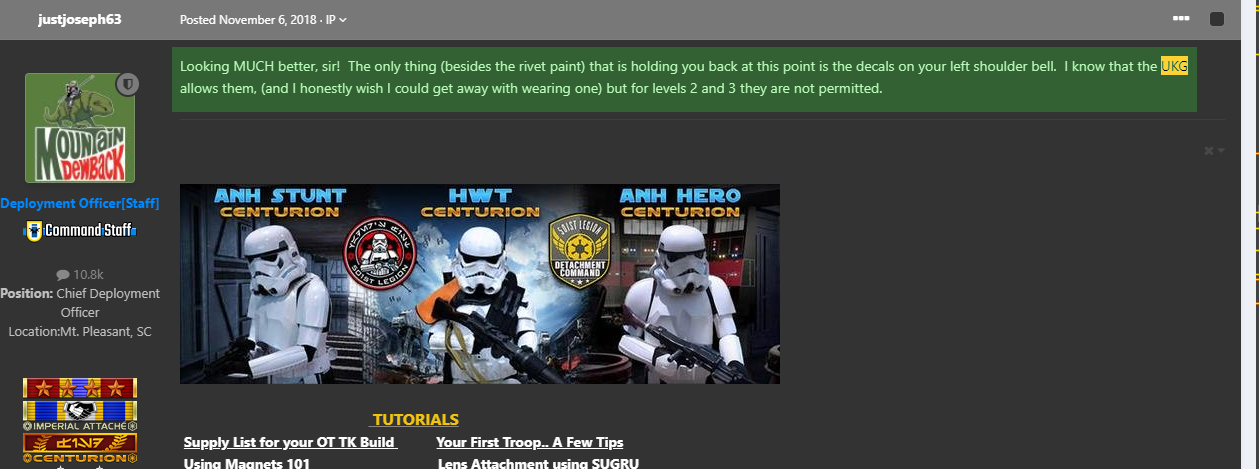
Those two threads are ones I quickly found, there are others out there on the subject. Here is just one post in an application by a DO asking for it's removal, again there are more and this has always been the case since I've been a member, most will seek L2 and L3 approval and once approved just have decals applied again, Also a confirming comment by our current DO lead Joseph in the exact same application I know another member who has two shoulder bells, one with one without decal, great idea for LFL cannon events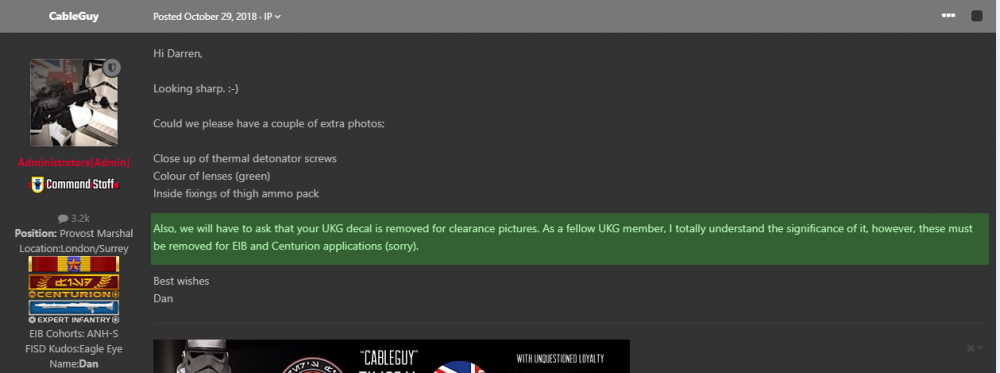
-
TLJ / TROS CRL Update Work Flow
gmrhodes13 replied to ukswrath's topic in Hard Armor (General Discussion)
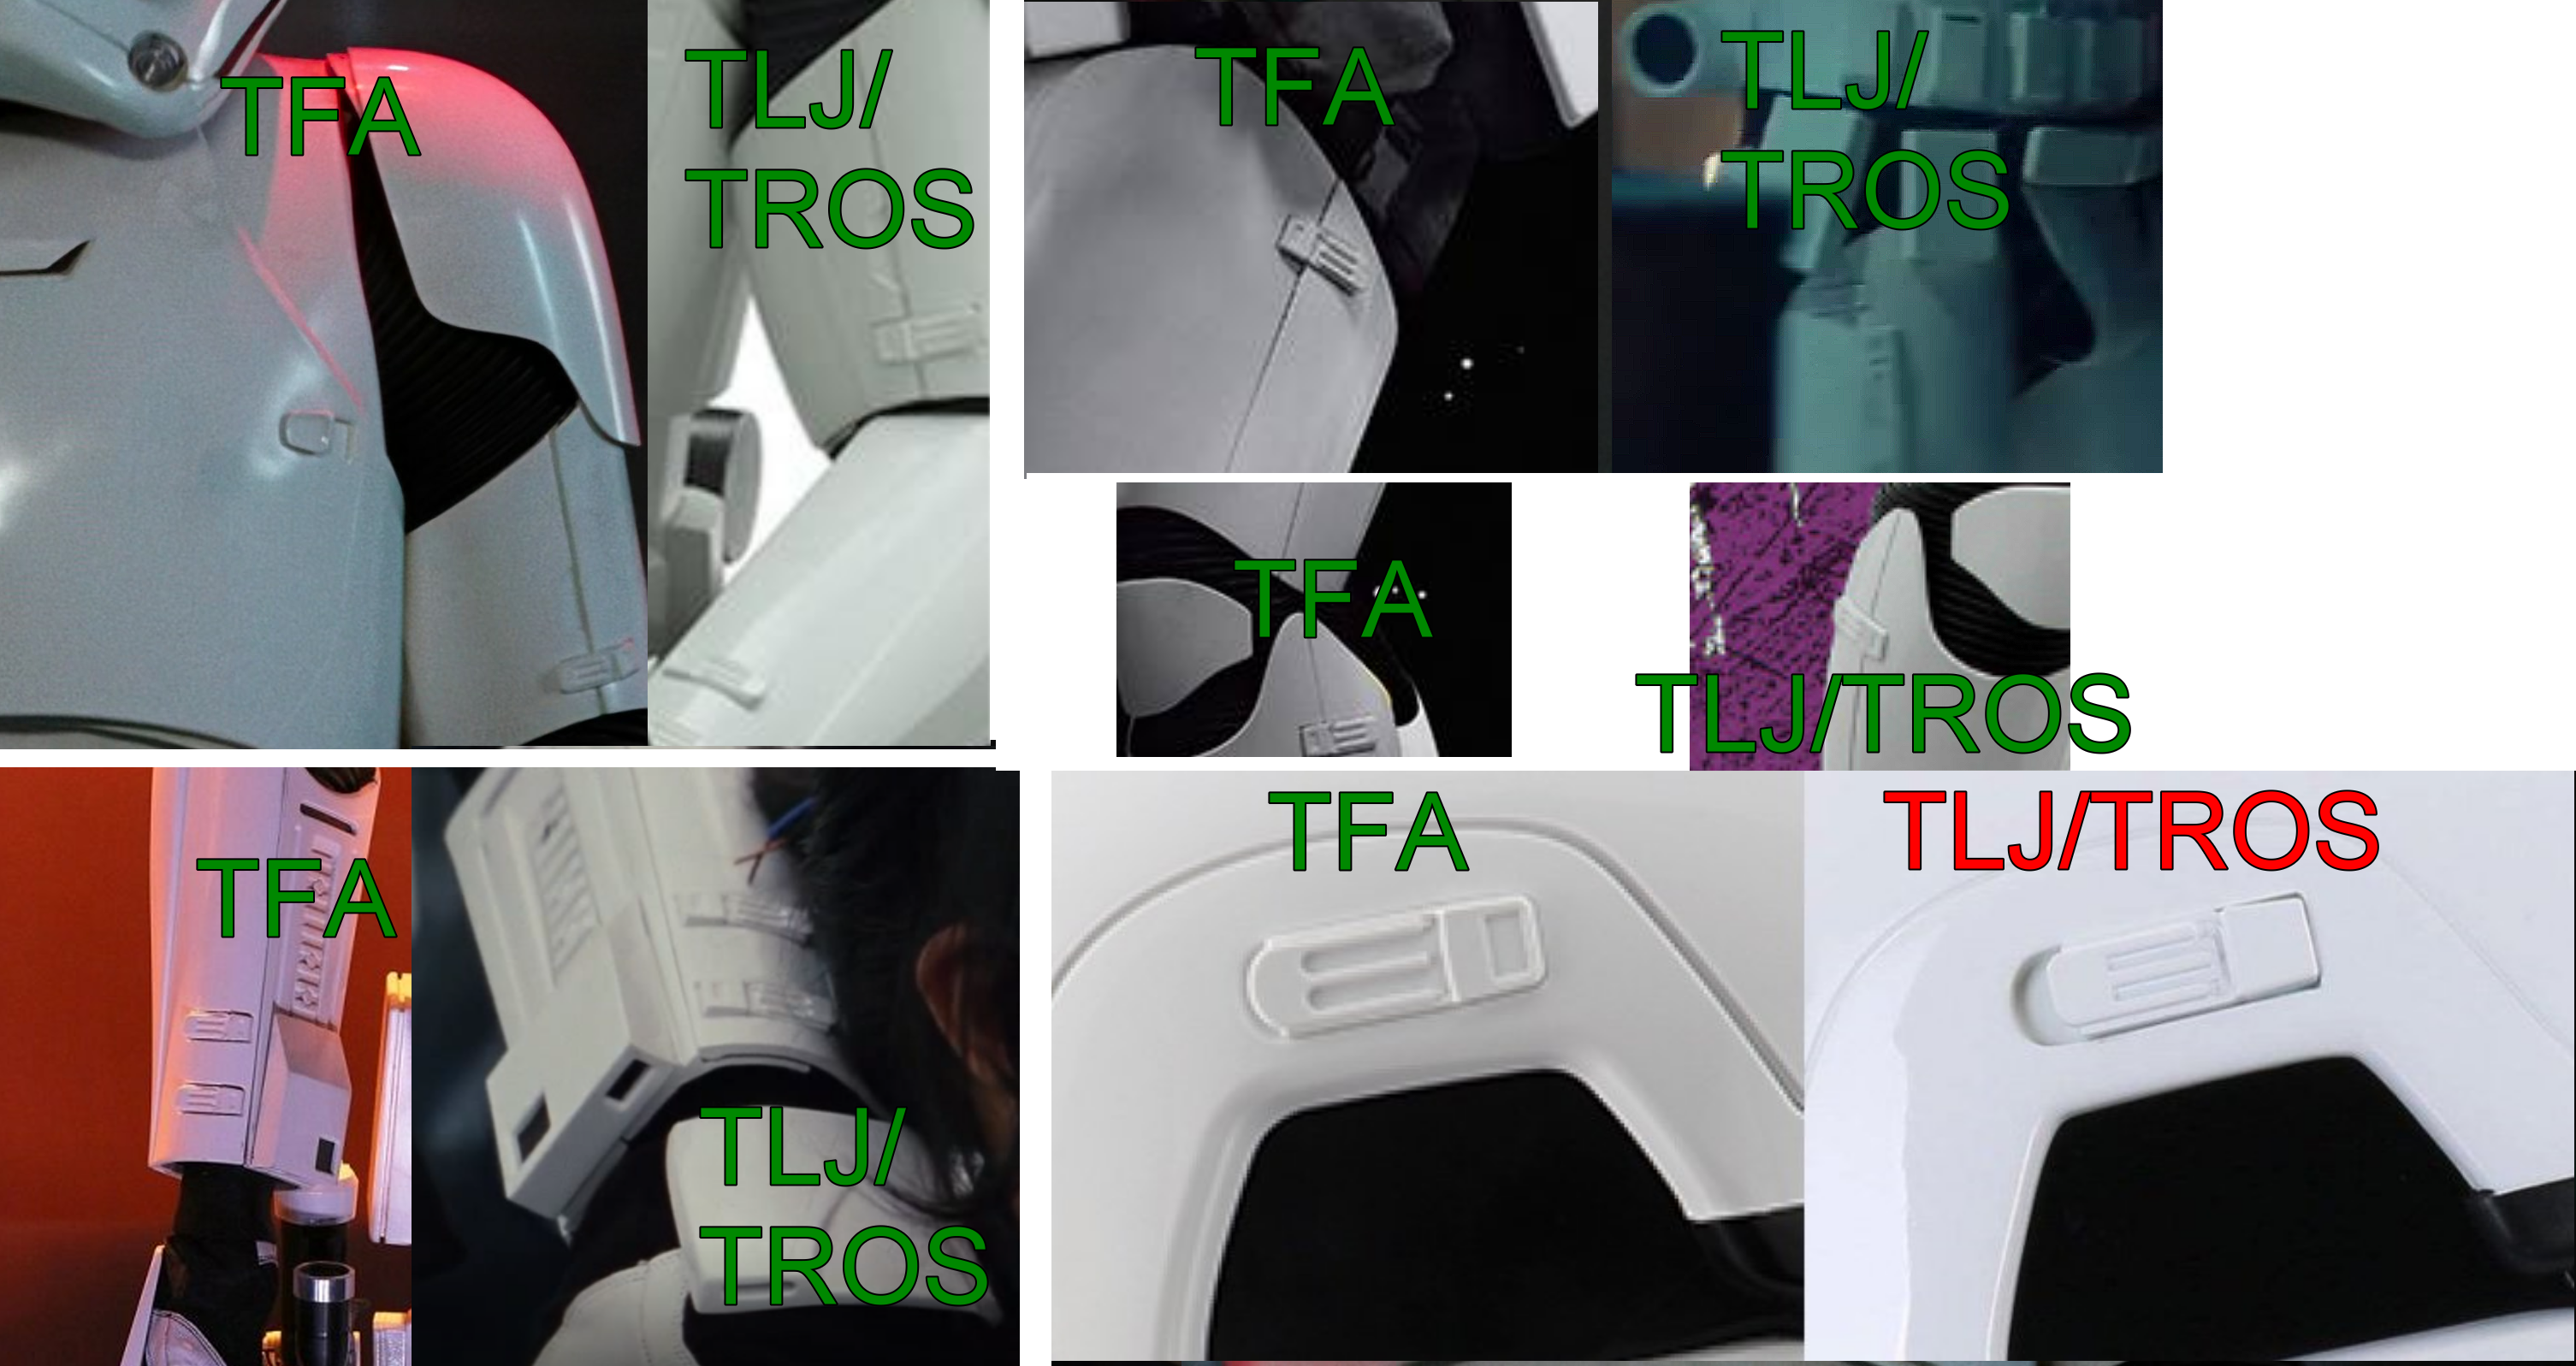
Appears so, a few comparisons
-
CallMeMrTibbles requesting pre approval HWT TK
gmrhodes13 replied to CallMeMrTibbles's topic in Request TK Pre-Approval
Correct, not allowed for L2 or L3 -
Cleantrooper kindly requesting pre approval. TM ESB tk
gmrhodes13 replied to Cleantrooper's topic in Request TK Pre-Approval
Not a stir at all just an interesting situation, I've been doing this for nearly 10 years and can't remember seeing anyone using rubber gloves with stitching. To me I wouldn't attempt.as I would thing they could pull through the rubber. Hopefully we'll here from the DO's soon, but again should not hold you up for basic approval -
Is this an acceptable DLT-19?
gmrhodes13 replied to rzill's topic in Boots, Soft Parts, and other Accessories
Correct, just the stock is brown For my build I used a lot of industrial spray paint as they are a little tougher, silver base then the black I used a satin as I find it gives a better appearance. You can add weathering but don't add to the T tracks, they would have been plastic like the E-11's -
In some instances you will find information in the CRL's like rivet sizes A split (bifurcated) or single cap rivet is present on the lower tab (cod area) of the abdomen armor. Rivet does not need to be functional. Rivet on must be brass or silver in color, approximately 5/16" (8mm) in diameter and is not painted. Ideally there no gap between the abdomen and kidney armor. Abdominal and Kidney Plate align horizontally at top. A single visible seam line is present. Three rivets, approximately 5/16"(8mm) diameter, are present on the left side of the abdomen armor. Note: The original rivets used for the TK armor were bifurcated rivets or split rivets. Rivets are equally spaced along the depth of the armor and about 10mm from the edge. The heads are rounded or domed. Note: Paperclip brads are not considered to have a domed head. Rivets are painted white. A single male snap on the top right corner of the ab plate is present. Thigh ammo belt is attached to thigh with a solid head rivet, painted white, in the upper corner and fastened to the lower thigh ridge. The rivets used shall be single cap, double cap or split rivets. No pop rivets allowed. Rivet should be approximately 5/16" (8mm) in diameter (exterior). Snaps used are generally Line 24(5/8") snaps You can also refer to this thread, full of information
-
TLJ / TROS CRL Update Work Flow
gmrhodes13 replied to ukswrath's topic in Hard Armor (General Discussion)
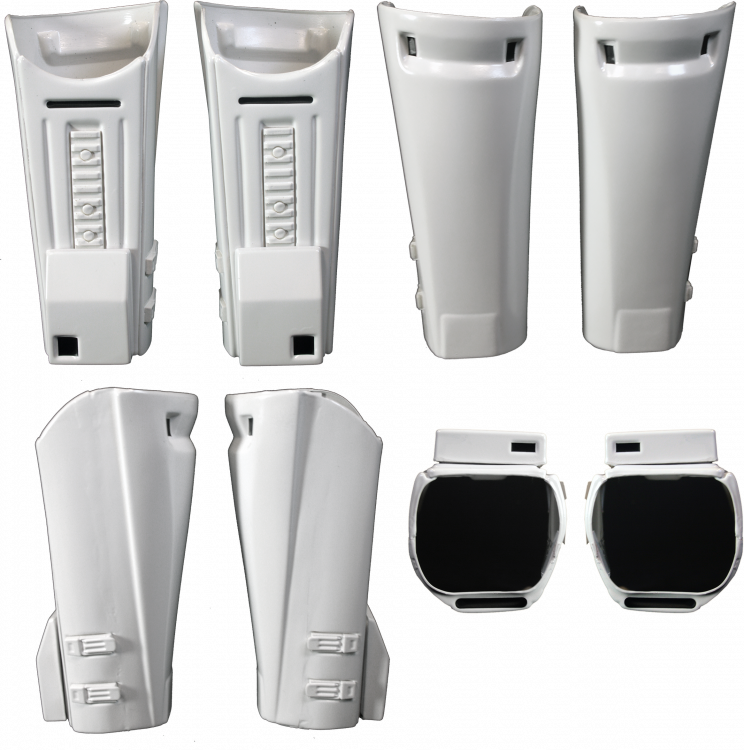
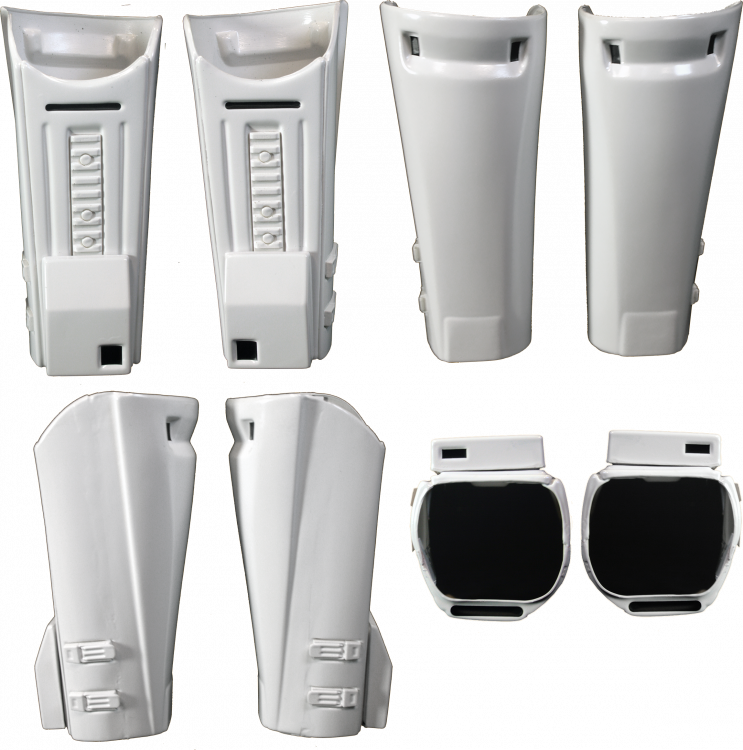
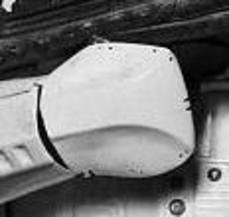
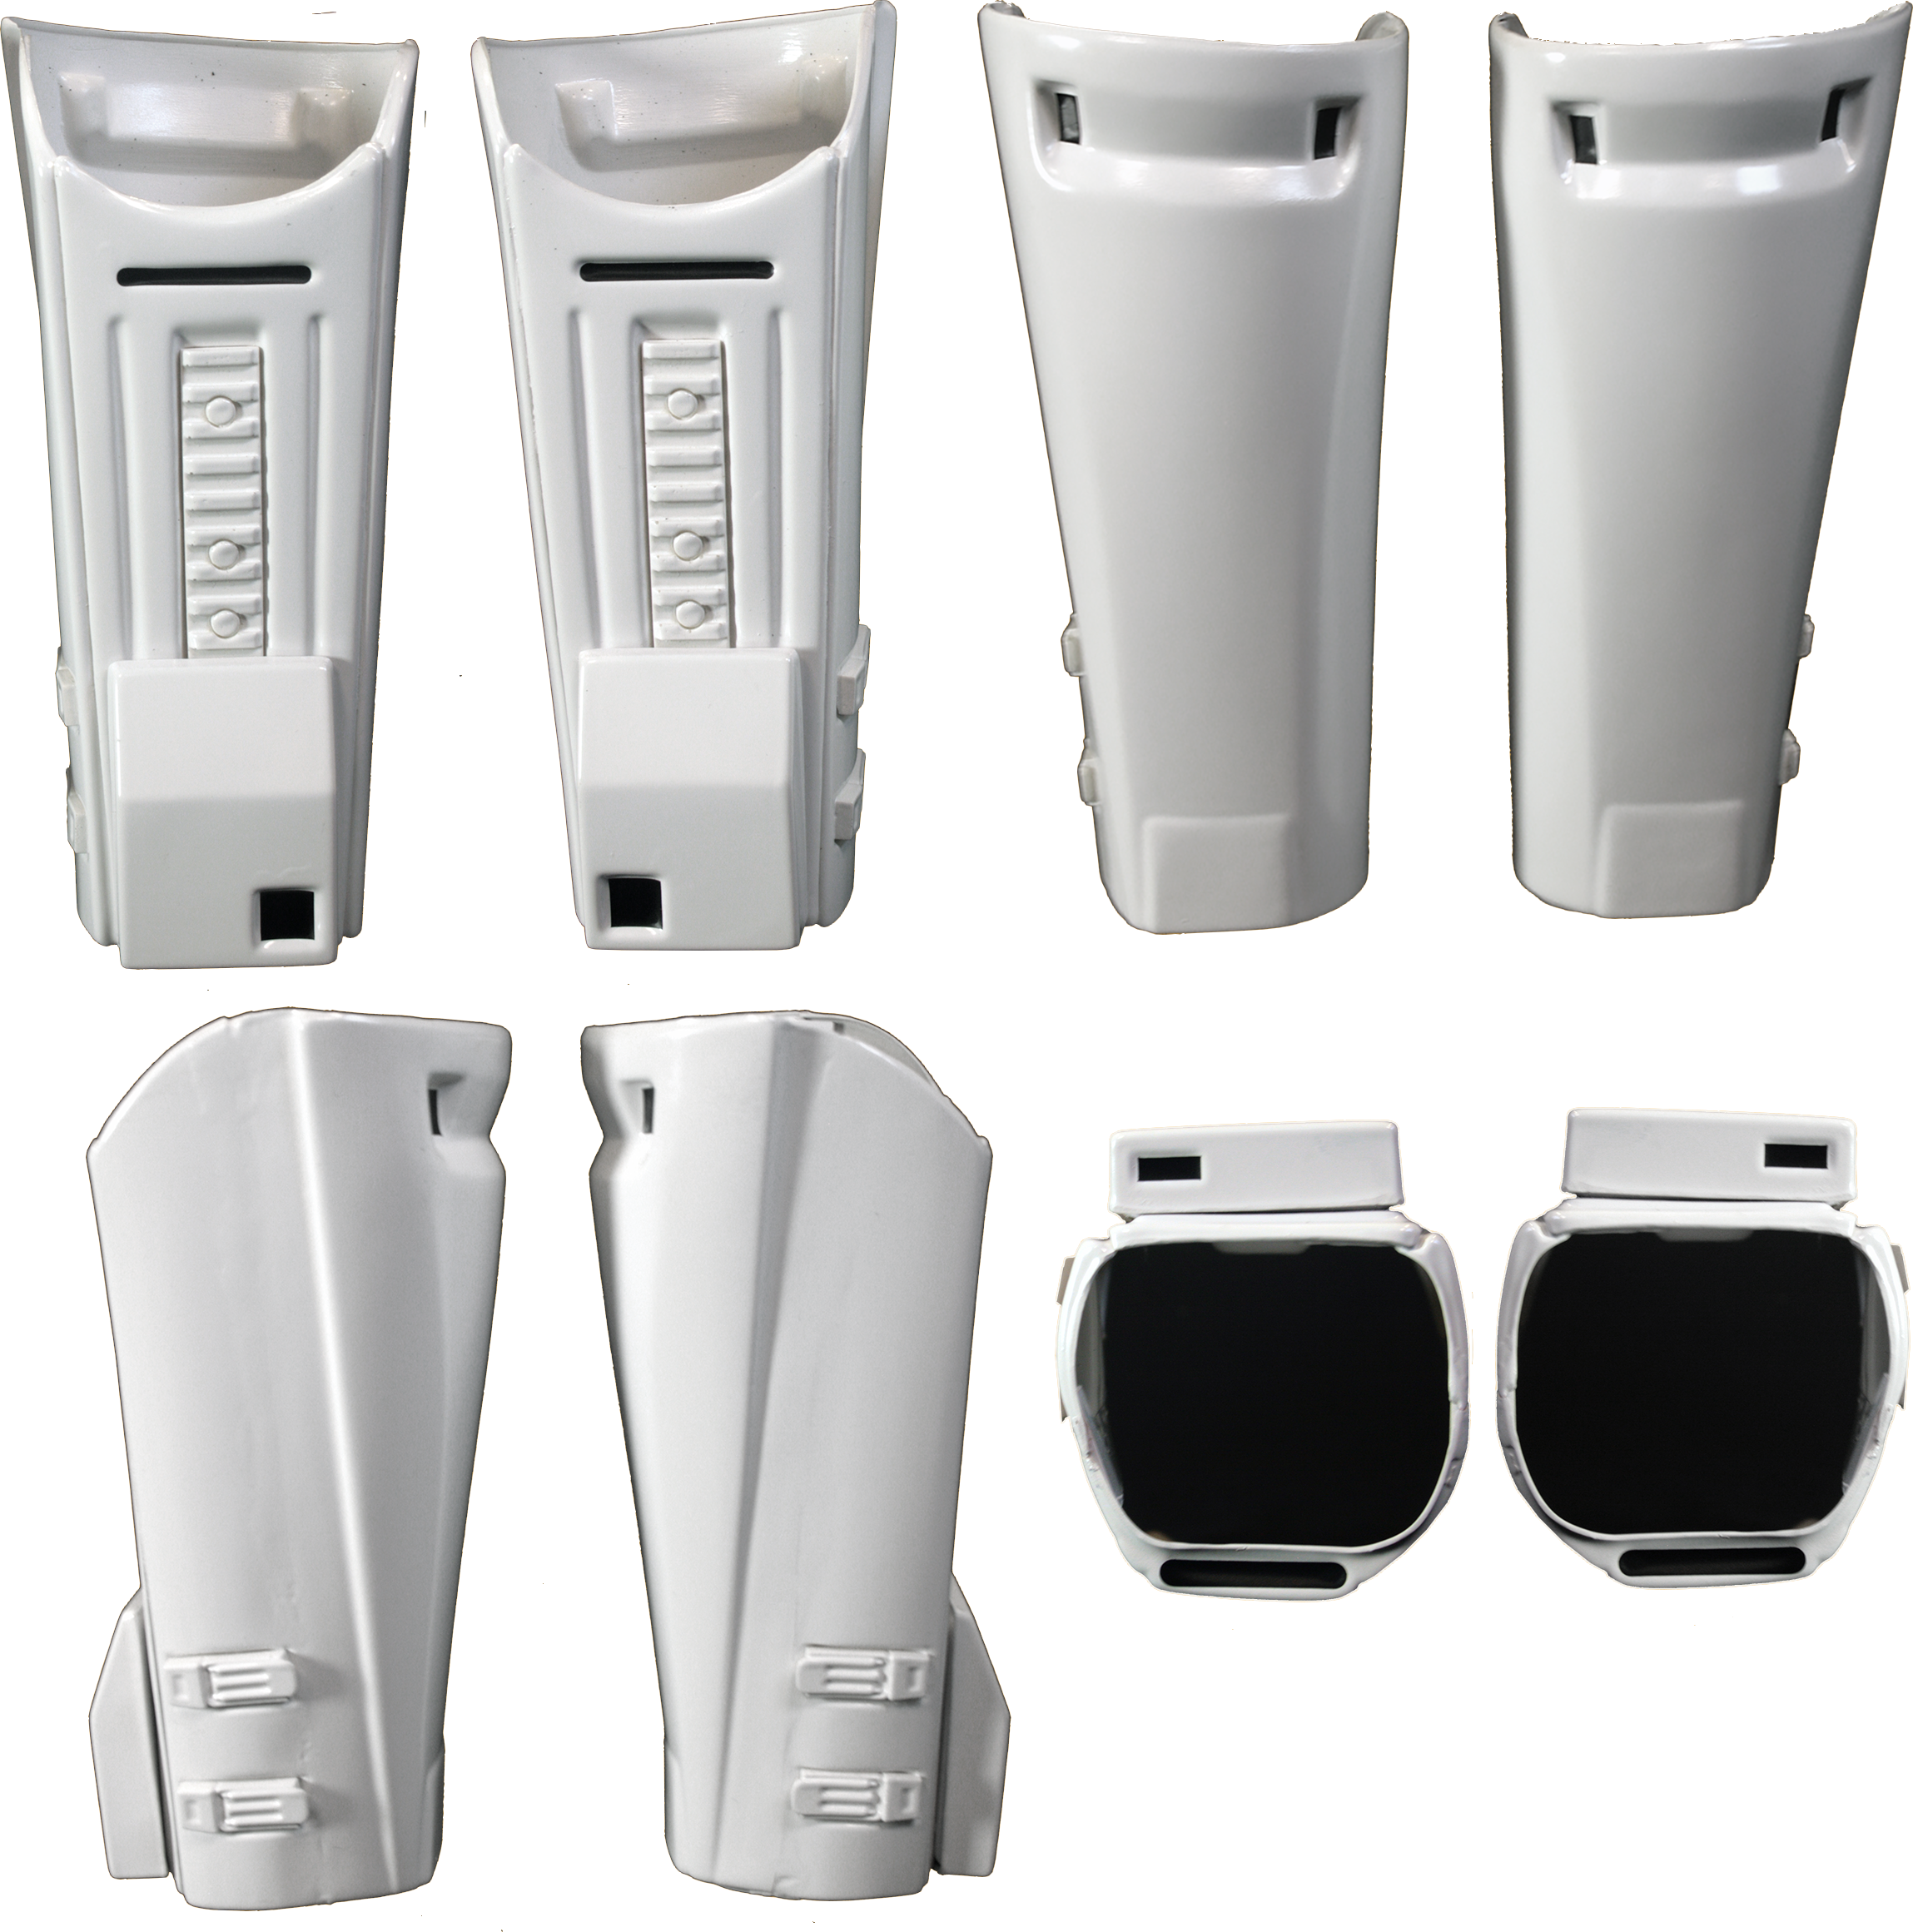
Forearms Forearms shall have have ridged rail, similar to a picatinny, embedded on the inside of the forearm, roughly covered 1/3rd by a box shape. Forearms shall have a box on the bottom the wrist end. On top of each box shall have is a single black square in the lower inside corner. On the end of each box there is a small black rectangle on the outer side. Each forearm shall have two 'clasp greeblies' on the outside facing surface, near the wrist. Detail box includes black rectangle on small edge perpendicular and closest to wrist. On the underside of the wrist on the end is an oval black detail OPTIONAL Level two certification (if applicable): On the ridged rail the third retaining button head closest to elbow is to be either painted grey, a grey decal or a screw/bolt. Forearm elbow end should have the correct cut/inner curve (opposite to TFA) OPTIONAL Level three certification (if applicable): Forearm wrist box should be a separate piece and affixed to forearms. Forearm top plate is not attached at front of wrists. Also the CRL image shows the lower box inner details on the outside, should be on the inside, but the forearm images may need to be changed if we add the angle/cut of the inner elbow WRONG CORRECT FYI in the above image it shows the other clips/greebles on TLJ/TROS are the same as TFA (unlike the helmet clips/greebles)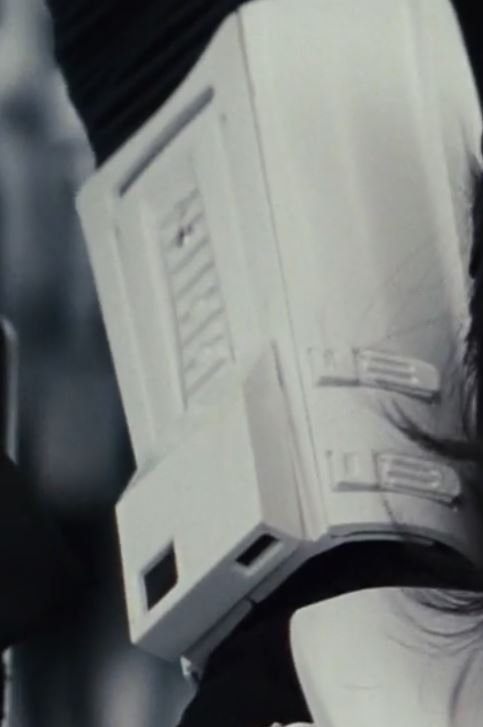
-
TLJ / TROS CRL Update Work Flow
gmrhodes13 replied to ukswrath's topic in Hard Armor (General Discussion)
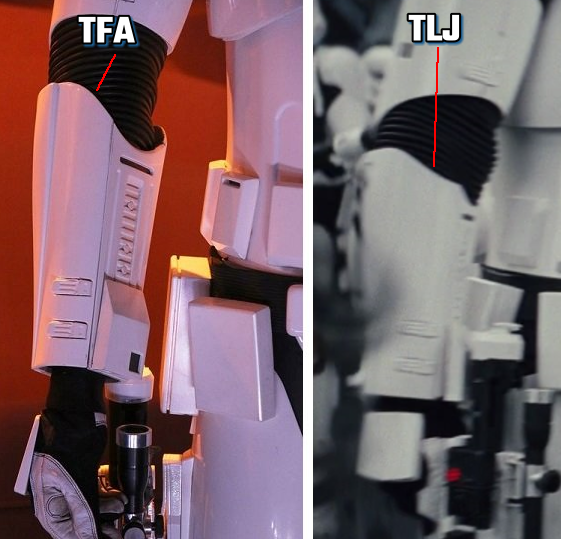
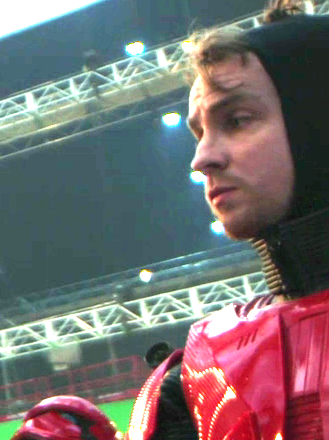
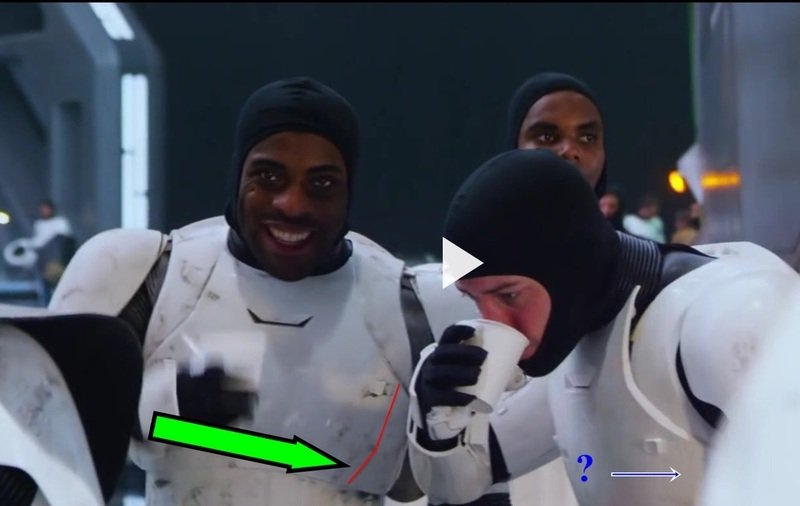
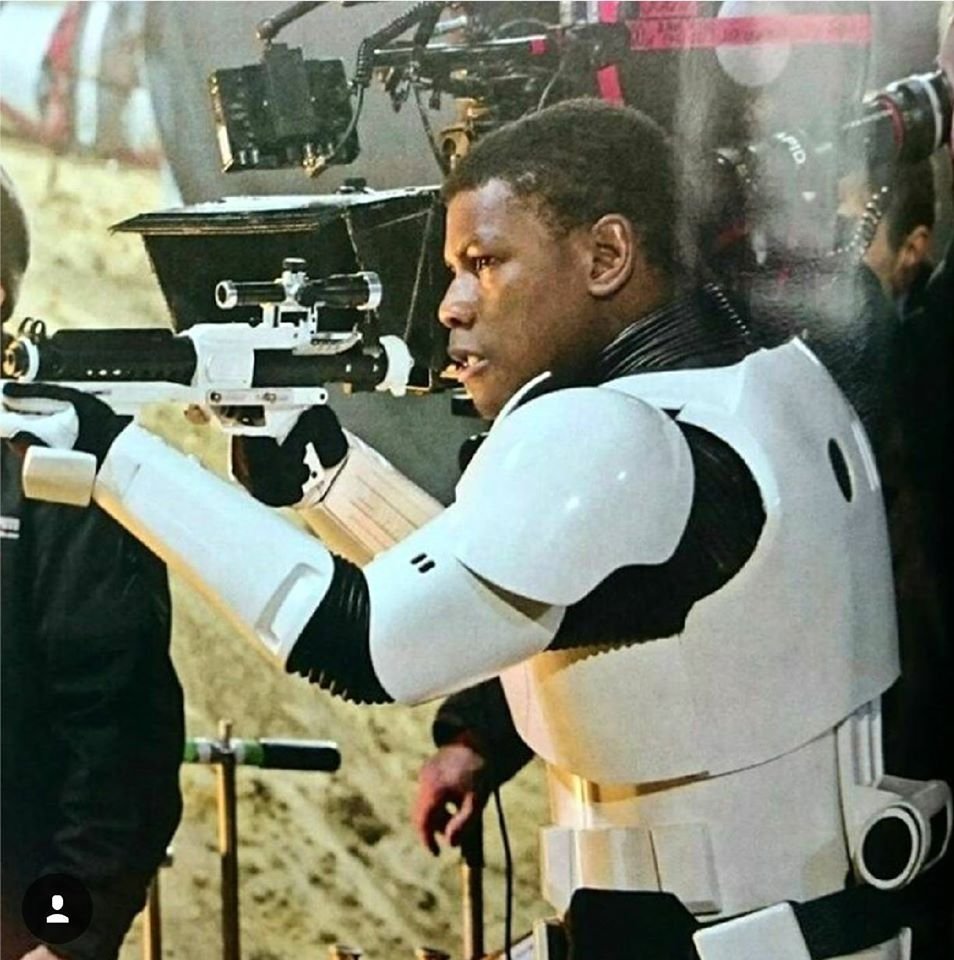
I think from memory "Ideally" was added to the FO CRL's as there was only one clear image at the time showing the neckseal having 11 ribs and no proof others were the same. 11 here: But looking at these two images there only appears to be 10 ribs (right side trooper, oh and disregard the arrows ) 10 here as well Going off other images it appears 11 ribs is consistent throughout other TLJ/TROS costumes though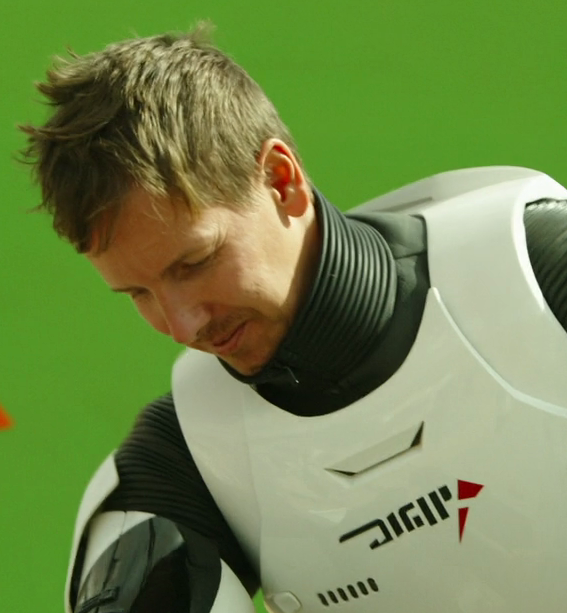

.thumb.png.5fbd7cc35367b9d4d404d766e5fc410c.png)
-
Cleantrooper kindly requesting pre approval. TM ESB tk
gmrhodes13 replied to Cleantrooper's topic in Request TK Pre-Approval
To me the CRL specifically states the two differences, no mention of stitching with rubber gloves, only with silk, BUT as always with higher level clearance it is ultimately a Deployment Office decision. I can tell you this is being discussed by the DO's and they will chime in once a decision has been made


.png.89d532eb5a9fbf100e186343dfacb2e7.png)