gmrhodes13
-
Posts
31,208 -
Joined
-
Last visited
-
Days Won
1,070
Content Type
Profiles
Forums
Gallery
Articles
Everything posted by gmrhodes13
-

Dead Post Links & Broken Photos, How You Can Help
gmrhodes13 replied to Sly11's topic in Forum Help & Support
Weapons Locker General Weapons Discussion BlasTech E11 - ANH BlasTech E11 Page 15 Completed - gmrhodes13 Page 14 Completed - gmrhodes13 Page 13 Completed - gmrhodes13 -
You did state "The biceps keep wanting to kick out at a 45 degree angle" hence why I suggest adding the foam. You need to space out all our arm pieces so the gaps are more consistent. Note your shoulder straps are being pulled outwards sideways to the shoulder bells so you may need to double over the elastic or try a thicker elastic.
-
Note the image above the amount of gap between the thighs and shins, most armor kits will ideally fit up to 6' but some can supply taller shins so the gap is not as big, RT-Mod and TM do. For taller/wider troopers AM seems to suit most.
-
It is a very subtle bump, barely noticable, you could check against references in our gallery sections Also some nice comparison images here
-
They look a tad large, you could add some foam on the insides of the biceps this should help stop them kicking out sideways. With skinny arms I also have foam in my forearms and thighs.
-
The BigJasoni Captain Cardinal Build
gmrhodes13 replied to BigJasoni's topic in Captain Cardinal Build Threads
So much sanding, good luck -
Motoring along Daryl, nice work
-
Have a look at this post , yes the design is a little different in places, originally this was supposed to be TFA armor but now more matches the TLJ, some adjustments will be required. Also check with your GML as some are a little stricter than others.
-
Have a look at the first post in this thread, you must add a link to your membership profile
-
You could just rim a little off the ends of the belt, hopefully that will be enough so the 45deg corners match the belt About the gaps in the sides that's entirely up to the @Deployment Officer Team as they look after the higher levels, if you check the CRL is states. OPTIONAL Level three certification (if applicable): Ideally there no gap between the abdomen and kidney armor. I would try to reduce that gap I know the DO's like to see no gaps

-
Really depends on your funds. Most OT armor kits are gloss plastic and don't get painted, this one looks a little beaten up, have you thought of trying some polish to see if you can revive the look and remove some marks? Also looks like you have overlap construction looking at the shin, this only happens with a few versions of TK's, ANH stun or hero and ESB should be butt joined with coverstrips ROTJ are overlapped.
-
ANOVOS (DENUO NOVO) FOTK Armor Delivery Possibility
gmrhodes13 replied to JonnieBear's topic in TFA Stormtrooper
18th August 2022 Another update on the continuing pauldron saga, finally after another 2 weeks, 3 emails and messages on their FB account a response Hi Glen, We have no way of reimbursing you since we didn't take the original payment. I will have the replacement sent to you as soon as I can. Thanks and MTFBWY! Denuo Novo Customer Service No mention of returning the pauldron I have in hand I guess that's just too difficult, I will just have to wait another month or so and see if one turns up, or perhaps I may get tracking info who knows. Oh and for those wanting to compare Denuo Novo's pauldron I received with screen references, there's a few pauldrons in this video 299018916_1245061719589004_2966879741562067085_n.mp4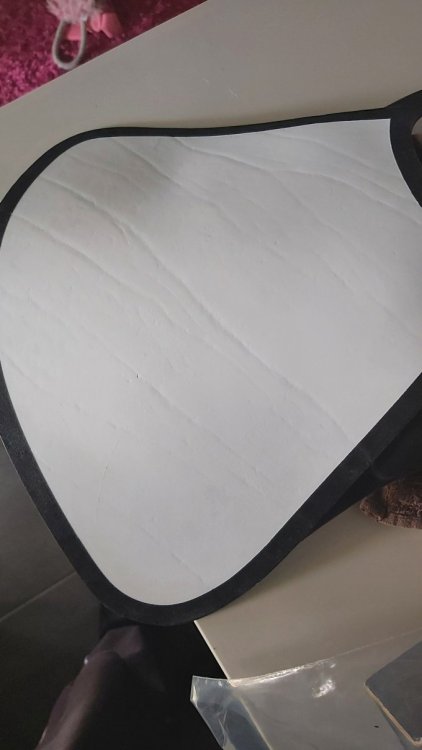
-
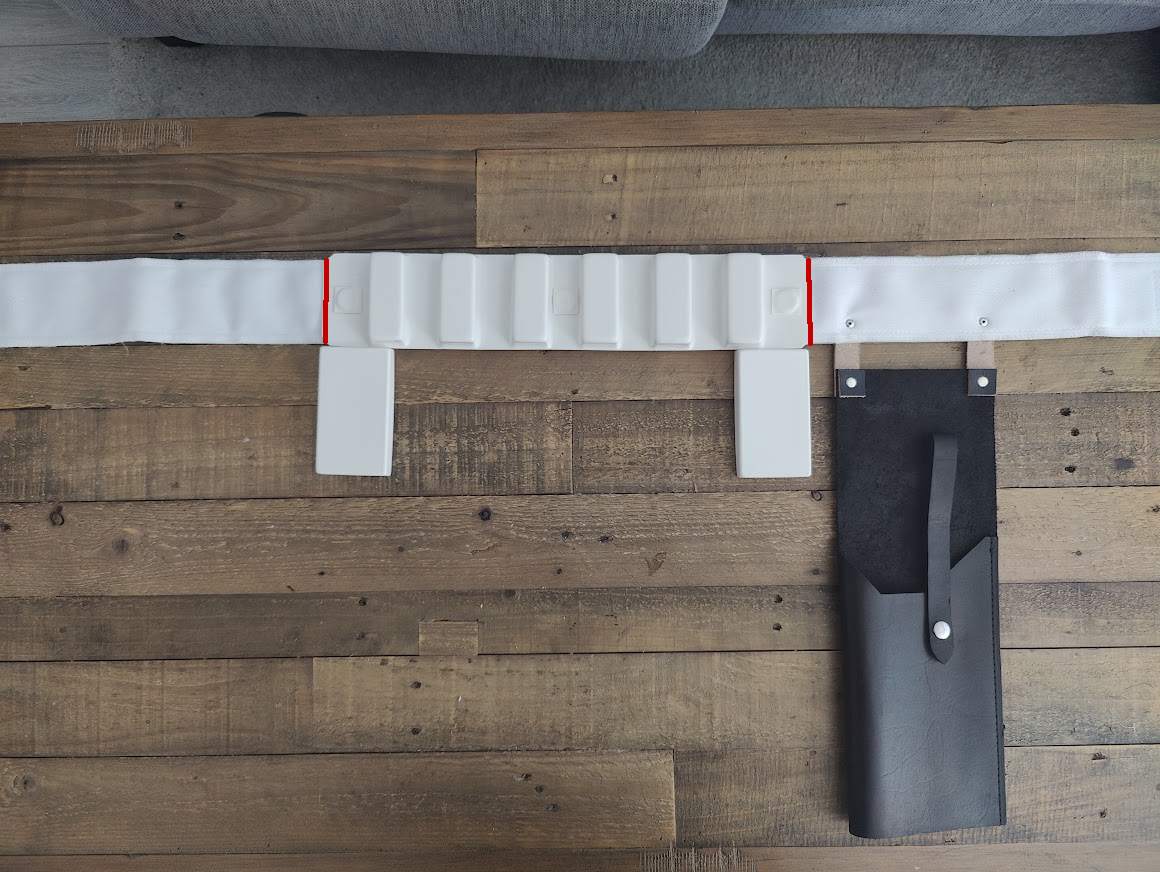
Looking good, just a few tweaks, more for higher level approval. When you take your approval photos don't have your blaster holstered Some of us add a plastic section inside the belt to try keep it level but with the weight of the blaster they can pull down/ Side shims should be ok for basic approval but for L2 and above these would have to be seamless OPTIONAL Level two certification (if applicable): Any shims used to achieve this effect are of a similar material and color as the abdomen and kidney armor. Shims fit flush and seams are allowed. Again take out that holster which should help you stand straighter, at present your shoulder straps not sitting flat on the rear. You might have to add some slightly longer elastic to the drop boxes, they appear to be sitting up tight to your belt, overlapping in some images A small piece of your neck seal is sticking up You may have to touch up the bottom of the thighs on the back for L2, notice the gaps in the middle under the T track OPTIONAL Level three certification (if applicable): Any mobility cuts on the back do not extend beyond the top of the raised ridge. Belt corners should meet the fabric belt, this is for L3 The corners of the plastic ammo belt shall be trimmed at a 45 degree angle that that meets the outer edge of the cloth belt. Blaster counter is a little far back and on a slight angle, I would probably also cut down your wiring a little Bit hard to tell if your TD screws are fully painted black, again this is for higher level approval OPTIONAL Level two certification (if applicable): Clips shall be attached with slotted type, flat or dome top style screws, and be black (two per clip) Just a few tweaks and you should be good to go
-
All good, working now
-
That would be because you uploaded them Appears you are using Google? does not work on this forum you need to use a photo host
-
Unfortunately some of your photos don't appear to be showing, many of us use Imgur a free online image host, upload your photos there then copy and paste the links into your post
-
Dead Post Links & Broken Photos, How You Can Help
gmrhodes13 replied to Sly11's topic in Forum Help & Support
Weapons Locker General Weapons Discussion BlasTech E11 - ANH BlasTech E11 Page 18 Completed - gmrhodes13 Page 17 Completed - gmrhodes13 Page 16 Completed - gmrhodes13 -
Congratulations trooper and welcome to the ranks, you can request higher TK access here
-
TK 34677 requesting ANH stunt EIB status[AM] (1047)
gmrhodes13 replied to WillJ's topic in Request Expert Infantry Status
Congratulations trooper and welcome to the EI ranks and welcome to the EI honor gallery -
Great news, nothing better than BBB's. Many find with commission builds that they have to do a few mods to strapping so you are not alone. Looks like you may need tighter strapping between your ab and chest, riding up, or it could be because you have your arms lifted. Many of use use velcro on the rear of the shins, but on some occasions you need to apply some heat so the shins will close fully, many use a hot water batch, I use a heat gun but that's with A LOT of practice, using a heat gun can be dangerous as you can go from almost pliable to molten mess. Originally the screen suits use elastic and hooks With your thighs you may be able to add larger rear coverstrips, or you may have to add some shims depending how wide you need to go. A couple of thread may be helpful You could also shape some of your coverstrips so they don't dig into you when moving Lots of helpful folk on the forum ready to assist so don't be too worried
-
Greetings from Southern Saskatchewan
gmrhodes13 replied to BAZINGA's topic in New Member Introductions
I didn't think you would be was just an example I've not been trooping much these past few years, I have some medial issues one is with my immune system so been trying to dodge the dreaded covid, so far so good but I don't venture out without a mask which I found can be a little more restricting wearing a helmet for airflow and heat build up. Like many I do a few builds to keep me occupied, having a few 3D printers makes prop work a lot easier than it used to be, recently got it to Arduino electronics which has been taking up some time, going from adding lights and sound to programmable electronics is a big step. A lot of the costuming side is hands on, you can start small and work your way up, many add additional costumes over time, being able to work on them yourself does save a lot of $'s. I guess for me whenever something new Star Wars comes out it peaks my interest, building the next prop from a new series and having it at your next troop or convention is very rewarding, especially when you hear the public commenting on them. -
ANOVOS (DENUO NOVO) FOTK Armor Delivery Possibility
gmrhodes13 replied to JonnieBear's topic in TFA Stormtrooper
I have been asked a few times about some areas which may require some work, filling, painting, FIRSTLY check with your GML as some may allow some items/details, others may not, also note the TLJ CRL is being updated and some text/images may change. Back/Yoke There are no visible seams on the back/yoke (front and rear pieces need to be glued, filled and painted). Note the overlap, this would need gluing, filled and painted Abdomen Section The abdomen section must wrap around the wearer's body without a visible seam (would need to be joined on both sides, filled and painted). Biceps Biceps have one seam that faces forward, and a seam on the inside of the arm. The rest of the bicep must be seamless (joined on sides, filled and painted). I haven't had a close up of these, I think they may be ok the way they have molded them and won't need to be filled as previous version were. Forearms Have the wrong shape at the elbows for TLJ, they are more TFA "Finn/Stunt" style (triangles pieces of plastic could be added, filled and painted). Thermal Detonator TLJ detonator center section is an inserted piece of pipe, top ridge and control panel are cut out showing the black pipe inside. This may be for higher level clearance. CRL Update discussion thread can be found here Also recent yoke discussion here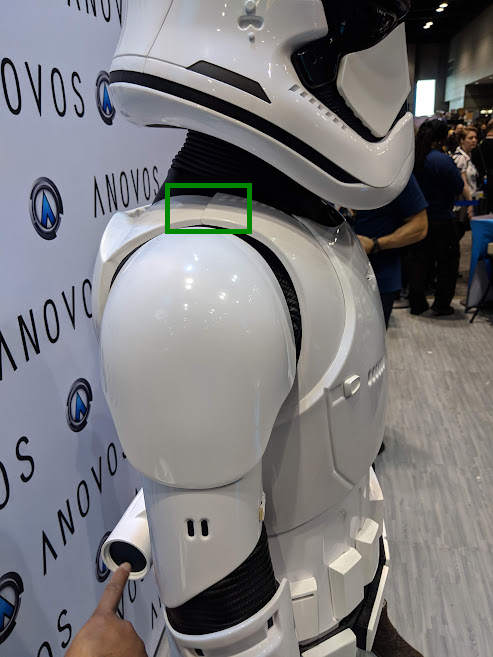

-
Greetings from Southern Saskatchewan
gmrhodes13 replied to BAZINGA's topic in New Member Introductions
Sorry to hear you don't have anyone local to troop with, I have attended several events which I sourced myself, even trooping on your own can be a rewarding experience. A visit to a hospital or care centre for children with special needs can be very rewarding. If you do want to try find some events in your area make sure you run it through your local garrison command, they may have steps you need to take and ways to post events, some other members may even make the trip out, really depends on how far they have to drive. Most of the year we can't troop at retail locations but at certain times LFL does allow a lift of these rules, one such recent is for IMAX Rogue One is playing on the 26th and for some members are able to troop at those locations, we don't have one locally so I'll be missing that. -
ANOVOS (DENUO NOVO) FOTK Armor Delivery Possibility
gmrhodes13 replied to JonnieBear's topic in TFA Stormtrooper
There are pieces that will need joining, filling and painting, some have been mentioned in this thread, also some mentioned in this one