gmrhodes13
-
Posts
31,206 -
Joined
-
Last visited
-
Days Won
1,069
Content Type
Profiles
Forums
Gallery
Articles
Everything posted by gmrhodes13
-
You could also try some automotive polish, a rag with a sharp piece of plastic can get in between the stripes, just have to be careful, I use something sharp in the rag for more control. There are other products like GooGone which gets rid of sticky residue, I would test on some scrap plastic first before attempting the helmet to make sure it doesn't melt the plastic.
-
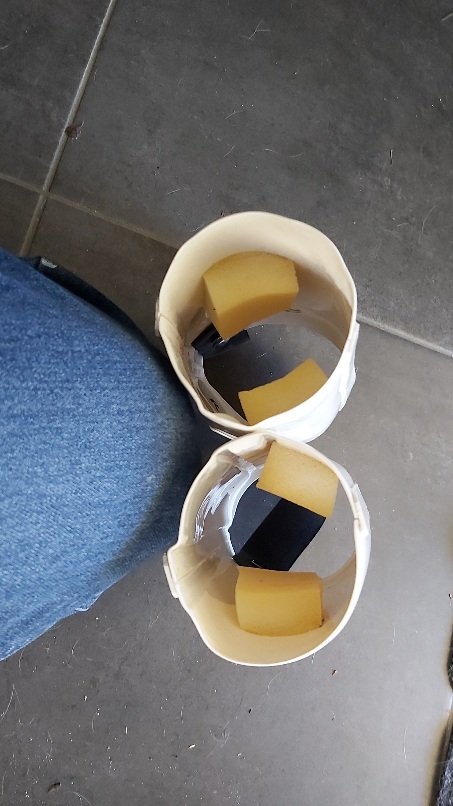
You could also use some pieces of ABS to stop the sides coming outwards
-
 Congratulations and welcome to the Expert Infantry and EI Honor Gallery
 -
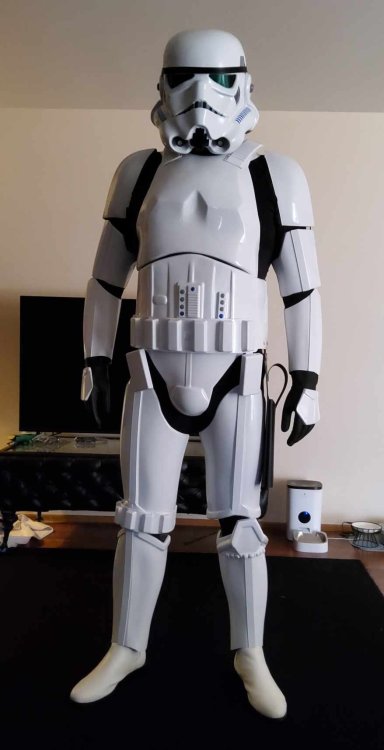
Looking good, appears you have highlighted most of your issues. Tighter strapping should help the chest to pull over the ab plate, I wouldn't heat unless you have had practice, ABS can go from pliable to molten mess in the blink of an eye. I would bring your brow trim up a little, most low brow's are Hero versions, with Stunt's being a lot higher. FYI a blaster is needed for L2 EIB approval and above Good luck and hope to see you approved very soon
-
Legacy FemTK Build Thread
gmrhodes13 replied to Eleanor's topic in Legacy Stormtrooper Build Threads
Looking good -
Sorry I don't have any photos handy, I have since sold the mannequin as droids have taken over available display space. Basically just used foam and duct tape in areas that were a bit loose.
-
Great to see you back Joseph, it's a long hard journey and coming back from the dark secluded corner is a trial for sure.
-
Hello and welcome aboard, this thread should be of help
-
Depending on your mannequin you may need to use some foam to get parts to sit correctly, biceps, forearms, thighs and such. Furniture foam (light yellow) is what I usually use.
-
Legacy FemTK Build Thread
gmrhodes13 replied to Eleanor's topic in Legacy Stormtrooper Build Threads
Using soft foam can also be used in place to keep armor in position and stop rubbing Also note in this image towards the end you see the chest piece pop up above the abdomen, perhaps tighter strapping may be needed (or don't salute ) Getting close
-
Hello and welcome, the backpack is strapped pretty much like any backpack, it does rest against the back of the armor and doesn't crack For Heavy weapons trooper the backplate rests inside the backpack Sandtroopers (MEPD forum) backpack rests against back plate
-
You can find all approvable 501st TK version CRL's here: https://databank.501st.com/databank/Costuming:FISD_CRL
-
Most feedback from members takes L3 into account, although not required for basic approval we do encourage builders to build to the higher levels hence the stricter commentary. Text and photo references is what we base our feedback on. You may notice in the CRL's the word "ideally" this gives a general outline of a specific detail or details, although our feedback may give more detailed information anything with "ideally" is open to interpretation. And in the event there is conflicting information go with what the Deployment Team say
-
Legacy FemTK Build Thread
gmrhodes13 replied to Eleanor's topic in Legacy Stormtrooper Build Threads
Coming along nicely. Just watch any sharp corners/edges they can catch and leave you with "armor bites"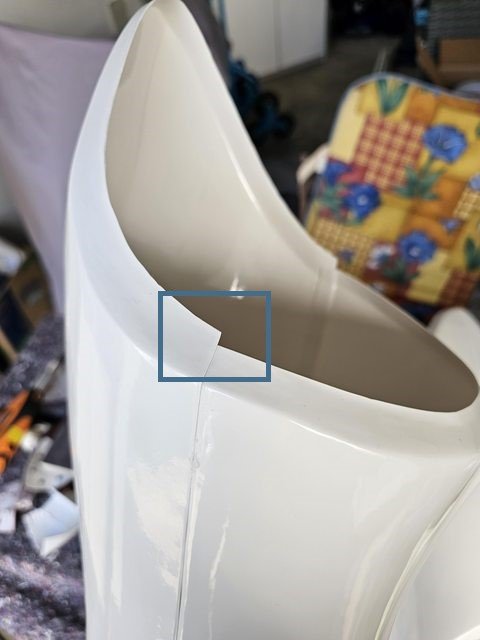
-
Almost there
-
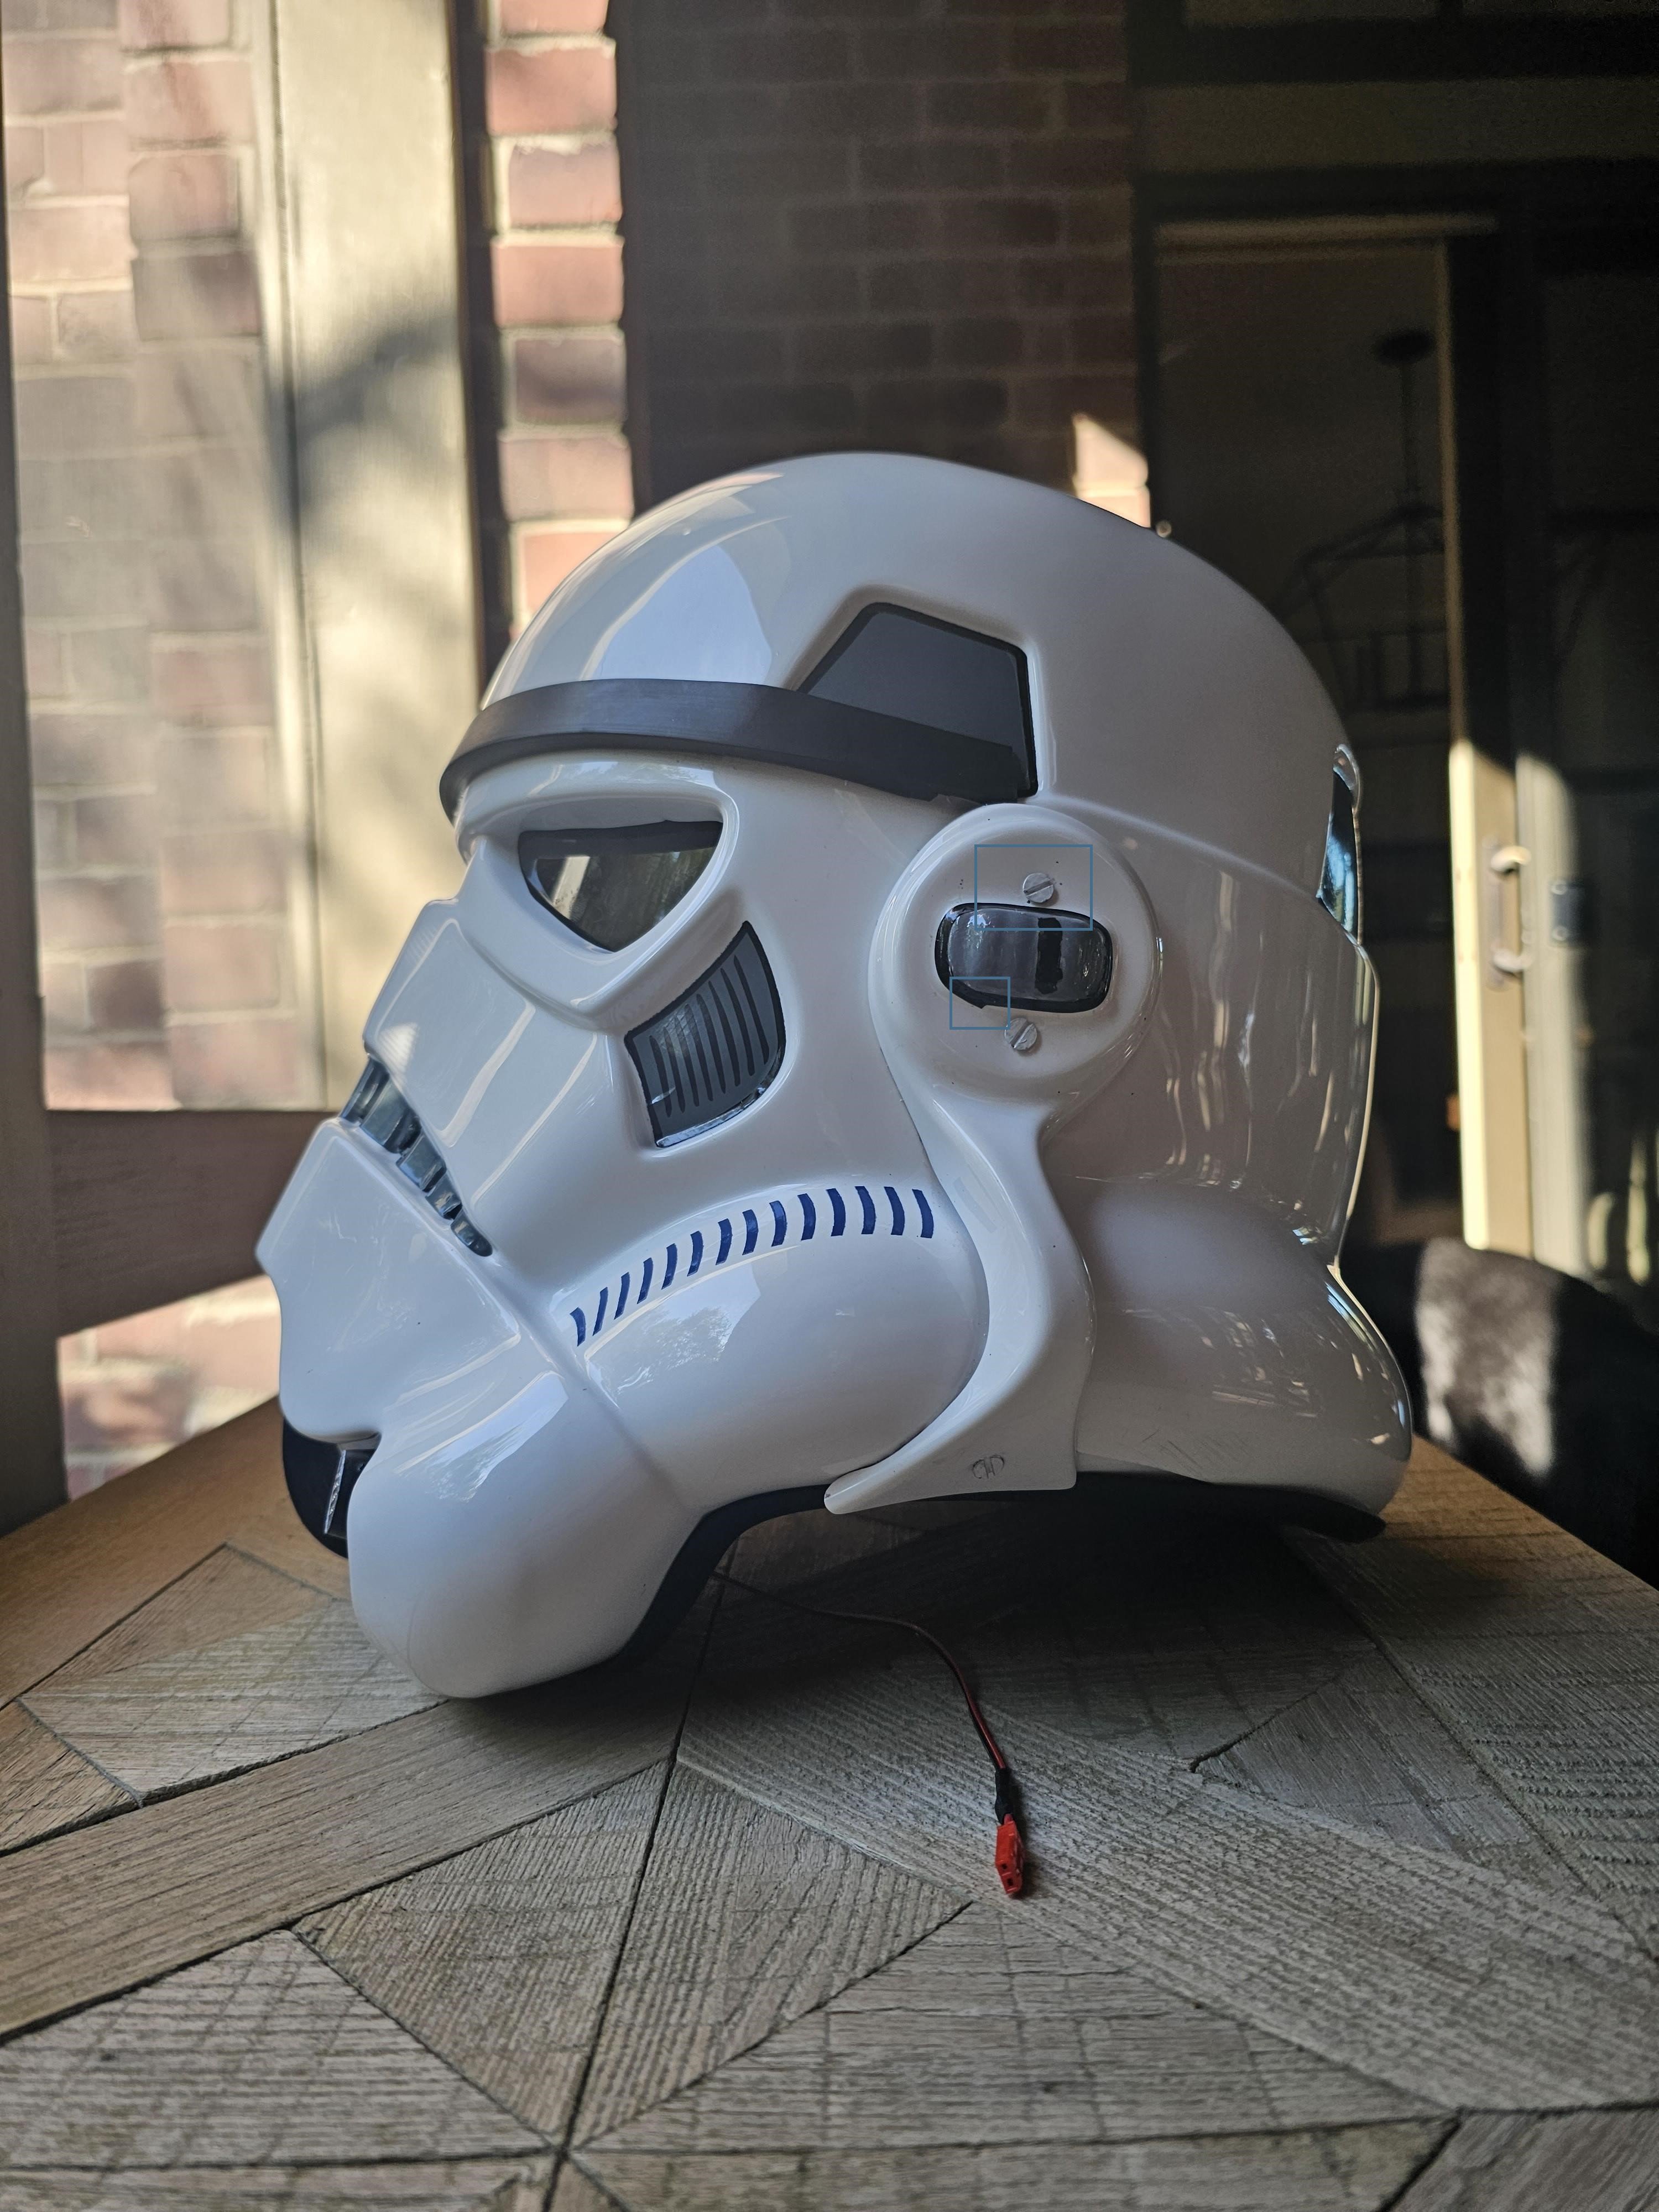
It's very hard to get stickers to follow around the ears well, many choose to paint these, just be aware you have a couple of points sticking out, also one side is rounded and the other square. For higher levels you could countersink the ear screws For Level 3, all ear screws must be "..slotted, flat-topped, countersunk and painted white".


-
Legacy FemTK Build Thread
gmrhodes13 replied to Eleanor's topic in Legacy Stormtrooper Build Threads
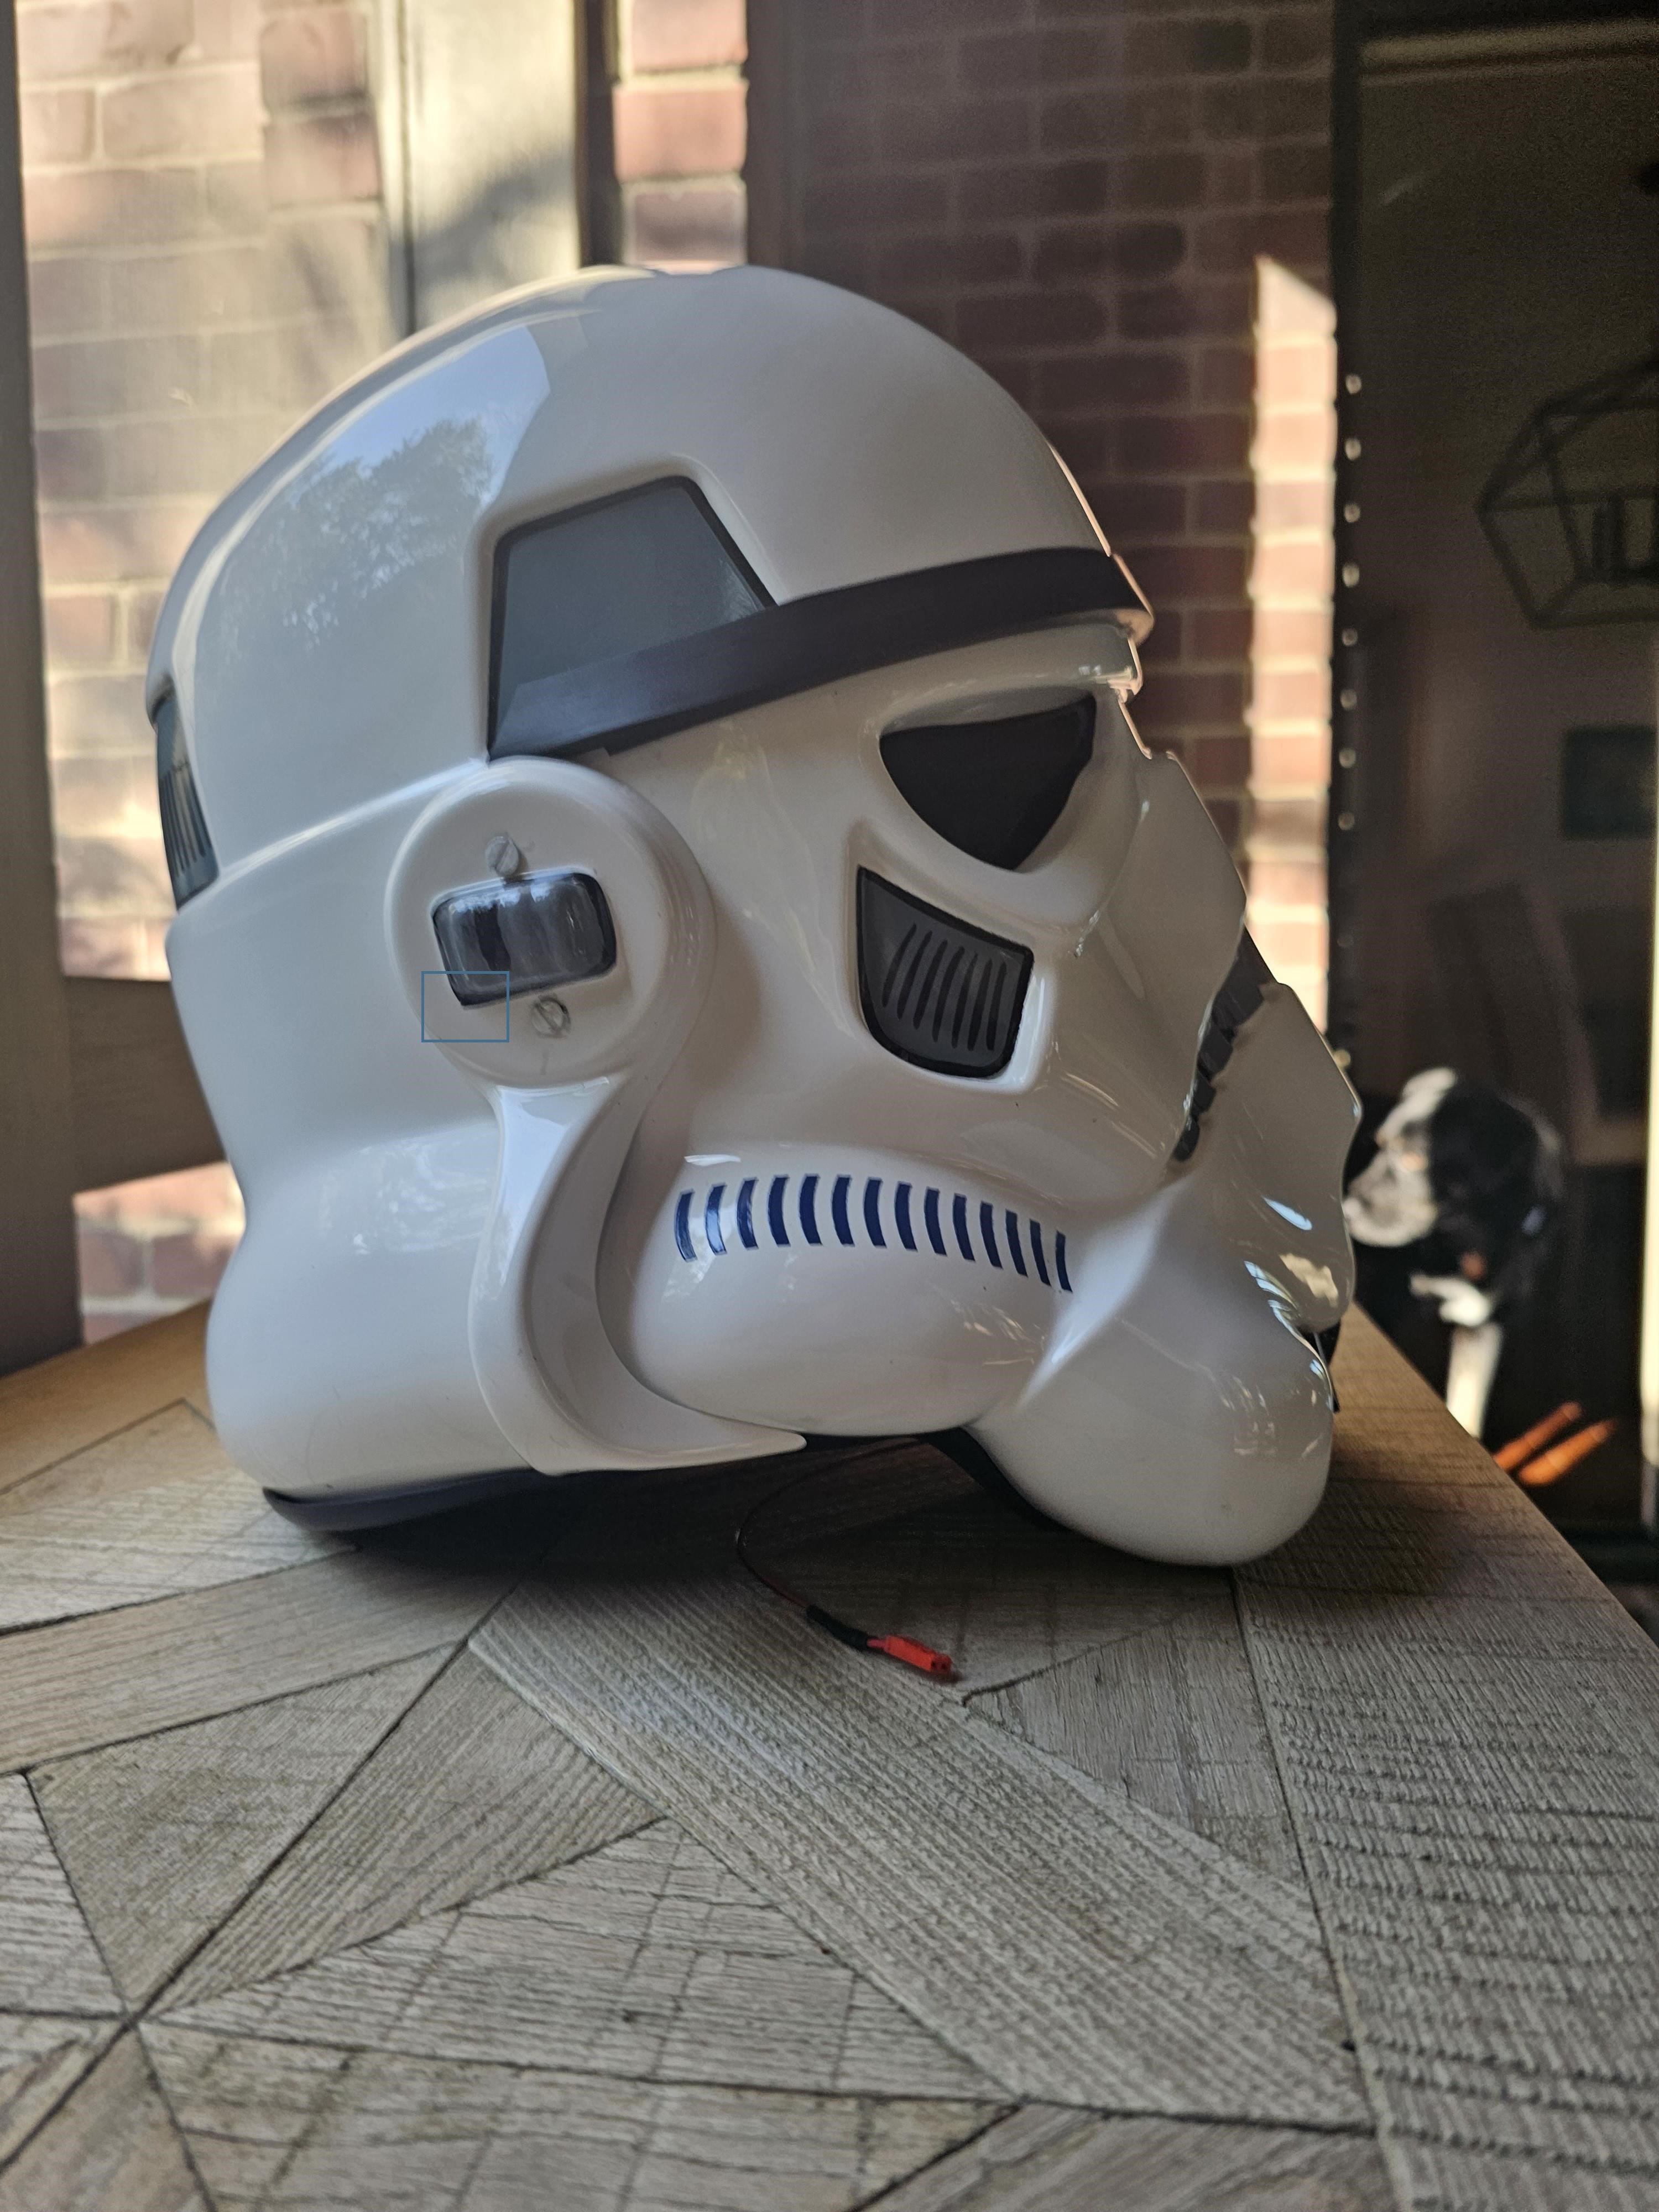
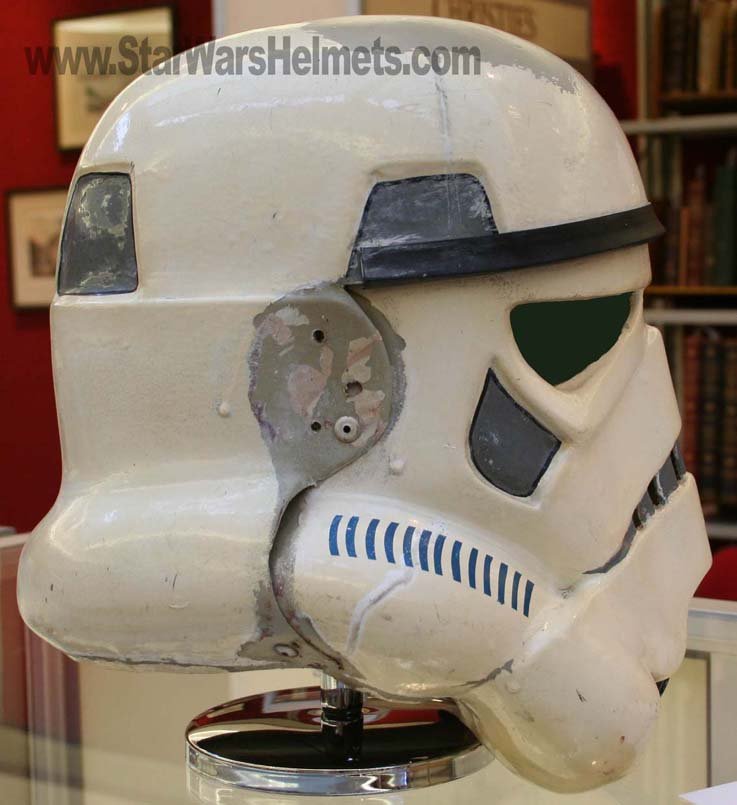
Hopefully these will help The "ideal" ear placement is as seen below, where the screws line up with the rear angle of the trap right above it. Because some armorers design their helmets differently or send them pre-assembled this is not always possible to achieve, but it is suggested that you try to get as close as you can. Note: Top ear screws should ideally be located directly below the rear of the trap.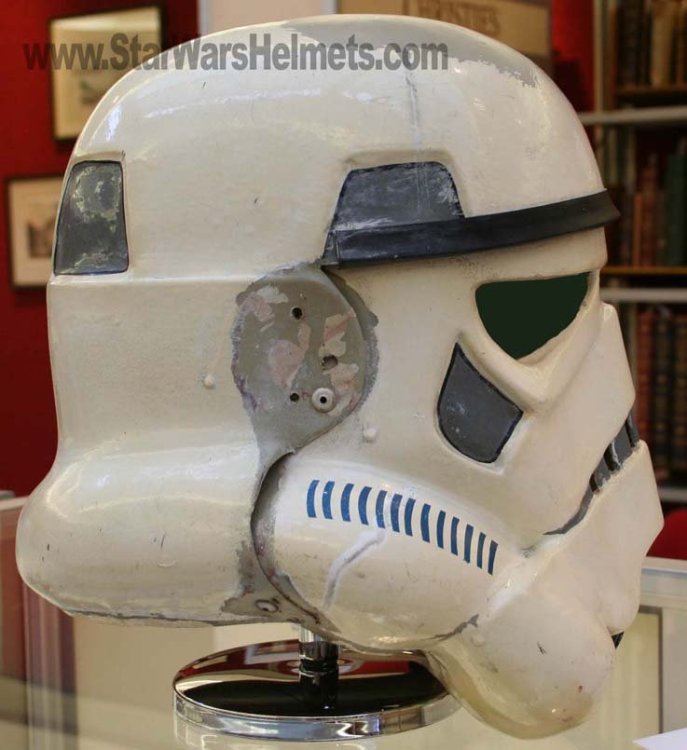
-
You can right click and copy paste or take a look at this thread, may give you another option https://www.whitearmor.net/forum/topic/48799-posting-photos-using-imgur-101/ Happy dance
-
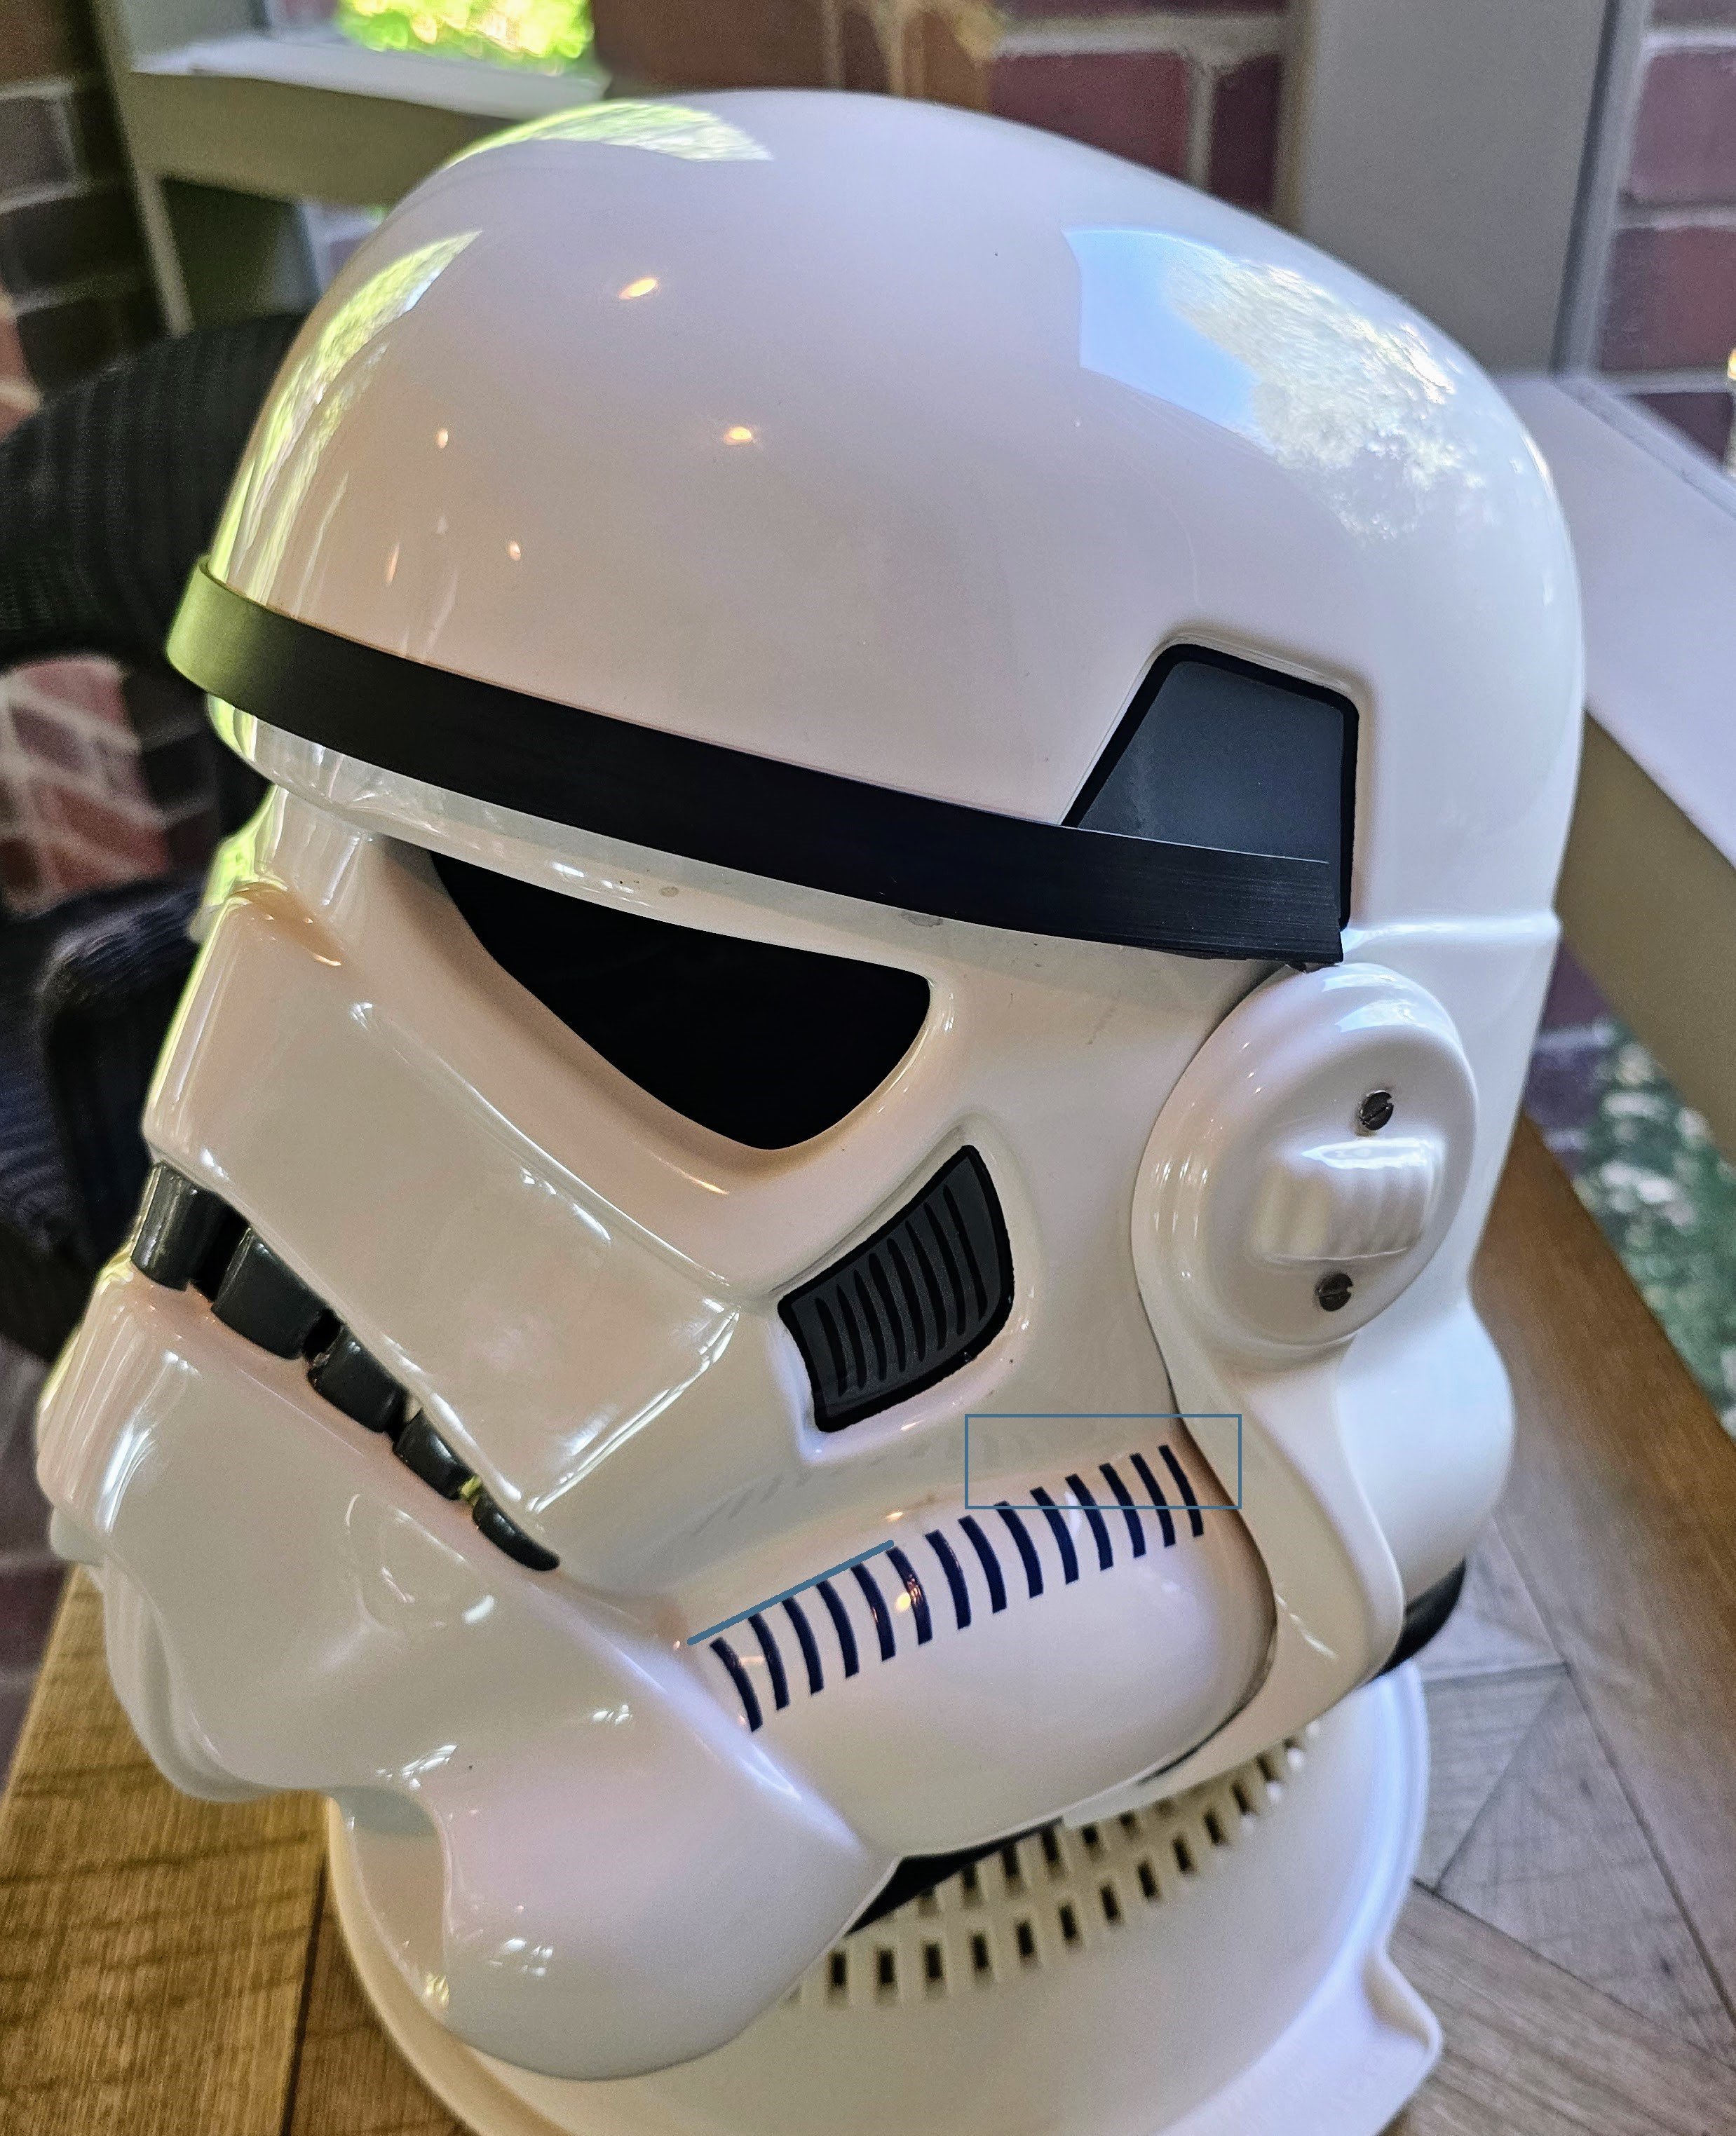
Much like you I have the same issues, a couple of things which may help, make an outline with pencil as a guide and if any of your thin lines need a tidy up try a permanent marker, you can have a little more control with a marker
-
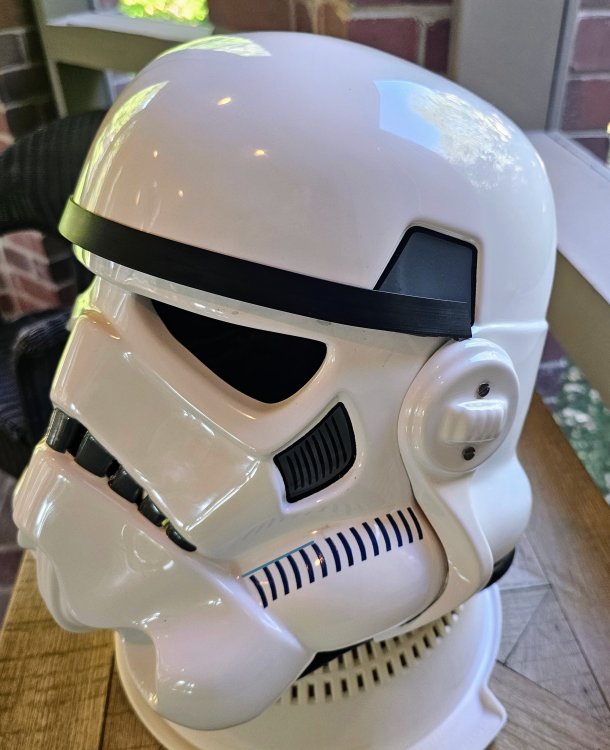
Just watch the height position, this one is a little lower Also looks as if you are really close to the cheek at the back L2: Ideally, the tube stripes are positioned approximately a pencil width from the side of the cheek.

-
Legacy FemTK Build Thread
gmrhodes13 replied to Eleanor's topic in Legacy Stormtrooper Build Threads
Off to a great start and very informative I believe trim up to that mold line, KW helmet for reference -
I would if you are thinking of going for higher level approval, it's really only the first one you have to move. I had to do this on a recruits helmet once, I used clear tape and pressed hard on the front tube stripe, gently lifted the tap and used a blade to start lifting the corner then lifted the rest off. Easy to reposition with using clear tape
-
IMPERIAL BOOTS VS TK BOOTS
gmrhodes13 replied to TK71169's topic in Boots, Soft Parts, and other Accessories
Correct -
Looking to Build an Approvable TK
gmrhodes13 replied to Tilheyra's topic in New Member Introductions
Yay, happy dance, then the panic when you realise you have to start cutting Remember the golden rules, measure twice and cut once, don't be afraid to ask questions, there is no silly questions only silly mistakes from not asking Good luck with the build -
Looking good. One thing to watch especially for higher levels is the fall of the tube stripes L2: Fall of tube stripe tops ideally lean toward the front.