


jnnfr72
-
Posts
1,541 -
Joined
-
Last visited
About jnnfr72

Recent Profile Visitors
4,572 profile views


-
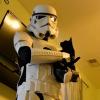
What a handsome helmet! Nice job
-
Hi! Yar, that was my sticky blaster.... tk 9496. [i kept my good blaster that I bought from TKBondsrvnt.] Found it - I paid $190 to Ronime Studios Feb 20th 2013. I am sorry it's sticky... I tried to 'splain that in the sale thread. Here's what I found on the internet: https://www.facebook.com/THGProps/ Transaction ID 84K84099A0715241M
-

TK 30307 Requesting ANH Stunt EIB Status [AP] [529]
jnnfr72 replied to JodoYodo's topic in Request Expert Infantry Status
Very nice looking armor! Awesome job. -
As I like to say (about that dad and kid) ... RUUUUU!
-
I'd like to say that is unbelievable, but sadly - I can believe it! Sorry you got junk punched. My only weird experience was a few years ago. I was holding my expensive DSL camera - trying to get some pics of my garrison mates. I started getting swatted at + grabbed by 1 kid at a toys-for-tots event. I just kept backing up from this pre-teen boy who had his hands all over me. I kept my camera above his head while his mother kept telling him to stop - to no avail. I'm not sure if he had some developmental issues or if he was a punk, so I walked away and put my camera back in my car. My TK friend came looking for me to make sure I was ok - which I was. I was so thankful I had my armor on! Yah... never troop alone! p.s. Thanks Mark Williams, if you are reading this!
-
Nice job so far Brad! Congrats on your ATA... sorry 'bout the wait. I saw this, and thought you might get some use from it. There's lots of info.. just have to dig - which sometimes takes hours! http://www.whitearmor.net/forum/topic/14806-how-to-assembling-ata-abs-helmet-1/ Cheers!
-
Nice job! Congrats to Jennifer Those are how my boots look. I went with the statue version, so those boots were ok by my gml. Only us nerds will notice - the shoulder bells probably need pulled forward a bit. I had to keep tweaking my bells and thighs and knees. This looks very awesome! YAY!!!!
-
Looking good! Congrats on your new build, and congrats to your wife!
-
Hey Cotton! I went through both of my ears, and decided on the last set that I'm just going to have some gaps. I agree with Bobby.... you can ask your GML. My GML was very helpful, and I made 3 revisions before getting approved. I kept shaving off plastic on the straight flat parts of the ears, which helped the curved parts fit a bit closer. I still have gaps, but I'm living with it. I spent about 50% of my build time being frustrated, but it worked out in the end. Just keep at it, we know you can do it! Cheers, Jenny
-
Hey Girlie! That's a cute pic! Your armor build was similar to mine. I agree - looks like you could make the thighs smaller, but raising them 1st might do the trick. I had my thighs (Thunder and Lightning ... haa haa ) all glued, and realized they needed to be tighter after several try ons. I took it as a VICTORY! I am still adjusting the AB... it's been a P.I.T.A. since the very beginning. And, I also cut off an inch or 2 from my forearms, too. I cut off from the elbow area, not the wrist. My right calf is bigger than my left and I added extra shims to the right side. I made abs paste - and from up close it looks horrible, but from 5 feet away... no one has said anything. Maybe everybody is just being nice... either way - it works. I love seeing your progress. Keep up the good work! Troop on little Trooper!
-
You look amazing. I don't know about being able to see the ab/kidney peeking out on your side area when you lift your arm up.... I wouldn't think it matters too much. It's white plastic - so I wouldn't think it matters if it's the chest plate or the ab/kidney plate? I went with the comic version, but I like both versions! It's nice to have options. Have fun at your outing and post us some pics of all your shiny white awesomeness.
-
Hi Jen - my namesake! You are doing an AMAZING JOB! Your build will help lots of us ladies who do not quite fit in Kevin's original design. I like how precise and neat you build. You are so organized!!! I have felt your pain with the try-ons, then the temper trantrums, then the pouting.. then deciding to try again. You'll be trooping in no time. Get lots of pics and share them here for us. Cheers! Jenny in Georgia
-
Jes Gistang [KWDesigns] build thread
jnnfr72 replied to jnnfr72's topic in Build Threads Requireing Maintenance
UPDATE - I am approved! Yay! In case some future Legacy builders are struggling, like I did, here's an inside view of what I did. I'm sure there are way better ways to build, but I just kept trying things until it worked. * DONT GIVE UP - YOU CAN DO IT!!! * I've re-done the strapping, painting, put holes in the ab plate, changed my mind... E6000-ed... rubbed off the E6000... and then re-E6000-ed again. I permantly attached the chest to the ab plate, and permantly attached the left ab side to the kidney plate, like a clamshell. The back plate is permantly attached to the kidney plate. I basically cut off the top inch of my ab plate - like they say NOT TO DO. Well, I was so frustrated, and it just worked for me - thank the armor gods. Here's some pics. WARNING - These are scary! I'm not saying MY way is the way to go... I'm just saying ~ Don't give up little Troopers! You can get through this. I took off my hand painting, which basically was horrible, and bought the stickers. I really wanted to say "it's all hand painted" but I had to admit defeat and move along... Attached knee piece to shin piece and added padding inside the knee... I should have used black elastic... but I black markered it.. and now the black ink keeps rubbing off. Arggh! haa haa.. Oh - i made the elastic strip too long... so then i went back and made it shorter by sewing. Belt had to get hooks. I discovered that I LOVE hook - n- eye closures. I made the elastic strip longer b/c I have a hard time seeing down the chest and the extra length seems to help. I am able to twist my belt 1/4 way around, hook that sucker, then twist it back into place. see how there's extra velcro on most pieces ... i just add more strapping over what i previously tried... More hooks attached to the inside ab plate. At the top of the ab plate you can see where I bent the top over and it cracked, but it cannot be seen. This crazy mess is the inside of the back plate connected with black nylon strapping, where I used snaps. Next, I used old blue rings from my chain mail project. I E6000-ed them to the back plate and used white elastic to tie the back plate and kidney plate together. They are basically always tied together. You can see a long white elastic strip with the hook hanging. There are 2, which I glued to the right side kidney plate, and the closure bars are glued to the middle of the inside AB plate. This shows the clam-shell approach I ended up with.... I still have blue painters tape to take off from my recent changes. Chest and back plates are attached with snaps, there are holes in my kidney plate from who knows what I tried... and it looks crazy, but it functions. Here's my shoulder bells and biceps. I added more velcro and moved each bicep slightly more forward, which helped secure the bells so they looked better. Hope this can help somebody. I've had lots of help on these forums and from Chris. He's my GA garrison GML and he was so nice - I didnt even cry once! haa haa I needed to make adjustments on my wonky thermal det... I ended up re-E6000-ing it two times. I decided on buying the cheek stickers from trooperbay after 2 attempts at hand painting them. I'm glad I gave up that battle. It got too frustrating. Oh, I ended up adding the elastic strapping with hook - n - eye closures for both legs - and Chris was right... all those things needed fixed. I could use some more padding and adjustments to my helmet, so I will work on that next. Thanks for reading. Cheers to all the troopers! -
Hi Michael! My hubby is 6'4" - about 220.... I got him Canadian armour from RTMod and I did not have much to trim and did not have to add any shims or extra abs plastic. Check out work in progress posts to help you decide, but don't forget that you can keep adding shims and make your own abs paste to modify any armor. I have made my own paste, and I'm not very good at keeping it smooth and lump free, but I don't have much practice, either! Good luck and enjoy your armor build!! Cheers, Jenny
-
Jes Gistang [KWDesigns] build thread
jnnfr72 replied to jnnfr72's topic in Build Threads Requireing Maintenance
Thanks everybody. I appreciate your guidance and support. Those shoulders were giving me fits in my test run. I 'bout forgot about them! I'll be adding some hidden elastic and re-doing my helmet padding. Oh - my shin armor has this very loud and annoying squeak when I walk. It's rubbing on my boots. I think I'll try adding some cloth type fabric to the lower inner shin part to reduce the noise. I still don't think I can sneak up on anybody though. I'm waiting on more helmet trim to get here since I cut too much off the brow trim. Also, my belt seems to be barely holding on, so I'll need to figure out how to secure it a bit more. I carry my white duct tape for every troop, so in a pinch... that'll do, but I need to find a permanent fix. Oh... and I just remembered I want to add a little bit of padding behind my knees so they don't tuck under the shins. Looks like I've just made my to-do list. Cheers! Jenny
