


RogueTrooper
-
Posts
4,222 -
Joined
-
Last visited
Content Type
Profiles
Forums
Gallery
Articles
Everything posted by RogueTrooper
-
How tall were the 1977 TK’s from ANH.
RogueTrooper replied to LEGENDDAN's topic in Build Threads Requireing Maintenance
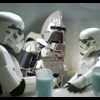
A theory of mine is, they wanted Vader to look more menacing by have the TKs and/or everyone around him to be much shorter. If you have ever seen a tall 501st TK standing beside a 501st Vader, the Vader doesn't look that impressive, or is it, most impressive. See how they picked a shorter TK to stand beside Vader in this scene. This is to give Vader a larger presence. It is all about the magic behind the movies. -
You can find all info/tutorials in the "Reception Center" Here is the first link to get you started: Chest Armor You will find the rest of the "various parts" links on the left side of the "Chest Armor" page link I gave you. Also, here is the links to the 501st CRL: https://databank.501st.com/databank/Costuming:FISD_CRL I like the way the 501st site has a fast "one page" break down of all the "various parts" ( info with the image). I think it helps people new to this understand it quickly. That is why I gave you the 501st.com links too.
-
How tall were the 1977 TK’s from ANH.
RogueTrooper replied to LEGENDDAN's topic in Build Threads Requireing Maintenance
I read where Lucas preferred the person in the Stormtrooper suit to be 5'10". He liked the way the armor fitted a person that size. But, as you can see in the photos below, the people playing them were all different heights. I guess Lucas didn't tell the casting director to send out a call for anyone 5'10" X number of pounds. I know that they do this in the movies when they are casting for parts for extras or a certain type. If we are talking about Hamill, he is not what his bio says 5'9". All actors exaggerate things about themselves and the number one thing is usually height. You can tell that Hamill is not tall because of his chest piece being trimmed much shorter so you can see his AB plate. As for anybody that actually did play a Stormtrooper in the OT, meeting them now and trying to get an idea of what their height was 30 plus years ago would be hard, because as you get older your body compresses and thus you height shortens. So their height 30 years ago is not what it is now. -
Hey John, I hope you have a fun B-day mate!
-
Plus, I don't think that doing this would be that difficult of a process for the FISD CRL. I too have a form of dyslexia and know where you are coming from, Mason.
-
The one thing that I think would be a help to the new FISD members is to update our CRL with the breakdown of the verbal information with a reference picture of that component or piece, like what they did on 501st.com and MEPD. I think a lot of people process the information better if they have a visual and it doesn't overwhelm them. I know our CRL does have sub-links to the breakdowns of the armor/weapons/accessories with tutorials, tips, etc. and at the very bottom has reference photos that you can download. But it is not as helpful as it would be if the verbal information had an immediate visual for a guide. Take a look at the three different CRL links from the 501st.com, MEPD.net, and Whitearmor.net. You will see what I am talking about as to how the 501st and the MEPD have done theirs. I think this would be a big help for new members here to have the visual with the break down of the verbal. FISD CRL link for ANH Stunt TK 501st.com CRL link for ANH Stunt TK MEPD.net CRL link for the TD There is saying: "A picture is worth a thousand words"
-
Welcome aboard Xilian, make yourself at home. Do as much research as you can (Look at the How Tos, tips, and the different builds) that is the key to help you find the right kit for you. BTW, it is customary to introduce yourself and tell a little about yourself and how you found this forum in the New Member Introductions Section. This is so the members here can welcome you and get to know you little bit.
-
First of all, I see that this is your first post. So, I would like to welcome you to the FISD, Josh. BTW, it is customary to introduce yourself and tell a little about yourself and how you found this forum in the----------This is so the members here can welcome you and get to know you little bit. As for your question about red primer, most companies (Krylon, Rustoleum and Valspar, to name a few) make "Red Oxide Primer" which is what was used on the original HDPE lids back in '76. If you can't find it at your local home improvement or hardware store, then look up or Google Pro Paint Shops in your area. Contact them and ask them if they carry it. Any Pro Paint Shop worth their salt will carry a brand of "Red Oxide Primer" .
-
FYI, as long as you don't use boiling water, just hot water from the faucet, the hot water from the faucet is fine for this process and will not harm the plastic.
-
I saw some minor flaws just like Mark did. These can be easily corrected and pictures taken. The one other thing that I didn't see is a close up of the Hovi's. I remember you wearing this armor at C5 and it didn't have any major problems that day and you were actually one of the better TK's in the group in that trooping. I think this will help a lot of other people that have been through or will be going through this process to understand that it is a learning experience that is not mistake proof. Look forward to seeing you get your ESB EI.
-
We all know that some of the helmets were painted with the ears attached, because of the pictures that we see of the Sandtrooper Helmets on starwarshelmets.com. You can see the silhouette or non-painted area where the ears were attached. In the filming schedule the Tatooine/Tunisia scenes were to be filmed first. Ainsworth only had enough time to vac-form and get to them what they had to have in time for their departure to Tunisia. I think by the time they started doing the regular TK's, how they assembled and painted things had changed. A theory of mine was that since the ears were made of white ABS and the Stunt Helmets were made from the khaki green HDPE, they could have, with some of these helmets, just painted the whole helmet and then attached the ears, then touched up the bolts with white paint and then the ear centers painted grey, with the black trim and marks. Thus, my theory of why you are seeing some of the ears attached with unpainted bolts holding them on and Stunt Helmets painted fully white, without ears in the picture with all of the helmets stacked up in front of Sheppeton Design Studio.
-
That's what I saw, a cave man painting of a billy goat. Thanks Gra, I started thinking I was the only one that saw it. Try this Caleb: Pine Sol paint removal from plastic. When removing more permanent paint such as a spray paint, some drastic measures will be needed. The gentlest method I know of involves soaking the plastic in a solution of hot water and pine cleaner such as Pine Sol. The oil in the Pine Sol loosens the paint and makes it easier to remove. After soaking, use a soft wet cloth or brush to gently rub the plastic and remove the paint.
-
Slacker's Armor Build [*VT]
RogueTrooper replied to Slacker's topic in Build Threads Requireing Maintenance
When you are wearing the white armor, your mobility is somewhat restricted. If you can, please post pix, that will help us to give you our opinion if you are wearing the thighs in the correct position or let you know if you if you need to trim them. -
Looks good Andy As for the paint, go with the Krylon primer and gloss White enamel. The new Krylon aerosol paint cans have a new spray nozzle to them that helps with a more even spray pattern to give a better and more even finish. Also, look into getting a pistol grip handle that snaps onto the aerosol can. It eliminates finger fatigue and will improve accuracy and control, Plus no more paint on your finger tips. The snap on style pistol grip handles start at $2.99 - $10.00. You can find them at your local hareware/home improvement stores.
-
size of side rivits on ab?
RogueTrooper replied to PGHtrooper21's topic in Boots, Soft Parts, and other Accessories
I like this version much better than what is there now. But, I would change in this one sentence One male snap on the top back corner of the right side of the ab plate. Back side of a 15mm male snap should be facing outward. Patternless snap is prefered. I didn't know if you have had time to ponder my question that I posted above about this being an EI must have. -
size of side rivits on ab?
RogueTrooper replied to PGHtrooper21's topic in Boots, Soft Parts, and other Accessories
Hey Andy, If you want my opinion, none of the above. They are all too large compared to the originals. Have a look at this link:-----------Jack ( 1970si ) has found some rivets that are closer to the size and style of what you are looking for. BTW, the original flower rivets are approximatley 3/8" (9mm). Hope it helps, good luck. -
HDPE lid, thanks, now my fav, comments !
RogueTrooper replied to tk7713gra30's topic in Build Threads Requireing Maintenance
Great work Graham, your lid has got the rugged look of the screen used lids. I have always like that as well I can wait to see it finish. -
size of side rivits on ab?
RogueTrooper replied to PGHtrooper21's topic in Boots, Soft Parts, and other Accessories
I like the condensed version as you described, but I am one for detail, as you can well tell. The only things that I see that is lacking in the condensed version is the size of the rivets and snap and the direction the snap should face. * 6 white solid cap rivets approximatley 3/8" (9mm) matching what was seen on screen mounted on the left side ab/kidney plates (3 on the ab, 3 on the kidney) * Single male snap approximately 5/8" (15mm) facing inward on the top right back corner edge of the ab plate. Here is something that I think would be helpful, but I don't know if you want to take the time. Adding a small visual beside each little description, instead of leaving it all at the bottom of the page of the CRL and EIB. I think it would help newcomers and wouldn't overwhelm anyone who is trying to get a grasp on each part. One more point, since it seems more people are taking an interest in being screen accurate, is there ever going to be a chance that the rivets and snap that we have been talking about will be EI must have and not a should have and let the CRL stay like it is, a should have? I know what I said above is probably opening a can of worms and people will be throwing rocks at me for suggesting it, especially the ones that already have their EIB that didn't do the rivets and snap. But they could be allowed time to update their suit or just "Grandfather" them in and make the requirement from a certain date forward. The only reason I am saying this is the EI holds to a higher standard than the CRL. Just my 2 cents. -
Looks like you are going to have some fun with this one Caleb. BTW, Is it me, or does the sanded/removed paint (grey out line) look a little like a billy goat? and no I have not been drinking....
-
size of side rivits on ab?
RogueTrooper replied to PGHtrooper21's topic in Boots, Soft Parts, and other Accessories
If I may interject my two cents worth, Paul; you gave me a great base to work with, I just tweaked it and added some additional info to help the description. Here is my rendition: *Left side of armor should have six rivets, approximately 3/8†(9mm) in diameter. They should be white or painted white. Split rivets are preferred as they should have solid caps. Three each go on the ab plate and three each on the kidney plate and are equally spaced along the depth of the ab and kidney plate. The three rivets on the ab plate should mirror the three rivets on the kidney plate. These rivets should be placed approximately 10mm from the vertical edges of the ab and kidney plate. *There is one male snap, approximately 15mm in diameter, on the right hand side of the torso, at the top back corner edge of the ab plate. The spacing of the one male snap should be spaced approximately 15mm from the top edge and 10mm from the side/vertical edge of the right hand side of the ab plate. The 15mm male snap is positioned with the back side out. Camping snaps without text or patterns will look best. -
If you want the best sharpest lines, use what pro-painters use when they are masking off for doing pin striping and other design work for automobile and bike paint. It is a rubberized, very flexible. striping tape. You can only get this at pro-paint shops, like Sherwin Williams or DuPont. You will not find this style of tape at your hardware/home improvement store or any automotive supply store, like Pep Boys, Advanced Auto, etc. The tape is like rubber and keeps paint from bleeding through it, and has a very clean edge to give a pro finish. This tape comes in widths from 1/16" to 1". BTW, this is not the pin striping decals that self adheres to the vehicle. Here is a couple of pix of one of the rolls that I have (width 1/4"): Just look up you local pro-paint stores in your area and ask them about the tape. .
-
TIP: Sturdier Aerators for the Skullworx Speakers
RogueTrooper replied to gilbert's topic in Tutorials, Tips and HOWTOs
Cool tip Gilbert. Thanks for posting it. -
After you are finished Assembling and painting the details of your AP lid, you can protect the ABS and paint by using a UV protected car wax. The car wax will not only give a lustre, but it will also help protect the ABS and painted details from becoming yellowed or faded. Just a tip..
-
Name of this Trooper armor?
RogueTrooper replied to Stvbosel's topic in Hard Armor (General Discussion)
Part 3 -
Name of this Trooper armor?
RogueTrooper replied to Stvbosel's topic in Hard Armor (General Discussion)
you also might like seeing this from Skygunbro. PART 1 PART 2