Leaderboard


Popular Content
Showing content with the highest reputation on 09/14/2025 in all areas
-
Added some larger patches of gold. Weathered the midsection and checked how it all looks together and..... Aren´t you a little short for a Stormtrooper..?2 points
-
I ordered 3D files from Galactic Armory. I friend of mine printed them for me, mostly in back, but the bipod was grey. The bipod legs and the main housing were too big for the printer so they had to be printed in two separate parts. I sanded everything down. The print lines were vey fine so the sanding wasn't overwhelming. I used some scraps from my RO TK build to make inserts that I put inside the bipod legs in order to support them when I cemented them together with J-B Weld. I also cemented the main housing piece together. For both of them, I used some Bondo Spot Putty to fill the small seam. Once sanded, I first primed the inner barrel with Rust-oleum flat gray. I then painted them with Rust-Oleum flat black. I knew that once the barrel was built, it would be difficult to fully paint those inner barrels. I then primed all the pieces of the outer barrel and the main housing and stock. I built the two pieces (front barrel and housing/stock) and painted them flat black. I then used pure graphite powder and brushed it onto all the "metal" parts except the stock. I left that flat black. In order to make travel easier, I left the two main parts as separate pieces. I used two pieces of 1/2 inch aluminum tube and a 3/8 inch solid aluminum rod to make an insert to stabilize the blaster and to give it a little more weight. I put a rubber stopper down the front of the barrel so the aluminum rod would not slip out. I also made the rod into two parts, one with the aluminum rod glued into the tube and an additional tube that slid over about 7 inches of exposed inner rod. Together they fit into the inside of the blaster. The completed DLT19 was approved for use by my GMLs. It's good to go for New Hampshire Comic Con with the New England Garrison this coming weekend!1 point
-
Yeah I just figured since they are hard parts and connected it’s plausible although a bit unexpected1 point
-
Hello! Welcome to FISD1 point
-
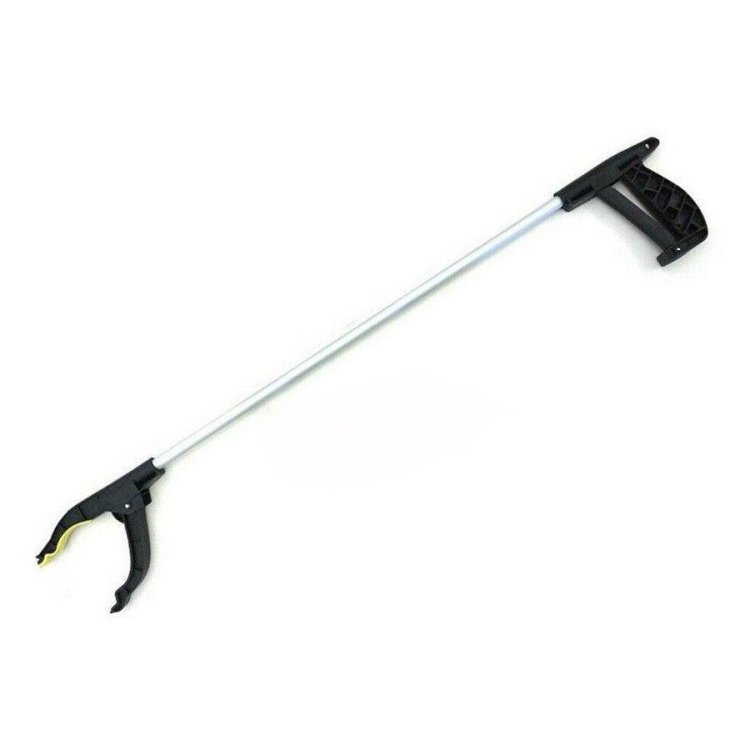
I have the same tool and did exactly the same thing on my first use, in the end I added a piece of elastic to the handle with a loop so I can have it around my wrist and I also added a magnet on the end and glued a magnet inside my glove, the magnets usually attract enough so I don't have to bend all the way down.
 1 point
 -
Side story: I had an issue dropping small things (gloves, etc.) while suiting up. Since bending over/kneeling down in full armor can be a pain I bought one of those grab sticks with the clamp on the end to reach anything that fell on the ground. On my next troop, the first thing that fell on the ground was the grab stick.
 1 point
 -
Welcome Ventura! Bienvenido Ventura!1 point
-
Welcome Ventura1 point
-
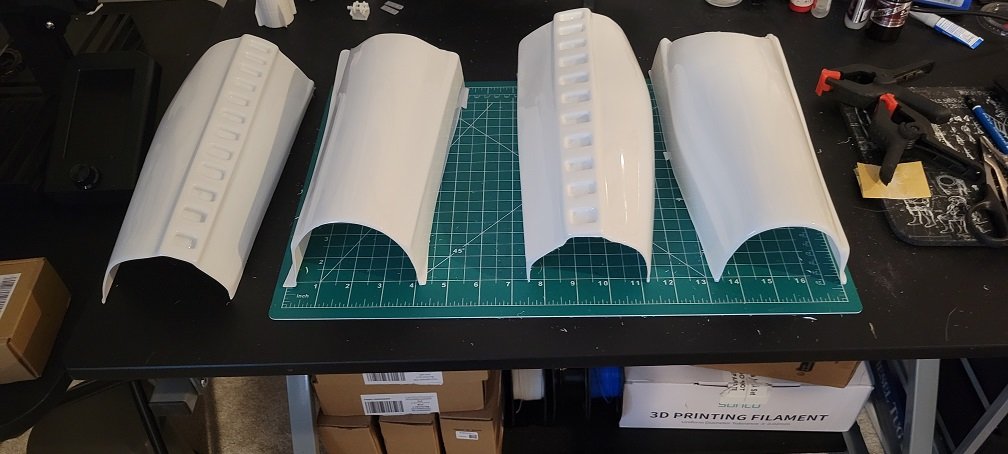
Starting the trimming of the forearms. Once the trimming is done, I'll start fitting and assembly the biceps and forearms. I promised my wife I would start on mine and learn the process (AKA make all the mistakes) before starting hers!
 1 point