Leaderboard


Popular Content
Showing content with the highest reputation on 04/08/2025 in Posts
-
Thank you to all the members that contributed. We have reached our goal, and have locked this thread, so no further donations are needed for this campaign. Thank you again for this amazing community for pitching in to keep this forum run!5 points
-
Totally missed this thread somehow! Sent! ID: 24M40245W8496632S3 points
-
I managed to get the shoulder bridges off the chest plate with minimal struggle. The chest plate got a little scratched up when I went in there, but hoping to take some Novus to it to clean it up. I will use the aforementioned method of making my bridges super strong! Because my shoulder bridges had somewhat undesirable curves to begin with, mainly because the tabs on the chest plate don’t very well line up with the ones on the back plate, I decided instead to form the support the “right” way, then glue the bridges to it instead of the other way around. I still had the ⅛” thick ABS sheet from the TK kit that I used for cover strips. I figured I could use it as a strong base for each shoulder bridge. The trick was to get the ABS cut and then shaped into curves so the bridges could be glued to them without trying to first glue and then bend, which won’t work. Overall, this would mean that the bridge assembly is on the thicker side, but I don’t see anything in the CRL about it needing to be any particular thickness. I had an old 6” curve mold from a previous project, which I again used to shape the ABS. 6” happens to be just about right, give or take. I first tried the water bath method, allowing some water in a glass bread baking dish to get to full boil in the microwave, then immersing the strip in it for several minutes, and quickly pushing it into the mold. This really didn’t work. The strip sprang back quite a bit to maybe a 12” diameter curvature. The glass transition point (Tg) of ABS is 221 degrees Fahrenheit, so that’s just above what boiling water can provide. So, I lined the cookie sheet of my toaster oven with foil, set it to about 225 degrees F, and watched and timed it all very closely. What was good about this is that I started with the partially bent strip from the water bath, which allowed me to figure out the time that it flattened back out, which was around four minutes. As toaster oven thermostats are not known to be accurate, your mileage may vary. I advise you to watch this very carefully. When it flattened out, I waited another 30 seconds or so, then quickly and carefully pulled the strip out and stuck it into the mold. Results were good! I needed to add two feet to the bottom, though I then tested the curvature on my armor to ensure that it was good. Next came the glue. I did find the Plastruct Plastic Weld at a local art store. Upon inspection, there were still several wide gaps, so I glued those down with CA glue first. I then applied the Plastic Weld, and sanded down the edges. The seam was still apparent, so I painted over them with some gloss white Testors.1 point
-
I'll do if possible too, but as they didn't have any costumes props or so on on display in London I don't have high hopes...1 point
-
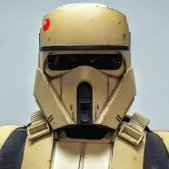
Sounds like we just drop that requirement, and member can replicate as they choose. Non-Saga is the terminology LMO will want us to use, I guess adding (Rogue One) can happen though. As far as I am aware all of the night troopers are R1 armour, and certainly all of the primary reference is so I feel mandating it is correct.1 point
-
Get some good photos to share1 point
-
Enjoy your new banner @DocDan1 point
-
Yeah they could have cut it out better 😄. I do hope its here for Celebration to get a closer look at, but also for a costume display for Ahsoka where they have his armor up.1 point
-
We're almost fully funded for the year. Who will bring us across the finish line?1 point
-
Late to the party but a bit more for the Det! PP: 7M369035H0763323G1 point
-
1 point
-
Sent. #7SD6230285449092C1 point
-
Sorry for April 1 everyone. Just following orders. ... yeah.. totally just following orders.1 point