Leaderboard


Popular Content
Showing content with the highest reputation on 01/12/2025 in all areas
-
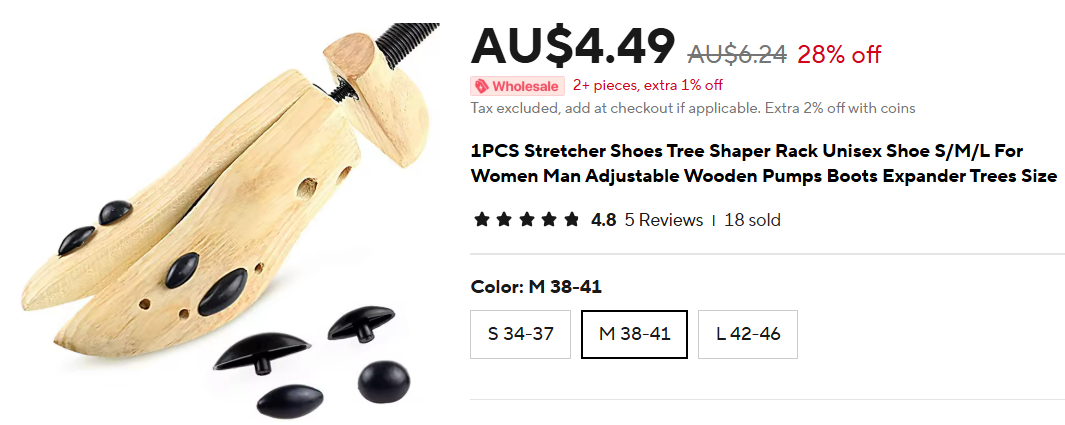
You can also increase size an area of leather, first dampen the inside, use a dowel or some other item just larger height than the area needing to stretch, force the dowel/tool into place, ;eave to dry, you can also add some heat from the outside which can also soften the leather, then leave for a few days. I did run across this stretcher on Aliexpress which you can add pieces to help stretch specific areas
 2 points
 -
2 points
-
Thanks, gmrhodes13. I have some electric fence wire that fits the inside diameter of the tubing and will use that. I made a paper template for the blue strip under the tube stripes and then used some scrap to cut them out. I removed some additional material so they would fit better. After a hot water bath, they fit well and those will go in after painted and the helmet is primed and painted. With some extra material from the belt, I cut a piece to put into the back of the helmet to cover the rough cuts where the batteries and microphone were. After a hot water bath to shape it and a little trimming, I glued it in. To darken the lenses and meet the CRL, I bought some green window film. I made a template for each lens, cut the film, and adhered it to each lens. Lenses with no film, as they came: Adding the green film: The left lens without the green film and the right with the film attached, light behind in the first image and light in front in the second image:1 point
-
I'll experiment - doubt they'll fit my feet anyway, they look a tad small... Sent from my Pixel 7 Pro using Tapatalk1 point
-
I know there is leather color for motorcycle seats, but I'm not sure if your boots are real leather. Spray paint usually works as well, but will crumble away after being worn a couple of times.1 point
-
Looks like Keith also had his shin armor shortened, but that might come in handy if you want to wear him for that motorcycle stunt. Take good care, though! I think Keith has been a FX armor in his past life, if you want to make him approvable for the 501st legion after the stunt, there are some good threads in this forum on how to get a FX armor up to higher standards. However, have fun with your find and enjoy the time with Keith!1 point
-
Looking good. I have found with some tube the rubber can be soft and can fold/crimp when it is bent but if you add a piece of wire inside it will help to keep the shape, you may not need this but just in case1 point
-
You don't have to have the loop as long as you only see elastic between the drop boxes and belt. Some cut a section out of the loop so it sits around the snap, just like the originals I cut a semi circle so it would clear the snap and then sealed the elastic with a soldering iron, you could also use glue1 point
-
I realized that in order to place the blue under the tube stripes, I'd need to remove some of the structure. I cut it away and then replaced the clamps that snap the front of the helmet to the back. I used only one screw and then some J-B Weld since the second screw couldn't be used. For the vocoder, I made a template based on images of the helmet in the R1 TK gallery. I traced the template onto the helmet, made some adjustments, and drilled pilot holes. I then used a larger bit to drill the final holes which are smaller than the tubing I'll be using. I ordered 1/4" outer diameter rubber tubing for the individual vocoder tubes. I plan to put wire inside to get the right bend.1 point
-
Really really pleased with how this is coming out - bit of distressing and I'll be very satisfied indeed! Sent from my Pixel 7 Pro using Tapatalk1 point
-
A few steps more done in the project. After some thought and looking on reference pictures I opted for black mesh on the hovi as suggested by @gmrhodes13. Got them painted with some tip weathering and mounted, super satisfied. Only thing left is the inside of the helmet and attaching the lens. Here is a side by side picture with my RWA Stunt and TM Hero. Also started working with the belt. Measuring and checking as I’m reusing my armor. This made it kind of hard though as you were stuck with the snap placement on the armor fitting previous belt. Wanted it to just snap on in the right place with no need for adjustments when it’s on. Let’s say even though tripple measuring I needed to change place on the snaps 😆🙈 Good thing it’s on the back. (bad lighting and the phone camera makes the belt look a bit weird, it’s straight and nice though) QUESTION: The drop boxes, are you allowed for Expert and centurion to place Velcro on the white elastic band and the belt instead of doing the standard loop around the belt? 🤔 Would be much easier to adjust them and the snaps in the belt wouldn’t be in the way.1 point
-
Thanks! Well due to the fact that the shown shoes are the only ones I can wear without pain I really hope the slight lean is not a big deal because it's either the slightly sharper angle or a modification on top of the instep so... And in reality the lean is not as heavy as the lines in the picture. Crazy that due to this medical condition the shoes are the most nerve wrecking thing about the whole armor...1 point
-
Super awesome, thanks everyone, especially Doggydoc (and team?) for the incredibly detailed descriptions on all the various changes to make before Centurion. Excited to be a part of the EI Honor Gallery!1 point
-
Nothing new here - one strap in front and one on the outside of the thigh has been standard for ROTK and FOTKs for a while. I believe everything is supposed to be New Gen style moving forward.1 point
-
Working on these adjustments. Thank you gmrhodes13!1 point
-
Just a quick update, still gluing the arm pieces together, I'm taking it slowly and doing inside seams also for added strength. I also finally fixed both the eyes so the lenses will be closer now. Not exactly easy but worth it in the end. Just had to make a quick template then cut and glue in place. fill the gap with abs paste, sand and then paint using Mr Colour gloss white followed by Mr Colour thinner to give it that nice smooth texture. I don't really want to do anything like that again, it's a pain in the a very impolite person to do. As far as the decals go I think I might do hand painted after seeing Cableguy's youtube tutorials. I only just found out he passed away Also I probably might end up just doing a sandtrooper instead of converting it after. Please don't hate me oh shiny ones.1 point
-
I finished attaching the edging I had to remove. First I reinforced them on the inside to strengthen them. As those dried, I found kman's HOW TO: Make ABS Paste. I cut a bunch of small pieces of the ABS I had left over and added acetone slowly as suggested. I applied the paste with a toothpick and then used a rubber spatula head to push it into the seam. Looking back after using it, I should have added a bit more acetone. It seemed to be the right consistency, but it was a little too thick and seemed to dry quickly. It worked for me, but I would have liked it looser so I could have gotten it into the seam better. The dried paste was pretty rough and not smooth at all. I used a 220 and then a 400 grit sandpaper to smooth the finish. It's what I had on hand. If I had a finer grit, I would have done one more round with that. Once I got the smooth finish, I used the XTC-3D to give it a glossier finish. Below are some close up pictures. You can see that it's not perfect. There are two pictures from a distance also and in those, the attachments and ABS paste look pretty good. Not perfect, but pretty good.1 point