Leaderboard


Popular Content
Showing content with the highest reputation on 11/03/2022 in Posts
-
Matt! That is wonderful! Welcome to Centurion. I am so happy you got approved! If you would like, I can make a small post documenting what I did to tailor my torso and let you know or tag you in it to satisfy your curiosity I took some photos when I did this can have it up in a few days. Again, congrats!2 points
-
Hello, After many months I finally finished my 3d printed Rogue One TK build up to the point where I feel it can be reviewed. My goal is basic 501st certification. Thank you Name: Steve Skidmore Height 6’1” Future Garrison : Cloud City (Oregon) Neck seal- Imperialboots.com Boots-Imperialboots.com Gloves-Imperialboots.com Helmet- Nico Henderson 3d print file Armor brand- Akira Yuming ROTK 3d print file Belt boxes- BigJasoni 3d print file E-11Blaster- 3d print file (still in work on the flashlight) 3d printer- Prusa MK3S Thanks to ROTK forum users: BigJasoni & 11b30b4 , their build threads are extremely helpful.1 point
-
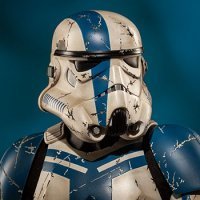
So this showed up a few days ago: Not the worse likeness (I don't think my nose is that big, though ...)1 point
-
Wow Logan, finally some photos!! excellent work on your build. I do agree it needs a touch of weathering/scuffs to ebb closer to the screen accuracy side, and those longer drop boxes Glen has mentioned will be a good finishing touch as well. Great Job and the CRL for this will be a reasonably easy write up. Is it possible to have the shins taper a bit more towards the bottom? Currently they look a little tubular,(same width at the top as they are at the bottom) and I'm not sure what room you have to move with trimming the 850 kit to achieve that.1 point
-
Congrats and welcome to the ranks!1 point
-
Looking great my brother! Weathering won't be a problem and maybe we can find a black series bucket as I recall you mentioning wanting to snag one.1 point
-
Nice work, one thing that may be needed is a little weathering to the yellow paint, we see quite a lot of scuffs on screen, the hot toys figure and black series helmet Belt boxes are a little on the small size, if you wanted to update those these may be of help 3D files available Comparing to CRL image1 point
-
Awesome job Matt. Welcome to centurion.1 point
-
Woohoo! Congratulations Centurion!1 point
-
Outstanding job!1 point
-
Requesting Centurion certificate Matthew Landes TK66007 Centurion Letter TKSpartan Much appreciated and thank you for all your help through my whole build! M My pleasure, sir! https://www.whitearmor.net/eib/certificates/66007-centurion.png1 point
-
Wow! Thank you Mario, and thank you for all your help through this whole building process! M1 point
-
I’ll be honest, with the electronics and all I’m easily close to $2k. More than I wanted to spend but you only live once right……I’ve spent more on worse lol1 point
-
https://www.501st.com/members/displaymember.php?userID=20846&costumeID=124 please add tk190071 point
-
Also depends on where you are in the world, shipping is ridiculous these days and can cost hundreds of dollars extra, that and the currency exchange are also no help especially when you have a low exchange rate.1 point
-
OK folks, so here it is (at last). I got all the pieces attached and secured and 95% of the weathering complete. Still a few tiny areas I want to tweak, but overall this is it. NOW, before anyone mentions the lack of black paint on many of the actual screws, prongs, spring and such, I left these as-is to show that they had been added. Whoever ends up with this is more than welcome to cover them with some flat black but that will be their choice. As for general weathering I am a minimalist. Yeah, I did add more "brass" on the Hengstler than normal, but I wanted it to pop a little. The lighting was not too great, so here is a better pic of the front. Yes, the word OFF and the arrow on the end of the magazine are a bit wonky. I had to use a Dremel to inscribe it and this was after 5 Mountain Dews. I really gotta' cut down on the caffeine. Also a close-up of the rear power cylinder setup. Front view of the scope/cylinders/Hengstler Front sight close-up OK, so if you remember a few posts back I was concerned that since I wanted to use a real wire spring that the inside circumference of the rear of the shroud was too tight. I was determined not to let this beat me, so I ended up going with a hole saw bit (Pic 1). I used an extension bit to get down inside, but there was a lot of the PVC pipe inside in the far end that just shredded, so I used some elongated needle nose pliers to get out the bits and it worked a charm. HOWEVER, the inside walls were... well let's just say chewed up badly, so I CA glued sandpaper to the hole bit and went to town on it. It worked. Not perfectly smooth inside, but very close and not noticeable. Took me about 3 hours. Here is the end result, and I'm pretty pleased. End cap Hengstler** Grip **As I mentioned earlier, I used my leftover curved Lexan lens from an old build. Note: The lens appears to be fogged under the 0 and 5, but that is a reflection. And finally the folding stock. I was worried that since I was using a real vintage Sterling one that it wouldn't line up correctly. But, that was unfounded. Bryan's 3D files are so accurate that it fit like a glove with no modifications! And that's it, folks! This build was both challenging and fun, and I hope you enjoyed it as much I enjoyed doing it. It will be going up for auction in the next day or so to raise funds for the JDRF, and I hope it makes money for a great cause. If you would like to see any detail pics that are not shown or have any questions, just ask here in this thread. Last but certainly not least, I would like to give a BIG shout out to Bryan @trooper96 for supplying the files (and some extra pieces) for this incredible weapon, Kevin @kmwilson343 for donating the 3d print (and extras), Brian @Bulldog44 for donating one his incredible scopes, and Andrew @Sly11 for giving me the thumbs up to auction this off here on the FISD. You all truly rock, gentlemen, and my bucket is off to you.1 point
-
The problem is, he removed 2" from total shin circumference making them really narrow at the ankle.1 point