Leaderboard


Popular Content
Showing content with the highest reputation on 12/28/2021 in all areas
-
Stumbled across this, but easily one of the cleanest AP builds I've seen - good on ya and that Centurion is well-earned!1 point
-
I got my boots and gloves from Crow Props. I actually matched the paint to the boots instead of the other way since I know nothing about dying leather. I found that Duplicolor Torch Red matches really close to his boots/gloves, and is really close to the color of the toy and the helmet. Sent from my iPhone using Tapatalk1 point
-
After some time my BBB finally arrived. While it was longer than anticipated, Walt kept us in the loop with status updates, pictures of prints and molds, and issues with shop and personal life. While it was a long delay, Walt's professionalism and customer service has been really great. I'm still missing a a forearm and belt box piece, along with my TFA helmet, which should be shipping shortly. I've decided to go a different direction than when I first ordered the kit. Instead of a FOTK, I'm going to make Captain Cardinal. The release of the action figure has clarified some missing visuals of the character. I know CrookKnight and other have started the main discussion with this CRL and hats off to to them for all their work and research. In the time since ordering my armor and deciding to go the Captain Cardinal direction I've ordered red boots and gloves from Crow Props, along with building a F-11D and a SE-44C thank to Germain and his files here on FISD. I will be updating the my build thread regularly along with adding a page of research I've cobbled together with the help of others. I'm going to start rereading the Phasma book to find some text references along with giving me inspiration for this build. If one of the mods can move this build thread to the appropriate section, I'd be grateful.1 point
-
Congratulations trooper!!! Now get out there and make some kids smile.1 point
-
Congratulations trooper and welcome to the ranks1 point
-
Congratulations Trooper ! Welcome to the Legion and FISD !! Enjoy being a Bad Guy Doing Good.1 point
-
TKs need pockets. That's just all there is to it. I've got a nice pouch velcro'd to my inner chest, but I have to take off my arms (and basically torso) to get to it. Not great for locking up the car after a parking lot change. So I started digging around this board for a storage solution and found Mayo's ( @MakeNoiseMan ) awesome drop boxes. I had to have a set of my own. Cracked the two halves free. I've never been happier about using CA glue on something. They came free with a satisfying pop. I had a bunch of left over white shoulder elastic, so it seemed like using that for the card retention straps and the hinge would work well. I cut and sealed each elastic edge. Folding elastic and then heating produces a very nice crease. Perfect fit for the larger side of the box. Hinge glued to the outside bottom of the inner boxes with E6000. And the retainer straps got glued to the inside of the outer boxes. I used blue tape to keep the E6000 from seeping through and bonding both halves of the elastic together. Seems like maybe overkill, but I had the clamps to spare. Why not let them be useful again? You can also see the industrial velco I added to the tops to keep the two halves together. Spoiler: the velcro is stupid strong. Once things were dry the next day, I sized up the hinge against the outer box and made some small black marks for where to cut. Then the elastic got re-trimmed and re-sealed. Trimming the hinge elastic exactly meant the boxes would pair up flat and not be thicker than they were before. Held in place with some magnets and left to cure another day. I added some finger grab holes to each drop box. This lets me break the stupid-strong velcro free and access the goodies inside. Note, I can't really get to stuff in these boxes with my gloves on or while trooping. The velcro is just too strong. And that's okay. I just want a place to keep my keys and ID. Maybe a couple dollars for ice cream. But if you're reading this and thinking of the boxes as a place for trading cards... ehhhh.... further modification of the idea would be needed. Maybe some weak magnets to hold the tops together. Finished! That's a useful dropbox!!! A TK pocket if you will. Proof of concept. The retaining loop is a little loose with only 1 card and a few bucks, but it's okay for now. I may tighten it later. And, for me, the money shot - A key and fob fit inside the box! Note that the little ring won't let the box close, but that's easily fixed. I have some braided metal flexible key rings on the way from amazon. Replacing the split ring with the glorified fishing line will solve this and let the box close. Reinstalled. Nothing is different from the outside. The boxes hang as they did before and have no extra thickness. SUCCESS!!!1 point
-
I just realized I didn't update my build thread with my armor bin. I probably spent far too much effort on this, but it was super fun. I painted it, weathered it, and shot it with a blaster. I designed and printed in-universe vintage travel stickers for it. And I turned the inside into a padded TK picnic basket.1 point
-
Wow, its still bouncing around I made the template so you could just print it out at 100 percent and it would be correct scale. You may need to shingle pages to make it work.1 point
-
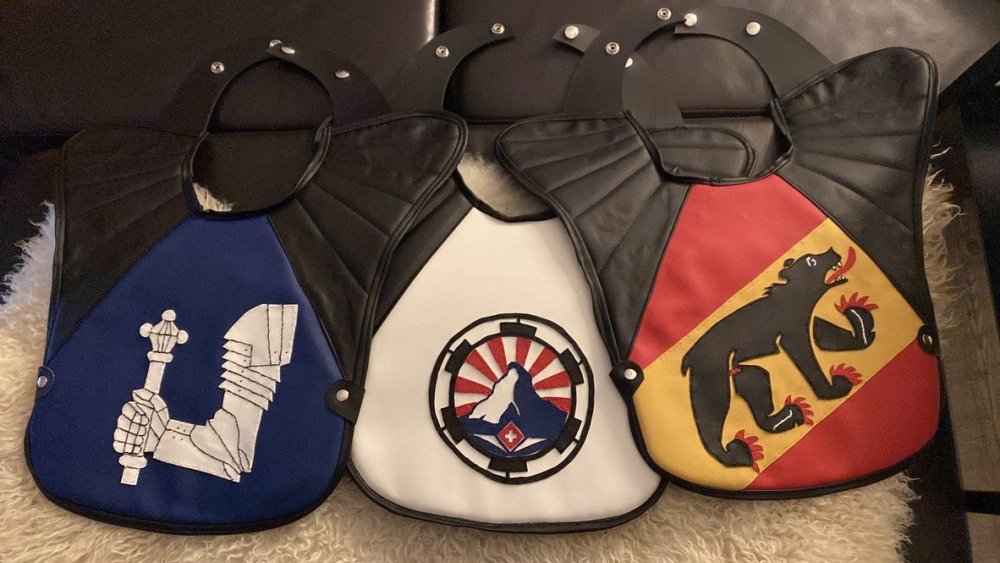
I usually print it in DIN A3 and got perfect results so far. They are the same size as the pauldrons I use for my sandtrooper that where made by trooper1 and his work is awesome. (Crest of the Village I grew up, Swiss Garrison Logo, Crest of the canton I live in)
 1 point