Leaderboard

Popular Content
Showing content with the highest reputation on 10/06/2021 in Posts
-
Hey all, apologies for the lack of updates on this thread... where does the time go? I admittedly have had a bunch going on lately (which I'll post a bit about here - again, my threads are less of a 'how-to' and more of a diary of my journey, and often includes a bit of life updates as well for those curious...) but I have also made some progress that I haven't shared just yet. Hang on, it's a doozy. Sooooo what's that ol' Rascal been up to? Frankly, I've been super burnt out, took some time off, and am easing back into things. I was fortunate enough to be part of a pretty cool project over the summer and ended up working on (building or rebuilding) like a half dozen suits in a very short timeline, and by the end of it, didn't even want to look at armor again for a while! haha More on that... later maybe. Next up, let's do a workspace update - I finally took the time to do a little garage/workshop remodel, so I could stop building armor in the living room of our one-bedroom. This little overhaul included doing some restoration work on an old metal workbench and vice that was left to me by my late grandfather. The workbench was cleaned up, repainted inside and out, got a new laminate top, a very cool oversize architect style light, second movable clamp light for detail projects, new hand press for snaps/punches, a power strip, cutting surface, drawer organizers, and an old monitor I had laying around (with VGA-to-USB-C connector, so my phone can run an Android desktop environment on it - great for displaying reference materials, how-to videos, etc). The old Columbia vice was also disassembled, cleaned, sanded/filed, and repainted somewhere near its former glory. I was also fortunate enough to receive a couple of new tools as wedding presents, including a very nice Milwaukee drill from @Ninety-Nine and a cordless rotary tool. I also got some pretty awesome Wall Control pegboard for behind the bench, to hold many of my tools (and a row of blasters). Finally, I updated my little patch collection wall in the space above it - featuring some fun FISD, IOC, and Southern California Garrison/Orange County Squad patches (my personal units). A brighter, directional main garage light also replaced the bare low-watt bulb. Pretty happy with how it all came out, but I still have a good deal of organizing to do and will likely add some more bins/organizers to the side. I added a lot of links in case anyone wants to know where this stuff came from - I'd recommend any of it! Before: And after (still a work in progress): Speaking of wedding presents, I took a good deal of time out this summer to help plan things out, and well... get MARRIED! My wife (and Jawa, DZ-71490) and I had a beautiful, small ceremony in August at a resort overlooking the beach and it was a phenomenal day. @Dsposato0 was kind enough to help MC and represent the FISD Crazy enough, a few weeks after the wedding (bringing us to the last couple weeks), and she ended up spending a long weekend in the hospital with a burst appendix and recovering, so armor again went on the backburner while I took care of her. She's doing much better though and work continues! I also was PET-scanned again this summer and continue to be in remission from cancer, so that's cool too. Butttt I also ended up taking a fin to the back of the head while out surfing in May and needed 20 internal sutures and 17 staples to hold my head shut, so that wasn't fun and prevented me from wearing a bucket for about 6 weeks (Hall of Meat - a pic of the wound for those with a strong stomach). It healed up well but again, set me back. We've forsure had ENOUGH medical issues to deal with lately. I have a build for @JHowe102 and a new Shadowtrooper recruit I'm currently still working on (but nearing completion), then once those are out the door, it will be back to focusing on the FOTK, then on an Anovos ANH build to replace my original ANH-S suit that has seen some battle... I was able to be patient in my search and came across a deal I couldn't say no to. I won't be doing a build thread persay (why, when @ukswrath has it fully covered?) but will likely do a little 'tips and tricks' thread, showing some of the techniques and tools I use throughout my build, and maybe it'll help someone (or me with your comments!). Still a bit backed up in the (MESSY) workshop though. Okay, so where's the FOTK at?! So let's start with a little spoiler for future projects (since I SWEAR I'm done for a while after closing all of these open projects out... adding some little troopers will be the focus!)... I bought more armor haha I found someone selling JUST the pieces needed to upgrade from TFA to TLJ, also from @jimmiroquai , and painted, 'ready to wear'. I saw the Facebook Marketplace post right around when the new Black Series TLJ buckets started shipping, so it felt like fate. You'd think I'd have learned my lesson about BS conversions, orrr about buying secondhand armor, but nope - I had these parts shipped from the UK and was pretty disappointed in the paint preparation and overall quality. You can literally see where a piece of masking tape was left and just painted over... the chest pills were hacked pretty haphazardly... and there was both topical damage (scratches/gouges) and casting imperfections that were never addressed originally - NOT up to my high standards. It'll be a full sand and repaint too. The other downside of this new set of armor is there was a LOT of velcro epoxied into it that was very difficult to remove. One upside is that it has not had additional resin added to the interior, so it is significantly lighter than my other chest/yoke. I'll likely add some resin, but NOT as much as the other suit, which will likely get sanded back a bit. I'll actually probably use the new chest/back/shoulders (not the cod/TD) for the TFA that I'm likely to wear more often, and the heavier stuff for TLJ. Another pretty big update is that I have been working with Sheev's Emporium a bit and snagged one of the first of their new full soft good kits (gaskets, neckseal, and rigging) for FOTK's and the stitched ribbing is probably the best I've ever seen. Looks like a very well designed kit and I'll be excited to take delivery this week hopefully (will post an update). I also have shiny shorts coming from @Soulart/Geeky Pink's, and already have Trooperbay gloves and Imperial Boots chukkas in hand, so that should be all my soft goods accounted for. I also snagged a rubber F-11D since I decided to sell the 3D printed one I have instead of trying to sand the myriad of print lines out. The gentleman who cast it was both former Praetorian and Ano...ther company, and apparently there is some controversy as to the ownership of his mold over on Faceballs, soooo that was a whole thing. But it's a solid, good looking rubber blaster and was a fair price, so whatever. I'll get around to painting it up as well and will likely use it as my trooping blaster, but won't try to add electronics to it. Okay, but where's the actual armor at?! The armor still has a long way to go, and I've had several minor (that feel like major) setbacks, and much like my ROTK, I can tell that several steps in the process are very linear and need to happen before I can move on to the next. The first and most daunting is adding the additional resin to the new pieces. For many months (freakin' pandemic Etsy hobbyists) resin has been very difficult to come by, and I am FAR from an expert in it, so I was really trying to buy the same stuff I used on my ROTK that worked well, but it has been out of stock (and the can I had went bad... resin has a short shelf life and I should have known that). I finally was able to find what I believe is a comparable product in stock at a reasonable price, so that's up next. Happening somewhat in parallel has been general paint prep. I started with the new chest and back/yoke, and well, this isn't even as many priming/sanding passes as I've done total, but here's a few shots. I've definitely learned since doing my ROTK and need to be a bit less of a perfectionist, and to "follow the rules" when painting - stuff like to allow for proper dry times, don't try to paint at night or when it's cold/humid, mask and manage for overspray, etc... always lessons being learned the hard way, but it's coming along. Another big lesson I learned is that my ROTK... is too shiny. The screen used suits are maybe a semi-gloss at best, but definitely don't have a thick layer of high gloss clear like mine. While it does look great, the time and money I spent to get it that way... really just wasn't worth it. What I DO like about the paint is how hard and scuff resistant it is, which I attribute to the 2K paint. I think for this one, instead of a Rustoleum white base with 2K clear on top, I'm going to try just USC's 2K Gloss White on top of white primer and call it a day. This should in theory be MUCH easier to repaint in the event of damage... which has already happened to my ROTK and now that I have to think about repairing it, I wish I had done differently (live and learn). I haven't had major issues with using THIN layers of Dynatron filler (which is similar to Bondo glazing putty) but I was recommended USC Garage's Flexible Glaze, which is a 2 component filler. I'll SAND the old paint, make any structural/deep REPAIRS with Apoxie Sculpt or marine epoxy, then a thin layer of filler/GLAZE on top, then PRIME with light colored filler primer, then white sandable primer moving forward (scratches/chips on the ROTK revealed the dark colored primer, which wasn't ideal), and then TOPCOAT with the 2K gloss white. I'll be doing the inside with satin white, as the flat I used last time tends to scuff and transfer color more. I'll probably be purchasing one of those decent sized paint booths that are like a popup camping tent since I made a huge mess in my garage last time, even after hanging plastic sheets. Anyways, I think that's it for now... LONG overdue, but hopefully updates will be coming more frequently now and I'd like to have this thing approved by the end of the year. My brothers in the SoCal Garrison (including @equuspolo, @Surfintrooper, and @yo_its_nino) totally inspired me with this photoshoot over the weekend, and it is too cool not to share! Photo by @KC Grim who may be joining the FO ranks soon as well! LONG LIVE THE FIRST ORDER!4 points
-
Truly impressive shot, and those are all actually super nice guys and many are talented builders - great crew and it got me all jazzed to finish mine and join! I've already been in touch with Teresa lately since I'm snagging some shiny shorts and sent it over to her as well haha Thank you though! I swore I'd never paint a full suit again, but then also... I learned enough and I'm starting in a place where I don't think it'll be as bad and I can be significantly more efficient. Appreciate the kind words!2 points
-
[quoted photos and text deleted for easier reading] I'm going to take another pass at the vocoder. Looking at the references, most of the stunt vocoders seem to have bars 2 & 6 with higher tops, so I plan to address that soon. I will also paint more of the sides of the Hovi-Mix tips black as I believe there’s too much white showing right now.2 points
-
After reading/researching other build threads here, observing and talking to local garrison members I am starting one of these threads! My first official build step (other than acquiring the kit). I just purchased a kit from a fellow garrison member here in VT who lost interest in the build . The good thing is it is staying within our local squad and most of the trim work is done (only the belt, ab boxes and ankles left). All the soft goods came with the purchase as well . The kit is from Back Stage Props, that I believe, has since gone out of business. I have two other members @ShadyP here that bought this run a few years ago who I will be working with. The known issue with this early kit is the lack of a return edge on the chest yoke. I am in communication with a few vendors to see if I can get a replacement part instead of trying to build an edge. Here is what I have so far with a few pics: Boots: Imperial Boots Belt kit: Belts of The First Order Pouches x2: Trooper Bay Gaskets: Geeky Pink (he and I are are ironically close in size- 5'6" and slim) Tactical vest Gloves: Endor's (I think) Under suit: UK Extreme Racing Helmet: Anovos "BBB Day" for me was the day I got to pick everything up from my fellow squad member! Nice boxes of pre-trimmed armor I started to lay everything out and label L/R Belt Kit Blaster base and shoulder bell hanger Greeblies (I think everything is here?) Gaskets1 point
-
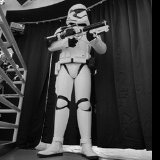
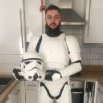
Hello everyone from Ukraine! We decided to take a couple of photos, I hope it's not bad.1 point
-
I saw Ardeshirs post with those photos yesterday, man what a beautiful shot that is. For what it's worth i will be adding it to our anniversary project because i think it;s the best FO TK shot we have seen in many aspects. Such a crisp photos, that just pop's, I can't express how much I like it. Now to you, thanks for the epic update. I have no doubt you will turn that kit into a first class FO TK when finished, also interesting to read of your thoughts and adjustment to your ROTK. Plenty of work ahead for you, that's for sure, and congrats once again on your wedding.1 point
-
Coming nicely Justin and congrats on your marital status.1 point
-
Hey Justin, congrats again for your wedding and glad to read you're back and recovering well.!!! Nice working place setup and yes, that FOTK 's photo is awesome.1 point
-
That's a great Boba. And you're hitting it all out of the park. There's never enough white amor in the field. Welcome aboard!1 point
-
Congrats and welcome to the ranks! Next you’ll get the experience of trooping, something that I unexpectedly found to be the best part of the journey, enjoy!1 point
-
We're going to make this happen bud! Thanks for relighting the motivational fire for this project.1 point
-
Hey Chris, If you build your TK as well as your Boba Fett, it will look amazing! I found a wealth of advice from everyone on FISD and my home garrison forum. My advice is: if you are ever unsure, always reach out. Good luck and can't wait to see your progress. Sent from my Imperial Comlink1 point
-
Wow this looks nice l! I’m going to have to see about getting one of these. still waiting on my Hellhounds I ordered several months back, having another E-11 I can put electronics in would get great. -- UPDATE: Ordered one!1 point
-
Hey joseph made one or 2 mods. Currently getting married so will post soon as wedding planning taken over Sent from my SM-G986B using Tapatalk1 point
-
Aight here it is, guys... took some time to lay it all out and triage the good, the bad, and well, the ugly! So if you don't already know, I'm in the final stages of wrapping up my ROTK build (I know, I know, I'll finish that before I begin any work in earnest on this one!) and I really like the way Jim's armor is made and was keeping an eye open for sales or discounts on perhaps picking up a set. I actually had purchased a B-grade set of KB Props armor super cheap, but wasn't too stoked on an ABS build in general and decided to give it up (and a few other things) in a little yard sale to go towards an FO. And wouldn't you know it, a fully painted and assembled suit popped up for sale here on FISD that was only about an hour's drive away to go get! I hit @Dynamic1 up and ended up driving down to swoop up his kit. I got what I felt was a pretty darn good deal, but there is of course a good deal of work to do to bring the kit both up to being in good repair, and further to my generally high standards. I'll go through all the things I'm stoked about, and the stuff that concerns me below (with some pics!) So strap in, here's another Rascal build (rebuild? upgrade?) comin' your way. The GOOD: - The kit is fully assembled, and Brian is about the same height and weight as me (though much more muscular, but FO's are kind of top-heavy anyways, and the biceps fit fine). - The kit was available locally and didn't need to be shipped (Orange County to north San Diego county isn't close, but definitely not far!). - The kit is fully painted!!! And pretty darn well, with almost all the pinholes and imperfections filled, and with a easily available Krylon rattle-can white... but there are some issues (see further below). - It included a set of boots (too small, but I can sell em and recoup some cost since I have a pair from Imperial Boots for my ROTK already), gloves (TrooperBay ones I may replace with EndorFinders), and even a blaster (3D-printed that I may replace as well). The Hengstler counter bit fell off but I have it somewhere, no worries. It has pretty bad print lines and I juuuuuust don't want to sand it, so it will likely be replaced, but is great for now! - It included a metal R2Dan holster already! It wasn't paint-matched very well, but I can respray it. - I stopped by @Oztrooper 's house to drop off some stuff for @equuspolo and he happened to have a fresh Anovos ABS FO helmet up for grabs and offered it to me at a reasonable price, so I grabbed it! Wasn't expecting to purchase it just yet, but it worked out. He had already done some of the mods I'd want to do anyways, including reshaping the duckbill a bit with heat, adding a rubber neckseal trim, and a metal aerator tip from VaderPainter (now no longer made?). Big thanks to him for the convenient hookup. I actually had an Anovos Premier that I got an incredible (eBay) deal on, but it was just too dang heavy. The BAD and the UGLY: - The kit did not come with much in the way of strapping and what's in it, I will likely replace anyways. Step one will probably be stripping the interior and hitting it with a quick coat of flat white touchup. It looks like it was a mix of velcro and snaps, but I've been messing with magnets a lot lately, hmmm.... - Severalll pieces of the kit will need to be sanded and repainted due to scuffs (like this knee that I already started sanding). Some other pieces may clean up with a polish. I would prefer not to have to repaint the whole kit, but I learned a lot from my last rodeo and will see how much it bugs me. - Jim's kit in general does not have a couple features that may hold me up for Centurion if I choose to go there (have you met me before tho? haha) - the forearm wrist boxes are molded in, as are the ab belt boxes. Perhaps I can add a small groove to simulate them being separate pieces? ( @shashachu @justjoseph63 @TKSpartan would that fly?) - All the small accent details are stickers - I will likely paint most them on and replace the chest/shin/bicep bits with the proper cutout/gaff tape combo. - The back yoke is cracked at the shoulders pretty bad, which scares me, but also makes it a prime candidate for @ukswrath 's shoulder bell bracket/reinforcement/support thing. I probably will NOT run the strapping THROUGH the yoke like you're supposed to, but fiberglassing the bracket in may be a good way to both repair and update its accuracy. - The ab boxes have some pretty bad cracks, likely from being flexed up while suiting up/down. These and the shoulders are the worst of it, but there are a few small stress cracks in other places that I MAY address... these I will for SURE. - At least one little greebly fell off, but they'd probably benefit from switching out the velcro with the new Ultra-Thin stuff I came across in my other build thread! - The belt is the proper sandwich of three materials, but needs to be reglued, as it has largely separated. Brian said the belt was a giant pain in the butt, like my RO, so I'm glad it's already pretty much done. I think that's all for now... just wanted to do some triage and get some pics up to show you (and myself) what I'm up against. I may be able to rig up some strapping and try it on in the next couple weeks, but this will likely be 2021's project. I'll post more once I've finished my RO (updates on that coming soon) and work on this begins! Thanks for stopping by and joining in on the madness once again!1 point