Leaderboard


Popular Content
Showing content with the highest reputation on 02/20/2021 in Posts
-
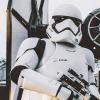
Name: Ardeshir Radpour Username: equuspolo TK-42128 Southern California Garrison Los Angeles Squadron Height = 5'10 Weight = 165 Armor Maker = KB Armor - Trimmed to fit like Anovos Helmet Maker = Anovos Premium Fiberglass Boot Maker = Imperial Boots Gloves = Endor Finders Belt = Trooperbay Belt Pouches = Trooperbay Pauldron = Trooperbay Neck Seal = Imperial Seamstress Holster Maker = Dan Sczudlik Gaskets = Geeky Pinks F-11 = Branfuhr Studios Resin Kit- Custom built by me with custom light system. Electronics = Wireless Microphone with Acker Amp Custom Parts = Chest yoke and Backplate welded together with ABS Slurry. Chest Pills and Chest cut out backed with Textured Fabric, TD slurry welded. Entire armor painted with Rustoleum 2x Glossy White. Belt, Cod, Butt Plate attached to armer with Anovos leather waist tassets3 points
-
Awesome, thanks for the advice. I was also told the same within the garrison so will be looking to grab some of these as well.2 points
-
Lookin' SHARP, Greg! I will be with you shortly, sir.1 point
-
Probably The Foundry - Armor and Prop Making and then that section is all done.1 point
-
Hey Brother, good luck. You got this no problem.1 point
-
I'll look into that. I've also got the 20's on their way for arrival next Friday. Half tempted to replace the belt though since that earlier episode. If only I could, but with RS down...bleh. I could only order like a set of 10 I think for like $7.00 or so. You seem to have hundreds. Nice score! These are the Tandy ones I've got coming. I got confused on ebay when they started asking what size post... https://www.ebay.com/itm/Line-20-Snaps-Nickel-Plated-10-pk-By-Tandy-Leather-1261-02/301524925466?ssPageName=STRK%3AMEBIDX%3AIT&_trksid=p2057872.m2749.l26491 point
-
I've done that to all of my belts after realizing a flat belt pops of with the slightest of movement1 point
-
Well it just so happens that I guess I would be his "armorer" LOL. There is certainly no better place then here! And yes unfortunately we haven't had any in person armor parties in a few years.1 point
-
Hi Cory welcome to the FISD. So I am Steve and I just commented on your post over on the Empire City Garrison forum. I'm glad you found it here. Everyone here will be extremely helpful with your build.1 point
-
No I didn't go out of my way to add any curvature. I've not even seen a suggestion for that in any tutorials. It's always lain flat. Are you suggesting doing that?1 point
-
Cocking Lever is Pinned and Glued!! Backsight is Printed! Still not sure how soon I'll get it (we're still thawing out here in TX), but once I do, I'll get it added!!1 point
-
I’ve trooped my RWA armour many times. It’s an excellent kit for the price point. As above, excellent service from Ross. I also know many other troopers with RWA and the feeling is positive all around. :-) RWA armour (with another make of helmet). :-)1 point
-
Congratulations Trooper Sent from my SM-G981B using Tapatalk1 point
-
It's amazing how much more productive I've been now that I'm feeling a bit better - I just kept going and cut the other thigh! The right side with the ammo pack has now been cut decently symmetrical - I used a template and measured several points logically, so I'm happy enough with it. I also sanded the inside lips smooth on both in preparation for paint. Still unsure how I'm gonna safely mask them without peeling the clear and would love any suggestions... If you didn't notice, I also removed the interior strapping mounts I had glued in (you can see where I scuffed up the paint to help them stick). I'll probably respray the interior flat white real quick before I figure out where the new mounts will go, and I'll also be using TWO snaps for the attachment on both, unlike last time. The single snap mount on the outside of the leg would make the buckle swivel and it would get lost down the side of my leg... Dumb design, but hey I'm learning. With the thighs cut, I can hang them a little lower and hopefully have more mobility at my knee as well. I'm glad I left some room for adjustment in the belt drops. And just to give you an idea of how much I removed... I absolutely should have test fit better early on and done this before paint, but here we are... Looking forward to my next suit up and hope this will help a lot! Okay, what's left?! - black outlines on the rear traps, and final helmet cleanup in general - final barrel paint cleanup - reinforcing the shoulder straps more with epoxy and adding foam and a bit of velcro to the undersides - painting the areas I trimmed white again, and... Clear? I don't want to buy more 2K... (On a side tangent, I've been appreciating how tough and shiny it is. Peeling and the price have been the big issues...) - remaking the mounting tabs and reinstalling the thigh strapping - installing the blue mesh for the tube stripes - not needed for submission, but the helmet will need fans at some point too... And I'll install my audio system in the helmet, and likely behind the chest plate again... It works well. - blaster? And that should be it! Hopefully I'm on track to suit up and take photos this weekend. Thanks for stopping by!1 point