Leaderboard


Popular Content
Showing content with the highest reputation on 05/20/2019 in Posts
-
Hi, I recently bought a complete E11 blaster kit from Chris Fieldmarshall (sterling replica, M38 scope and rail, T racks, Hengstler counter, sensor type A, real sterling mag). It was quite complicated to import it in Europe (I'm French) but it's finally at home ! This kit is absolutely incredible and I can't wait to start assembling it. It's a long journey that begins and I want to share it with you. I send a friendly greeting to Chris with whom I had very good conversations on the phone and on the web! Thanks again to you!5 points
-
Might not be a kit but delighted to report one of my Pauldrons has just shipped. Sent from my iPhone using Tapatalk Pro4 points
-
As a few of you may know, I semi-retired, sold my house and bought a new 5th wheel to hit the road! Finally got my "TK man-cave" organized, but needless to say at 10 ft x 8 ft. it's tiny! While it's probably what most might would definitely consider TK overkill, it makes me happy so I thought I'd share a few pics.2 points
-
The assembly instructions were in the photo ! ( round in the aluminum pipe tube ). They are also here Thanks p4ntb0y and T-Jay (I think some parts on my first blaster are from you ). As you've seen on Flirck, I love stormtroopers helmets2 points
-
The back torso parts only go together one way with each part butting up against each other. I always leave a small gap between the parts to allow them to move as you walk but essentially they are butted up. The shoulder area and chest overlap are where the adjustments can be made. At your height you are pretty much maxing out the size, so when you strap the chest using the original strapping brackets, you don't really have any adjustment there. Your main adjustment will be the white elastic shoulder strap length. You will find the armour feels much better when you have strapped it with elastic. Taping it together is fine to get a basic feel for the armour but it doesn't allow any movement like elastic does. I don't quite understand your concern about the return edges. Just leave enough to attach the brackets (7-8mm) and a few mm's everywhere else.2 points
-
I made the visor removable using Chicago screws, like Alay and TKZombie did. I used this green grinding screen that I saw on another post. Sorry, I can't remember who originally posted it. https://www.amazon.ca/gp/product/B003X3UAMY/ref=ppx_yo_dt_b_asin_title_o02_s00?ie=UTF8&psc=1 I made EVA foam grommets to help keep the Chicago screws in place and reduce some strain.1 point
-
This is great. Thank you. I will trim them down and take more photos. Sent from my iPhone using Tapatalk1 point
-
Had such a great time at my first troop, I quickly signed up for an event in Corpus Christi. I arrived early to be sure I had plenty of time to get my armor on but still needed help with some pieces. This was a longer troop than my first one but still had a great time: The local Volunteers and a huge help. These little girls (and future Star Wars fans) were an absolute blast. The smile says it all... Even the security guard wanted a picture with us. Amazing (and satisfying) how many people just want a picture with us! And then I had my first troop related TK Malfunction. The Velcro on the back of the right shin came loose resulting in a 'blow out.' Luckily it was toward the end of the troop: Will be moving, repairing the shin soon, and getting ready for my next troop!!1 point
-
Even the outside didn't escape being tagged, lol.1 point
-
Here's a little more progress. Shins and spats. I'm not doing Velcro closures on these. I will be doing magnets on most of my closures going forward and that will take place after most of my parts are glued together. I did not follow the Anovos instructions on the spats. They call for the greeblie side to be glued down and I dont like that look so I am following Ukswraths build for the spats. Also, beware if you are using the supplied templates for placing any resin parts on the armor. The templates are not to full scale.1 point
-
I find on areas that are still a little curved that the cover strips need more pressure to hold them, use of clamps and masking tape can help this, when you apply the cover strip hold with clamp then apply pressure to the thighs and wrap tape around, this will help hold them until the glue dries.1 point
-
The most important thing is that you like your amor. So even if SDS is not the best objectively, as long as you're happy with what you have and think it looks good then that's what matters. You just might have to change stuff for approval and higher levels.1 point
-
Hey Rob As of now I would go with KB props and you find them on FB1 point
-
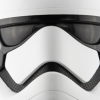
Little update of the helmet1 point
-
They are Local crafts store, ebay, amazon to name a few. The more the merrierKidding aside, a good base would be around 50 of 20x3mm.1 point