Leaderboard


Popular Content
Showing content with the highest reputation on 11/10/2017 in Posts
-
This seems to be the same every time. When I received my first DoopyDoo's kit, I simply wanted to glue it and paint it black, but then came across some nice build threads and thought "Okay, make the trigger working". I ended up with modifications on almost every part I could think of - and this only happened because of the FISD community. For the same reason I encourage people to start build threads. So, Stefan, you might find your intention to change along the way when building...3 points
-
Almost there.....almost there.....(stay on target) almost there... (Death star assault run)2 points
-
Hmm. I should really get my build thread going, especially with how much I pressure my RL recruits to do one.2 points
-
Sniper knee glued Inviato dal mio iPhone utilizzando Tapatalk2 points
-
Sneaking in here with somewhat of a strange first post, but I think I've passed through the site quietly more than a few times picking up bits and pieces of information working on a project, but thought it was time I just and say hello. I'm a design engineer / materials physicist by profession with a specialty in developing theories into application. Most of my time is spent integrating things together with an absurd amount of constraints, but I love what I do, which is why it's also something I do in my personal time. That being said, I've been really attracted to this idea for a while: to make something that doesn't just look like it's real but also works like it's real; to smudge up that line that goes between science fiction and science fact. Which leads me here... What I'm Proposing: I would like to see about designing and possibly prototyping a system which could either be built into a new helmet or possibly retrofitted into existing helmets. Developing that system to address different shortcomings of current helmets. And do it in an economical way that could be put together into a simple kit. Or.... I want to make the helmets work closer to the way they should work if they were military issued. Plus, you shouldn't try to make a better hammer, without talking to a carpenter. So in effort to do that, I'd really like to get some input from anyone willing to share. I've got a few questions I'm hoping to answer, but also see if I'm missing some things that should be included. What kind of field of view would you really want to have? Full 175 degree horizontal and 135 degree vertical FOV isn't exactly an impossible thing to accomplish using a flexible OLED, nor is it that expensive as the screen component would cost about $9 - $10; however, this would be more prone to fish eye curvature, and would probably through off depth perception. Sacrificing some of that down to say 120 degrees / 90 degrees would be able to give a more 3D effect to establish depth and minimal distortion. What about incoming sound? I've heard / read numerous times that it's really hard to hear what's going on around you. Bringing external sounds in wouldn't be much trouble to do at all, but thanks to this wonderful modern day we live in, it would also be possible to filter out crowd noise or would it be better to try and just hear things around you as if you weren't wearing the helmet? Cooling is the other one I see as being a huge complaint... Before we even talk about adding in these kind of extra electronics. Personal opinion, I don't like fans... Spinning blades in tight quarters near your face... That being said, weight is going to be the issue with alternative methods, and power... There are passive methods of basically hiding a heat exchanger in between everything but it may not help enough during a Florida summer. There are active ways of cooling that essentially would be putting a tiny air conditioner in the helmet that could handle a Death Valley noon day picnic, but then power would become the problem maybe ending up with 2-3 hours or so before needing a recharge. And what about heating, would there ever be a need to actually warm things up in there? These are just some basic questions from my end, but I'm also really open to hear about what other things people might want. Things like switchable from electronic display to normal in case of power failures or just because are things I do consider, but I'm totally open to even crazy ideas like, could a respirator be added. Because if it's wanted / needed / etc. then why not. Plus, right now I'm at the drawing board so it's easier to put it in and figure out how to make it work. As this process goes on, I'll start to focus on addressing how to many it fit for different sizes and things like that, but again, right now it's "what's on your wish list"1 point
-
Hello all, recently I have gotten my ATA kit. This is my first build with Stormtrooper armor, so advice would be very much appreciated! So far I have started on my helmet, and I have been following pandatrooper's build thread. I will try and post a lot more photos in future posts, but as of now despite resizing I can't seem to be able to attach any files. Guess that's what I get for being a newbie on the forums.1 point
-
Awesome to see another build thread in the works. Good news the photo you posted is not damaged goods but indeed peeling the protective layer off. I'm suspecting if you peel it back a bit you'll find the armor in good condition. Looking forward to your build.1 point
-
Sent from my SM-G920F using Tapatalk1 point
-
I ended up grinding out the counter and building a fully functional working stock on mine. Went a little too far me thinks [emoji1] Sent from my SM-G920F using Tapatalk1 point
-
Great progress, Dan - and the weekend hasn't even yet begun. Cannot wait to see the paint job in your next update...1 point
-
I have had a VERY busy summer, but will be resuming work on my TK build this week. I hope to post some progress pictures soon!1 point
-
Doh forgot that pic.! Yes it slides open pretty nicely ! Found some builds incorporating it with a resin barrel so hopefully it will work out... removing and replacing the pin seems to be the tricky part... researching how to clean the gunk off this thing too Sent from my SM-J700T using Tapatalk1 point
-
Attached folding stock to body: Scope: Start hollowing work. Cut the front part with hack saw. I use drill from small to bigger diameter to make hole. Will continue with wood spade drill bit tomorrow.1 point
-
PM sent for mesh1 point
-
Welcome! I use imgur to host my files, and I think it resizes them for me. It looks like you need to take more material off. The holes aren't supposed to be round , they have straight lines. Check out these pics for some idea1 point
-
So here's the dome. Now, for this next picture of the dome I am a bit confused if I am supposed to trim the straight parts after the curve ends. I think I am supposed to, but I am not positive. It looks like the build I am following does so, but he hardly seems to take a good picture of the back for me to be quite certain. And finally, the faceplate itself. I know the teeth aren't done yet, but I was wondering if I was taking off enough material or not for it. The best example of what I think looks done is the first tooth's right gap.
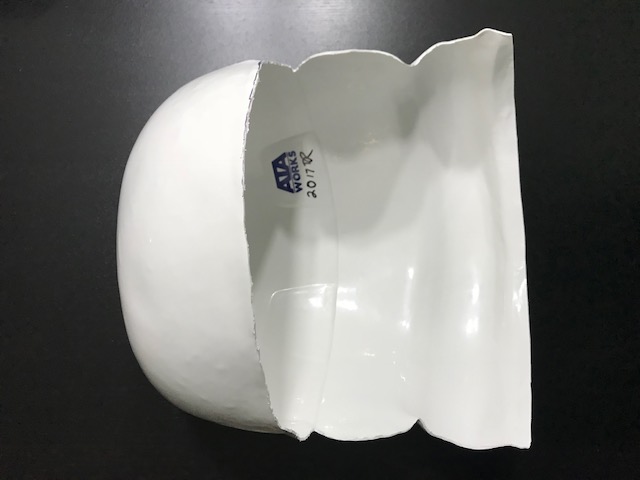
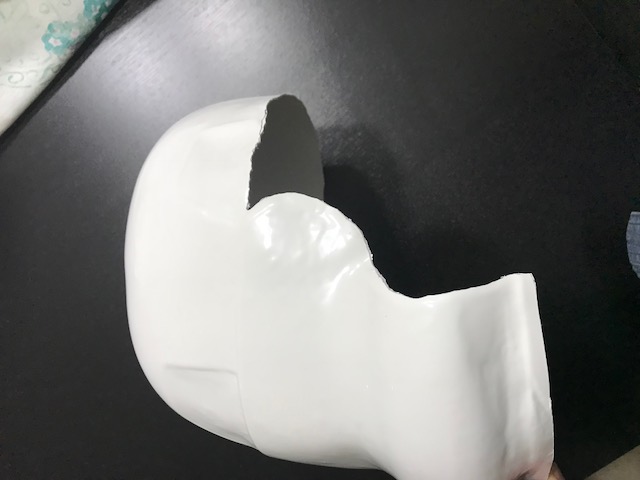
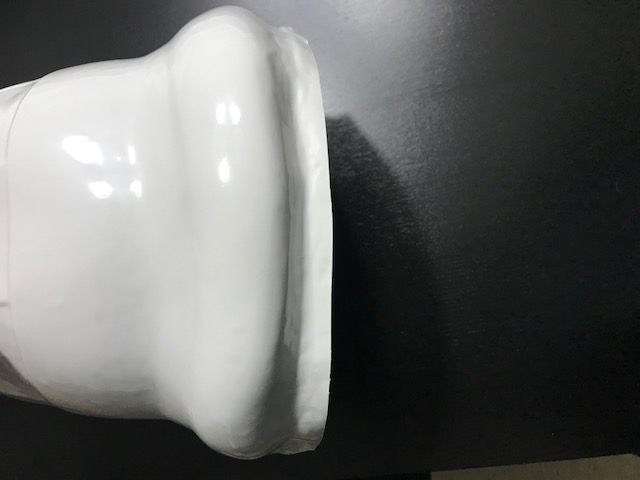
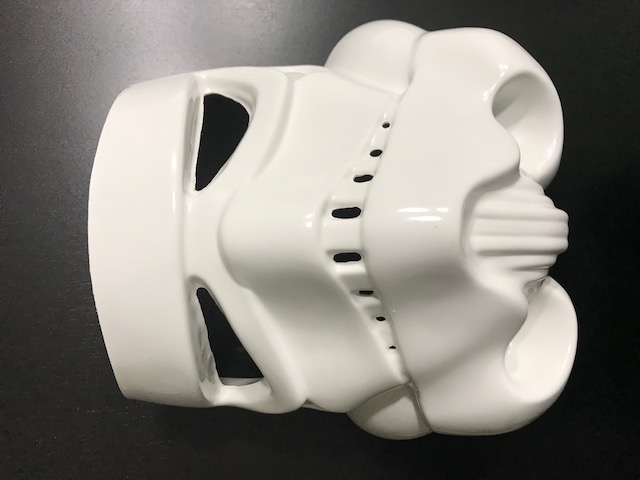 1 point
 -
Evening all, Did a few of the final pieces tonight. I started with the “marker pen” inner bolt mod. Then moved on to the pins on the counter. I used pin and spade connectors, cut down to size with the Dremel. Next up, a part I wasn’t really planning on doing, however I’m really pleased I have now. I used a piece of ABS cover strip from my armour build for the counter reset button. Marked up for drilling - ended up drilling out through the bottom of the counter...doh. Also, managed to snap off half of my drill bit IN the counter and couldn’t get it out; hence the weird shape of my ABS reset button. After studying the real counters a little more, I noticed the little gap under the pins - used a junior hacksaw to add the little gap. In amongst all of the above, I also improved the areas where the T-tracks meet the barrel. Mag repair also sanded down. Thanks world. Painting next!!!!! :-) Sent from my iPhone using Tapatalk1 point
-
Cheers, Stef. I didn’t think I’d go to this much effort - just got caught up in the little details that make it pop. With all the great advise, tips and feedback on here, not too mention so many builds to drool over, you might end up doing more than you expected. ;-) Sent from my iPhone using Tapatalk1 point
-
I spoke with Rocky today and he told me that they've begun doing longer cods and larger thighs. He said that he himself required a kit bigger than the standard WTF kit, and that's when the decision was made. He assured me that the kit would fit me just fine (I'm 6'1 and 250lbs) and even shared photos of a fellow WTF trooper who is bigger than I am, and he looked fantastic. Just an FYI for anyone who's wondering about that!1 point
-
I second that - Keep up the good work1 point
-
Looking great Matt Sent from my iPhone using Tapatalk1 point
-
I got the shoulder bells closer and looking better.1 point
-
Wow. Truly amazing work Sent from my iPhone using Tapatalk1 point
-
Thanks Germain! 1. Semi gloss black base coat and light weathering with silver guilding wax (like Rub and Buff). Seal with clear coat. This will show through the "openings' of the wrinkle layer later. 2. Brush and dab toothpaste on areas where you want the base layer to show through. Allow to dry. 3. Spray a light but thorough coat of wrinkle paint. I use VHT Wrinkle Plus. Allow 48 hours to dry. 4. Use a dishwashing scrub and remove the toothpaste under running water. Now your blaster smells fresh and minty! That's it!1 point
-
Maybe use shielded wire for your extension? Sent from my iPhone using Tapatalk1 point