Leaderboard


Popular Content
Showing content with the highest reputation on 09/09/2017 in Posts
-
I got my blaster kit today and thought I'd share it's progress during the build. Will try my best considering my work schedule, but I'm sure it won't take me too long since I'll need it to eventually go for Centurion. I'm not sure if he has a website for the kits, other than eBay. But you can check out his demo video here: https://www.youtube.com/watch?v=QJbuJFXcrrM&t=14s The online instructions for the building of this kit is found here: https://www.dropbox.com/s/snajmo4wxtklq9w/UBER BLASTER KIT INSTRUCTIONS.pdf?dl=0 For tools, I have pliers, exacto knife, metal needle files, gorilla brand super glue, and varying grits of sandpaper. I first looked over everything once I got it back home and out of the box. The receiver section isn't shown because i had already started the assembly before thinking of taking pictures. lol The two sections joined and the supports in the bolt channel removed and sanded down. While i waited for the glue time to dry, I spent some time on some parts in the next steps. Cleaned up the mag well and release button and set them aside for now. I then started to clean up the other barrel section, making sure i hit the inside areas the best i could. Since I am going to include the electronics I needed to sand out the inside of the barrel itself so the LED assembly can be installed inside as easily as possible. Testing with the LED holders until they slide through completely. Before attaching the barrel section, I noticed the tab had broken off during shipping. It was an easy fix to glue back in place before joining the two parts together. Sitting them to the side to let the glue dry before removing the tabs with pliers and an exacto knife. For me the pliers worked well enough on their own and the knife was used to scrape off any excess glue or plastic bits from the tabs and from the 3D printing. Give it a quick sanding to smooth out the edges from joining the sections together and to begin smoothing out the surface the best I can. I never worked with 3D printed items before but it definitely requires a lot of sanding for each part to get a somewhat smooth and uniform surface. I will most likely do the best I can and hit it with a coat of primer before paint to hopefully fill in some of the imperfections of the surface.2 points
-
http://www.bbc.co.uk/news/entertainment-arts-41199638 Another of our screen heroes draws their career to a close. I was lucky enough to meet him in May and it was clear then he wasn't going to be doing it long. Enjoy your retirement Lord Vader.1 point
-
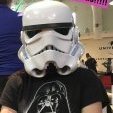
update: the CCG trooped our first Ottawa Pride parade, over a dozen strong, and Won the Best Costumes award.1 point
-
Respirator is a must. I forgot one evening and it hurt for 2 days!1 point
-
You know you are painting a TK when your shoes look like this! Been busy sanding, painting, lint-removing, clearcoating, and cursing the past few weeks. The tent really helps, but sadly there's been a lot of rain so it's made things challenging. I'm trucking on and the time of day doesn't stop me, so I am even painting at night. Must look really weird to my neighbors seeing me going out into my tent wearing this to paint.. Noticed some cracks starting to form in the ab: It's not really noticeable, but I wanted to prevent further cracking so I added some fibreglass mat and resin to the backside to kill some of the flex. I also plan to get into the ab section by lowering it down over my head instead of flexing it around my body. Also noticed some cracks on the yoke and codpiece, going to just apply some epoxy to the backside on these. Done with clearcoating most of the parts, i'm doing it as fast as I can as the temperature is starting to drop towards winter. What i've found to be really helpful is to have a spreadsheet of what parts you have done this and that to. Only some parts left now! Window/door seal strips have been purchased and is gonna go on the shoulder bells and other various areas on the armor where it rubs the most, tips on other places where to put it is appreciated! Other things: The maker of my 3D printed F-11D/SE-44C kit told me the shipment had been lost and he is printing a new one, just hope it is soon. Also ordered a Heston blaster and pistol on the sick sale he had, had to get a US friend to order it as he doesn't ship internationally. 240l Stanley chest has been purchased and is on its way from the UK! TRamp has been ordered and i've also received my wireless mic kit from eBay.1 point
-
Finishing up some front sight assemblies,,, sight block and the little blade sight piece1 point
-
You could rough up the back with sandpaper and apply fibreglass mat and resin, would give it some strength, I've used this on a set of clone armor I purchased which was trimmed too far and needed return edges putting back on. You just have to be careful not to use too much hardener in the resin as it can get hot while curing.1 point
-
I bet you will [emoji16] And I have some new inspiration now [emoji6] Skickat från min SM-G930F via Tapatalk1 point
-
Hey Sam welcome and thank you for your EI application. Lets hit it!! CRL and EIB Application Requirements: All submission photos have been posted except for your action shot. Can you please post this asap as it is needed in another part of our forums. Your armor displays all the necessary elements to qualify for Expert Infantry. Welcome trooper! Other-Armor Fit/Assembly: In this section we review observations made by your fellow troopers and ourselves. Some observations may lead to suggestions to improve the overall look of your armor. We have a couple minor suggestions to mention here. Such a crisp tidy build Sam, love it, another fine EI for Australia As your fellow troopers have mentioned, if you could bring that shoulder bell in just a smidge to balance out the gap, it will be perfect. reference Centurion Suggestions: Because Centurion photos show much more detail than EIB, items pertaining to Centurion might be seen there and not here. We try to point out all we can from what is seen but the final accuracy is the responsibility of the trooper. This is also where we try and get you in the best possible position for a successful Centurion application. From what we can see, the only thing that stood out here was your drop boxes. They are in different positios across a few of the photos and need to be fixed in position and aligned with the ends of the plastic ammo belt. For level three certification (if applicable): Drop boxes are vertically aligned with the end of the ammo belt with minimal gap between belt and box. reference image Just for accuracy, not a deal breaker: As mentioned by Joseph, a nice touch would be to get some pan head, slotted screws for the thermal detonator reference Applying for Centurion is a no brainer for you mate, go over the Centurion photo check list to make sure you have everything you need, make those couple of small and easy mods, and we shall see you in Centurion review soon. Congratulations once again1 point
-
Looks really good! Best of luck on your application!1 point
-
I'm 5' 3" and finishing up my first kit. Check out Cricket's and Fragarock's threads, which are both amazing resources for shorter troopers. I highly recommend cutting the cod, as that allows you to drop the abdomen quite a bit lower. Christine (Cricket) also ended up trimming the bottom of her chest piece and rebuilding the return edge, but I didn't have to as I have a long torso for my height.1 point
-
Well done. Its a lot of work but they look like they cam out great. Sent from my SM-G935V using Tapatalk1 point
-
Thanks Paul!!!!!!! Feels great to have your support!!! <3 See you at the next one1 point
-
I know I've not been busy lately but I've managed to finish my magnetic closure system for the greaves.... it's been a long journey and I've taken them apart more times than I've had hot dinners .... but I've got there in the end..... I think These are the internal magnets on the greaves.... I think I may have used too many magnets as they stick together better than a sticky thing that gets stuck .... and I really have to pull them apart .... And stuck together..... Side on .... It seems to have taken ages... but I'm chuffed with the results ... So I'm on the home straight now.... we'll almost..... Just the thighs to complete, strap the torso and arms together,paint and fit the buttons, fit sniper knee plate and thigh ... I've forgot what it's called.... oh thigh ammo belt... I think.... oh and the main ammo belt I have that to do as well.... so I'm getting there..... Slowly slowly catch the monkey .... as they say..... Hopefully I will get there by Christmas..... which year ...... who knows ..... lol..... I originally thought I would be a TK by summer . ........delusional or what ..... Sent from my iPhone using Tapatalk1 point
-
Every troop and cause can find a home in the three "c"s of the 501st. Costumes. Charity. Community. Centuri...ok not that. Disney , themself, said the 501st is ok to go for pride events. GLB used to be about sexuality. LGBT became about gender. LGBTQA is still about gender, both for those identifying as LGTBQ, and those who just support their friends', and strangers', rights to identify as whomever they wish. Im in the A camp. Occasionally thats followed by hole. In this regard it means Ally. I feel really dumb for even posting this:. This thread wasnt a discussion about lgtbqa members. It was a call for shout outs to themselves, if they wanted to. OP: BRAVO ZULU for stepping up and out. Enjoy the prides. My garrison marches on the 27th in Ottawa. Ill be there suited up and rainbowed in support.1 point
-
ESB blaster has none of the following: No ammo counter shall be present. No power cylinders on the magazine housing. For level 2 Sterling based blasters have the correct M-38 or M-19 style scope. (The M-19 scope is preferred.) When ever in doubt check the CRL's ESB ANH1 point