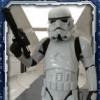
Solcar23[TK] Posted August 15, 2016 Report Share Posted August 15, 2016 Well, I'm fresh off posting my EIB status and I figured I'd be pro-active and get this ball rolling too. Here's my submission for Centurion status for my Anovos build. Thank you in advance for your consideration! Ok, then........(holds breath)....here we go: Name: Carlos MendozaLegion ID: TK 5924Forum Name: Solcar23Garrison: Midwest Garrison501st Member Page: http://www.501st.com/members/displaymemberdetails.php?userID=14790Height: 5'9"Weight: 175Armor maker: AnovosHelmet maker: AnovosBlaster: Doopydoos full kitCanvas Belt: GazmosisHolster: GazmosisHand Plates: Latex/TrooperbayElectronics: Icomm voice changer/ AkerBoots maker: TK Boots/Size 11Neckseal: Anovos And now the pictures............ Front - Arms at side: Back - Arms at side: Left - Arm raised: Right - Arm raised: Right side detail: Right side "Han" snap, as it didn't come through in the above pictures: Left side detail: Rubber Gloves and Latex Hand Plates: Shoulder bridge back w/elastic: Shoulder bridge front: Back to chest connection: Thigh Pack attachment: Knee Plate front: Knee Plate right side: Knee Plate left side: Drop Box backs: Cod to Butt Plate attachment: Ab Detail: Interior Strapping: Kidney Plate notch - right side: Kidney Plate notch - left side: Wrist side of forearms: As stated in my EIB thread: I did a redo of the lid following Gazmosis' post on the subject. The frown has been repainted, correct screws installed, its pop riveted together, better fitting and more accurate brow trim, the tube stripes are Trooperbay decal replacements for the decal that was there. The lenses were also custom cut and installed as per Gaz's post, using hockey helmet screws embedded in abs stacks. The helmet is also Plasti-Dipped on the inside with MICH pads for support. Helmet - front: Helmet - left side: Helmet - right side: Helmet -back Hovi-Mic Tip detail (upgraded): Lens color: S-Trim: Frown repaint, right point: Frown repaint, left point: Helmet interior: Blaster - left side (?): Blaster - right side (?): Blaster D-ring attachment: Canvas belt front: Canvas belt back: Holster attachment: Neck seal: Thermal Det back w/correct painted screws: Action Pose 1: Action Pose 2: Obligatory lid off: Thank you for your consideration....fingers crossed...... 1 Quote Link to comment Share on other sites More sharing options...
illusionz_09[TK] Posted August 15, 2016 Report Share Posted August 15, 2016 Good Luck! nice build. 1 Quote Link to comment Share on other sites More sharing options...
Solcar23[TK] Posted August 31, 2016 Author Report Share Posted August 31, 2016 Soooo......these getting reviewed anymore?........ Sent from my iPhone using Tapatalk Quote Link to comment Share on other sites More sharing options...
Sly11[Admin] Posted September 4, 2016 Report Share Posted September 4, 2016 Hi Carlos, any chance you can shorten those top straps that connect your shoulder bells to the bridges please, your armour looks great but it could look even better with that little adjustment Quote Link to comment Share on other sites More sharing options...
JulietLimaTango[TK] Posted September 4, 2016 Report Share Posted September 4, 2016 Looks good! What glue did you use for the white nylon straps holding the internal snaps? Might copy the idea with E-6000. Good luck! Quote Link to comment Share on other sites More sharing options...
Solcar23[TK] Posted September 4, 2016 Author Report Share Posted September 4, 2016 Hi Carlos, any chance you can shorten those top straps that connect your shoulder bells to the bridges please, your armour looks great but it could look even better with that little adjustment Hey Sly! Thanks for reviewing me! I totally understand what you're going for and believe me, there probably no one who it bugs more than me! I've had this convo a couple times with Gaz about it and I literally have the elastic so tight that it's difficult to snap it while suiting up. I think the bottom line really is that my stupid shoulders are too broad and it just pulls it outward. If I raise my arms a little it meets perfectly but if I relax they separate. The only solution I can think of at this point would be to use nylon so there's no stretch. I went through several tries to make it sit right but no matter how tight I make it as soon as I relax, it comes right back. I'd really like to get it approved but I don't want to cheat and put gaffer tape or something just to get the shot, it kinda is what it is. If anyone's got a better solution, I'll totally try it and resubmit! Sent from my iPhone using Tapatalk Quote Link to comment Share on other sites More sharing options...
sylverbard[TK] Posted September 4, 2016 Report Share Posted September 4, 2016 (edited) Hey Sly! Thanks for reviewing me! I totally understand what you're going for and believe me, there probably no one who it bugs more than me! I've had this convo a couple times with Gaz about it and I literally have the elastic so tight that it's difficult to snap it while suiting up. I think the bottom line really is that my stupid shoulders are too broad and it just pulls it outward. If I raise my arms a little it meets perfectly but if I relax they separate. The only solution I can think of at this point would be to use nylon so there's no stretch. I went through several tries to make it sit right but no matter how tight I make it as soon as I relax, it comes right back. I'd really like to get it approved but I don't want to cheat and put gaffer tape or something just to get the shot, it kinda is what it is. If anyone's got a better solution, I'll totally try it and resubmit! Sent from my iPhone using Tapatalk I don't understand. Which elastic is so tight? Biceps elastic should be loose. Top attachment just needs to be shorter by half an inch each. Safety pin it shorter and put it in. Does that fix it? Do your shoulder bells have a return edge on the bottom holding it out a quarter inch? Actually...if you swap the white double snapped nylon from left to right that moves the snap an inch...do they line up properly otherwise? Edited September 4, 2016 by sylverbard Quote Link to comment Share on other sites More sharing options...
Solcar23[TK] Posted September 4, 2016 Author Report Share Posted September 4, 2016 I don't understand. Which elastic is so tight? Biceps elastic should be loose. Top attachment just needs to be shorter by half an inch each. Safety pin it shorter and put it in. Does that fix it? Do your shoulder bells have a return edge on the bottom holding it out a quarter inch? Actually...if you swap the white double snapped nylon from left to right that moves the snap an inch...do they line up properly otherwise? The elastic from the shoulder bridge snap to the top of the bell. I don't have my armor with me here so I need to get it to take some shots. Its so tight that any tighter will begin to pull the bridge nylon strap outward. I never thought of reducing the bell bottom return edge, but i trimmed nearly every return edge to around 7mm so I didn't think it would be a bit deal. My ATA never had this issue and the bells are smaller on that kit! Let me see what I can do, if its a deal breaker I'll have to resubmit pics later. Thanks again! Fingers crossed I can get it to meet! Quote Link to comment Share on other sites More sharing options...
Solcar23[TK] Posted September 4, 2016 Author Report Share Posted September 4, 2016 Looks good! What glue did you use for the white nylon straps holding the internal snaps? Might copy the idea with E-6000. Good luck! I just used E 6000. Good luck! Quote Link to comment Share on other sites More sharing options...
sylverbard[TK] Posted September 4, 2016 Report Share Posted September 4, 2016 Well the bottom of the bells are obviously sticking out half an inch in your pics. Personally if youre just that broad shouldered and everything else is perfect I hope it won't prevent centurion. I'd get rid of any return edge on the bottom of the bells. Armour should sit flat against other parts. Quote Link to comment Share on other sites More sharing options...
Solcar23[TK] Posted September 4, 2016 Author Report Share Posted September 4, 2016 Well the bottom of the bells are obviously sticking out half an inch in your pics. Personally if youre just that broad shouldered and everything else is perfect I hope it won't prevent centurion. I'd get rid of any return edge on the bottom of the bells. Armour should sit flat against other parts. Got it! Like I said, it bugs me too, I've always taken an enormous amount of pride in my builds and values of the Centurion status (otherwise I wouldn't have submitted again with my new armor). It was an issue I couldn't resolve and since it's not technically a requirement I just thought I'd submit when I felt the needed details were in order. Not trying to skimp or cheat at all on details. I want it perfect too! I'll get on it asap and resubmit! Thanks again for the help my brother! 1 Quote Link to comment Share on other sites More sharing options...
Solcar23[TK] Posted September 4, 2016 Author Report Share Posted September 4, 2016 Also I had some issues posting from my phone which resulted in multiple posts, how do we delete those? Quote Link to comment Share on other sites More sharing options...
sylverbard[TK] Posted September 4, 2016 Report Share Posted September 4, 2016 I'm sure an admin can nukem . 1 Quote Link to comment Share on other sites More sharing options...
Novak Dimon[TK] Posted September 4, 2016 Report Share Posted September 4, 2016 I removed the return edges of my shoulder bells nearly completely. <br> Doing this might help closing the gap to the shoulder bridges. I think it's worth a try. <br><br> All the best!<br> Christian 1 Quote Link to comment Share on other sites More sharing options...
Solcar23[TK] Posted September 4, 2016 Author Report Share Posted September 4, 2016 I just read your comment Sly about reversing the white nylon straps! I bet if I do that and lose the return edge it might just do the trick! Sent from my iPhone using Tapatalk 1 Quote Link to comment Share on other sites More sharing options...
Solcar23[TK] Posted September 10, 2016 Author Report Share Posted September 10, 2016 Took some new pics, they're as close as I can get em. Considering it's not a requirement, how much longer do you think it'll take to get reviewed? Sent from my iPhone using Tapatalk 1 Quote Link to comment Share on other sites More sharing options...
silverdollar22[TK] Posted September 10, 2016 Report Share Posted September 10, 2016 Awesome job Carlos! Your armor speaks for your attention to detail! Should be a slam dunk! 1 Quote Link to comment Share on other sites More sharing options...
Solcar23[TK] Posted September 10, 2016 Author Report Share Posted September 10, 2016 It's been almost a month. Any idea how much longer it'll take to review my submission? Sent from my iPhone using Tapatalk Quote Link to comment Share on other sites More sharing options...
Sly11[Admin] Posted September 11, 2016 Report Share Posted September 11, 2016 Thanks for posting up the new images Carlos, I am just completing your review now, your wait is almost over. 1 Quote Link to comment Share on other sites More sharing options...
Sly11[Admin] Posted September 11, 2016 Report Share Posted September 11, 2016 Hey Carlos, welcome to your long awaited Centurion review, lets get to it. CRL and Centurion Application Requirements: All required photos are present. Your armor meets the requirements for the Centurion CRL, with that a big Congratulations!! Other-Armor Fit/Assembly: In this section we usually make comment on any elements that can make you look the best you possibly can. We do thank you for your persistence with t those shoulder bells, finally they are perfect. You have a beautiful build and a well deserved Centurion rank. I for one would be proud to march beside you Congratulations trooper 1 Quote Link to comment Share on other sites More sharing options...
sylverbard[TK] Posted September 11, 2016 Report Share Posted September 11, 2016 Took some new pics, they're as close as I can get em. Considering it's not a requirement, how much longer do you think it'll take to get reviewed? Sent from my iPhone using Tapatalk Looks perfect. What fixed it? Quote Link to comment Share on other sites More sharing options...
Solcar23[TK] Posted September 11, 2016 Author Report Share Posted September 11, 2016 That's awesome! Thanks a lot Sly! That really makes my night! I'm so very proud to be a member of this detachment! Thanks again! Sent from my iPhone using Tapatalk Quote Link to comment Share on other sites More sharing options...
Solcar23[TK] Posted September 11, 2016 Author Report Share Posted September 11, 2016 Looks perfect. What fixed it? Just some really tight, fresh heavy duty elastic. It might separate a little if I twist or reach across but it sits nice now when in a relaxed pose. Sent from my iPhone using Tapatalk 2 Quote Link to comment Share on other sites More sharing options...
Solcar23[TK] Posted September 11, 2016 Author Report Share Posted September 11, 2016 Just looked it up, my first Centurion build was #52 in 2012 and now my second is #268. It's crazy that we've added added 216 Centurions in the last 4 years! Keep up the good work friends! Just as an aside, my first EIB in 2012 was #247 and my 2016 EIB is #625. 378 new EIB's in 4 years. Just so awesome! Sent from my iPhone using Tapatalk 1 Quote Link to comment Share on other sites More sharing options...
Captain_Wordo[TK] Posted September 12, 2016 Report Share Posted September 12, 2016 Congrats Carlos! 1 Quote Link to comment Share on other sites More sharing options...

Recommended Posts
Join the conversation
You can post now and register later. If you have an account, sign in now to post with your account.