GeorgePBurdell[501st] Posted March 2, 2015 Author Report Posted March 2, 2015 Arms today Began by trimming the right arm down to size Gluing on backing strips (15mm wide) Connecting the bicep halves I noticed while gluing the bicep halves that the biceps are designed kinda wide, meaning it takes a lot of bracing to keep them in place while the E6000 sets. I made several trips to Home Depot and bought many clamps during this stage. Doing the same thing for the forearms. While the arms were setting up, I ate dinner, then switched to finish the backs of the legs. Trimming them to fit. Applying the backs (20mm for thigh and 30 mm for shins) And now we play the waiting game.... Knee plate, thigh pack, left arm, and velcro for shins to come! Quote
Pencap510 Posted March 2, 2015 Report Posted March 2, 2015 Good looking clean build - keep up the great work Quote
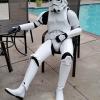
GeorgePBurdell[501st] Posted March 2, 2015 Author Report Posted March 2, 2015 Ate lunch at home today and took this picture to make a coworker jealous. Little do they understand how much work still needs to be done... Quote
GeorgePBurdell[501st] Posted March 3, 2015 Author Report Posted March 3, 2015 More progress from last night! Applying velcro to the backing of the calves. Gluing on the knee plate. According to the tutorial, you can do this with rivets, but according to the CRLs, you cannot use rivets for the knee plate for centurion level. So I just glued it on. Note: I'm not applying for centurion, I'm just following those guidelines since I'd like the most accurate looking armor. Putting the knee pack on. I heated it in the oven and bent it to my will first. The edges needed to be cut to the correct shape as well before I could rivet it one to the thigh armor. I also finished the left arm armor the same way I did the right arm. It goes much faster the second time when you know what you're doing and can use your right hand to help fit the pieces... Making straps and snap plates. Quote
Tolo[TK] Posted March 3, 2015 Report Posted March 3, 2015 (edited) Looking at your shins, will you be putting the cover strip in the back of the? I saw you have put your velcro without the strip. Sent from my iPhone 6 using Tapatalk Edited March 3, 2015 by Tolo Quote
GeorgePBurdell[501st] Posted March 3, 2015 Author Report Posted March 3, 2015 There is a cover strip. It's hard to see in that picture but there's a 30mm cover strip that the velcro is attached to. I'll get a better picture in my next update. Quote
Sly11[Admin] Posted March 4, 2015 Report Posted March 4, 2015 Great build so far, keep up the good work. I see you have ticked two boxes so far. Blood and sweat, the tears will be tears of joy when you are fully approved. Nice build. Sent from my iPad using Tapatalk Quote
GeorgePBurdell[501st] Posted March 4, 2015 Author Report Posted March 4, 2015 As I mentioned before, here are some better back views of the shins I also invested in a sewing machine. After hours of struggling and reading the ambiguous, pictogram filled instruction manual for hours, I cranked out a canvas belt, made the same way as in the tutorials. It turned out to be a bit shorter than I though so there's only about 2 inches of overlap instead of several. I'm hoping my thermal detonator can will cover that up. I'd also like to point out that I tried to heat bend the plastic part, BUT the plastic is so flexible that it kinda just sags back flat. So I decided to just leave it as is and allow it to flex as is when attached to the belt. I'll probably reinforce it with velcro at some point, too. A friend came over and helped me fit my ab, kidney and posterior plates so I trimmed them and am now strapping it all together. I removed the cod piece from the ab plate because it's really awkward feeling to keep them together and I noticed that it is common to do so. I was messing with the snaps method but they kept breaking off so I just went with the permanent method. The elastic straps are glued down and then held in place with magnets while the glue dries. Also, here's the cutout of the lower corner on the kidney plate (22mm by 22mm as specified in the CRL) Quote
Bone[501st] Posted March 4, 2015 Report Posted March 4, 2015 Is cutting the cod common? I thought just the opposite ... Quote
GeorgePBurdell[501st] Posted March 4, 2015 Author Report Posted March 4, 2015 Common enough to have a step for it as an option in the tutorials. I'm not sure how many people actually do it, but when I was fitting the pieces, it was pretty uncomfortable as a solid piece, so I went with it cut. Quote
chrskmbr Posted March 6, 2015 Report Posted March 6, 2015 Hey nice build so far, I was going to paint the inside of my bucket as well. It's been a little bit since you painted it, how's the smell. I figured I would wear it around the house often after completing it... but I don't want my wife to come home and find me high on fumes and passed out on the floor just in my boxers and my bucket! Anybody else know about how long until the smell wears out? 1 Quote
GeorgePBurdell[501st] Posted March 6, 2015 Author Report Posted March 6, 2015 The smell in mine is still pretty bad, I can't wear it for more than a few minutes without getting a headache, but it's getting better. 1 Quote
chrskmbr Posted March 6, 2015 Report Posted March 6, 2015 Spray Paint I assumed? Did you go for Semi-gloss finish? Quote
GeorgePBurdell[501st] Posted March 6, 2015 Author Report Posted March 6, 2015 It's a spray enamel, same exact paint as the exterior, just in spray form. So yeah, it has a semi-gloss. I kinda like the look of the flat black though so my next build will probably use that... 1 Quote
GeorgePBurdell[501st] Posted March 6, 2015 Author Report Posted March 6, 2015 Also, if anyone is interested, I found this on Amazon and got the idea for a water cooling system that would run through all of the hot parts of the armor. http://www.amazon.com/dp/B00JWJIC0K/ref=wl_it_dp_o_pC_nS_ttl?_encoding=UTF8&colid=LSFCXF04S2DO&coliid=I1PL3GRHG6N1WS I plan on buying some heat sinks, a couple of really small computer fans, and some vinyl tubing and having it run all under my undersuit and vent out through the helmet vents. I'll probably start a separate thread for that once I get the parts together and have time to work out the thermodynamics of it all... Quote
hondutrooper[501st] Posted March 7, 2015 Report Posted March 7, 2015 Also, if anyone is interested, I found this on Amazon and got the idea for a water cooling system that would run through all of the hot parts of the armor. http://www.amazon.com/dp/B00JWJIC0K/ref=wl_it_dp_o_pC_nS_ttl?_encoding=UTF8&colid=LSFCXF04S2DO&coliid=I1PL3GRHG6N1WS I plan on buying some heat sinks, a couple of really small computer fans, and some vinyl tubing and having it run all under my undersuit and vent out through the helmet vents. I'll probably start a separate thread for that once I get the parts together and have time to work out the thermodynamics of it all... sounds like a great idea...would like to see that built Quote
GeorgePBurdell[501st] Posted March 8, 2015 Author Report Posted March 8, 2015 UPDATES! So I think I've gotten the strapping down. Here's some pictures of what I did. It fits pretty well, I'll have pictures in the armor once my photographer (roommate) gets home. Here's what it looks like from the inside when it's all together. Kinda works like a suspender system. The elastic that holds the shoulders down is too big to be canon so I'm going to have to replace it with something much thinner in the near future. Here's the shoulder connection. Here's the thigh connection. Note that I padded the thighs with a bit of foam. It keeps them from rattling while walking around. I also padded the tops of the shin grieves for the same reason as the thighs. Got some supplies from my favorite industrial supply company to make thermal detonator tube clips for the belt. And now for the neckseal. It took three tries, so I'm just going to show the one that worked. I started with headliner material, found at Hancock Fabrics. I cut out two 5 inch by 20 inch strips, created a cutout for the Adams apple, and sewed the top and sides on the inside. Basically just following the tutorial. You'll notice that the headliner fabric that looked black in the store is actually quite grey. So I had to buy some upholstery paint to get it the right color. Testing the paint on one of the previous failures. But before painting, I took advantage of the grey color and marked it up with sharpie so I could get nice, even, straight ribs on the whole neckseal. And once I sewed it and added the velcro, I painted it and set it out to dry. While that's drying, I went ahead and made a bib to go on the bottom of the seal. I'll probably finish that up tonight and have another set of pictures with it and the rest of the armor. I'm pretty much finished with all I can work on, except for the hands, so I'm probably not going to have any updates until I get my boots in, buy some leather for the holster, and find a blaster kit I can put together. Quote
Tolo[TK] Posted March 8, 2015 Report Posted March 8, 2015 Nice job on the neck seal Sent from my iPhone 6 using Tapatalk Quote
Sly11[Admin] Posted March 8, 2015 Report Posted March 8, 2015 (edited) Keep up the good work. Edited March 8, 2015 by Sly11 Quote
GeorgePBurdell[501st] Posted March 8, 2015 Author Report Posted March 8, 2015 Thanks guys! Here's the neckseal finished: Quote
GeorgePBurdell[501st] Posted March 9, 2015 Author Report Posted March 9, 2015 Ok so for the hand guards, I simply made elastic straps to hold them on. I might try to invest in some latex ones for future builds, as these plastic ones are not very comfortable... Finally got some pictures in the full armor. Not going to apply just yet, I need my boots to come in, will be remaking the belt to eliminate the sag in the back, and need a holster and blaster still. Also, I didn't realize the bib was sticking out of the back, the calves weren't properly velcroed, or the side strap wasn't in place when these were taken, so just ignore those issues... Quote
Tusken RTT Posted March 9, 2015 Report Posted March 9, 2015 Heck yea, looking great! You could trim off the chest piece some, the side portions that are extending towards your back. You can see some of the reference pics to see just how much. Strong work! Quote
GeorgePBurdell[501st] Posted March 9, 2015 Author Report Posted March 9, 2015 Yeah I wasn't sure how far to go with that but I'll take another look for sure! Thanks! Quote
Bone[501st] Posted March 10, 2015 Report Posted March 10, 2015 (edited) Your thighs look rather big compared to your calves ... Do you have a lot of room inside of them? Oh, and you don't have to redo the belt. Just add the two snaps to the ab-plate and it will sit fine. Edited March 10, 2015 by Bone Quote
GeorgePBurdell[501st] Posted March 10, 2015 Author Report Posted March 10, 2015 I don't think I have a picture, but the back is falling apart due to poor sewing. I need the practice anyway for future builds haha... As for the thighs they were kinda large so I padded the insides with foam to help keep them in place. I didn't want them too tight in case I happen to regain the 15 lbs I recently lost. Quote

Recommended Posts
Join the conversation
You can post now and register later. If you have an account, sign in now to post with your account.