DarthDadio[TK] Posted December 15, 2014 Report Share Posted December 15, 2014 James Roman TK76626 (76626 is Roman on a telephone keypad) Star Garrison -- North Texas Squad Mandatory Information Armor Maker = AM Helmet Maker = AM Blaster Type = Hasbro/Doopy Doo Modified (Replaced barrel, trigger, trigger guard) Optional Height = 6.1†Weight = 235 lbs Boots Maker = Bass Amsterdam painted white Canvas belt = Homemade Hand Plates Type = AM (abs) Electronics = Helmet Fan Neck Seal Type = Homemade Holster Maker = Homemade Pictures Full Body Front - Arms at Side 
 Back – Arms at side 
 Left – Arm raised 
 Right – Arm raised 
 Right Side Detail – Arm raised 
 Left Side Detail – Arm raised Armor Details 
 Abdomen Details 
 Action Shot 
 Cod and Butt Plate Attachment 
 Interior Strapping Helmet Details 
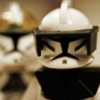
 Front 
 Side 
 Back 
 Hovi Tip Detail 
 Lens Color Blaster Details 
 Blaster – Left 
 Blaster – Right Accessory Details 
 Neck Seal 
 Thermal Detonator – Back 
 Holster Attachment Thank you for your consideration. I'm looking forward to the feedback and any opportunity to improve. Quote Link to comment Share on other sites More sharing options...
Snaps[TK] Posted December 15, 2014 Report Share Posted December 15, 2014 Great build. Good luck! Quote Link to comment Share on other sites More sharing options...
fuumantroop[TK] Posted December 15, 2014 Report Share Posted December 15, 2014 Good luck James! Looking good! Quote Link to comment Share on other sites More sharing options...
Sly11[Admin] Posted December 15, 2014 Report Share Posted December 15, 2014 Good luck james, armour looks great. Sent from my iPad using Tapatalk Quote Link to comment Share on other sites More sharing options...
cm325i[TK] Posted December 15, 2014 Report Share Posted December 15, 2014 Looks awesome James. Should be an easy approval. Quote Link to comment Share on other sites More sharing options...
DarkTrooper[TK] Posted December 15, 2014 Report Share Posted December 15, 2014 Very nice photos Quote Link to comment Share on other sites More sharing options...
ukswrath[Staff] Posted December 16, 2014 Report Share Posted December 16, 2014 Nice build James. Nice looking home made belt and neck seal. Good luck. Quote Link to comment Share on other sites More sharing options...
Tusken RTT Posted December 16, 2014 Report Share Posted December 16, 2014 Very clean- great job! Quote Link to comment Share on other sites More sharing options...
Dark PWF[Staff] Posted December 20, 2014 Report Share Posted December 20, 2014 Looks good, James!!! Only little thing I'd say to look at changing for accuracy's sake - nobody will ever see it while you're in armor - is to get flat-tipped screws for your TD instead of Phillips. Should be quick and painless!! Good luck, Star brother!! Quote Link to comment Share on other sites More sharing options...
DarthDadio[TK] Posted December 20, 2014 Author Report Share Posted December 20, 2014 Looks good, James!!! Only little thing I'd say to look at changing for accuracy's sake - nobody will ever see it while you're in armor - is to get flat-tipped screws for your TD instead of Phillips. Should be quick and painless!! Good luck, Star brother!! Thank Tim, I've been on the lookout for some but so far no luck. 1 Quote Link to comment Share on other sites More sharing options...
I'm Batman[501st] Posted December 21, 2014 Report Share Posted December 21, 2014 I just puttied up mine to make single slots, then painted. Quote Link to comment Share on other sites More sharing options...
gazmosis[501st] Posted December 21, 2014 Report Share Posted December 21, 2014 I want to aplologize for my short absence. It is that time of year that I am commissioned to build several Christmas gifts and I was hit with two that were both complicated and short of time. I have reached the point where I can get back to business. Sorry for delay again, troopers! Mr. James! Thank you for your application for EIB! I want to add a comment for you newer troopers. Jim's armor is a perfect example of finding the correct armor that works for your size. Jim is in the category of a "larger trooper". At 6'1" and 235, I certainly wouldn't mess with this enforcer! But his research led him to AM and it was a great choice. The armor is a wonderful fit for his frame! Well done, Sir! So let's look at your kit a little closer!! CRL and EIB Application Requirements: All required photos have been submitted. Nice work! Your armor contains all necessary elements for EIB. That saying, I would like to congratulate and welcome you to Expert Infantry!!! Other-Armor Fit/Assmembly: This section is for suggestions to be made by myself and your fellow troopers that go towards improving the overall look of your armor. Unless specifically stated, these suggestions will have no affect on any application. You did a very nice job on your build. It was well thought out and executed. Again, the fit is great for you as well! There was not a lot to add in this section which is always a good thing!! I did want to mention a comfort suggestion. There seems to be a lot of return edge at the top of your forearms. I just wonder if this cuts into your arms at all and/or restricts your movement. You can remove some or all of this if it is uncomfortable in any way. Also, there is nothing removed on your left forearm at the inner portion of your elbow. This can also be scooped out a bit if your movement is at all difficult. If you have no issues here, leave it be. Congrats on the handpainting of your helmet details. I applaud anyone who challenges this task. Although some lines are a bit choppy, the overall product has good character. Since we are on the subject of your helmet, I wanted to bring up your brow line. Again, this is totally up to you, but why I bring this up is the path of the brow trim itself. In the film, the spacing between the tops of the eyes and the brow trim itself varied greatly as seen here: Although the gap differences were minute, they were different. Which is fine. The path of the brow in relation to the eyes, however, remained constant. It was for the most part level across. On yours I noticed a fairly good drop in the center. I marked the right circle as much lower than the left circle. By comparison to the screen used helmet. I have run into this situation before and by removing the brow trim and trimming the browline then replacing the trim this can be remedied. If this is something you want to tackle. Lastly, with a couple neatly placed drops of CA (super) glue, you can hold that mouth screen in place with a little more reliability than tape. Tim had mentioned replacing the "X" head screws with slotted screws for accuracy sake. But that is also up to you. Very nice thermal detonator by the way! Centurion Suggestions: You thoughts towards Centurion were obvious in your build. There are a couple things that will need to be upgraded first. Your blaster will need to be upgraded to a Sterling based blaster. DVH or Doopy Kits are most commonly used. You will need to get the latex/flexible hand plates and glue them directly to the back of the gloves You have been around long enough to know about the chest and back upgrades needed. If you do decide to make these upgrades, make sure the straps that hold your shoulders in place allow them to be pulled up to come close to if not touch the ribbed shoulder bridges. Congratulations again!!! Your Garrison should be proud to be by your side! Quote Link to comment Share on other sites More sharing options...
gmrhodes13[Staff] Posted December 21, 2014 Report Share Posted December 21, 2014 Congrats and welcome to the ranks trooper Quote Link to comment Share on other sites More sharing options...
I'm Batman[501st] Posted December 21, 2014 Report Share Posted December 21, 2014 Congrats buddy! Quote Link to comment Share on other sites More sharing options...
DarthDadio[TK] Posted December 21, 2014 Author Report Share Posted December 21, 2014 Woot and wooyay. Thanks for the feedback. I appreciate the insight on the brow line and the screen for the frown. The return edge for the upper forearm is on my adjustment list; it is by far my most troublesome spot and it bruises my arms every time. I am looking forward on working towards Centurion. 1 Quote Link to comment Share on other sites More sharing options...
cm325i[TK] Posted December 21, 2014 Report Share Posted December 21, 2014 Congrats man! I had the exact same brow issue w my AM helmet. Good suggestion they had for trimming it up. I may have to try that myself. Quote Link to comment Share on other sites More sharing options...
Snaps[TK] Posted December 22, 2014 Report Share Posted December 22, 2014 Congrats and welcome to the EIB ranks! Quote Link to comment Share on other sites More sharing options...
Dark PWF[Staff] Posted December 22, 2014 Report Share Posted December 22, 2014 Congratulations James, and welcome to EIB!!! Quote Link to comment Share on other sites More sharing options...
PGHtoolman Posted December 23, 2014 Report Share Posted December 23, 2014 You did an awesome job!! Quote Link to comment Share on other sites More sharing options...
SeanTX Posted January 30, 2015 Report Share Posted January 30, 2015 If you are still looking for flat head pan head screws I think I found some the right size at ACE hardware. Specifically the Arlington location on park row. Someday I'll post a build thread and show pictures. Quote Link to comment Share on other sites More sharing options...
ukswrath[Staff] Posted February 2, 2015 Report Share Posted February 2, 2015 Congrats James sorry for being late to the party. Quote Link to comment Share on other sites More sharing options...

Recommended Posts
Join the conversation
You can post now and register later. If you have an account, sign in now to post with your account.