Tsalagi Posted October 22, 2012 Report Posted October 22, 2012 Recently picked up a T/MC kit and excited to get moving on it. I'm fortunate enough to be local to the maker and got to pick up directly from the Armor Factory, the place where Troopers are born. Very cool guy and his operation is trick. My plan is build this up as an ANH Stunt, but ultimately convert it to a TD. I just love the TD's and there don't seem to be many around, at least where I'm at. I had been procuring various items prior to the actual armor kit, so had many of the items on hand so I could dive right in. Although I still need a few things, like helmet paraphernalia, gloves, and who knows what else, the build has begun. Like a kid at Christmas, the box was ripped open and the armor laid on the floor to check it all out. The kit is offered fully trimmed, shaped, and sanded, but I opted to take it raw and have all that fun myself. The first several sessions were spent marking trim lines, scoring, and snapping. The maker gave me one of the best tips yet and that was to ditch the standard exacto blade and use a #16 scoring blade. I'll have to post a pic, but I was able to make fluid and straight lines with ease. Day 1 progress - Trim arms Day 2 - Trim the legs and big parts Other evenings worked on some of the smaller parts and did some shaping and sanding on the arms. More or less got it all trimmed (cut out) the first week. Stay tuned, will keep posting progress and questions.... Quote
Tray[TK] Posted October 22, 2012 Report Posted October 22, 2012 Awesome. Nice start so far. I love my T/MC. I'm building my latest T/MC kit into a Death trooper. Then I'll be getting a new kit to build a new TK. Quote
Rezablad3[TK] Posted October 22, 2012 Report Posted October 22, 2012 Many fun days ahead of you...Good luck buddy, and have fun.... Quote
gmrhodes13[Staff] Posted October 22, 2012 Report Posted October 22, 2012 Very nice good luck with your build Quote
gazmosis[501st] Posted October 22, 2012 Report Posted October 22, 2012 Jeez I love armor builds!!!!!! Nice work so far!!! \ Quote
Tsalagi Posted October 23, 2012 Author Report Posted October 23, 2012 The first pieces I glued together were the biceps. Definitely nerve racking, but they look good in the end. Also got to use a belt sander and really shaped everything up and got it all sanded and looking good. Next step is work on the Chest to Back and begin on the strapping for the arms. Quote
Tsalagi Posted October 23, 2012 Author Report Posted October 23, 2012 Made some more progress on my strapping system and the beginning of the getting the arms connected. Adding the snap plates to the chest and back to create those connection points Lots of snaps in the shoulder bell to get this hooked into the chest. I've had some shoulder injuries over the years and this just goes to show how the shoulder floats and is connected primarily through muscle and tendons I used a seatbelt strap from one of my kids old car seats (works perfect) to connect chest to back and added the spur over to the shoulder. This is my bicep strap made of the non-roll elastic, the ends where snaps are located are reinforced with webbing sewed on (std block X) I'm not sure on the use of webbing to connect my shoulder bell to the Chest snap, I like how it keeps the bell forward, but it seems too tight... Do most use elastic or webbing for this connection? Quote
Tsalagi Posted October 24, 2012 Author Report Posted October 24, 2012 Chest to Back and the Right arm is assembled and strapped up. Still not sure on the webbing from chest to shoulder bell, may need to change that to elastic so there is some flexibility. Any thoughts? Suited up, the one armed bandit Feedback, how's it looking? Quote
Tsalagi Posted October 25, 2012 Author Report Posted October 25, 2012 Last night got the left arm assembled and strapped up. Sometimes these snap plates are a PITA. One on my shoulder bell popped off, so need redo that one tonight. Notice the clamp casualty, i put a little too much pressure on the clamp to get a snap plate to hold down and that thing exploded! Quote
Horrendous Posted October 25, 2012 Report Posted October 25, 2012 Glad you're posting this stuff. It's really giving me some insight on my build Sent from my Desire HD using Tapatalk 2 Quote
troopermaster Posted October 25, 2012 Report Posted October 25, 2012 One on my shoulder bell popped off, That doesn't surprise me. There is no reason to have your straps snapped inside your bells. It is much better to simply glue the straps directly to the plastic and only have one snap on the end of your top strap to connect under your shoulder strap. Quote
Tsalagi Posted November 20, 2012 Author Report Posted November 20, 2012 The torso and other connections were next up. The the snapping and strapping took tons of time, thanks to all who came before me on that front with all the examples. Used Split rivets on the ab to add an elastic connection on the left side The kidney to bootie connection The whole shebang Still have a couple things to sort out, namely the kidney to ab "GAP"! It's not much but still not quite the 1/2" for EIB. Trying to locate some ABS or like material that can help me close the gap. Now I'll need to back out the split rivets on the kidney side, make some ABS paste and fill the holes and sand.... ugggg. Quote
Ravenwood[TK] Posted November 20, 2012 Report Posted November 20, 2012 This is looking really good, love watching others build, it motivates me to finish mine excellent work Quote
gmrhodes13[Staff] Posted November 23, 2012 Report Posted November 23, 2012 Very nice work, keep it up Quote
PiettLives[TK] Posted November 27, 2012 Report Posted November 27, 2012 Nice... I can tell you're very detailed. All your work is clean. I grabbed a few of your images to help me with my build. Great job so far! Quote
Nicky Posted November 27, 2012 Report Posted November 27, 2012 (edited) Hi! Great kit, and great clean job, maybe the photo camera is boasting a bit though ^^ Very clean trim and sanding everywhere. How tall are you? Why did you choose overlap joint instead of butt joint on the biceps and forearms? The 2 sharp edges of the cover strip makes a big part of the sharp sturdish look of the TK arms. Didn't order finishing strips from Tray? Edited November 27, 2012 by Nicky Quote
Tsalagi Posted November 28, 2012 Author Report Posted November 28, 2012 Hi Nicky- Funny I have a friend from Gothenburg and another close close friend from Grums. Thanks for the compliments, I've been trying to do a good job on this. Originally I had planned to use the coverstrips, but the guy who made the armor suggested the overlap method which is what he did. I do think the hard edge would look better at those joints. I'll probably turn this kit into a TD and get another one for secondary TK where I can use the coverstrips. I need to post some pics of my helmet work which is what I've been working on lately. Quote
Nicky Posted November 29, 2012 Report Posted November 29, 2012 (edited) It's a small world even smaller gothenburg! haha Convert! You won't regret it If you have the cover strips for it, and you used E6000 you can easily convert to butt joint for better looks, you would only need to trim half the ridge on both ends, peel the glue residue, re-sand and glue with cover strips that'll cover the entire ridge. You picked ANH Stunt so butt joint is best suited, even for TD. Edited November 29, 2012 by Nicky Quote
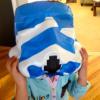
Tsalagi Posted December 12, 2012 Author Report Posted December 12, 2012 The next installment of progress on the TK kit..... "The Helmet" Getting overworked with cutting, scoring, snapping, gluing, creating snap plates, setting snaps and REPEAT, so moved over to the long anticipated work on the helmet. Many hours have been spent gathering reference pics, staring at movie stills, handling the untrimmed helmet, and envisioning how all this is going to manifest itself into one of the most recognized and feared "Faces" on the planet. Awesome. Being that this part of the project was so critical and Fun, I took lots of pictures along the way. The helmet is a very integral and standard part of the TK Armor, yet lends itself to interpretation, creativity, and individual vision. Of course I goofed some things up along the way, did some back tracks, and its not perfect. 1. Prepping the Helmet with Pencil On the teeth I went for a rough cut look with some irregularities and un-uniformity 2. Making first cuts, with power 3. Bag over my head Painting on my smile Vocoder 4. Applying the DARK SIDE Using lots of electrical tape to mask off the teeth and eyes Almost ready for paint Dark Side Treatment (Plasti-Dip) Removed all the Tape 6. Getting the lenses put in... Didn't come out clear as I'd like. Used a heat gun to soften the lenses then hot glued them into the socket There are several very blurry spots in my lens and if cleared up would make it very easy to see out of (relatively of course) Got more done just need to get some pics uploaded Quote
Potty Meister Posted December 12, 2012 Report Posted December 12, 2012 Your helmet looks great so far. The teeth could use some more paint though. It should go from top to the bottom. And the tops and bottoms on one won't necessarily line up with the one next to it. Quote
Tray[TK] Posted December 12, 2012 Report Posted December 12, 2012 (edited) Looks good so far. I would clean up the frown paint as well. The flat area of the teeth should be completely painted to the edge. I used electrical tape when I masked off the frown. It allowed for more give and shape the frown area better. Edited December 12, 2012 by Tray Quote
gmrhodes13[Staff] Posted December 12, 2012 Report Posted December 12, 2012 Found it was easier to get the right coverage on the teeth just with a brush as the hight and taper of the teeth varies. Keep up with the good work Quote
jnnfr72[TK] Posted December 13, 2012 Report Posted December 13, 2012 Awesome job taping / painting your bucket! Quote

Recommended Posts
Join the conversation
You can post now and register later. If you have an account, sign in now to post with your account.