Search the Community
Showing results for 'Imperial Gaskets' in topics.
-
Hey all, I'm hoping to document my first order TK build here! This will be my first build, and I will inevitably have a million questions, so I'm hoping I can have some guidance! Here are my current plans: My dream is to make the TFA version of the trooper, as this design is what truly got me invested in stormtroopers years ago when I first saw them walking around Hollywood Studios. The DN kit is obviously intended to be used as a TLJ/TRoS suit, but from what I can tell, it can be made into a TFA kit. So that leads me to my next question, are the only differences between the two versions the helmet, forearms, and cod piece, or are there more? My plan is to order the individual TFA pieces from Imperial Surplus, and make both versions of the suit. Long term, id like to have an approved TFA kit, TLJ/TRoS kit, and Executioner kit. Lofty, but doable I think. As far as the helmets go, I would love to have both of the DN premium helmets, however, im not keen on dropping nearly $1,300 on the two of them. I will certainly get the premium TFA one, however, for TLJ, im going back and forth between the premium and standard line. The premium line helmet is very accurate. The standard line helmet is slightly inaccurate beneath the mouth, using the TFA chin. I thought about converting a black series helmet, as the chin is more accurate, however, I have quite a large head, and worry it won't fit. I have 3D printed 5th Horseman's F11-D, and SE44-C. Geeky Pink seems to be the go-to for gaskets, however, I am looking for rubber ones, as I hope to apply for centurion. I believe there are runs of accurate metal holsters, as well as well defined resin hand plates, both of which I hope to purchase. In addition, I may upgrade to Dino's spats. Any guidance and/or tips are greatly appreciated! I have completed a few ANH TK kits before this, and I'm excited to add this to the roster!
-
I winced at the price, but I finally pulled the trigger! Lets hope this is smoother than Anovos... So, as things currently stand: DN TLJ Helmet- Ordered DN FO TK Kit- Ordered DN Neck Seal- Ordered Anovos TFA Helmet- Ordered I still need: Boots Gloves Imperial Surplus TFA Parts Metal thigh bracket Metal shoulder brackets Shiny shorts New gaskets (?) I cant wait to start this thread!
-
 We now have a member who has completed his costume build, so now we begin the written construction of this new CRL. Nuts and bolts to be fleshed out as we develop the appropriate descriptive language. FIRST DRAFT Description: Imperial armored commando, The Mandalorian Prefix: TK Detachment: First Imperial Stormtrooper Detachment Context: Star Wars the Mandalorian Season 3 Episode 23 & 24 Under the leadership of Moff Gideon, a new class of elite soldier has been trained and equipped with advanced weaponry. Highly trained in the use of multiple lethal weapons and equipped with Beskar armor and Mandalorian weaponry, makes him a formidable adversary. Required Costume Components The following costume components are present and appear as described below. General Construction Notes All components should closely match the Imperial Armored Commando from the Mandalorian season 3 episodes 23 & 24. All Armor is constructed from a rigid material such as PLA, PETG, ABS, fiberglass, plastic, resin, Sintra, vacuum-formed ABS, firm rubber, metal, or similar, unless specified otherwise in section below Armor has the appearance of thickness and depth. Helmet Lens is smoky gray or black in color. The lens must be sufficiently dark enough to obscure the costumer's eyes Two black aerators are present on each mandible end, which are dark grey color Four recessed tube stripes are present on each side of the mandibles A diamond shape black greeblie is present in the recessed mouth section between aerators The nose section is black and separates the cheek plates. The nose section has a series of stripes and a single one that links the recess presents on each cheek The upper cheek is white and has a recess line running across the nose The lower cheek is recessed and has two sections that forms a V-shape. The upper portion is black, and the lower portion is dark grey. The brow is black, protrudes from the dome and extend to the ear caps The top of the helmet is dome shaped and white color A medium grey rectangular section runs along on each side of the dome and separate the front and the rear sections. A medium grey ear cap protrudes from the main rectangular section and contain a gloss white clip greeblie. The rear section is medium grey, starts below the dome shape and has a protruding band that joins the two middle rectangular sections. There is a trapezoidal shape that protrudes and ends at the lower corner end of the middle rectangular section. A white strap is attached to the rear section of the helmet. It has teeth and a flat section Temple section on each side is black and protrudes from the dome There is a white collar around the bottom of the helmet that hides the wearer’s head OPTIONAL Level two certification (if applicable): Protruding ear section is visibly a separate piece Clip greeblies and strap are visibly separate pieces Aerators and diamond greeblie are visibly separate pieces The collar has vent oblong holes on the rear section OPTIONAL Level three certification (if applicable): Neck Seal Flight Suit Flight suit is a medium gray, may have a tint of brown and is made of cotton/cotton-blend, plain-weave material. Alternatively, it can be made of a stretch fabric for the lower pants Topstitching is same color as material One or two-piece in construction, but joining of top and bottom must not be visible when all costume components are attached. Flight suit top shows no closure method when worn. A panel must cover the front zipper if present. Flight suit top as a mandarin style collar Flight Suit has double sleeves: long sleeves with short sleeves layered on top Short sleeves have horizontal quilted ribs Long sleeves have horizontal quilted ribs visible between the short sleeves and the gauntlets. Flight Suit does not have any visible pockets, zippers or logos when all costume components are attached. OPTIONAL Level two certification (if applicable): Flight suit is one piece construction OPTIONAL Level three certification (if applicable): Upper Arm piece Left The upper arm piece left is white and fixed to the suit without any visible means of attachment The upper arm piece left is rectangular and has the following features from top to bottom A large recessed rectangular shape with dark red color A raised white square at the lower right of the inside of the red colored rectangle A raised medium grey box matching the same color as the rest of the armor medium grey A recessed line OPTIONAL Level two certification (if applicable): The box has a rectangular recess at the back OPTIONAL Level three certification (if applicable): Upper Arm piece Right The upper arm piece right is white and fixed to the suit without any visible means of attachment The upper arm piece right is rectangular and has the following features from top to bottom A large recessed rectangular shape with dark red color A raised white square at the upper left of the inside of the red colored rectangle A raised medium grey box matching the same color as the rest of the armor medium grey A recessed line OPTIONAL Level two certification (if applicable): The box has a rectangular recess at the back running horizontally OPTIONAL Level three certification (if applicable): Forearm Gauntlet Left Gauntlet is white in color. various boxes on all sides are medium grey in color that matches the medium grey color of the armor Gauntlet is a clamshell-style without any visible closure methods and has seam line present on each side. The gauntlet can be divided into 4 sections: top, inner, bottom and outer sides. The top side of the gauntlet has the following features: - A white raised box with angled extremities with the following features as per references. - A trapezoidal shape with black color - A small black square shape near the wrist side - A square red shape toward the elbow extremity of the top box -Two cylinders silver color with rounded extremities - A rectangular grey box near the wristThe outer side of the gauntlet has the following feature: - A raised angled white box on which there are two medium grey shapes The inner/bottom sides are comprising: - A semi-circular shape on which multiple recessed trapezoidal shapes are present - A red square shape OPTIONAL Level two certification (if applicable): The two red colored square shapes are red illuminated The grey boxes are visibly separate parts OPTIONAL Level three certification (if applicable): Forearm Gauntlet Right Gauntlet is white in color. various boxes on all sides are medium grey in color that matches the medium grey color of the armor Gauntlet is a clamshell-style without any visible closure methods and has seam line present on each side. The gauntlet can be divided into 4 sections: top, inner, bottom and outer sides. The top of the gauntlet features three steps with the tallest at the beginning of the wearer’s elbow with the following features: - There is a red rectangle on the inner side the tallest step - A rounded Dart launcher sits in a rounded base atop of the tallest step. It is black and silver in color with a two-step cone with pointed tips. The main cone has holes representing the chambers for individual darts. - On the the edge of the second step, is a silver whipcord launcher greeblie - On the last step is a recessed display near the wearer’s wrist on which all buttons are medium grey color that matches the medium grey color of the armor. The outer side of the gauntlet has the following feature: - There is a large box on which 4 grey smaller boxes are attached - At the tip of this box, two circular ports of flame throwers are present and are silver color The inner and bottom sides are comprising: - a semi-circular shape on which multiple recessed trapezoidal shapes are present - A red square shape OPTIONAL Level two certification (if applicable): The two red colored shapes are red illuminated The outer side large white box and its grey box are visibly separate parts The whipcord launcher greeblie has a middle cylinder shape and dents on the top OPTIONAL Level three certification (if applicable): Hand Plates Hand plates are white and have three facets. Both left and right are symmetrical. A thick border is present all around the plate with a recessed rectangle in the middle section hand Plates are attached to the glove back. OPTIONAL Level two certification (if applicable): OPTIONAL Level three certification (if applicable): Gloves Gloves are made of plain soft black leather or similar material and worn tucked into the gauntlets. Logos, designs and any other non-canon details are not visible when worn. No visible stitches are present on the top of the gloves. OPTIONAL Level two certification (if applicable): Gloves are made of leather OPTIONAL Level three certification (if applicable): Chest Armor The chest armor is white and comprises of 4 distinct sections: - The lower section - The upper section - The left and right winglets The lower section extends down to overlap the abdomen armor and is attached to the upper section. It also extends to the rear under the arm pit, joining to the back section with a minimal vertical seam on each side There is a recessed medium grey section in the center of the lower section matching the medium grey color of the rest of the armor. A white raised rectangular shape with bevels is present in the middle of the grey recess A dark red oblong shape is present on the left side of the lower section A raised rectangular shape containing the ranking of the commando is present on the left side of the lower section and has the following characteristics: A raised white contour A medium grey ranking rectangle that matches the medium grey color of the armor, inside the white raised contour On the grey ranking rectangle, is present from top to bottom: A white rectangle 4 squares evenly spaced horizontally on a single row with these colors from left to right: black, dark red, light grey, dark grey 2 rectangles each having two circular shapes on them. The left rectangle has 2 large white circular shapes, the right rectangle has two smaller black circular shapes Under the ranking box is a red rectangle The upper section is a single piece with no visible seam and extend from the lower section to the back section There is V-shape in the front center of the upper section, on which is attached a raised v-shape white box On each side of the upper section are attached two raised shapes that gives the appearance of jetpack straps Over the wearer’s right jetpack strap is a rounded shape box. There is a medium grey grid at the front of the box that closely match the color of the rest of the medium grey of the armor. The left and right winglets are white and symmetrical. They are attached on each side of the upper section OPTIONAL Level two certification (if applicable): The 4 sections (lower section, upper section and 2 winglets) and shoulder box are visibly separate parts The ranking box components have thickness and are visibly separate parts The red light is functional under the ranking box The raised box over the right shoulder is visibly a separate part and has two semicircular recessed line on the outer side and a recessed on the inner side. The raised box grid has exactly 5 vertical rectangular grey shapes and is visibly a separate part OPTIONAL Level three certification (if applicable): Back Armor The back is white and attaches to the upper portion of the chest armor with minimal joint. It also attaches to the lower section of the chest armor under the arm pit forming a minimal vertical joint The back armor also attaches the jetpack to the armor with a removable mechanism The backplate extends down approximately to the height of the jetpack reactors tips. OPTIONAL Level two certification (if applicable): The jetpack has 3 attachment points that are visibly separate parts and are metallic finish. The two upper attachment points are circular T-shaped and anchored to the backplate with a circular plate The lower attachment point to the jetpack is cylindrical with a taper at the tip and is anchored to the backplate with a rectangular plate OPTIONAL Level three certification (if applicable): Jet Pack All grey parts on the jetpack should be medium grey color matching the medium grey of the rest of the armor. The jetpack has anchoring points to attach to the back armor and is removable The jetpack has a recess to wrap around the back armor and hide the anchoring points when viewed from the side The Jet pack consists of a main body and two side reactors all white color. The main body is thicker than the side reactors The main body comprises the following features from top to bottom: - A black intake with grills matching the outer shape of the main body. Inside the grill is a visible red shape - A rectangular grey shape with chamfered top and bottom edges centered on the main body and extending up to the start of the grills. - A cavity in which a grey and white plate is placed. Both the and white portions of the plates have two rectangular shapes present. - A white exhaust vent grill at the bottom The side reactors are symmetrical and have the following features from top to bottom: - An angled top - A large box with tapered top and 4 recessed cavities - 5 vertical cylinders attached atop of the large box - A small rectangular grey shape directly underneath the large box with two recesses, creating 3 sections - 2 small trapezoidal grey stabilizing fins located on the outside of each reactor - black directional thrusters, recessed into the bottom of the side reactors OPTIONAL Level two certification (if applicable): All grey and black components are visibly separate parts The top grill has a functional red lighting The bottom grill is visibly a separate part OPTIONAL Level three certification (if applicable): Abdomen Armor The abdomen armor is grey and span from the belt to the inside of the chest armor, hiding the wearers suit There is a seam on the right side of the wearer that closes the two parts without a visible gap. A seam can also be present on the left side but without any visible gap. There is the appearance of 4 straps seamlessly attached to the armor There is one raised shape at the back of the abdomen armor in between the 2 rear straps There are multiple raised boxes and shapes present on the front side of the armor OPTIONAL Level two certification (if applicable): The abdomen armor is made of flexible material Only one seam is present on the right side of the wearer’s side The 4 straps are all identical in width and geometry There is the appearance of a clip on the straps approximately at the middle of the abdomen armor OPTIONAL Level three certification (if applicable): Cod Plate The cod plate is white and is made of a triangular shape that curves inward in the lower extremity The main triangular section is completed by two small vertical sections curving inward on each side The cod plate has not visible attachment method and disappear under the belt and abdominal armor. There is no attachment of the lower portion of the cod to the suit OPTIONAL Level two certification (if applicable): There is a visible trapezoidal raised section on the top of main triangular section Belt Belt proper is made of white coton like material and has the appearance of being made with thick material stitched with 5 horizontal lines creating 4 wider section in the middle and two narrow ones at bottom and top The belt is attached to the abdomen armor with no visible mean of attachment, concealing the edge of the lower abdomen armor. The buckle of the belt is visibly two separate parts white in color. The male portion of the buckle has a visible link to the female buckle that is trapezoidal with metal color There are boxes on each side of the buckle attached to the belt strap. All boxes are white and are attached as per reference images. There are 7 identical rectangular boxes with a recess on the front vertical edges and a small chamfer on the top. 4 of these are attached to the wearer’s right and 3 on wearer’s left starting from the buckle. All are evenly spaced. There is a larger pouch on wearer’s left following the first 3 boxes. The pouch has the appearance of an overlapping rounded cover. The top cover has two horizontal chamfer on each side and the lower edges are chamfered vertically. There are two cylindrical boxes aligned with the abdominal rear straps on each side of the wearer’s back. The cylindrical boxes have an angled top and a fin protruding on the lower portion. OPTIONAL Level two certification (if applicable): The push release button of the female buckle is visibly a separate component There is a rectangular recessed line on the metal portion of the male buckle The metal portion of the male buckle is followed by a black section entering the female buckle Holster The holster is white and made from synthetic. A rigid frame may be used under this to give it the proper shape around the pistol but must not be visible. Features two retention straps with a snap button closure to secure the blaster pistol. The front loop attaches approximately under first box on the left side of the wearers. The back loop attaches approximately under the 4th boxes of the wearer’s left. The two loops joint together to form a singe v-shape above the holster. OPTIONAL Level two certification (if applicable): Thigh Armor Plates The thigh plates are white with a dark red insert and wrap around the wearer’s thigh with no visible mean of attachment. The left and right thigh plates are symmetrical. They have a top rectangular section that is aligned with wearer’s side. The thigh plates are curved to fit the leg shape and have rounded corners There is recessed shape that creates a contour along the periphery and leaves a rectangular shape in the center The red insert is trapezoidal OPTIONAL Level two certification (if applicable): The main section is asymmetric and is larger at the rear of the wearer’s thigh than at the front. The front top section is rectangular and the rear top section is at a downward angle OPTIONAL Level three certification (if applicable): Knee plates The knee plates are white and fitted over the wearer’s knee with no visible mean of attachment. The left and right knee plates are symmetrical and comprise 4 sections (top, inner, outer, lower) There is a recessed trapezoidal shape in the lower section There is a trapezoidal winglet attached on the outer section Greaves The greaves are white and have the spat seamlessly attached to it. The left and right greaves are symmetrical. There is a flat face at the front and at the rear running from the spat all the way up to the top of the greaves If seams are present, they must be minimal and be located on the edge of front and rear flat portions A raised lip is present around the top of the greave A rectangular box is seamlessly attached to the outer top side of the greave. The top and bottom of the box are angled A smaller box, aligned vertically with the top box is attached to the spat A rectangular box is attached at the rear of the spat and finishes at an angle on the greave OPTIONAL Level two certification (if applicable): The greave is a single piece construction with a seam only present at the rear which overlaps to the inside. The rear spat box has a recess edge on the outside creating a smaller shape. The spat overlaps the boot with minimal gap. OPTIONAL Level three certification (if applicable): Boots FO style boot Sole is black rubber with no visible heel There are no visible buckles or laces The instep has stiches that run across and creates multiple sections OPTIONAL Level two certification (if applicable): There are 3 stitches lines that run across the instep. The instep is made of thick material with the stiched lines creating raised sections. There is a vertical zipper on the inside that spans the height of the boot. OPTIONAL Level three certification (if applicable): OFFICER COMPONENTS Optional Accessories Blaster Pistol Pistol blaster may be scratch-built, or a modified commercial toy Imperial Armored commando pistol blaster Details to be painted black and metallic per reference photos. Rifle blaster Rifle may be scratch-built, or a modified commercial toy Imperial Armored commando rifle blaster Details to be painted black and metallic per reference photos.
 -
My first official troop on Saturday in Edinburgh with the incredible crew at Imperial Scottish Garrison 501st Legion helping the Edinburgh children's hospital charity, followed by a troop supporting the Catherine Mcewan Foundation at Falkirk Stadium drive in Movie Nights showing The Empire Strikes Back! It was an experience being in my armour in public for the first time and really enjoyed it. Especially the joy it brings to people seeing these iconic characters brought to life. Pictures to follow I give permission for FISD to repost my photos on social media in an appropriate fashion.
-
 So the journey started back in December, now completed this week. Below are the images of the final build along with individual parts in high definition so you can capture the details. In the next threads below, I will explain how I did end up with this final result. I will also try to share the tips and tricks for you guys to make your life easier. I based all the design and parts on the reference document I have put together (you can find it in the reference section in my post). Here's the build: Boots from Crowprops Leather gloves from Crowprops Abs section made out of urethane foam rubber molded, per screen reference Suit from Keeptrooping a good portion of the 3D models are from Big Fred Customs who did an amazing job already (I did modify almost all of them for screen accuracy and trooping) Several parts modeled by me (single piece Shin/spat, abs mold, dart launcher and greeblies on gauntlets, top box on chest plate, jetpack, jetpack attachment to the back plate, cod piece, etc) Soft goods made by my girlfriend (MW11271)- belt and holster, velcros, harness,...!) I will post the build process of these parts in the following threads. I will show how everything was printed/ prepared, painted, assembled. I will make the models available when possible (only the parts 100% designed by me, for the modified parts, I will sync with Big Fred to see how they could be shared. Goal is to provide you info on how to build a suit that is designed by a guy who knows the pain of wearing the armor (my Sithtrooper is a tuff one to troop... Front top to bottom:
 -
Introduction from Southern California
chrioboy replied to chrioboy's topic in New Member Introductions
I’ve been putting some thought into it and poking around other detachments. The only other trooper which caught my eye over the past several years has been the Death trooper. Since I still have the same build as I did twenty years ago, 5”10 150lbs, a lot of the newer suits are build around larger folks and it shows in the chest plate. Ideally if I built an RO or DT it would have to be build around something lineage rather than completely new sculpt. I think this might be possible if I piece together parts from a couple kits. I put together a spread sheet of the cost including hardware, gaskets, boots, gloves and helmet. Price it to around the upper end of my budget but I believe if I put considerable amount of work into my next armor I will be happier with the outcome. Thanks for the advice and thorough responses I appreciate it. -
*forums broke my photos* (will go back and add them to my imgur and link when I have time...) Finally getting around to starting a list of troops and times I've suited up - better start now before I have too many and start forgetting! I'll come back through and add events, info, and pictures as I am able. I'm going to list ALL of my troops for my own records, as this is the forum I am most active on, but will note and number which are in FISD costumes for FTEs, and those which I wrangled, POC'ed, or was in another costume. Pre-approval I decide to start building my Imperial Staff Officer and order my uniform! - 6/20/17 *Scum and Villainy Cantina - Hollywood, CA - 7/29/17 (First time wearing my mostly assembled uniform!) *SCG Garrison "Bowling with Buckets" Charity Bowling Tournament - La Habra 300 Bowl, La Habra, CA - 8/19/17 (First Legion event!) WRANGLED - Inpatient Room Visits - CHOC Children's Hospital, Orange, CA - *Scum and Villainy Cantina Pub Trivia Night - Hollywood, CA - 9/20/17 Approved Troops 2017 Got my Imperial Staff Officer Approval and Legion TKID! - 10/4/17 1. "Star Wars Reads" event with Lucasfilm/Disney - CHOC Children's Hospital, Orange, CA - 10/5/2017 (One day after my approval!) (ID #1) 2. Special Olympics Orange County Fall Games - Santa Ana, CA 10/14/17 (ID #2) *Southern California Garrison Photo Shoot - Los Angeles Memorial Coliseum, Los Angeles, CA - 10/21/17 3. Book Donation Event w/ Twin Suns Foundation - CHOC Children's Hospital, Orange, CA - 10/26/17 (ID #3) *WRANGLED - STEM Science Night - Sycamore Elementary School, Orange, CA - 10/26/17 (Double duty!) *WRANGLED - Down Syndrome Association of Orange County Buddy Walk Event - Angels' Stadium, Anaheim, CA - 10/29/17 4. "Star Wars Reads" event - East Anaheim Public Library, Anaheim, CA - 11/4/17 (ID #4) 5. Walk for ALZ - Angels' Stadium, Anaheim, CA - 11/11/17 (ID #5) 6. HPE 86th Annual Hollywood Christmas Parade - Hollywood, CA - 11/26/17 (ID #6) *Seal Beach Christmas Parade - Seal Beach, CA - 12/1/17 (TK - EPiC Fire Team event - pre-approval, with Squad Leader's permission) 7. AutismSpeaks Walk - Angels' Stadium, Anaheim, CA - 12/3/17 (ID #7) Got my ANH-S Stormtrooper approval! - 12/5/17 8. HPE Anaheim Ducks Hockey Star Wars Night - Honda Center, Anaheim, CA - 12/11/17 (ANH-S TK #1, FTE #1) 9. St. Jude Employee Holiday Party - St. Jude Hospital, Fullerton, CA - 12/21/17 (ANH-S TK #2, FTE #2) 2018 10. Santa Margarita Catholic High School Star Wars Winter Formal - Richard Nixon Presidential Library, Yorba Linda, CA - 1/20/18 (ID #8 and ANH-S TK #3, FTE #3) 11. Kids Night Out - Orange, CA - 1/26/18 (ID #9 and ANH-S TK #4, FTE #4) 12. Snowfest - Lake Forest, CA - 1/27/18 (ANH-S TK #5, FTE #5) 13. Just Like Me Foundation 1 Year Celebration - San Clemente, CA - Sat. 2/17/18 (ANH-S TK #6, FTE #6) 14. Irvine Pack 654 (Cub Scout) Blue and Gold Banquet - Irvine, CA - Sat. 2/24/18 (ANH-S TK #7, FTE #7) Got my IOC Executor approval! - 2/26/18 Got my ANH-S Expert Infantry approval! - 2/27/18 *WonderCon 2018 - Anaheim, CA - (HWT/ID) 15. Mardi Gras for Autism Festival - Fullerton, CA - Sat. 4/7/18 (ANH-S TK #8, FTE #8) 16. Library Comic Con - Mission Viejo, CA - Sat. 4/14/18 (ANH-S TK #9, FTE #9) Got my ANH-S Centurion approval! - 4/26/18 *Disneyland After Dark Star Wars Nite 2018 - Anaheim, CA - Fri. 5/3/18 (ANH-S TK) 17. Star Wars Weekend at Pretend City Children's Museum - Irvine, CA - Sat. 5/4/18 (ANH-S TK #10, FTE #10) 18. Lowell Elementary Carnival - Santa Ana, CA - Fri. 5/4/18 (ANH-S TK #11, FTE #11) 19. OC Regional Library Comic Con - Garden Grove, CA - Sat. 5/5/18 (ANH-S TK #12, FTE #12) *Disneyland After Dark Star Wars Nite 2018 #2 - Anaheim, CA - Wed. 5/9/18 (ANH-S TK) 20. Special Olympics - Irvine, CA - Sat. 5/12/18 (ANH-S TK #13, FTE #13) 21. HPE Angels Baseball Star Wars Night 2018 - Anaheim, CA - Fri. 5/18/18 (ANH-S TK #14, FTE #14) Got my Heavy Weapons Trooper approval! - 6/6/18 22. Kaiser Permanente Annual Pediatric Oncology Carnival - Anaheim, CA - Fri. 6/8/18 (HWT #1, FTE #15) 23. Star Wars Day at the OC Zoo - Orange, CA - Sat. 6/16/18 (HWT #2 and ID #10, FTE #16) 24. Relay for Life Chino - Chino, CA - Sat. 8/04/18 (HWT #3, FTE #17) 25. ROCK4CHOC - Irvine, CA - Sun. 8/5/18 (ANH-S TK #15, FTE #18) 26. Star Wars Family Movie Night - Orange, CA - Sat. 8/11/18 (ANH-S TK #16, FTE #19) Got my IOC Imperator approval! - 9/3/18 27. Orange Public Library Comic-Con - Orange, CA - Sat. 9/22/18 (HWT #4, FTE #20) 28. City of Irvine Disability Services Flashback Dance - Irvine, CA - Fri. 9/14/18 (ANH-S TK #17, FTE #21) 29. Special Olympics Regional Fall Games - Santa Ana, CA - Sat. 10/13/18 (ANH-S TK #18, FTE #22) 30. Courreges Elementary School Red Ribbon Week Ceremony - Fountain Valley, CA - Fri. 10/26/18 (ID #11) 31. Buddy Walk - Anaheim, CA - Sun. 10/28/18 (ID #12) 32. JDRF Walk to Cure Diabetes - Anaheim, CA - Sun. 11/4/18 (ID #13) Got to film for The Mandalorian! November 2018 33. Walk4ALZ Angeles Stadium- Anaheim, CA - Sat. 11/10/18 (ANH-S TK #19, FTE #23) 34. HPE 87th Hollywood Christmas Parade - Hollywood, CA - Sun. 11/25/18 (ID #14) 35. HPE Anaheim Ducks Star Wars Night 2018 - Anaheim, CA - 12/12/18 (ANH-S TK #20, FTE #24) 36. Pacifica High School Adopt A Child for Christmas - Garden Grove, CA - Wed. 12/19/18 (ID #15) 2019 37. 11th Military Police HQ Soldier, Family, Children Event - Los Alamitos, CA - Sun. 1/13/19 (ID #16) 38. City of Lake Forest SnowFest 2019 - Lake Forest, CA - Sat. 1/26/19 (ANH-S TK #21, FTE #25!) * Cub Scout Pack 58 Blue & Gold Banquet - Bakersfield, CA - Sat 2/23/19 (POC #1) 39. Palmyra Elementary Literacy Lunch - Orange, CA - Fri. 3/1/19 (ANH-S TK #22, FTE #26) 40. Mardi Gras for Autism - Fullerton, CA - Sat. 4/06/19 (ANH-S TK #23, FTE #27) 41. Construction Vs. Cancer - Anaheim, CA - Sun. 4/28/19 (ANH-S TK #24, FTE #28) 42. Pretend City Children's Museum's May the Fourth Be With You Event - Irvine, CA - Sat. 5/4/19 (ANH-S TK #25, FTE #29) 43. May the Fourth Be With You! Elks Club Veterans Fundraiser - Mission Viejo, CA - Sat. 5/4/19 (ANH-S TK #26, FTE #30) 44. May the 4th Be With You Special Needs Spring Dance - Costa Mesa, CA - Sat. 5/4/19 (ANH-S TK #27, FTE #31) 45. Costco #429 CHOC Fundraiser - San Juan Capistrano, CA - Sat. 5/11/19 (ANH-S TK #28, FTE #32) 46. Star Wars Day at the OC Zoo - Orange, CA - Sat. 6/22/19 (ID #17 and HWT #5, FTE #33) 47. National Night Out - Fullerton, CA - Tue. 8/6/19 (ANH-S TK #29, FTE #34) 48. HPE Weird Al "Strings Attached" 2019 Tour - Costa Mesa, CA - Thur. 8/8/19 (ANH-S TK #30, FTE #35) 49. City of Laguna Niguel 30th Anniversary Carnival Star Wars Night - Laguna Niguel, CA - Sat. 8/17/19 (ANH-S TK #31, FTE #36) Got diagnosed with freakin cancer! August 2019 50th! Star Wars Lego Night at Zion Lutheran Elementary School - Anaheim, CA - Fri. 9/13/19 (ANH-S TK #32, FTE #37) 51. Stonegate Elementary's Welcome Back Festival - Irvine, CA - Fri. 9/20/19 (ANH-S TK #33, FTE #38) 52. HPE 88th Annual Hollywood Christmas Parade - Hollywood, CA - Sun. 12/1/19 (ID #18) *HPE Anaheim Ducks Star Wars Night - Anaheim, CA - Fri. 12/6/2019 (Wrangler) 53. Heideman Fall Forensics Festival - Tustin, CA - Sat. 12/7/19 (ID #19) 2020 - The Year of Cancer & COVID *Cub Scout Blue & Gold Ceremony and Dinner - Irvine, CA - Mon. 2/10/20 (POC #2) Got my HWT Expert Infantry (#2) approval! 4/23/20 54. Portola Springs Elementary Show & Tell Round-table - Virtual Troop - Wed. 6/3/20 (ANH-S TK #34, FTE #39) Got my HWT Centurion (#2) approval! 6/10/20 Got my ESB Stormtrooper approval! 8/1/20 55. Kiddie Academy Summer Camp Character Meet And Greet - Virtual Troop - Fri. 8/7/20 (ESB TK #1, FTE #40) Got my ESB Expert Infantry (#3) approval! 8/12/20 56. Corona Public Library, Virtual Propmaking Workshop - Virtual Troop - Sat. 10/3/20 (ESB TK #2, FTE #41) Got my ANH-H Stormtrooper approval! - 10/6/20 Got my ANH-H Expert Infantry (#4) approval! - 10/13/20 57. Portola Springs Elementary Drive-Thru Trunk-or-Treat - Irvine, CA - Fri. 10/23/20 (POC #3 and ID#21) Got my Imperial Warrant Officer (Ver. 1) approval! 11/9/20 Got my ESB AND ANH-H Centurion (#3 & #4) approvals! 11/20/20 2021 Officially in full remission from cancer!!! January 2021 Got my Rogue One Stormtrooper approval! 3/9/21 Got my Imperial Staff Officer (Non-Saga) approval! 3/17/21 58. Star Wars Day Storytime and STEAM Costume Workshop for Portola Springs Elementary - Irvine, CA - Tue. 5/4/21 (ROTK #1, FTE #42) Got my Rogue One Stormtrooper Expert Infantry (#5) approval! 6/28/21 *WRANGLED - Tustin Meadows 4th of July Parade - Tustin, CA - Sun. 7/4/21 59. La Habra Host Lions Club Car Show & Pasta Fest - La Habra, CA - Sat. 7/17/21 (ROTK #2, FTE #43) Got to film for Obi-Wan Kenobi! July 2021 60. La Habra Host Lions Club Corn Festival Parade - La Habra, CA - Sat. 10/09/21 (ID #22) 61. Portola Springs Elementary Trunk-or-Treat - Irvine, CA - Fri. 10/29/21 (POC #4 and ID #23) 62. HPE 89th Annual Hollywood Christmas Parade - Hollywood, CA - Sun. 11/28/21 (ID #24) 63. HPE Anaheim Ducks Star Wars Night - Anaheim, CA - Fri. 12/17/21 (ID #25) 64. Rivero Graveside Burial Honor Guard - Santa Ana, CA - Wed. 12/22/21 (ANH-S TK #35, FTE #44) 2022 Got my Rogue One Imperial Security Services Officer (Non-Saga V1) Executor (#2) approval! 4/20/22 65. Star Wars Day at Portola Springs Elementary – Irvine, CA - Wed. 5/4/22 (POC #5 and ID #26) Got my Rogue One Imperial Security Services Officer (Non-Saga V1) Imperator (#2) approval! 5/18/22 66. Father's Day Empire Strikes Back Showing at The Frida Cinema - Santa Ana, CA - Sun. 6/19/22 (ANH-S TK #36, FTE #45) *WRANGLED - Tustin Meadows 4th of July Parade - Tustin, CA - Mon. 7/4/22 67. HPE Star Wars In Concert: The Empire Strikes Back Showing with the Pacific Symphony Orchestra - Irvine, CA - Sat. 8/20/22 (ANH-S TK #37, FTE #46) 68. OC Sea Country Festival - Laguna Niguel, CA - Sat. 8/27/22 (ANH-S TK #38, FTE #47) Received my designation as an FISD Armorer! 8/29/22 *HPE - Mon. 9/12/22 Got my 2nd ANH-S Stormtrooper approval! - 9/15/22 *HPE Disney+ "Andor" Hollywood Red Carpet Premiere Launch Event - Hollywood, CA - Thu. 9/15/22 (ID) 69. Zion Lutheran School Star Wars Lego Night - Anaheim, CA - Fri. 9/16/2022 (ANH-S TK #39, FTE #48) 70. Orange Public Library Comic-Con - Orange, CA - Sat. 9/17/22 (ANH-S TK #40, FTE #49) 71. Orange County Children’s Book Festival - Costa Mesa, CA - Sun. 10/02/22 (ANH-S TK #41, FTE #50!) *Portola Springs Elementary Trunk or Treat - Irvine, CA - Fri. 10/28/22 (POC #6) *HPE - Sat. 10/29/22 72. Kaiser Permanente Pediatrics Halloween Event - Anaheim, CA - Mon. 10/31/2022 (ANH-S TK #42, FTE #51) 73. Eli Home Thanksgiving - Orange, CA - Sat. 11/19/22 (ANH-S TK #43, FTE #52) 74. HPE 90th Annual Hollywood Christmas Parade - Hollywood, CA - Sun. 11/27/22 (ANH-S TK #44, FTE #53) 75. HPE Anaheim Ducks Star Wars Night - Anaheim, CA - Tue. 12/6/22 (ANH-S TK #45, FTE #54) *Special Event - Sat. 12/11/22 2023 76. Aliso Niguel Winter Formal - Aliso Viejo, CA - Sat. 2/4/23 (ANH-S TK #46, FTE #55) *Southern California Garrison Photo Shoot - "Endor" Theme, Porter Ranch, CA - Sun. 3/5/23 77. Community Science Night - Orange, CA - Fri. 4/28/23 (ANH-S TK #47, FTE #56) *HPE - Thu. 5/4/23 78. City of Mission Viejo Star Wars Day - Mission Viejo, CA - Thu. 5/4/23 (ANH-S TK #48, FTE #57) 79. Star Wars Day at the OC Zoo - Orange, CA - Sat. 6/10/23 (ANH-S #49, FTE #58) 80. Tustin Meadows 4th of July Parade - Tustin, CA - Tue. 7/4/23 (ANH-S #50, FTE #59) *TX-41691 Space Marine Re-Enlistment Ceremony - San Clemente, CA - Tue. 8/15/23 *HPE Disney+ "Ahsoka" Hollywood Fan Launch Event - Hollywood, CA - Thu. 8/17/23 81. OC Sea Country Festival - Laguna Niguel, CA - Sat. 8/26/23 (ANH-S #51, FTE #60) *Southern California Garrison Photo Shoot - Brea Olinda High School, Brea, CA - Sat. 9/30/23 Moved houses and workshops! October 2023 82. Bryant Ranch Elementary Trunk or Treat - Yorba Linda, CA - Fri. 10/20/23 (ANH-S #52, FTE #61) 83. Portola Springs Elementary Trunk or Treat - Irvine, CA - Fri. 10/27/23 (ANH-S #53, FTE #62 84. Montessori of Ladera Ranch Annual Fall Festival - Ladera Ranch, CA - Sat., 11/4/23 (ANH-S #54, FTE #63) 2024 *WonderCon 2024 - Anaheim, CA - Sat. 3/30/24 (ID & Lt. Gauge) 85. Comic Orange 2024 - Tustin, CA - Sat. 4/13/24 (ANH-S #55, FTE #64) 86. Bradley's Honor Walk - Rancho Santa Margarita, CA - Sun. 4/21/24 (ANH-S #56, FTE #65) 2017 Official Troops - 9 2018 Official Troops - 27 2019 Official Troops - 17 2020 Official Troops - 4 2021 Official Troops - 7 2022 Official Troops - 11 2023 Official Troops - 9 2024 Official Troops - 2 Total Official Troops since Approved - 86 Total POCs since Approved - 6 Total ID Troops - 26 Total ANH-S TK Troops - 56 Total ESB TK Troops - 2 Total HWT Troops - 5 Total ROTK Troops -2 Total TK FTEs - 65 *Events in costume, but not formal/official troops, or wrangling/POC will be denoted with an asterisk and not counted towards Troop totals
-
Other Armor parts I did a first pass at how I made the rest of the armor below (high definition pictures of each part are in the first post of the build thread). I designed/built them to be as screen accurate as possible to the best of my knowledge and easy to troop with. Other than printing, coloring and finish already described, I will try to list the specifics of each part. I will also to make all the parts from my own creation available eventually on Etsy, but in the meantime, if you need them, just PM me. Clear coats For the clear coat, I used the Glamor 2K for the white and Rustoleum satin for all other colors. N.B. screen accuracy can’t tell the exact finish, but obviously the white is either semi-gloss or gloss as it has specular reflections. The other colors are visibly lower reflectivity as they do not have specular reflection, but diffuse ones, so some kind of satin finish. Fasteners disclaimer 😊 As a disclaimer, I don't like velcros! they are a quick fix though. I started with those on this armor for several reasons: initial adjustment, fitting for screen accuracy, difficulty to attach fasterners on soft armor. My 2 cents on this: - The preference should always be snap buttons and straps, but sometimes they lack the rigidity to maintain uniform flexible joints between attached armor parts (like chest and back armor for example). - Velcros keep the suit and armor pieces in close contact on the periphery of the armor, so this can be required for screen accuracy (like in this case for belt, knee, thigh, bicep). I will add snap button to the velcros for sturdy attachment on knee plates, holsters thigh plates once I have the final fitting. - When possible, try to stich the velcros instead of gluing (never glue velcros on fabrics, it will fail). If using the adhesive backed velcros, only rely on high quality brand (3M or Velcro), not cheap stuff on Amazon. Otherwise, you’re way better off using plain Velcro that you will secure with E6000 or Silicone adhesive (for gluing to silicone parts or very flexible parts) Helmet The helmet is from Big Fred’s custom (no changes, except for the clips which I made thicker for screen accuracy). I printed and built all the parts separate for accuracy and ease of finishing. A lot of different colors and finish, so a lot of masking…! Some tricks for clean paint lines is to use good quality masking tape. I would recommend Frog tape, you won’t get overspill if applied correctly (you can find it on Amazon, use narrow one or cut it) The lens is a cut faceshield from amazon (see picture below) that a lot of people are using for their helmets (Hobart 770580 Face Shield replacement lens shaded). Pretty cheap and you can do multiple helmets with one shield. I secure it with duct tape so if it scratches it can be replaced and it’s very sturdy. Glue is not an option for this lens as there is not large overlaps with the helmet body. For padding, I used tactical helmet padding you can find on Amazon for less that 15$. This helmet is designed to be tightly fitted to your head, so not a lot of room for padding. You WILL need fans in this helmet, as the seal is almost making it airtight 😊, no way to wear without those. No wonder why you see the guys without their helmet while waiting for shooting… You will need low profile fans and very small battery pack. I suggest you 3D print a couple of fans form factors before purchasing and try to fit them first. Standard Stormtrooper fan kit or voice changing kit WILL MOST LIKELY NOT fit in this helmet if you maintain the proportional ratio of the helmet to screen reference (i.e. you should check carefully the space left before ordering standard kits). I will include a picture once all the pieces are in place, still WIP Chest armor The chest armor needed some mods to be wearable and screen accuracy. First, the overlap between the bottom and top portion is just a lip on Big Fred design, So I basically redraw the chest and added clamps so that both parts are rigidly attached while still showing that they are two separate parts. I wouldn’t count of glue to secure these critical parts together with original design (in my humble opinion) as the gluing surface is not very large vs the length of the parts. If not using this design, I recommend you secure the two parts with additional brackets/ reinforcements. The ranking box also needed some tweaking to have the right size of button and thickness per screen reference. I suggest you print the parts individually and scale them to have better screen accuracy and ease of painting. I glued the chest armor large parts together with E6000, just like all the small parts. I like E6000, as it remains flexible, but there are for sure other options (everyone has his own preference for gluing PLA/PETG). I attached the chest armor to back armor with large black heavy duty 2in velcros on the shoulder (I like the ‘VELCRO Brand Extreme Outdoor Mounting Tape’ from Amazon). this is what holds the back +jetpack so it needs to be strong, while keeping joints together closely). The sides can be secured with lighter velcros. You may need to add some plastic guides to prevent the sides from offsetting laterally while moving around. I forgot to add those on mine, but may add it to the model later. Grey is Rustoleum grey primer. The red is airbrush Vallejo game color 72.012 Lighting of the chest is discussed in another post in this thread Below are the two pieces from internal side showing the attachment clamps prior to assembly Back armor The back armor main body is Big Fred’s design without modifications. The jetpack anchorings are completely custom, but fully compatible with Big Fred’s original JJ industries bolting pattern (as described in jetpack section). I designed those to be 3D print robust. I added M4 threaded inserts in the back armor bottom anchor (you can see them in the picture below). For the upper T-shape Anchor, I used same principle as JJ industries and have an independent plate that I 3D printed and added M2.5 Threaded inserts. (you can see those in the picture below). To attach to chest armor, I used heavy duty black velcros for the shoulder and lighter white velcros for the sides. Bicep boxes I ended up redoing the bicep box from Big Fred’s as the sides were not accurate. I kept the same design, but added the central notch to be screen accurate. I secured them to the suit with velcros doing the full size of the rear notched portion to end up with the same fit as the screen reference. Grey is Rustoleum grey primer. The red is airbrush Vallejo game color 72.012 Gauntlets Both Gauntlets from Big Fred’s needed corrections to be perfectly screen accurate/trooping (IMHO). Here is the list of mods on Big Fred’s original model: - Rescaling of the gauntlets to have the right proportion to screen accuracy - Redrawing all boxes so that they are thicker (they protrude quite a lot on screen reference) - Redrawing the whipcord and the dart launcher (missing the cone) - Adding internal guides to clamp the gauntlet with ease and no visible attachments (you really DON’T want to put velcros there as you need a minimal and uniform joint). Guide pins are 4mm dowels you can buy on Amazon (left overs from my Pit Droid antennas). - Printed all parts separately for screen accuracy https://a.co/d/a3muoaW Painting for metallic parts is airbrush Vallejo 77.701 aluminum. Medium grey is Rustoleum grey primer. For the red squares/rectangles, I used 3mm dark red transparent plexiglass on amazon. I cut them with a Dremel saw and polished the sides. At 3mm it protrudes enough to be screen accurate. https://a.co/d/7DojMLk Lighting of the gauntlets are discussed in another post in this build thread. Below are pictures of the internal of the gauntlets. Belt I tried to scale the size and features of the belt strap against references. My best estimate is that it is approx. 2in wide. The material is some sort of cotton with quilted horizontal ribs (3 even large in the center and 2 small on each top and bottom edge). For that, my girlfriend used simple cotton from the local fabric store with the closest white matching and some very light filler in between layers. Once sewed, you end up with a study belt ( I was surprised how nice this end up fairly straight forward). Below if a picture of the filling material used in the belt, pretty cheap at the fabric store. For the belt boxes, I used Big Fred’s initial design for starting point with the following mods: - redrawn the circular boxes to have the proper angled fin and proportions - Modified all the boxes and clips to have proper scale and still maintain the 2in wide belt. Added 3 holes at the rear of the boxes to secure properly the boxes onto the belt. - Modified the belt clips to add 20mmx3mm magnets holes to keep them secure. I used M5x8mm setscrews to secure the belt boxes. You can find them at reasonable pricing at any store. In the US, the equivalent would be 10-32 setscrews. I added white velcros at the rear of the boxes to secure them against the abdomen armor. I painted the male front clip with 3 colors for screen accuracy (one can see on reference pictures that the belt male clip has a metallic finish connecting part that is followed by a black section). For these two sections, I used Vallejo Aluminum 77.701 and Rustoleum Matte black, followed by satin finish Rustoleum clear coat. Holster For the holster, I made it out of two parts (the holster straps and pistol holder). I used synthetic leather with 2.5mm thickness (bought on Amazon). for the main straps section I measured the length to attach under proper boxes to fit screen accuracy (first and 4th boxes on right side). I attached velcros to secure under the Abdomen section. There is no clear answer whether it is secured under the abdomen or under the belt. I choose under abdomen because it keeps the belt with even gap against the abdomen armor (otherwise you will see two boxes protruding from the other boxes. For the pistol holder section, I used a 3D print frame to give it a nice rectangular shape on which I glued a thinner 1mm synthetic leather (with spray gorilla glue). I added a pistol strap with standard snap buttons for thick material to secure the pistol per screen reference. Cod I modified the Big Fred cod to add the trapezoidal section and rescaled it (X-Y-Z) to have proper shape for screen accuracy. The cod is secured under the abdomen armor section with Velcro band so that it’s flexible and can move back and forth but not sideways. Knee plates No change to Big Fred, except scaling. Secured to suit with velcros on the whole back face so that there is no gap visible while moving around. Thigh plates No change to Big Fred, except scaling. Secured to suit with velcros on the whole back face so that there is no gap visible while moving around. Shins & spat Both Big Fred and Galactic Armory have a two-piece split design and were not fully screen accurate. Having had a split design on my current Sith Trooper, it’s a NIGHTMARE to put together and very difficult to have them stay perfectly closed with just velcros. So, I decided to design a single piece flexible 3D print (you can print it with any rigid plastic, but by design it is flexible). I designed them with the opening at the rear along the internal side of the flat portion as per screen reference. It opens up just like molded ABS would do, it clips and stay closed with magnets. I have placed them on Etsy if you want to have more details and a small video on how flexible it is: https://www.etsy.com/ca/listing/1704251352/imperial-armored-commando-shin-files?click_key=98d055ce0aceca6cb2e49b78066827e614e8b8e8%3A1704251352&click_sum=37b14591&external=1&rec_type=ss&ref=landingpage_similar_listing_top-2 Blaster Pistol I used Big Fred’s pistol as is, no mods required. I painted according to what is available on the screen reference. The painting on the blaster pistol (and for the blaster rifle) is as follow: - Standard finishing (200grit sanding/bondo+acetone/400grit sanding/filler primer/ 400-1000grit sanding) until very smooth. Metallic surfaces need 1000grit finish before appliyingpaint and graphite. - Rustoleum black spray paint for hard base color coat (matte / semi-gloss, doesn’t matter). Thin film just to evenly color before mettalic finish. Let dry overnight**. - **For fully exposed metallic parts, I applied graphite powder while the black rustoleum paint was just an hour dry so that it sticks into the paint. - Vallejo Dark aluminum 77.703 airbrush all over the pistol, except for parts that are already graphite coated. Let dry for an hour at least. - Vallejo black 71.057, thinnest coat possible, just to hide the aluminum paint. When the paint dries and just stops being shinny, you can rub it with your finger to expose some of the aluminum underneath. I makes the easiest weathering 😊 Blaster Rifle I have a post in the weapon’s thread section on this rifle. There was no existing model, So I did it to be as screen accurate as possible. There is only one good picture of it, rest give ideas, butt blury. Black series/Hot toys are not available, so this is my best interpretation. The gun is a mix of E-11 (scope, parts of the receiver, folded stock) and some other mixed parts (the ejector is not the E-11). It has a modern M4 butt stock on top of it! I will update the design when more info becomes available. I wanted it to be trooping grade, so there is a metal rod going through it. You can find it on Esty with more info as well (3D model or printed if you don’t have a printer). Finishing and weathering is identical to the blaster pistol described above. https://www.etsy.com/ca/listing/1667406690/imperial-commando-rifle-blaster-stl?click_key=25ecdbab2cfbfaa3d409f4d598185ec222a74f17%3A1667406690&click_sum=885df68a&external=1&rec_type=ss&ref=landingpage_similar_listing_top-1
-
 (Please bear with me as I update and reorganize - it is a TON of additional work to document... a ton of work! I decided to commit to a more thorough build guide if it helps people, but wanted to get some work done and a framework set up before inviting comments. I will be continually editing the original posts as well as adding, then linking in the OP, more information as I go. Thank you!) Sections, Navigation & Check List: Helmet Options Discussion a. Anovos TLJ - Fiberglass (Out of Production) b. Anovos TFA - Plastic/Fiberglass (Out of Production) c. KB Props TFA or TLJ - Slush cast resin - KB Props TLJ Helmet Project d. Hasbro Black Series TLJ - Plastic (Modification required) e. Denuo Novo TFA/TLJ - Fiberglass (Potentially Available Q1 2023) f. 3D Printed 1. Chest and Back Yoke a. Chest and Back Trimming - 01A Inner Chest - 01B Outer Chest - 01C - Back b. Chest and Back Assembly c. Shoulder Bell Support Bracket/Tab d. Seams? 2. Shoulders a. Shoulder Bell Trimming - 02A/B Shoulder Bell Trimming - 02C/D Support Lip Trimming b. Shoulder Support Lip Assembly c. Shoulder Bell Strapping 3/4. Biceps a. Bicep Trimming - 03/04A Outer Bicep Trimming - 03/04B Inside Bicep Trimming b. Bicep Assembly c. Bicep Strapping 5/6. Forearms a. Forearm Trimming - 05/06A Forearm Top Trimming - 05/06B Forearm Bottom Trimming - 05/06C Forearms Box Trimming b. Forearm Assembly 7/8. Hand Plates a. 07/08 Hand Plate Trimming b. Hand Plate Accuracy Update c. Hand Plate Attachment 9. Torso 1. Torso Trimming - 09A Torso Front Trimming - 09B Torso Back Trimming b. Torso Assembly c. Torso Rear Closure d. Torso Strapping (Suspenders) e. Ab Box Paint f. Ab Box Assembly g. Roman Skirt Strapping 10. Spine Plate & Thermal Detonator a. 10 Spine Plate Trimming b. Thermal Detonator Accuracy Update c. Thermal Detonator Paint d. Thermal Detonator Decals e. Spine Plate/TD Assembly 11. Belt 12. Cod a. 12 Cod Trimming b. Cod Strapping/Mounting 13. Posterior/Culet a. 13 Posterior Plate Trimming b. Posterior Plate Strapping/Mounting 14/15. Thighs a. Thigh Trimming - 14A/B Thigh Front Trimming - 15A/B Thigh Back Trimming b. Thigh Holster Mounting c. Thigh Holster Accuracy Update d. Thigh Strapping 16. Knees a. 16A/B Knee Trimming b. Knee Mounting 17/18. Shin/Calves a. Shin/Calf Trimming - 17A/B Shin Trimming - 18A/B Calf Trimming b. 25 & 26. "Kit-Kat" and Shin/Calf Assembly 19. Spats a. 19A/B & 20A/B Spat Trimming b. Spat Accuracy Update Soft Goods Discussion 20. Belt 21. Gloves 22. Boots 23. Neckseal, Undersuit/Gaskets & Shiny Shorts 24. Accessories
 -
My name is Josh... I'm a Star Wars-aholic... I've been with the 501st since 2022 as a Revenge of the Sith Darth Vader. I've currently got 3 costumes in various stages of completion (hence the "aholic" moniker) above... TK, Tank Trooper, and Imperial Officer. I'm finally getting the ability to put together my ANH Stunt starting in February at an armor party. I've got a second hand Walt's kit that never got beyond some very minimal initial trimming, so everything is still mostly in its untrimmed form. I've been following the WTF ANH Stunt Build thread and I've got about everything except for some of the soft parts (strapping, velcro, etc.) that I will be procuring this weekend (my daughter gets an employee discount at JoAnn's... YEAH!). I'm looking forward to another lovely costume that it's difficult to see and sit in !! ...sitting, yeah, that is what the Imperial Officer costume is for... lol!
-
Imperial March Star Wars Empire State Building Takeover Merchandise reveals here https://www.starwars.com/news/imperial-march
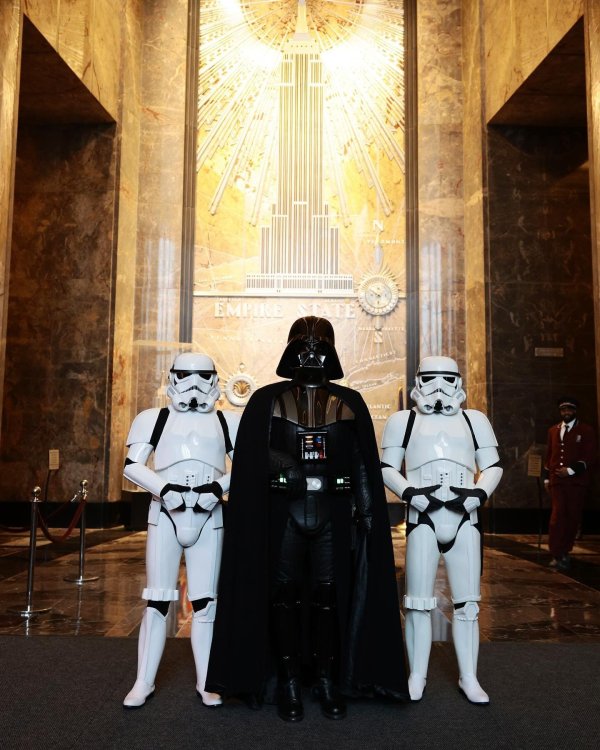


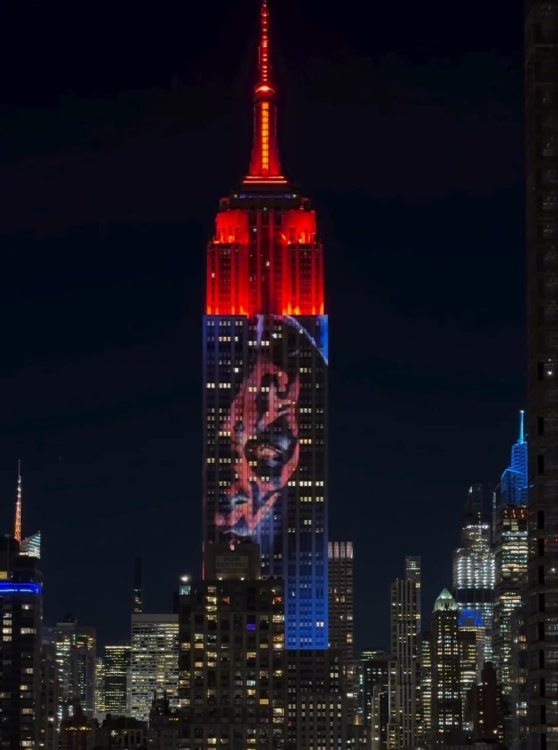
.thumb.jpg.6e1a565dadc20ffa7c277c166a316ed2.jpg)


-
NEW In Memoriam Detachment Leader Executive Officer Merchandise Officer Hall of Fame FISD Meme's Around the Detachment Trooping Opportunity INFORMATION & AWARD PROGRAMS FISD Tri-Fold Brochure Common FISD Acronyms and TK Glossary Pre Approval Forum 3D Section Field Exercise Award Imperial Attaché Program Master Armorer Award Fire Teams EIB & Centurion: What do these terms mean? Need Help Ask the Deployment Officers Advance to 1500 Advanced Tactics Awards Social Media Newsletter Editor Staff List 2023 Follow FISD Michael Culver, a British actor best known for his role in the 1980 Star Wars movie The Empire Strikes Back, has died. He was 85. Culver's agency Alliance Agents announced in a statement on Facebook Tuesday that he died Feb. 27. No cause of death has been revealed. "We are very sad to confirm the passing of our friend and client Michael Culver," read the statement. "A career spanning over 50 years with notable roles in Sherlock Holmes, A Passage to India, Secret Army and, of course, one of the most memorable death scenes in the Star Wars franchise." Our thoughts are with his family and friends and wish them all strength during this difficult time, rest in peace. "Buckets Off" Sascha Schütz entered the Hall of Eternal Legionnaires on May 20th 2022. It was a heavy loss, felt deeply by those in the German Garrison who knew him. Because of the pandemic situation, he did not even get to troop a single time in his costume. Sascha joined the German Garrison with his Biker Scout, which he had built with great effort, since September 2021. He would have loved to participate in an event, but unfortunately it did not happen, and his fellow troopers mourn the loss of the opportunity to welcome him at his first event with them. He had fully internalized the spirit and purpose of the Legion. He embodied the ideals of the 501st Legion: he put smiles on people's faces and hearts, and celebrated Star Wars as a part of our lives and shared that joy with others. All this made it truly tragic that Sascha never got the chance to troop in an event. Condolences to his family, friends and garrison "Buckets Off" Greetings troopers! A month already, time flies when you have a lot to learn. You would not believe the amount of paperwork! In the last month we managed to fund the forum email system into the next term so a big thank you to all of you who donated to the Imperial propaganda effort. You should have all received your forum banner now, so if yours is missing please do reach out. We've also made a start on the CRL for Captain Enoch, with a few builds being worked on and hoping to be the first in Legion. This is based on the Night Trooper draft CRL, so if any of you are working on a build please make sure you are involved in the CRL so there are no surprises. This term I am also hoping to get some of the past CRL work completed, so do keep an eye out for changes. Merch wise the gears have been turning and things are now starting to appear soon, but I'll leave that to the DMBO to announce. There are some exciting things to come this year, TDs included. With Unquestioned Loyalty Chris Pearson TK-10991 "themaninthesuitcase" Detachment Leader Greetings fellow members, Chris is off to a great start as our new Detachment leader, and has taken to the role well. I am honoured to accept the position as his XO, and will continue to assist him in getting up to speed as quickly as possible. Hopefully everything appears as seamless as possible so far, all considering. Chris has a good plan for the continuation of CRL work, as there were a few things we simply ran out of time getting finished last term. The future of a couple more new CRL's this year is exciting, as is the prospect of adding to existing CRL's (unfinished work from 2023). I think we are in for a fun year for all, so please keep an eye out for announcements, the newsletters, and please visit the forums so you don't miss out on any of the action. With Unquestioned Loyalty Andrew Franke TK-11469 "Sly11" Executive Officer Greetings Fellow Troopers! Lots of exciting news on the Merch Front, so let's get right to it! Old Business I know it feels like it has been forever since we did this run. The end of the year holidays and then the Chinese New Year didn't do us any favors. The last word I received was that the coins were en route to Pfab from the Factory, so we should start seeing them here in the beginning of April. Any further developments will be posted in the sales thread, found here: Secret Merch Item The Rocker run had a bit of a set back. The lettering was not centered correctly in the proofs that we received. The vendor has gone back to the factory to get this corrected before they go into production. Updates will be posted by @MaskedVengeance in the sales thread (below) once he has more info. Rocker patches. The Banner patch proofs were sent, and the look good. I approved them and they are scheduled for production. I don't have any dates as of yet, but I'll update the sales thread below once I do! Stormtrooper Banner Patch The Interest Thread for the Memorial Patch for Terrell Reber of ATA, has closed. . We are currently inquiring with vendors to find a mix of good price and high quality. Once we have selected a vendor we will open the sales thread. Thank you to everyone that expressed Interest. New Business Now for the new business! The OP rules for Merchandise and Branding changed at the end of last year. We lost a Merchandise slot, but gained what are called "Standard Logo Items" or Branding items. These items are meant to be generic representations of the Units. They are only allowed to have the Approved Unit logo and the Approved Legion logo, and they include items like T-shirts, coins, patches, and flags/banners. As MBO for the past 3 years, t-shirt is the second most requested item that I get. So for the first FISD Branding item, we are going to do a T-shirt run. The design above is just for attention and is not the final design. We are currently running a poll to get feedback from members on what color shirt, logo placement, and what variant (2 colors, long sleeve, hoodie) they prefer. You can find it here: FISD Branding Item Poll FISD OT and FO vinyl stickers are available again from Assassin Graphics. FISD Racing Shirt For those that read the Legion forum, you already know that there was a bit of a dust up about Garrison/Outpost Logos usage permission. I fear that I may have caused some of that because of the request we made for our next racing shirt. The staff (and by staff I mean @revlimiter doing all the work and us asking him to make changes to the final.final(2).Imeanitthistime_final.pdf) has been diligently working on creation of the next iteration of the FISD Racer, and we have locked down the design, but we are still working on permissions for logo usages and selecting a vendor. While I am not going to reveal the shirt here, be on the look out 1 May 2024 for an Interest thread to be posted with the majority of details. We will run the Interest thread the month of May and the sales thread the month of June, so stay tuned! Okay, just a tease... There is still more to come, we are talking about a Baseball Hat, a "war" banners, different coin options, patches and even a badge lanyard. So lots to look forward to this term. If you have any thoughts, suggestions, comments or concerns about FISD Merch or Branding, my "virtual" door is always open. Hit me up, you can reach me via email, forum DM, or find me on Facebook. With Unquestioned Loyalty James Silvius TK-12953 "jsilvius" Merchandise & Branding Officer If Darth Vader ever made a music video, it would look a little bit like this! What an awesome shot! Please welcome TK-20177 to the Stormtrooper Hall of Fame, March 2024! @Cybergrunt Troop log can be found here. Congrats Bill on 190 troops! Sooo close to that legendary badge! Other HOF recipients can be found here. With Unquestioned Loyalty Jonatan Östling TK-23592 "Nairy" Attaché Ambassador You can find the full meme thread here This Month's Screen Saver New desktop Screen Saver/Backgorund alert! In this months Screen Saver/Background release, from left to right we have: TK-66979 (Alan), TK-21476 (Lucas @lugalleg), TK-89400 (Adam, @revlimiter), TK-10492 (Brandon, @elwessbrandon) Members from Fire Team Rio Bravo! Trading Card Archives For those with FISD detachment trading cards please consider sending two to Paul @Daetrin keeper of our detachment archives. Address and more info here With Unquestioned Loyalty Paul Hoeffer TK-8020 "Daetrin" Detachment Founder Keeper of Archives LFL Retail Moratorium Lift While there is currently a retail moratorium on character appearances in effect, it is being lifted May 3-5 at retailers selling Star Wars Related merchandise during the May the 4th fan holiday. We are also happy to allow appearances at theaters screening The Phantom Menace during this time. All fans, costumed or otherwise, can participate with venues of their choice within this window with the restriction that costumed appearances must not be used in the advertising for the event. Although these appearances will be treated like an open invite, we’ll leave it to the fan groups to independently organize around these events as they see fit. LFL will not need to approve or coordinate these. Please note that retail locations should not include restaurants, bars, or venues with no apparent reason to feature Star Wars characters. In the coming weeks, we may send out a list of ‘preferred’ retailers and theaters who would welcome fans to participate at their venues within these event windows, but you are all still welcome to make plans with appropriate retailers or venue hosts of your choice regardless of whether or not they appear on the list. *REMEMBER* Always follow your garrison/squad/outpost guidelines when in comes to organizing Disney/LFL promotional troops, only command staff should deal directly with LFL. INFORMATION & AWARD PROGRAMS For a full list of FISD awards programs head here. *Now Available in Swedish* Want to spread the word about FISD?, you can with our FISD Tri-Fold Brochure. Originally these were done in a limited run by the member who created them, but nowadays, we have moved this to a print your own service making them accessible to all countries around the globe. Files are available to all full 501st members on request by contacting our DL Andrew @Sly11 , you can find more info here Currently Available languages: English - Spanish - German - Swedish Are you new to the FISD and wondering what the heck all those abbreviations and strange sounding terms mean? To help you @justjoseph63 has started a list of the most commonly used ones that will give you some insight. If you have ANY questions about a particular term that is not listed or suggestions for new ones please contact Joseph. You can find the list here. Pre Approval Forum allows future Troopers the opportunity to submit photos of their completed build to be reviewed by the Staff, Imperial Attaches and others in preparation for forwarding it to their GML for approval. Any and all advice/suggestions given will be specific, constructive, helpful and respectful. Please note that this program will NOT take the place of your local GML, as Detachments are not chartered for costume approval and can not override a GMLs decision, but is instead a peer review program designed to help you look your best and offer guidance and positive feedback. For more information on this program, please visit the link here. Don't forget to visit our 3D section when next surfing the FISD forums, there is plenty of useful information to potentially help you on your next TK adventure. You might be feeling may generous and share with our community a new TK related 3D file and maybe win yourself a 3D contributors award so check out the details below and be part of the in house 3D community. Congratulations to Helvio "Kuroi_Sabato" TKID: -----, for his excellent E-22 files and instruction manual. Not only has he put a good deal of time and effort into these files, but he has offered them free of charge for use to FISD members. Thank you sir, we award you with the FISD 3D Contributors award, congratulations! https://drive.google.com/file/d/15BcYD-rOJrIrJWRauFvmXZXC3CUOMSfB/view?usp=drive_link Here is a link to the FISD 3D Contributor program. Don't forget to create a troop log here on FISD and get awarded for your adventures The list of accomplished troopers keeps growing, so get on board and register your troops today Simply start (or update!) your troop log, keep the running total in the title, and post (at least!) a date and name for the official 501st event where you wore your TK! Once you've hit a milestone count, go over to the "Field Exercise Awards -- Post your milestones here" thread to request your profile be updated! Simple, right? Also if you would like your troop photos shared on our social media channels please add the following to the first post of your FISD troop log: I give permission for FISD to repost my photos on social media in an appropriate fashion. Award Recipients March - April TK-87665 "Stardust665" Angie - - - - - - Are you an approved TK that spends more time on the boards than the average Trooper? Do you enjoy using your knowledge to help out future and existing Troopers? If so, we would like to invite you to join the Imperial Attaché program! Members of the I.A. team are chosen to help out not only those here on the boards, but on a local level as well. Our aim is to have at least one in each and every Garrison, Squad and Outpost in the entire legion to be the eyes and ears of the FISD on a local level. If you are a 501st approved Trooper who wishes to join the ranks of the Attachés, please get in touch with me and/or visit: http://www.whitearmor.net/forum/topic/15252-fisd-attaché-program/ For a complete list of Imperial Attaches, go here. Some of the benefits include: Access to exclusive Attaché merch, including patches. You may also be in the running for an Imperial Attaché Award. An award for those attaché's who have gone above and beyond [minimum 1 year of service]. You can find a list of prior recipients here. Imperial Attaché patch Imperial Attaché Rocker Imperial Attaché Outstanding Achievement Award ATTACHÉ AMBASSADOR Hello there! Our list of attachés is growing, and I'm pleased to announce that we now cover 3 additional attaché positions in the world! @dejango (Wisconsin Garrison), @JEAN LOUIS (French Garrison) and @Georgia Haywood (Outpost 42 New Zealand Garrison) Thank you for serving the Empire on a higher level with unquestioned loyalty! For the already existing Attachés that haven't done the Sound off for 2024, please do so! With Unquestioned Loyalty Jonatan Östling TK-23592 "Nairy" Attaché Ambassador The FISD Master Armorer program is an optional, detachment only incentive award to recognize individuals who have directly helped another 501st stormtrooper to achieve Expert Infantry status. Some people spend countless hours helping others, and want to reward their results as well as incentivizing new people to help as well. To register a “win” in the program, the assistance must have provided hands-on help trimming, building, and/or fitting of said armor for the person who was awarded Expert Infantry status. More information can be found here Want to setup a "Fire Team? the Fire Team program is completely optional, and is intended to help form a common identity and spirit of camaraderie among 501st Legion Stormtroopers in the same geographic area/garrison that troop together. Fire Teams are not officially recognized by the 501st Legion nor the FISD, although they will be able to access a Fire Team sub-forum on the detachment website. You can find more information here. For those interested here is the original discussion on the creation of Fire teams here With Unquestioned Loyalty Mark Ryner TK-4584 "captsafe66" Fire Team Relations So what exactly are and levels? These programs were designed for those who choose to take their armor above and beyond the minimum requirements for basic 501st Legion approval. It gives you the chance to show a level of dedication and pride that takes your armor closer to being as "screen accurate" as possible, without as much extra work as you may realize! You can find more information on the programs here. For those unaware it is possible to achieve extra awards at Expert Infantry for each additional version costume you have approved, additional awards are not issued with another Expert Infantry number (you are only issued 1 Expert Infantry number) but you will see a star above the award on your profile and the thread title will show [APPROVED] 2nd, [APPROVED] 3rd, [APPROVED] 4th and so on. Multiple EIB award recipients and info here NOTE If you are approved with a "2nd Version" of a particular costume that you are already approved with you do not receive an additional award, there is only 1 award issued for each costume version ie: only 1 x Hero, 1 x Stunt, 1 x HWT, 1 x ESB, 1 x TFA and so on. If you have a second/additional version costume approved you will see "2nd Version" and [APPROVED] added to the thread title, no additional profile stars (more info on profile awards here) For those of you who have a particular issue (or issues) before or after submitting for Expert Infantry / Centurion level approval, in order to get you an answer faster you can now privately contact the entire Deployment Officer team at one time! Questions about fitting, repairs, CRL standards/requirements or anything pertaining to reaching Levels 2 and 3 are not only welcomed, but encouraged. Keep in mind that no question is too small, and that your queries will only be seen by the D.O. Staff. We are here to help in any way we can, so please feel free to send us a message by clicking on this link: @Deployment Officer Team and we will get back to you A.S.A.P.! The 1500 unquestioned loyalty! This area lists all those who have gone above and beyond basic approval toward screen accuracy and obtained EIB or Centurion or both. FOR March - April the 1st Imperial Stormtrooper Detachment would like to congratulate the following. Expert Infantry Badge Award: Tim "TrickyT81" TK24881 EIB 2nd EIB approval GREAT job on your approval, now on to Level 3! Request your free EIB certificate here. You can find a list of multiple award recipients here. Multiple EIB award info here Expert Infantry Honor Gallery here --------------------------------------------------------------- Centurion Badge Award: Tyler "iSmilebak" TK82278 Centurion 530 Outstanding job on reaching Centurion, Troopers! Request your free Centurion certificate here. You can find a list of multiple award recipients here. If you see any of these Troopers around your Garrison or Squad, be sure to congratulate them! Last month we started into the Legion year with a post showing off our fantastic Valkyries. Thank you to everyone who shared their picture(s) with us, so we ended up with almost 50 photos! Definitely an amazing Women's Day for this Detachment. If you missed it, feel free to contact me at any point on the forum, I take picture submissions all year round and am always looking forward to showing off our members! Talking of showing off our members, keep your eyes open for another picture request coming soon. We might still have over a month until June but we will start looking for Pride pictures soon. All the information will follow shortly. If you've been active on Discord these past weeks, you might have noticed that we're now offering video chat meet-ups on our server. The dates and times will be announced a few days in advance both on the Discord, as well in our Forum Thread. We talk about everything FISD, Stormtrooper, and whatever else might come up. I'm looking forward to seeing you! With Unquestioned Loyalty Luca Hahn TK-66744 "Morgi" Social Media Relations With Unquestioned Loyalty Adam Wolf TK-89400 "Revlimiter" Content Editor Support With Unquestioned Loyalty Vicky Mandlmaier TK-50893 "Vicky_Velocipanda" Content Editor Support I'm always on the look out for interesting stories or posts, please drop me a message if you have anything of interest. For anyone interested in having a look through any of the older newsletters they can find be found here. With Unquestioned Loyalty Glen "Q" Rhodes TK-85421 "gmrhodes13" PRO, Newsletter Detachment Leader (DL): Chris Pearson (themaninthesuitcase) TK-10911 Detachment Executive Officer (DXO): Andrew Franke (Sly11) TK-11469 Chief Deployment Officer (DCA): Mario Reyes (TKSpartan) TK-48117 Deployment Officer (DCA): José Mª Sánchez (Chemi) TK-30173 Junior Deployment Officer (DCA): Gerald J Gyorffy (Doggydoc) TK-96004 Provost Marshall (DCoG): Steven Sheades (starsaber25) TK-10466 Provost Marshall (DCoG): Caleb Mask (MaskedVengeance) TK-73692 Provost Marshall (DCoG): Arthur Wong (giskard8) TK-39093 FISD Diplomat (DPRO): Tony Jobe (ukswrath) TK-10116 FISD Diplomat (DPRO): Tim Waychoff (Dark CMF) TK-51878 FISD Diplomat (DPRO): Christoph (Danny) Lauber (Ripper_L) TK-55550 Fire Team Relations(DCoG): Mark Ryner (captsafe66) TK-4584 Merchandise and Brand Officer (DMBO): James Silvius (jsilvius) TK-12953 Trading Card Specialist (DPRO): Eric Ho (Hoda) TK-77520 Newsletter Publisher (DPRO): Glen Rhodes (gmrhodes13) TK-85421 Content Editor Support (DPRO): Adam Wolf (Revlimiter) TK-89400 Content Editor Support (DPRO): Jeff Salt (Wingnut65) TK-50297 Special Unit Director-Valkyries (DPRO): Vicky Mandlmaier (Vicky_Velocipanda) TK-50893 Attaché Ambassador (DPRO): Jonatan Östling (Nairy) TK-23592 Social Media Relations (DPRO): Luca Hahn (Morgi) TK-66744 Personnel Officer (DPER): AC (NoVATie) TK-5597 Systems Administrator (DWM): Mathias Rodstedt (Locitus) TK-2959 Systems Administrator (DWM): Eric Brager (Darth Aloha) TK-9674 Systems Administrator/Detachment Founder (DF): Paul Hoeffer (Daetrin) TK-8020 Facebook: www.facebook.com/whitearmor Facebook Group: 1st Imperial Stormtrooper Detachment (FISD) Official Twitter: www.twitter.com/FISD501st or @FISD501st Instagram: www.instagram.com/fisd501st Discord: https://discord.gg/FmQZ2qW8gx On behalf of the 1st Imperial Stormtrooper Detachment Command Staff and the Imperial Propaganda Department
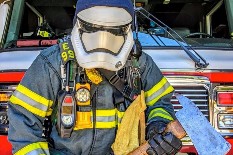


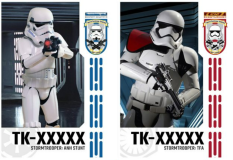

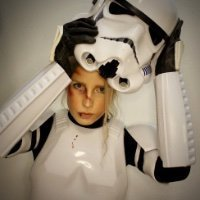

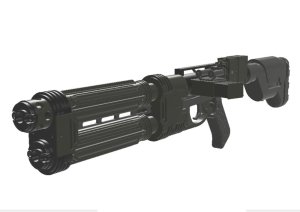
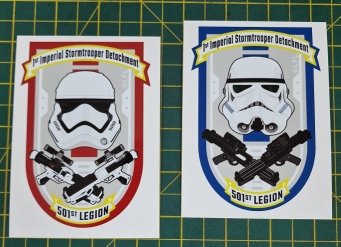
-
Completed the new detonator: Install on the spine plate just using a couple of wood screws: Been working on some refinements to my suit-up process. * Put spat on the shin before putting shin on. This puts less stress on the spat than trying to spread it open and putting it on with shin already on leg. * Attach leg gasket to thigh before putting thigh on. This will be much easier than putting the gasket on first, then trying to get the thigh on properly without shifting the position of the gasket. Here is my suit-up process. All steps are done by myself unless otherwise is mentioned: 1. Put under-suit on. 2. Put on neck seal and balaclava. 3. Put shoulder/arm gasket on. 4. Put thigh garter belt on. 5. Put lower torso on. 6. Attach gaskets to thighs, put on thighs, attaching thigh support straps to garter belt. 7. Put spats on shins, put shins on, tucking gaskets inside. 8. Slide up shins, put on boots, slide shin down over boot, position spat. 9. Attach cod piece to butt plate/spine plate. Hang spine plate on back of lower torso. 10. Attach cod to front of torso. 11. Put fabric pouches on belt, put belt on. 12. Attach shoulder bells to upper torso, put on upper torso. 13. Put on biceps. Have helper buckle bicep under shoulder bell. 14. Put on forearm. Have helper attach gasket to inside of forearms. 15. Put on gloves. 16. Put on helmet.
-
 This list is for Original Trilogy (OT) builds. ANH, ESB and ROTJ) For those who are about to embark on a TK build, in addition to the kit itself and the supplies you will need** to do that we are often asked about other items to complete the ensemble and get approved. These are known as "soft parts", and include the holster, under suit, boots, gloves, neck seal and canvas belt. Be aware that some armorers may include one or more of these items with their kit, but some do not. Also be aware that just because the seller includes them it does not always mean that they are the correct type/style and are eligible for approval (especially at higher levels). When in doubt, always ask your armorer which items are part of the package or feel free to ask here if you have doubts/questions. We are here to help! If there is a particular soft part you need, below is a list of "tried and true" vendors who have an excellent reputation, as well as suggestions for where to get other pieces or even make your own! NOTE: If you are a vendor and would like to add your sales thread here or you have a tutorial on how to make your own please PM me before posting here. **https://www.whitearmor.net/forum/topic/31404-supply-list-for-your-tk-build/page/11/ White Canvas Belt: NOTE: not all belts are created equal! The belts used in the films were firm and sturdy with no creasing or sagging. Vendor- Rob Kittel https://www.whitearmor.net/forum/topic/19803-fs-white-canvas-belts/ Soulart https://www.whitearmor.net/forum/topic/40849-geeky-pinks-phantastic-gaskets-and-so-much-more/ Trooperbay- https://trooperbay.com/stormtrooper-sandtrooper-white-canvas-belt Make your own: https://www.whitearmor.net/forum/topic/665-howto-a-guide-to-making-a-canvas-bel Neck Seal: Vendor: Darman https://www.whitearmor.net/forum/topic/21385-darmans-neck-seals/ Soulart https://www.whitearmor.net/forum/topic/40849-geeky-pinks-phantastic-gaskets-and-so-much-more/ Trooperbay- https://trooperbay.com/costuming-accessories/headgear-neck-seals/stormtrooper-neck-seal Make your own: https://www.whitearmor.net/forum/topic/34548-10-diy-neck-seal-v1/ Holster: NOTE: Holster straps differ for various costumes. Please see the CRL for your particular style here: http://databank.501st.com/databank/Costuming:FISD_CRL Vendor- Darman https://www.whitearmor.net/forum/topic/16744-leather-e-11-holsters-35/ Trooperbay https://trooperbay.com/costuming-accessories/ammo-pouches/stormtrooper-genuine-leather-blaster-holster Make your own: https://www.whitearmor.net/forum/topic/23643-making-a-holster-for-anh-stunt/ Boots: Vendor: Imperial Boots https://www.imperialboots.com/product/421/ NOTE: Imperial boots are 100% approvable at every level, but they only open once a month for orders. They can run a bit small, so I suggest ordering a half size larger than what you normally wear. Make your own: https://www.whitearmor.net/forum/topic/27565-how-i-did-my-boots-tkboots-alternative/ Under Suit: Under suits can be purchased from many sources, and you have the choice of one or two piece types. I have found Amazon to be among the least expensive sources. The easiest thing to do is visit that site and search for it, for instance "Mens compression suit top black long sleeve". Examples: Mens compression suit top black long sleeve- https://www.amazon.com/s?k=mens+compression+suit+top+black+long+sleeve&ref=nb_sb_noss Mens compression suit pants black- https://www.amazon.com/s?k=mens+compression+suit+pants+black&ref=nb_sb_noss Vendor Trooperbay https://trooperbay.com/star-wars-stormtrooper-sandtrooper-black-undersuit NOTE: While some prefer the one-piece type, the two piece tends to be better when you have to... uhhh, let's just say "answer nature's call". IMPORTANT! When ordering an under suit, be aware that many have printed logos, white stitching etc. These can not be visible while wearing your armor. Hand guards (Flexible) Vendor: justjoseph63 - https://www.whitearmor.net/forum/topic/35702-fs-flexible-hand-guards-for-centurion-level/ Vendor: Trooperbay- https://trooperbay.com/flexible-hand-guards-in-white-black-or-plain Gloves: NOTE: As per the CRL for Basic 501st OT TK approval, gloves must be all black with no visible straps/logos/designs and can be rubber, Nomex, leather or a leather-like material. For Level 2 (Expert Infantry) and Level 3 (Centurion) they must be made of rubber or a rubber-like material. I highly suggest finding ones with a long wrist, which prevents it from sliding out from underneath your forearm armor. Vendor: Trooperbay- https://trooperbay.com/accurate-trooper-black-latex-gloves Vendor: justjoseph63- https://www.whitearmor.net/forum/topic/49156-fs-rubber-gloves-for-expert-infantrycenturion-level/ eBay is also an alternative. Just search Black Nomex (or leather, rubber etc.) gloves. Be sure when ordering the rubber type from eBay that you are purchasing the heavier duty type and not the disposable kind. Thigh Garter system: Vendor: Pencap510 https://www.whitearmor.net/forum/topic/29991-thigh-garter-system/ NOTE: These are not a requirement, but they are AWESOME! Pauldrons- (For Heavy Weapons Troopers) Vendor: Soulart https://www.whitearmor.net/forum/topic/40849-geeky-pinks-phantastic-gaskets-and-so-much-more/
 -
This is going to be a slow build, so strap in and hang on. First is the BBB day (minus the BBB). its a lot of parts Planning on L3, so rubber gaskets are in hand Lots of sourced bits/bobs, this one is for the back of the armor (goes underneath the thermal det),
-
Hi guys! I've been wanting to do this for awhile, but never got around to setting up a Dropbox until tonight. Follow the links below, click DOWNLOAD, then download or open the files. Simple. HAPPY BUILDING! Aaron E-11 PVC PIPE BUILD TEMPLATES: Imperial Front: https://www.dropbox.com/s/i72nghlhz2hmyza/E-11%20PVC%20FRONT%20TEMPLATE.pdf?dl=0 Rear: https://www.dropbox.com/s/6aw5semfacsewnm/E-11%20PVC%20REAR%20TEMPLATE.pdf?dl=0 Combo (includes a Sterling instruction manual to help familiarize you with the parts): https://www.dropbox.com/s/mi700j3bbnikmpv/E-11%20PVC%20TEMPLATE%20COMBO.pdf?dl=0 Metric: Front: https://www.dropbox.com/s/b82du4kucfz9nl8/E-11%2040MM%20PVC%20FRONT%20TEMPLATE.pdf?dl=0 Rear: https://www.dropbox.com/s/kfbhebdvvfg0h7t/E-11%2040MM%20PVC%20REAR%20TEMPLATE.pdf?dl=0 FRONT SIGHT MEASUREMENTS: Imperial: Front Sight Block: https://www.dropbox.com/s/0yecc20a8948lv3/Front%20Sight%20Block.pdf?dl=0 Front Sight: https://www.dropbox.com/s/jyd1yb4iszgwvlr/Front%20Sight.pdf?dl=0 Metric: Front Sight Block: https://www.dropbox.com/s/mt20fysqnd8gekm/Metric%20Front%20Sight%20Block%20for%20A4%20paper.pdf?dl=0 Front Sight: https://www.dropbox.com/s/wxyo7w2f6zu6vu8/Metric%20Front%20Sight%20for%20A4%20paper.pdf?dl=0 TRIGGER GROUP 1:1 SCALE PDF: https://www.dropbox.com/s/b7e8l87ufkiwz6t/Sterling%20SMG%20Trigger%20Group.pdf?dl=0
-
As we continue to improve our support for the FOTK we've comprised a list of all the Hard & Soft goods vendors to help you with your build. We will continue to monitor and update the list as needed. Just a reminder the FISD does not endorse any particular vendor, nor is responsible for any transaction between you and the vendor. Please do your research before purchasing. Armor/Helmet: Jimmiroquai - Origin PHILIPPINES: Kits are partially assembled/fully trimmed lightweight fiberglass (ready for rigging and painting). No issues with quality or service reported. Contact for delivery times/price details. FB Link Here, Email Here or send a private message @jimmiroquai KB PROPS Temporarily Unavailable KB - Origin USA: Kits are made of ABS and will need to be trimmed and assembled. No issues with quality or service reported. Contact for delivery times/price details. Link Here, Email Here Armoryshop Props - Origin RUSSIA: Supplies a range of First Order Armour and Specialised 3Dprinted Helmets Link Here Armor vendors under review: 850 - Origin USA: Kits are made of ABS and will need to be trimmed and assembled. No issues with quality or service reported. Contact for delivery times/price details. Link Here Imperial Surplus (Kevin Weir) - Origin USA: Kits are made of ABS and require trimming and assembly. Armour kit is vac-formed with ABS and cast detail parts and decals are included with the kit. Quality has been solid, communication and service good. Kits ship out in 4 weeks or less Link Here WTF - Origin USA: TFA and TLJ new kit awaiting member feed back and reviews for quality etc. Kit made of ABS with some resin parts. Link Here Anovos- Offers a "Pre-order" FO kit at this time, but due to legal issues and extended (1 year plus) wait times is no longer recommended or available Denuo Novo - Origin USA: Purchase Anovos and are now supplying kits are made of ABS and will need to be trimmed and assembled. Website Link Here Soft goods vendors: Soft goods assorted (Soulart) - Origin CANADA: Neck seals, Harnesses, Shiny biker shorts, First Order gaskets, Phasma capes. Link Here Soft goods assorted (Imperial Gaskets) - Origin USA: Rubber gaskets, Pauldrons and Waist belts. FB contact Soft goods Rubber gaskets (Thorsson Associates Workshop) - Origin USA: Link Here Email: sthorsson99@yahoo.com FB: https://www.facebook.com/Thorsson-Associates-Workshop-112076042142986 Soft goods assorted (Trooper Bay) - Origin USA: Link Here Under Suit - Stormtrooperundersuit Link Here link not working Gaskets - Sheev's Emporium - Link Here (Facebook sales page) Belt - Belts of the First Order (JAFO)- Origin AUSTRALIA: Link Here Boots - Imperial Boots Origin CHINA: Link Here Gloves - Imperial Boots Origin CHINA: Link Here Endor Finders Origin USA: Link Here Neck Seal - The Dark Side Closet Link Here (Facebook sales page) Sheev's Emporium - Link Here (Facebook sales page) Suspension - Awaiting vendor Waist belt pouches - Trooperbay Origin USA: Link here Hardware vendors: Holster - R2Dan. Origin GERMANY: Other hard accessories available by application. V2 Link Here Hand Plates - As above Shoulder bell supports- (Accuracy upgrade) - ukswrath Origin USA: Link Here Waist belt center box base (Accuracy upgrade) (Empire 3D) - Origin AUSTRALIA Link Here Machined metal components - Justin Morrison Origin UK: Parts for Blaster rifle and pistol mounting, Resin holsters and other greeblies, machined metal components and more. Email Here FB links https://www.facebook.com/groups/1654472361474254/user/802819468 https://www.facebook.com/kingleezard Helmet Lens - OPLE props Origin GERMANY: Link Here Accessories: Pauldron - Denuo Novo (No stock currently) Pauldron - Trooperbay Link Here Riot Shield - Awaiting vendor Tactical Vest - Awaiting vendor 3D files: 3D print files TLJ helmet (Sano) Sanotized Creations - Link Here 3D print files F11D (The5thHorseman) - Link Here 3D print files SE-44C (The5thHorseman) - Link Here Commission builders: Crooknight - Crookknight@gmail.com dbetters - dan@thetown.org Building Guides/Thread,Tutorials & How To: Please refer to Building guides ... Weapons: General - Link Here F11D - Branfurh Studios (Etsy shop) Link Here Executioner Laser Axe - Armory Shop (Facebook sales page) Link Here / Etsy shop Link Here 3D print blaster kits - The Imperial Factory - ( Facebook sales page) Link Here Email Link Here Electroprod - (Empire 3D) - Email here. Link Here F-11D/E-11 Picatinny Rails - (justloseph63) - Link (purchase) F-11D/E-11 Picatinny Rails - (evike.com) - Link (purchase) F-11D/E-11 Picatinny Rails - (m416gelblaster) - Link (purchase) F-11D Picatinny Rails - (themaninthesuitcase) - Link 3D files E-11 Picatinny Rails - (TK14082) -Link Part of Rogue One 3D files Please refer to Vendors weapons list for up to date links/info
- 42 replies
-
- 10
-

-

Boots as of April 2024
themaninthesuitcase replied to Generalsneers's topic in Boots, Soft Parts, and other Accessories
Try Imperial Warfighters, see if they can help you out. https://www.facebook.com/profile.php?id=100063820369262 I thought they'd closed doors, but apparently I misremembered. -
Are you new to the FISD and wondering what the heck all those abbreviations and strange sounding terms mean? To help you along, I have compliled a list of the most commonly used ones that will give you some insight. If you have ANY questions about a particular term that is not listed or suggestions for new ones please ask! TK Glossary located at bottom of post Entries marked with blue asterisks ** are our "vetted" (tried and true) armorers. More information on them can be found here Acronyms A ABS- Acrylo Butadiene Styrene is a highly durable lightweight thermoplastic used by most makers of Stormtrooper armor. More info. here AM- Armor Master- U.S. based maker of ANH Stunt/Hero style armor ** (See DDD below) ANH- A New Hope (Star Wars episode IV) 1977 AOC- Attack of the Clones (Star Wars Episode II) 2002 AP- Authenticprops Canadian based maker of ANH Stunt style armor ** ATA- Affordable Trooper Armor U.S. based maker of ANH Stunt style armor ** (Sadly, no longer available) B BFG- Big Freakin' Gun Larger style weapons (T-21, DLT-19 etc.) used by HWTs, Sandtroopers and certain other TKs. C CFO- Cast From Original- UK based maker of ROTJ armor** CO- Commanding Officer CRL- Costume Reference Library List of all 501st costumes with a detailed description of each. Link here. CS- Command Staff D DO- Deployment Officer Responsible for approving troopers at higher levels (EI and Centurion) DD- Doopydoos UK manufacturer of various SW props, including resin weapon kits. UPDATE- No longer selling resin E-11 kits DDD- Dave's Darkside Depot Maker of AM armor (see AM above) DCA- Detachment Costume Advisor Offers advice to GMLs for approving various 501st costumes DCOG- Detachment Captain of the Guard Responsible for interpreting/enforcing rules, mediation and disputes. Also oversees disciplinary hearings and moderates FISD elections DF- Detachment Founder Paul (Daetrin) DL- Detachment Leader Elected head of a Detachment DMBO- Detachment Merchandise Branding Officer Responsible for all items pertaining to FISD logos and branding DPRO- Detachment Public Relations Officer Social Media, Newsletter, Publications, Photo Editing, Diplomat, Trading Cards, Content Editor etc. DWM- Detachment Web Master Systems Administrator/website gurus DXO- Detachment Executive Officer (XO is commonly used) Second in Command of the Detachment E EI- Expert Infantry Optional second level awarded for a more advanced screen accurate TK build. More info. here EIB - Expert Infantry Badge Official FISD logo used for the above rank. ESB - The Empire Strikes Back (Star Wars Episode V) 1980 EU- Expanded Universe Older term use for non-canon items/characters not seen in the existing SW films (books/novels/comics etc.) Currently referred to as Legends F FISD- 1st Imperial Stormtrooper Detachment FO- First Order FOBG- First Order Battle Group. Area of the FISD dedicated to all things FO related. Link here. FOTK - First Order Stormtrooper FX- Older brand of TK armor. Armor is acceptable for approval up to EI with modifications. Helmet is not accepted for approval at any level. G GML- Garrison Membership Liaison Responsible for approving costumes at Basic level GCO- Garrison Commanding Officer Elected head of a Garrison GXO- Garrison Executive Officer Second in command of a Garrison H HDPE- High Density Poly Ethylene A petroleum based thermoplastic polymer used to make the 50 original Stunt helmets for A New Hope. HIPS- High Impact Polystyrene Used by some makers of Stormtrooper armor. More info. here HWT- Heavy Weapons Trooper As seen in the Battlefront video game series. More info here I IA- Imperial Attache FISD Extended Staff Officer. More info here IAA- Imperial Attache Ambassador- Staff Officer in charge of the IA program ILM- Industrial Lights and Magic Special effects company founded by George Lucas in 1975 for SW IPM- Imperial Propaganda Machine Pertaining to the monthly FISD newsletter/Facebook/Twitter/Discord accounts L L1- Level one Basic 501st costume approval L2- Level two Refers to Expert Infantry status. Please see EI L3- Level three Refers to Centurion status. Award for the highest level of screen accuracy for a TK build. LCO- Legion Commanding Officer Description here LCOG- Legion Captain of the Guard Description here LFL- Lucasfilm Limited Film/television production company started in 1971 by George Lucas. Now owned by Disney. LMBO- Legion Merchandise Branding Officer Description here LMO- Legion Membership Officer Description here LPRO- Legion Public Relations Officer Description here LXO- Legion Executive Officer Second in command of the 501st Legion M MEPD- Mos Eisley Police Department Detachment for Sandtroopers. Link here N NL- News Letter Refers to the monthly FISD online publication O OT- Original Trilogy (A New Hope / The Empire Strikes Back / Return of the Jedi) P PER- Personnel Officer In charge of various FISD administrative duties PM- Private Message PRO- Public Relations Officer Serves as the FISD's main voice on Social Media R R1- Rogue one: A Star Wars Story 2016 RL - Rebel Legion Info here ROTJ - Return of the Jedi (Star Wars Episode VI) 1983 RPF - Replica Props Forum is a non-501st forum for prop replication information sharing. RS- RS Propmasters UK based maker of ANH Stunt style armor** RT-MOD - Canadian based maker of ANH style armor ** RWA- UK based maker of ANH style armor** S SDS- Shepperton Design Studios UK based maker of ANH style armor T TB- Trooperbay Seller of various TK accessories. Link here TBA- To Be Announced TBD- To Be Determined TD- Thermal Detonator TD - 501st Costume designation for Sandtroopers TFA- The Force Awakens (Star Wars Episode VII) 2015 TPM- The Phantom Menace (Star Wars Episode I) 1999 TK - 501st Costume designation for Stormtrooper style armor TLJ- The Last Jedi (Star Wars Episode VIII) 2017 TM - Troopermaster UK based maker of ANH Stunt, ESB and ROTJ style armor ** T/MC- U.S. based maker of ANH Stunt style armor ** TROS- The Rise of Skywalker (Star Wars Episode IX) 2019 W WIP- Work in Progress WTF- Walt's Trooper Factory- U.S. based maker of ANH style armor ** Glossary of common TK terms A ABS Paste- Slurry made from ABS scraps and acetone used to fill gaps/seams. More info here Armor bite- Points where the armor (usually return edges) are too tight and rub against your skin or cut into you causing chafing/bruising Aurebesh- Writing system/alphabet used to represent spoken Galactic Basic (the most commonly seen form of written language in the SW franchise). B Brow Trim- Black rubber gasket with a U shaped profile located above the eyes that extends back to the center of the ears on a TK helmet Bucket- Alternate name for a TK helmet Butt join- As used in ANH and ESB armor where the seams on the biceps, forearms, thighs and calves are hidden with a cover strip C Cap- Rear section of a TK helmet Canon- For our purposes, as seen on screen or deemed a standard part of the accepted/sanctioned Star Wars universe Centurion- Highest level of FISD approval for screen accurate TK style armor Info. here Cheeks- Elongated semi-tubular areas located below the tears on a TK helmet Chicago screw- Fastener that has a barrel-shaped flange and is internally threaded. Commonly used for attaching the holster to the canvas belt. Classic (strapping system)- As used in OT armor, the torso parts are held together with metal brackets/straps in lieu of snaps/straps Cod- Lower tab of the abdomen plate that covers the crotch area Cover strip- Plastic strip used to cover the bicep, forearm, thigh and calf seams on ANH and ESB armor D Detachment- One of 16 specific factions within the 501st dedicated to researching, constructing and promoting a distinct group of costumes Double Cap rivet- Hollow bodied 2 part fastener with a dome on both ends used for attaching ammo thigh pack. Not screen accurate. (See Single Cap Rivet below). Double snap- The use of two snaps instead of one on the ends of a connecting strap, providing a more reliable/stronger connection Drop Boxes- Rectangular boxes located below the ends/tabs of the ABS belt on most TKs E Ear bar- The raised area in the center of the top (round) part of the ear on a TK helmet Ear bump(s)- The 4 raised ridges on top of the ear bar. Hero ear bars have 3 bumps Expert Infantry- Optional second level of FISD approval for screen accurate armor, given only after Basic 501st approval Info. here F Face plate- Front section of a TK helmet Fire Team- Although not officially recognized by the Legion or FISD, these groups form a common identity and spirit of camaraderie among approved stormtroopers in the same geographic area/Garrison that troop together. More info here. Frown- The upside down V shaped opening (tooth area) located above the vocoder/Hovi tips on a TK helmet G Garrison- The largest type of 501st unit within a geographical region containing at least 25 members. Currently 76 world-wide Gaskets- Black ribbed rubber or shiny black coverings used to cover the shoulders, elbows and knees of FOTKs. Greeblie- A small part (usually plastic or resin) used to accessorize a prop weapon or armor H Hovi (mic) tips- Short round black plastic parts attached in the recessed areas on either side of the vocoder on a TK helmet. Note that the ones used in the original ROTJ helmets were metal. Hero- TK armor style as worn by Han and Luke in ANH. Differs slightly from Stunt. More info. here Hyperfirm- Maker of high quality rubber-type TK weapons/props. No longer in business. K Knee plates- Separate knee coverings worn by FOTKs which cover the front area between the thigh and shin L Legends- Please see EU in the acronyms area M Merch- Term often used when referring to FISD/501st branded merchandise Mobility cut- Arc shaped sections removed from the top rear of the calf and bottom rear of the thigh for comfort purposes N Neck Seal- Black ribbed collar used to conceal the entire neck and openings above the back/chest plate. Examples here O Outpost- The smallest 501st Legion unit containing at least 1 member, usually outside the borders of an existing Garrison/Squad. Currently 30 world-wide Overlap (construction)- As used on ROTJ armor, this is where one side of the bicep, forearm, thigh and calf connecting seams overlap the opposite seam, eliminating the need for a cover strip P Pauldron- Soft part used by Sandtroopers, HWTs and certain other TKs that cover the right shoulder Pull- Term used in vaccu-forming. Often used with "bad" or "rough" when the ABS loses it's intended shape in the heat molding process. R Rare Earth Magnets- Incredibly strong neodymium magnets commonly used for holding armor parts together during gluing. Info. here and here. Recast(er)- Person who steals someone else's original design in order to manufacture and sell copies, normally at a discounted price. Info here Return Edges- Angles on the edges of many parts of TK armor used for strength or to give them a thicker appearance. Info here S S-Trim- Black rubber gasket with an S shaped profile installed around the opening of a TK helmet Shim- ABS pieces normally used to extend the sides of the kidney plate, but can be used in other areas as needed. Single Cap Rivet- Hollow bodied fastener with a dome on one end used to connect the thigh ammo pack. Screen accurate, but split rivets may be substituted. Head diameter should be 5/16" (8mm) Sniper Knee Plate- Hexagon shaped piece attached to the top front of the left calf Shoulder bridge- Ribbed armor piece that connects the chest and back plate Spats- Circular pieces which wrap around the lower ankles of FOTK armor. Split Rivet- Round head metal fasteners with a split (bifurcated) shank attached on the left side of the kidney/abdominal plate. Head diameter should be 5/16" (8mm). Can also be used to mount the thigh ammo pack Squad- Subdivision of a 501st Garrison in a distinct region containing at least 10 members. Currently 78 world-wide Stunt- Armor style as worn by most TKs in ANH. Differs slightly from Hero. More info. here Swag- Alternate name for merchandise (coins, patches) etc. See also Merch. T Thermal Detonator- Elongated canister clipped to the rear of TK belts. Examples here Thigh ammo pack- Semi-round armor flexible piece with rectangular boxes, attached to the bottom front/sides of the right thigh Tears- Irregular triangle indentations located below the the eye openings on TK helmets. Pronounced "teer" Traps- The trapezoidal shaped indentations located above the rear of the brow trim on each side and on the rear of a TK helmet Troop- An event sanctioned by a local Garrison, Squad or Outpost. More info here Tube Stripes- Blue curved lines located on the upper section of the cheeks on TK helmets U Under Suit- Black (normally compression) garment(s) worn under TK armor to conceal all exposed skin Y Yoke- Extended tabs that are attached to the back plate and extend over the shoulder/under the armpits on FOTK armor. V Vocoder- The 7 raised black ribs located in the recessed area between the Hovi-tips
- 2 replies
-
- 13
-
-
Sounds like you have done your research. Detonator also different between the two versions. TFA TLJ has an inner pipe/tube with black areas of the housing cut out Some links for you: Great Anovos build by Ukswrath Also DN build by TheRascalKing Metal holster Rubber gaskets http://www.tandaworkshop.com/ https://www.facebook.com/Thorsson-Associates-Workshop-112076042142986 Resin hand guards There are some small differences in the blaster so check visual references from the movies Looking forward to seeing your build
-
Hello. My name is Daryl, and I’ve been a Cloud City Garrison member for about 6.5 years. I’ve built several armored costumes (ANH stunt, ESB Snowtrooper, Dengar, AT-AT driver), but this my first experience with the FOTK. Here's my parts list, so far armor: Denuo Novo (ordered Anovos 1/9/2018) helmet: Denuo Novo standard (ordered Anovos 1/9/2018) boots: Imperial boots http://www.imperialboots.com/product/trooper7-boots-gloves/ gloves: Imperial boots http://www.imperialboots.com/product/trooper7-boots-gloves/ metal holster: R2Dan on FISD shoulder brackets: Ukswrath on FISD fabric mesh/gaffers tape: Ukswrath on FISD I plan to use the Denuo Novo instructions a little bit, but I’ll also be following other pinned builds here on FISD. Supplies: Lexan scissors Painters tape Clamps Magnets E6000 80 grit sandpaper 220 grit sandpaper 400 grit sandpaper 1000 grit sandpaper 2000 grit sandpaper Behr Paint+Primer Gloss White Behr Paint+Primer Satin Black Acetone Headlight polish Novus scratch remover 2 & 3
-
 Hello! I'm looking into making a FOTK costume at some point, but something that confuses me is the undersuit and gaskets. If I bought this undersuit, would I still need to buy the gaskets? It has ribbing like it's meant to look like gaskets. But I don't know if that would be sufficient? Thank you!
 -
Break time finally!
-
For discussion of TLJ and TROS CRL only. Please keep this thread on topic CRL - https://databank.501st.com/databank/Costuming:TK_-_First_Order EDIT: Added working CRL to this post. This is fluid and will be adjusted as we discuss further. White is existing text in the CRL Green is additions and corrections Red is what exists but requires change/removal Helmet Lenses are smoky brown or gray in color. They may be bubble in shape or flat and must be sufficiently dark enough to obscure the costumer's eyes. A single silver aerator/mic tip cylinder is on lower left side of the wearer's chin. The frown is solid black and covered in black hexagonal mesh that extends to the tears. Each tear (area beneath the corners of eye lenses) is solid black. Seven cut out tube stripe slots are on each side of the helmet. Two clip greeblies are present over the traps on the side. Two clip greebles are present on the top of the helmet, parallel to the trap greeblies. The clip greeblies must be the correct TLJ version. Along the base of the helmet a black stripe runs from the side of the helmet and across the back to the other side. There is a slight groove that circumvents circles the helmet above the brow. There is a slight grove that circumvents circles the helmet along the bottom and over the chin. A brow of solid black material spans from the traps over the lenses. Directly below the traps toward the base of the helmet is a small trapezoidal stripe. Mouth area is angled and has 7 teeth with mesh/grill behind. Neckseal Black with horizontal ribs, fitted to the wearer, and extending from the base of the neck to conceal the entire neck. No hair or skin should be visible around the neck area. The neck seal may close at the front or the rear. OPTIONAL Level OPTIONAL Level three certification (if applicable): The neck seal must close at the front using a zipper enclosure. Ideally, the neckseal shall have 11 ribs. · The neckseal has a glossy finish. Chest Plate The chest plate overlaps the abdominal plate. The center-top of the chest plate is recessed and black on the side and upward facing edges. A smaller clasp greeblie shall be present on each side of the chest, just inside a small indented area the size of the greeblie. There is a slight groove running vertical on each lateral side of the chest that angles toward the center. Six recessed black ovals are on the wearer's right side, left of the greeblie. · OPTIONAL Level two certification (if applicable): OPTIONAL Level three certification (if applicable): Grooves on sides of chest should show clear separation. Six recessed black ovals are cut out and backed with black material. Back/Yoke The back plate contains a "O II" design, and the O is black in color. ·There are no visible seams on the back/yoke. The yoke portion extends over the wearer's shoulders and curves under the armpits. · OPTIONAL Level two certification (if applicable): OPTIONAL Level three certification (if applicable): A support tab extending from the outside top arch of the yoke shall be present. The support tab should be of a sturdy material, white in color. Need to include an image of the support tab Thermal Detonator The thermal detonator mounting plate sits under the back plate and rests above the belt. The control panel is black. The right hand recessed end cape is black. The lefthand end cap extends from the detonator assembly and is black all around the cylinder as well as the end surface. The left-hand end cap extends from the detonator assembly and is all black. · There should be no visible seams A visible seam is permissible between the detonator assembly piece and the detonator mounting plate. OPTIONAL Level two certification (if applicable): Small section of black around the base of the left extended end cap shall be present. The slot that runs across the top of the detonator shall have a black decal or be painted black at the bottom of the groove. OPTIONAL Level three certification (if applicable): The endcap is part of an inner cylinder that slides into the detonator assembly. The cylinder is completely painted black. It is visible through the top grove and back window(control Panel) The slot that runs across the top of the detonator should be cut through so the inserted black cylinder is visible Shoulder Gaskets Gaskets shall be rubber or a shiny black material with ridges. The shoulder gaskets must cover all exposed areas under the shoulder bell, between the bicep and chest, and between bicep and back. · OPTIONAL Level two certification (if applicable): OPTIONAL Level three certification (if applicable): · Gaskets shall be made of rubber. Fabric gaskets are not acceptable. Shoulder Bells One on each shoulder. The shoulders are considered effectively symmetrical. They may be worn interchangeably on the left and right shoulders. Shoulders have small round extension at the top under the bell itself that butts up against the yoke. } Biceps Biceps have one seam that faces forward, and a seam on the inside of the arm. The rest of the bicep must be seamless. A clip greeblie is present low and across the seam. Two black ovals are present on the outside-facing side of the · OPTIONAL Level OPTIONAL Level three certification (if applicable): Trapezoid detail and ridges in bicep must be present (small detailed section). The inner seam should be overlapped. Seams can be fixed or functional. Elbow Gaskets Gaskets shall be rubber or a shiny black material with ridges. The elbow gaskets must cover all exposed areas between the bicep and forearm. · OPTIONAL Level two certification (if applicable): OPTIONAL Level three certification (if applicable): Gaskets shall be made of rubber. Fabric gaskets are not acceptable Forearms Forearms shall have have ridged rail, similar to a picatinny, embedded on the inside of the forearm, roughly covered 1/3rd by a box shape. Forearms shall have a box on the bottom of the wrist end. Each box shall have a single black square in the lower inside corner. Each forearm shall have two 'clasp greeblies' on the outside facing surface, near the wrist. ·Detail box includes black rectangle on small edge perpendicular and closest to wrist. · OPTIONAL Level two certification (if applicable): On the ridged rail the third retaining button head closest to elbow is to be painted grey or is a grey decal. · The boxes should sit against the forearm with minimal to no gap. OPTIONAL Level three certification (if applicable): The seam between the forearm boxes and the forearm should not be filled. The top (elbow end) of the forearms should be trimmed in the correct TLJ shape TFA cut is not permissible. (Replace images with more accurate shape) Gloves/Handplates Are black with white palm, thumb and forefinger. Extend underneath the forearm. White area is made from leather or leather-like material. Handplates are rigid square boxes and the hand plates are mounted securely over the back of the glove. The recessed oval detail is aligned with the index finger of each hand. A black decal or paint may be used to emulate the recessed oval detail. ¨ OPTIONAL Level two certification (if applicable): OPTIONAL Level three certification (if applicable): Glove palm must have black stitching. Abdomen Section The abdomen section must wrap around the wearer's body without a visible seam. ·The abdomen has 7 boxes attached that match the order and placement shown against the armor. The large box has a small black recessed square on the lower left to the wearer. The second box to the right of the wearer has a small black recessed rectangle near the top. · OPTIONAL Level two certification (if applicable): The boxes should sit against the abdominal plate with minimal to no gaps. · OPTIONAL Level three certification (if applicable): The seams between the abdominal armor and the 7 boxes should not be filled. Codpiece The codpiece sits below the abdomen and under the belt. OPTIONAL Level two certification (if applicable): ·TLJ correct cod is required. Must replace image with correct cod OPTIONAL Level three certification (if applicable): Posterior armor The posterior armor sits below the abdomen and under the belt. Belt The belt is ribbed and made from a rubber or a rubber like material. The width of the belt is approximately 2" (50mm). Five white rectangular boxes and one pouch sit on the belt. There are 2 horizontal boxes on the front, on each side of the center. They are painted white on the outside half and black on the inside half. There are 2 vertical boxes on the right of the wearer. There is a large vertical black pouch with a white cover behind the left side of the wearer. A small black cloth pouch is worn on the left side and hides the buckle or remaining belt material. Undersuit An undergarment must be worn such that the space between the thighs and the belt shows a black material. The black material may be shiny or matte. The reference photo shows the type used on screen but is not required for basic approval. · OPTIONAL Level two certification (if applicable): OPTIONAL Level three certification (if applicable): The shorts area of the undersuit should be shiny. Thighs There are seams on the inside and outside of the thighs. A clip greeblie is present high and across the outside seams of each thigh. The right outside thigh to the wearer includes a base for a holster (holster must be present). · OPTIONAL Level two certification (if applicable): Holster must be shown to be Functional. Knee Gaskets Gaskets shall be rubber or a shiny black material with ridges. The knee gaskets must cover all exposed areas between the thigh and shin. · OPTIONAL Level two certification (if applicable): OPTIONAL Level three certification (if applicable): Gaskets shall be made of rubber. Fabric gaskets are not acceptable. Knee Plates The knee plates mirror each other and are placed evenly between the thigh and the shin. Convex edge of knee plate faces upward. Shins There are seams on the inside and outside of the shins, with the opening on the inside. A clip greeblie is present high and across the outside seams of each shin. The wearer's left outside shin includes two vertical thin boxes that are seamless. There is a rounded rectangle at the bottom outer front of each shin, which is visible above the spat. The recessed area is black. Spats The spats wrap around the lower ankle, just below the black ankle rectangles. The spats are enclosed on the outside of the ankle with a greeblie that overlaps the open side. There is a visible seam on the inside of the ankle. Boots The boots are above-ankle height, and made of white leather or leather-like material. There is a seam down both sides of the front that swoops out to the side of the foot. There is a vertical zipper on the inside that spans the height of the boot. There is a black flat sole with no heel. No buckles or laces. Optional Accessories Items below are optional costume accessories. These items are not required for approval, but if present appear as described below. If adding in an accessory after initial approval, the item still needs to be submitted to local GML for approval before use. Shoulder Pauldron A red, white, or black ornament made of rigid plastic or plastic-like material, worn over the right shoulder. · OPTIONAL Level two certification (if applicable): OPTIONAL Level three certification (if applicable): Must not be worn with riot baton or riot shield. Ammo Pouch One three slot German MP-40 style ammo pouch on the left shoulder. Pouch is black in color and made of canvas, leather or leather-like material. Pouch stitching must be black. OPTIONAL Level two certification (if applicable): Ammo Vest Black cordura or cordura-type material covering the chest armor. There are two straps attached to the outer top edges of the vest, going around the shoulders to connect to clips on each side of the vest. An additional strap starts along the bottom of the vest and goes around the wearer. There are 5 ammo pouches present. There are 3 white plates mounted along the top of the 3 central ammo pouches. Straps are connected with quick disconnects (clips). There are additional fabric bands across each ammo pouch. The outer two ammo pouches have front flaps present and closed. OPTIONAL Level two certification (if applicable): OPTIONAL Level three certification (if applicable): Strapping should match reference photo. When worn, riot baton and riot shield must not be present. Riot baton The baton has a white base with two black triangles on both sides, a silver pommel, black side grips, and a silver handle perpendicular to the base. The end of the base has an extension roughly 1 foot long with 5 silver bands equally spaced apart. ·There is a black strip running down the center of both sides of the extension. At the end of the extension, there are two white half cylinder arms each with 5 silver bands equally spaced apart. The end of the half-cylinders are angled at roughly 45 degrees. · OPTIONAL Level two certification (if applicable): OPTIONAL Level three certification (if applicable): Riot shield and riot baton must both be present. Pauldron, backpack, ammo pouches and ammo vest shall not be worn with riot baton/riot shield combination. F-11D Blaster Blaster may be scratch-built, or a modified commercial toy Stormtrooper blaster. · Details to be painted black, white and silver per reference photos. Blaster may have a picatinny rail on right side of barrel Blaster may have sling attached. OPTIONAL Level two certification (if applicable): Rear sight is painted black D-Ring shall be present on the rear end cap, rectangular in shape and painted white 3-D printed blasters can not contain visible print lines, and must be sanded smooth for a more realistic appearance. OPTIONAL Level three certification (if applicable): Working lights and working front torch are required. Front handle must be movable. Blaster must have a picatinny rail on front side of barrel F-11D Blaster Rifle (Heavy) Blaster may be scratch-built, or a modified commercial toy Stormtrooper blaster. Similar to standard F-11D Blaster with extended stock attached. Details to be painted black, white and silver per reference photos. Blaster may have a picatinny rail on right side of barrel OPTIONAL Level two certification (if applicable): Rear sight is painted white 3-D printed blasters can not contain visible print lines, and must be sanded smooth for a more realistic appearance. OPTIONAL Level three certification (if applicable): 3-D printed riot baton can not contain visible print lines, and must be sanded smooth for a more realistic appearance. Working lights and working front torch are required. Front handle must be movable. Blaster must have a picatinny rail on front side of barrel NEW Additions: Riot baton The baton has a white base with two black triangles on both sides,a silver pommel, black side grips, and a silver handle perpendicular to the base. The end of the base has an extension roughly 1 foot long with 5 silver bands equally spaced apart. There is a black strip running down the center of both sides of the extension. At the end of the extension, there are two white half cylinder arms each with 5 silver bands equally spaced apart. The end of the half-cylinders are angled at roughly 45 degrees. OPTIONAL Level two certification (if applicable): 3-D printed riot baton can not contain visible print lines, and must be sanded smooth for a more realistic appearance. OPTIONAL Level three certification (if applicable): Riot shield and riot baton must both be present. Pauldron, backpack, ammo pouches and ammo vest shall not be worn with riot baton/shield combination. Baton should have working lights down length of both sides of the barrel, and top of rear housing, center of back triangle area. Electroprod Blaster Prod may be scratch-built or 3D printed. Details to be painted black, white and silver per reference photos. OPTIONAL Level two certification (if applicable): There is a small tube that runs from half way up the shaft to the head. 3-D Electrprods can not contain visible print lines, and must be sanded smooth for a more realistic appearance. OPTIONAL Level three certification (if applicable): Electroprod must have working lights, rows of red in top silver housing and blue in end prongs. First Order Hand binders.
-
Since seeing Season 3 Mandalorian and the super commandos I wanted to build this armour. I have got as much reference images as possible to try and get as close to CRL grade as possible. The armour and helmet are from galactic armourer. The jumpsuit is being hand made from a modified boiler suit. Boots will be from Crow Props. Lights in the armour will be from ELwire.co.uk which will comprise of el panels. jetpack will be remodded to fit a can of compressed air, el lights and sound module which will work via remote fob trigger.


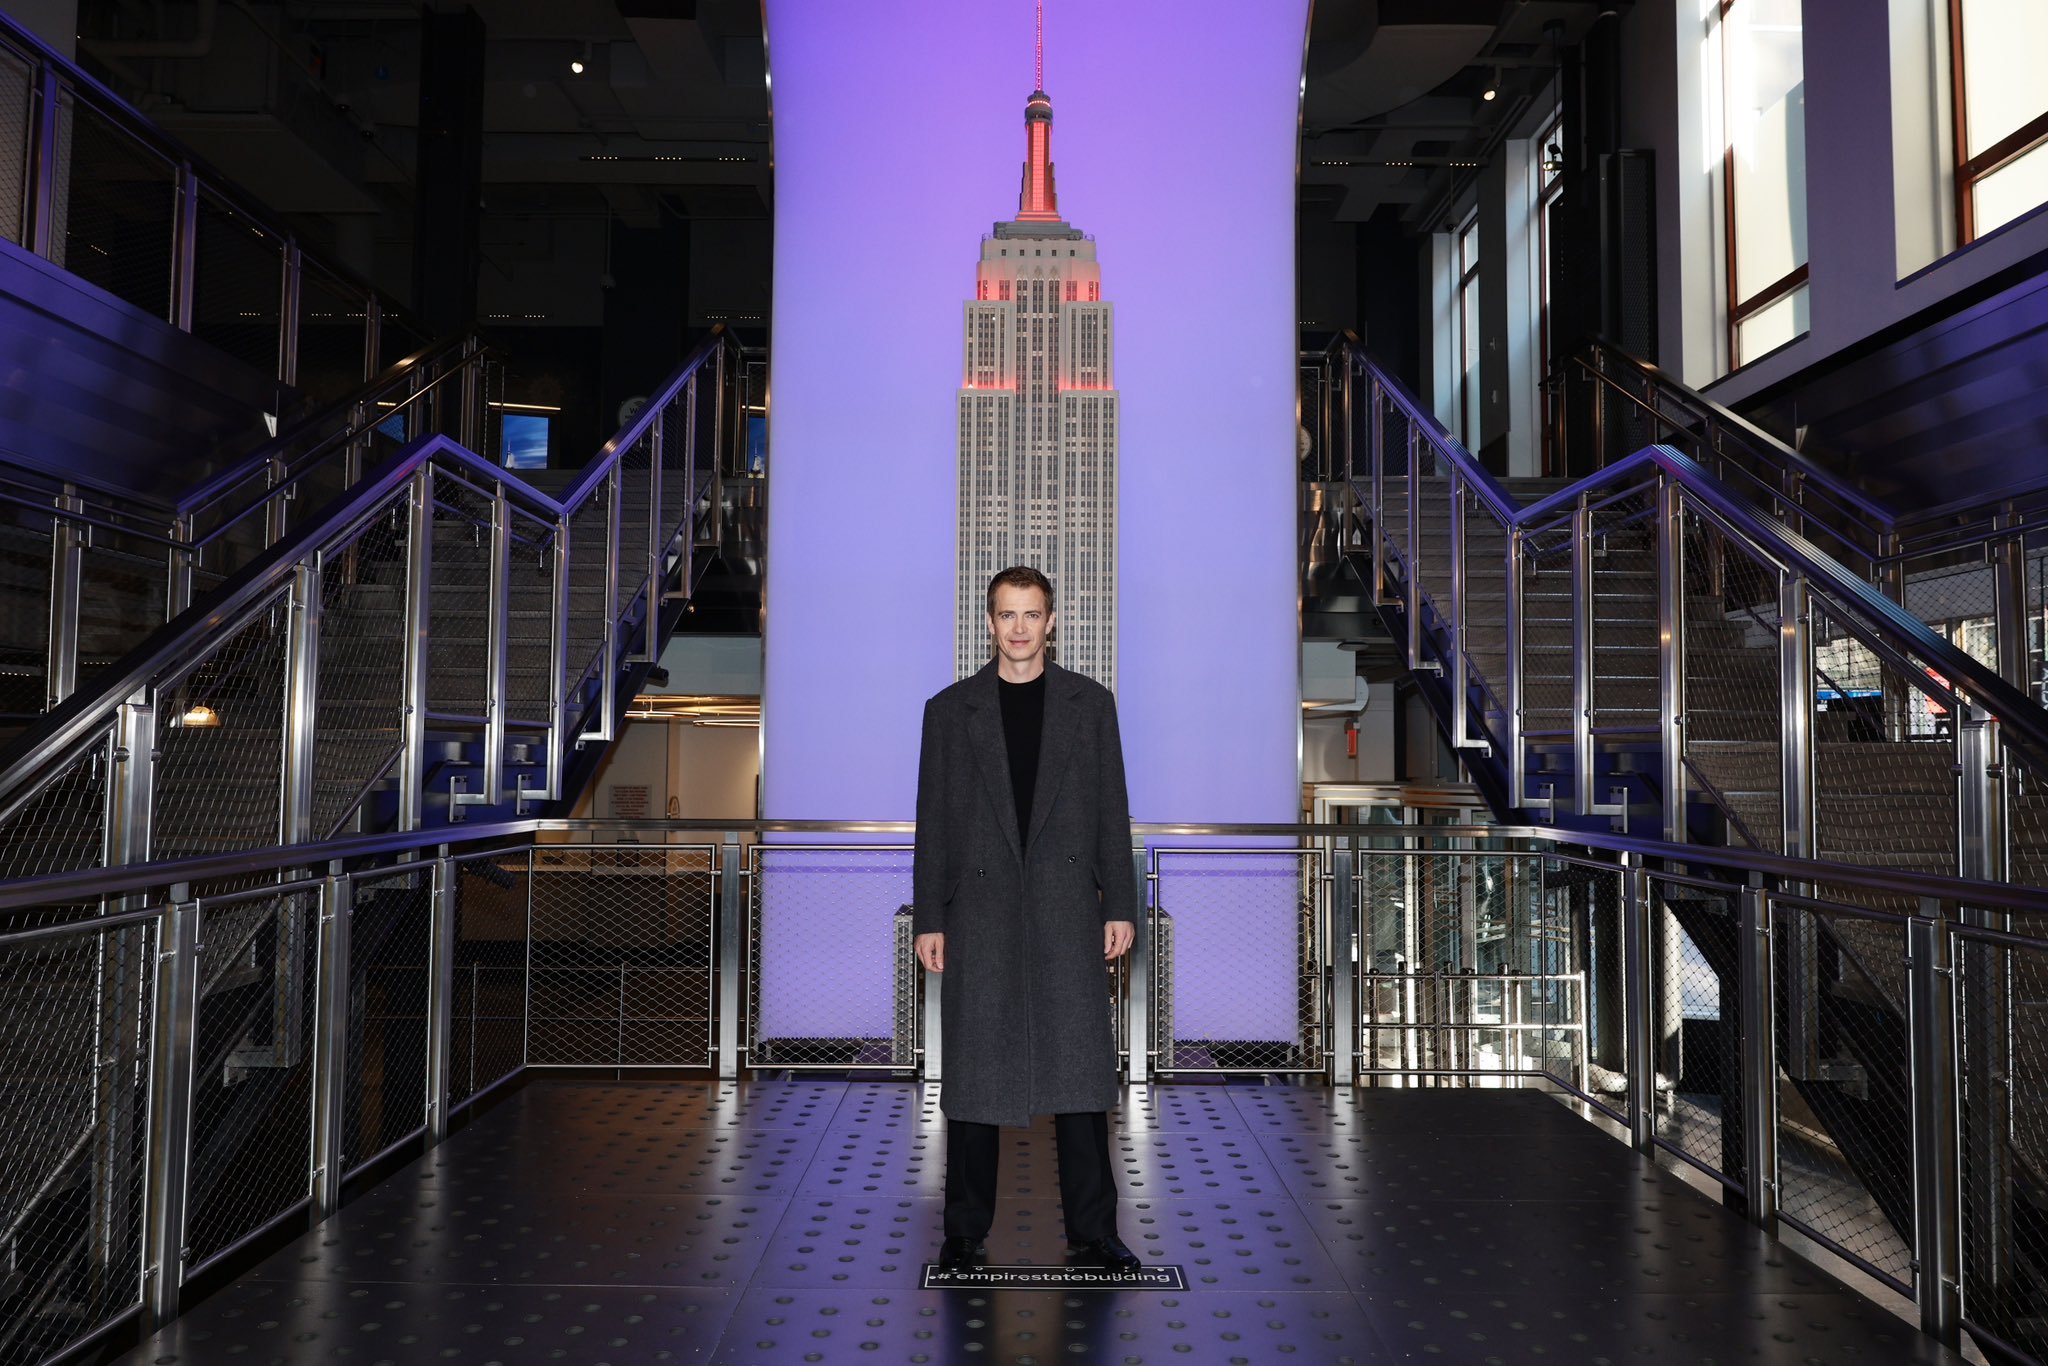
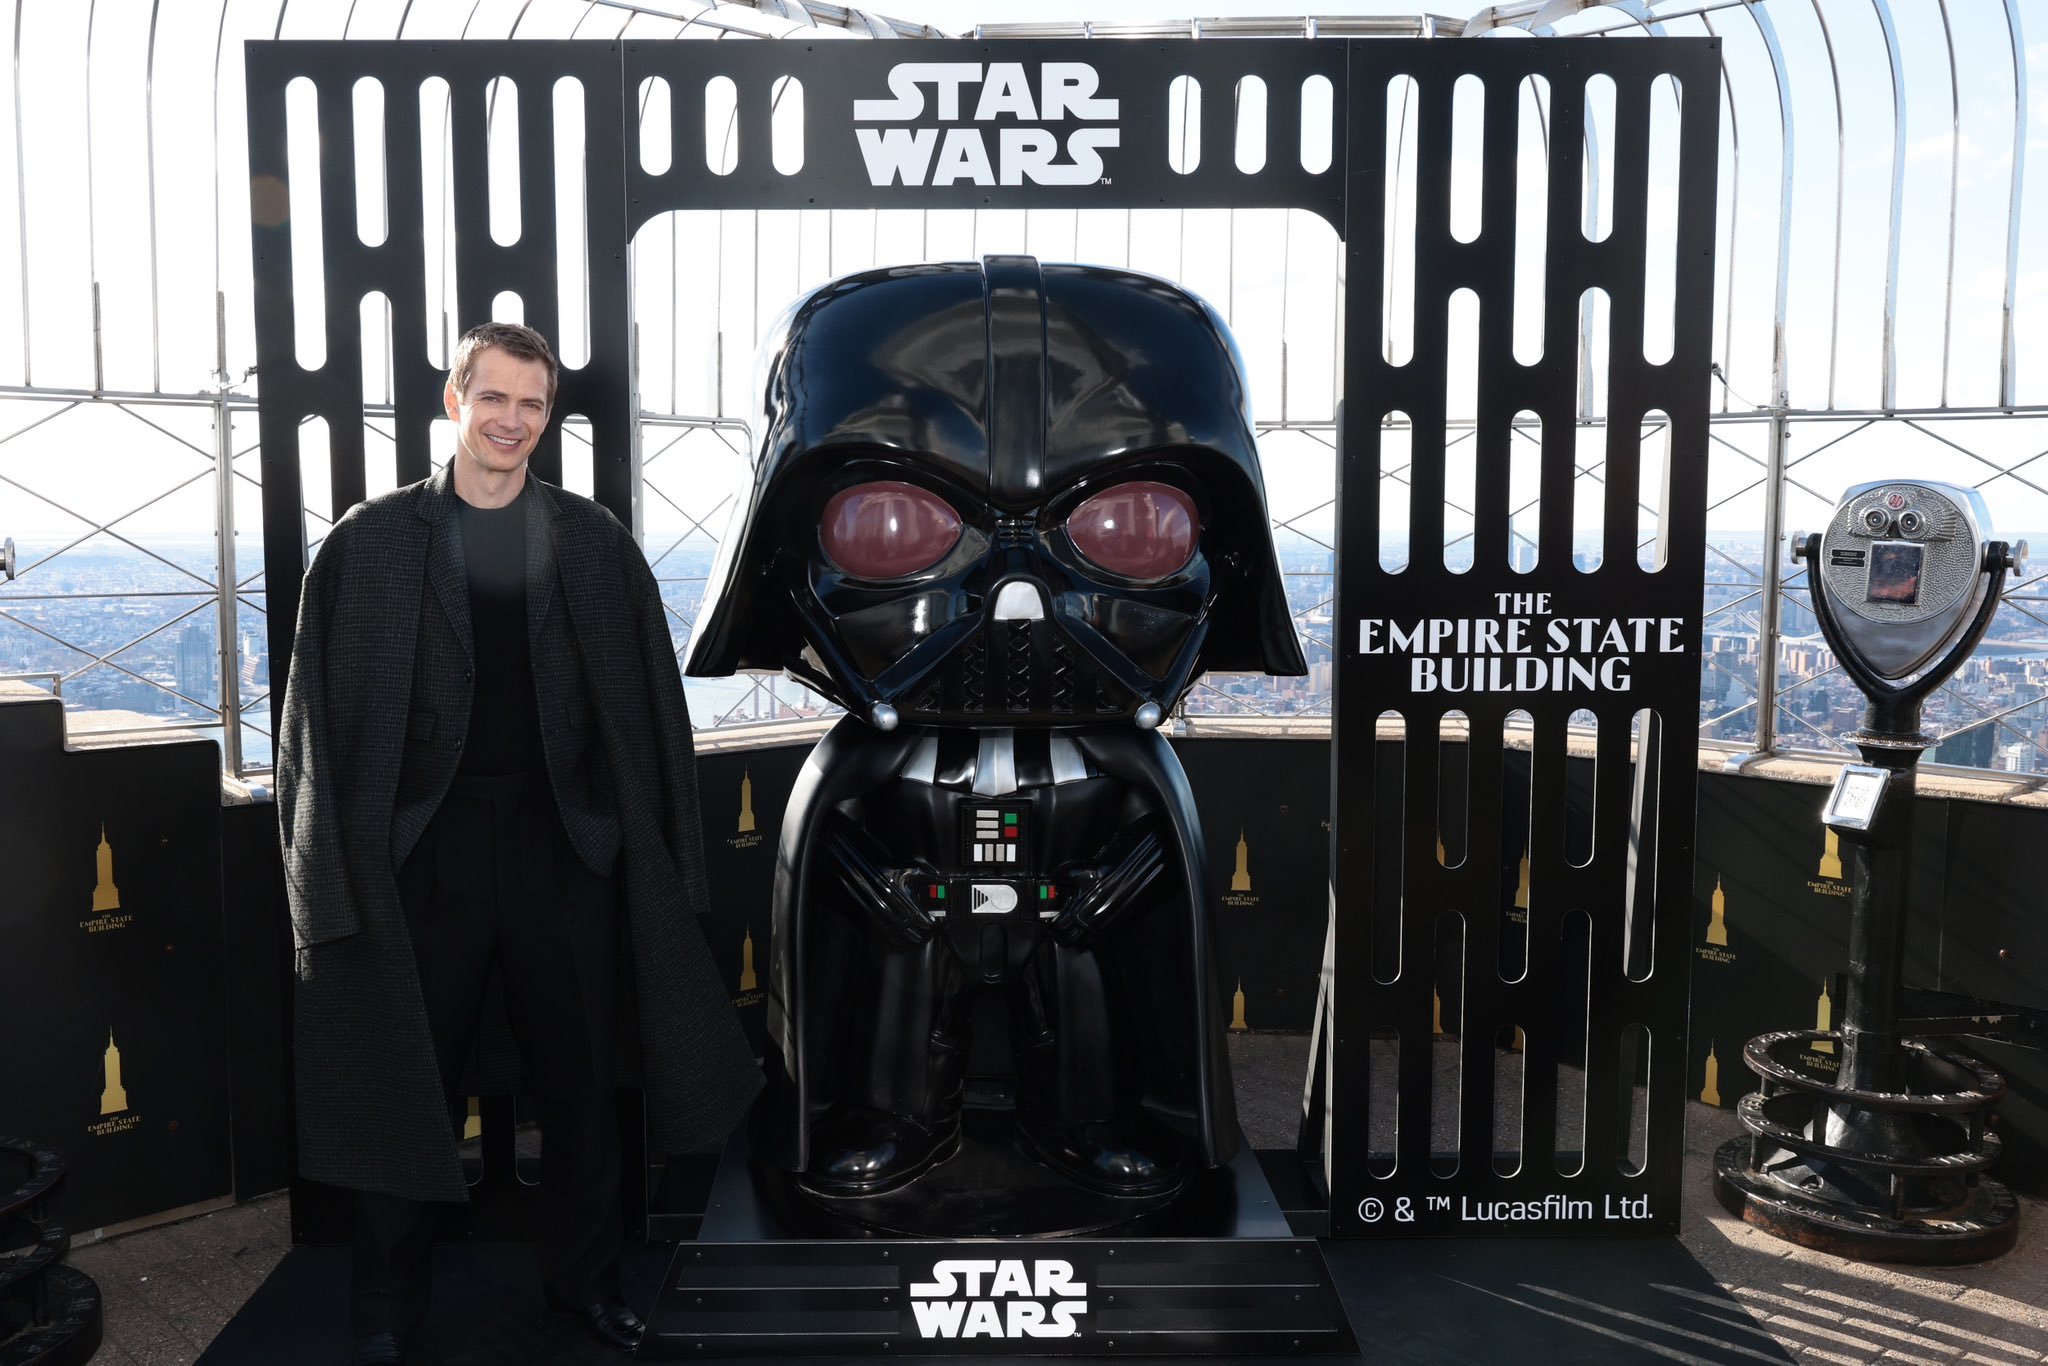


.jpg.b92cd5617ed5bbf248e16a3e16b4893c.jpg)