Search the Community
Showing results for 'Imperial Gaskets' in topics.
-
Hey all, I'm hoping to document my first order TK build here! This will be my first build, and I will inevitably have a million questions, so I'm hoping I can have some guidance! Here are my current plans: My dream is to make the TFA version of the trooper, as this design is what truly got me invested in stormtroopers years ago when I first saw them walking around Hollywood Studios. The DN kit is obviously intended to be used as a TLJ/TRoS suit, but from what I can tell, it can be made into a TFA kit. So that leads me to my next question, are the only differences between the two versions the helmet, forearms, and cod piece, or are there more? My plan is to order the individual TFA pieces from Imperial Surplus, and make both versions of the suit. Long term, id like to have an approved TFA kit, TLJ/TRoS kit, and Executioner kit. Lofty, but doable I think. As far as the helmets go, I would love to have both of the DN premium helmets, however, im not keen on dropping nearly $1,300 on the two of them. I will certainly get the premium TFA one, however, for TLJ, im going back and forth between the premium and standard line. The premium line helmet is very accurate. The standard line helmet is slightly inaccurate beneath the mouth, using the TFA chin. I thought about converting a black series helmet, as the chin is more accurate, however, I have quite a large head, and worry it won't fit. I have 3D printed 5th Horseman's F11-D, and SE44-C. Geeky Pink seems to be the go-to for gaskets, however, I am looking for rubber ones, as I hope to apply for centurion. I believe there are runs of accurate metal holsters, as well as well defined resin hand plates, both of which I hope to purchase. In addition, I may upgrade to Dino's spats. Any guidance and/or tips are greatly appreciated! I have completed a few ANH TK kits before this, and I'm excited to add this to the roster!
-
 Mandatory Information Costume = Stormtrooper, The Last Jedi Costume CRL Link = https://databank.501st.com/databank/Costuming:TK_TLJ Name = Justin R. TKID = 61490 Forum Name = TheRascalKing Legion Profile = https://www.501st.com/members/displaymemberdetails.php?userID=26076 Garrison/Squad = Southern California Garrison, Orange County Squad Armor = Denuo Novo Helmet = Anovos, TLJ (Standard) Optional Information Height = 5ft 11in, or 180cm Weight = 175lbs, or 80kg Neckseal & Gaskets = Sheev's Emporium Belt Boxes = Imperial Surplus Holster = Dantooine Props (functional) Hand Plates = Dantooine Props Thermal Detonator = Crossfire Props (Jesse_M files) Gloves = Endor Finders Undersuit shorts = Geeky Pink's Boots = Imperial Boots Armor Photos Helmet Off (unadjusted) Full Body Front Full Body Back Full Right Full Left I did my best to incorporate feedback from my TFA submission, including the new backdrop, but am still "training" my wife/wrangler/photographer on the new CRL (she knows the OTTK pretty well at this point!). I know the belt is over the spine plate and a little low in some areas but otherwise hoping these sail through Basic with my GML this week and not much is needed for L2. Thanks for any feedback!
- 1 reply
-
- 2
-

-
Let's give this a try to see where we're at with the @Deployment Officer Team... Mandatory Information Costume = Stormtrooper, The Force Awakens Costume CRL Link = https://databank.501st.com/databank/Costuming:TK_-_First_Order Name = Justin R. TKID = 61490 Forum Name = TheRascalKing Legion Profile = https://www.501st.com/members/displaymemberdetails.php?userID=26076 Garrison/Squad = Southern California Garrison, Orange County Squad Armor = Denuo Novo Helmet = Anovos, TFA Optional Information Height = 5ft 11in, or 180cm Weight = 175lbs, or 80kg Neckseal & Gaskets = Sheev's Emporium Forearms, Cod, & Belt Boxes = Imperial Surplus, TFA Holster = Dantooine Props (functional) Hand Plates = Dantooine Props Gloves = Endor Finders Undersuit shorts = Geeky Pink's Boots = Imperial Boots Blaster = F11-D, TFA Armor Photos Helmet Off (unadjusted) Full Body Front Full Body Back Full Right Full Left Action Shots Blaster It's hard to believe I headed down this rabbit hole over three years ago. Here we are, finally submitted for approval - 3 years, 4 different FOTK suits owned(/sold), from 4 different armor makers, parts from over a dozen vendors, a new house and workshop, and a new baby along the way since I've started. Thanks for looking!
-
 Below is an amended R1 TK CRL, I have ommitted items like the batton and Pauldron and some blasters that were not seen in use in the Ahsoka series . Required Costume Components The following costume components are present and appear as described below. Helmet Traps (trapezoids on dome of helmet) and tears (area beneath the corners of eye lenses) are gray. Rear traps and tears have engraved vertical black lines. Lenses can be flat material, green in color, sufficiently dark enough to obscure the costumer's eyes. The “ear” bars are gray or painted gray, with the largest bar oval cutout painted black. Frown is painted gray and does not leave the teeth area. The space between the 8 teeth is hollow and backed with Black or Dark grey wire screen mesh. Tube stripes are medium blue, numbering 12 per side. The stipes are straight, not curved like ANH. Vocoder (vertically ribbed chin detail) is painted black. Aerators/Hovi mix tips (cylinders on either side of the vocoder) have a black exterior and silver in color screen mesh. Tears and traps may not be hand-painted. Tube stripes are recessed, and the recessed section painted blue or backed by blue mesh. Note: The helmet is accurate in detail and proportion to official references. Many commercially available helmets or those considered disproportionate in size or shape are ineligible. The Black Series helmet is approvable if modified to meet the level 1 CRLs. Light to medium weathering as per reference images. Cracks may be painted on surface in metalic gold paint. OPTIONAL Level two certification (if applicable): Lenses have a very slight curve and are convex in style. Flat lenses and ANH style bubble lenses are not permissible. Rank bar area on ear must be of the correct RO style and pattern, no ANH style ear bumps allowed. Head opening has black trim running all along the edge. Brow trim should be positioned ¼" above the eyes. Ear screws must not have a visible slot mark and be flush to the ear. Any gap between the ears and helmet will only appear to be a seam, not any bigger. Correct 'Hovi mic' aerator tips. Chin section has a well defined seam from the angles of the mouth. Light to medium weathering as per references Cracks must be dremmelled or engraved into helmet. Cracks may be painted in metalic gold paint OPTIONAL Level three certification (if applicable): The Tube stripes are completely hollowed out with a blue section underneath. Vocoder is tubular in nature with 7 vertical tubes. A visible gap must be present between the Vocoder and the helmet. The inside of each tear will be a raised area that is grey, with 8 engraved black lines, hand painted lines like ANH are not permitted. The frown shall be recessed to the proper depth, unlike standard ANH. The inside of each rear trap will be a raised area that is grey, with 13 engraved black vertical lines, hand painted lines like ANH are not permitted. The inside of each side trap will be a raised area that is grey. There is a small bump in the right eye socket (when worn) under the lens as an intended flaw to pay tribute to the original trilogy designers. Green LED that can be switched on and off representing both living and the reserected Night trooper shall be fitted behind the lenses. TK anh stunt neckseal.jpeg Neck Seal Black with horizontal ribs, fitted to the wearer, and extending from the base of the neck to conceal the entire neck. Cracks must be dremmelled or engraved into helmet. Cracks must be gold leaf, gold paint is not permitted. Under Suit Black non-textured material, either one-piece or two-piece construction with no visible zippers or logos/designs. OPTIONAL Level two certification (if applicable): Top, where visible shall be fully ribbed with all horizontal ribbing on the arms, chest, and back. The centre of chest and back may be mesh as long as it is covered by armor. Pants shall be black non-textured material and have horizontal ribbing at the knees only. Knee gaskets are allowed as long as they correctly match top ribbing material, spacing and color. The hip section shall not have ribs. OPTIONAL Level three certification (if applicable): All ribbing on knees, arms, chest, and back must be stitched between each rib in detail and proportion to official references. The armpit area shall have the correct hexagonal mesh detail Shoulder Straps They may be affixed with Velcro or adhesive. Light to medium weathering as per references Cracks may be painted on surface in metalic gold paint. Weathering details, Gold and gray adorntments etc to be added. OPTIONAL Level two certification (if applicable): OPTIONAL Level three certification (if applicable): These shall be inserted behind the chest tabs and into slots of the backplate. Shoulder Armor One on each shoulder. The shoulders are considered effectively symmetrical; they may be worn interchangeably on the left and right shoulders and may have a black elastic strap that wraps around the inside of the bicep. Light to medium weathering as per references Cracks may be painted on surface in metalic gold paint. Weathering details, Gold and gray adorntments etc to be added. OPTIONAL Level two certification (if applicable): OPTIONAL Level three certification (if applicable): There is no swoop on the shoulder bell raised area. There is no elastic strap that wraps around the inside of the bicep. Weathering details, Gold and gray adorntments etc to be added. Upper Arm Armor Both biceps are symmetrical and interchangeable. The front strip is bevelled and approximately ⅛" thick that does not extend beyond the bicep, and has a smaller cover strip layered thereon. Light to medium weathering as per references Cracks may be painted on surface in metalic gold paint. OPTIONAL Level two certification (if applicable): OPTIONAL Level three certification (if applicable): Cover strips will cover both the front and back joints. Biceps are loosely held closed in the back with elastic, shock cord (bungee cord) or white Velcro and are designed to remain flexible. Weathering details, Gold and gray adorntments etc to be added. Forearm Armor The front strip is bevelled and approximately ⅛" thick that does not extend beyond the bicep, and has a smaller cover strip layered thereon. Light to medium weathering as per references Cracks may be painted on surface in metalic gold paint. Weathering details, Gold and gray adorntments etc to be added. OPTIONAL Level two certification (if applicable): OPTIONAL Level three certification (if applicable): Forearms are loosely held closed in the back with elastic, shock cord (bungee cord) or white Velcro and are designed to remain flexible. Cover strips will cover both the top and bottom joints. Weathering details, Gold and gray adorntments etc to be added. Hand Plates Roughly pentagonal in shape, the hand plates are mounted securely over the back of the glove. As an alternative to plastic, these may be made out of latex or latex-like material. Light to medium weathering as per references Cracks may be painted on surface in metalic gold paint. Weathering details, Gold and gray adorntments etc to be added. OPTIONAL Level two certification (if applicable): Hand guards shall be made of plastic. Weathering details, Gold and gray adorntments etc to be added. OPTIONAL Level three certification (if applicable): Hand guards should follow the correct RO shape, ANH hand guards are not acceptable. A small indent in the front of the hand plate shall be present. Weathering details, Gold and gray adorntments etc to be added. Gloves Black in color, made of Nomex, leather, or leather-like material, with no visible straps or logos/designs. The fingers are enclosed, non-textured. Rubber ANH style gloves are not permitted. Weathering details, Gold and gray adorntments etc to be added. OPTIONAL Level two certification (if applicable): The base material of the gloves will be a black synthetic material similar to Lycra, Spandex, Elastane, or Nylon. Palms of gloves shall be shiny black fabric or leather or leather-like material. On the index finger shall be a stitched piece of fabric made from the same material as the hand's underside that while stitched to the finger has one cutout towards the end of the finger that reveals the netted material underneath. Gloves shall have the correct leather pattern along the fingers/palm. Weathering details, Gold and gray adorntments etc to be added. OPTIONAL Level three certification (if applicable): Chest Armor Chest plate overlaps the abdominal plate Light to medium weathering as per references Cracks may be painted on surface in metalic gold paint. Weathering details, Gold and gray adorntments etc to be added. OPTIONAL Level two certification (if applicable): There are raised trapezoids at the top of the shoulder section beneath which the straps insert. The chest and back sides shall be connected by black extensions pieces. Weathering details, Gold and gray adorntments etc to be added. OPTIONAL Level three certification (if applicable): Top pectoral out lines swoop correctly outward. Bottom of ribcage flares correctly outward. Weathering details, Gold and gray adorntments etc to be added. Back Armor Back plate contains an "O II" design. There are raised trapezoids at the top of the backplate section beneath which the shoulder straps insert. The backplate continues past these trapezoids towards the top of the shoulder Light to medium weathering as per references Cracks may be painted on surface in metalic gold paint. Weathering details, Gold and gray adorntments etc to be added. OPTIONAL Level two certification (if applicable): Top of box wall has a trapezoidal indentation. There is a roughly 8mm circular indent near the right top corner of the backplate. Weathering details, Gold and gray adorntments etc to be added. OPTIONAL Level three certification (if applicable): Bottom of backplate is curved and extends past abdominal back cover plate. The O cog shall have 16 spines. The 11 bars have 5 horizontal evenly spaced raised bars on the bottom of the face. There is a rectangular tab protruding from the bottom of each of the two raised trapezoids at the top of the backplate. Weathering details, Gold and gray adorntments etc to be added. Abdomen Armor The abdominal armor consists of a one-piece corset design with a vertical opening centered on the back. The back opening is covered by a rectangular cover plate that is worn under the back armor. There are 3 vertical ribs centered on the front of the abdomen and two (one left and one right) ribs further spaced to each side of the center. There are two (one left and one right) angled (approximately 70 degrees) ribs on each side of the abdominal armor. There are two (one left and one right) angled (approximately 70 degrees) recessed ribs on each side of the abdominal armor behind the raised angled ribs that are black Any side shims added are to be added to the white areas of the armor. The center front detail consists of a raised rectangular panel. On the right half of the panel, there is a vertical column of 4 buttons approximately ⁷⁄₁₆" (11mm) in diameter. The bottom button is blue while the other three are grey. On the left half of the panel, there is a vertical column of raised evenly spaced horizontal gear teeth with a recessed trapezoid at the top of the column. The rectangular inside bottom of the trapezoid is black. The left front detail consists of a raised rectangular panel with an angled top. There is a vertical column of 4 buttons approximately ⁷⁄₁₆" (11mm) in diameter. The bottom button is blue while the other three are grey. The right front detail consists of a primary raised rectangular panel with an additional secondary raised rectangular panel covering the top ⅓ of the primary panel. There is a column of three thin horizontal evenly spaced raised lines across the top ½ of the secondary panel. The abdominal armor is accurate in detail and proportion to official references. Light to medium weathering as per references Cracks may be painted on surface in metalic gold paint. Weathering details, Gold and gray adorntments etc to be added. OPTIONAL Level two certification (if applicable): The cod armor is separate from the abdominal armor. The right front detail panel is centered between the two outer vertical right ribs. The left front detail panel is centered between the two outer vertical left ribs. Weathering details, Gold and gray adorntments etc to be added. OPTIONAL Level three certification (if applicable): The abdomen armor has two horizontal recessed rectangles centered above the center front detail panel and on each side of the center rib. All 8 Button details are recessed and bordered with a thin edge, only the recessed portion is painted. The center front panel column of raised gear teeth has only 9 teeth. There is a recessed edge (approximately ⅛" 3mm wide) along all four sides around the face of the center front panel The right front detail panel is centered between the two outer vertical right ribs. The left front detail panel is centered between the two outer vertical left ribs. There is a recessed edge (approximately ⅛" 3mm wide) along the sides and top around the face of the left front detail pane The abdominal armor back cover plate has two protruding tabs along the bottom that rest inside the back hard belt. Weathering details, Gold and gray adorntments etc to be added. Cod Armor The cod armor consists of a body shape formed triangular plate with a raised center rib and raised lower portion and is accurate in detail and proportion to official references. Light to medium weathering as per references Cracks may be painted on surface in metalic gold paint. Weathering details, Gold and gray adorntments etc to be added. OPTIONAL Level two certification (if applicable): The cod shall be a separate piece from the abdominal plate. Weathering details, Gold and gray adorntments etc to be added. OPTIONAL Level three certification (if applicable): Kidney Armor The kidney armor is separated in the back and covered by a rectangular plate. The rectangular plate is separate from the posterior armor. Light to medium weathering as per references Cracks may be painted on surface in metalic gold paint. Weathering details, Gold and gray adorntments etc to be added. OPTIONAL Level two certification (if applicable): OPTIONAL Level three certification (if applicable): Posterior Armor The posterior armor shall be a separate piece from the abdominal armor Light to medium weathering as per references Cracks may be painted on surface in metalic gold paint. Weathering details, Gold and gray adorntments etc to be added. OPTIONAL Level two certification (if applicable): OPTIONAL Level three certification (if applicable): Belt The Ammunition belt consists of a hard belt made of the same or similar material as the armor in two separate parts front and back (with overlap). The back belt overlaps the front belt on the sides. There are 6 ammunition boxes mounted to the belt. There are 2 (one left and one right) drop boxes suspended by black webbing approximately 2" (50mm) wide. Drop boxes must be accurate in detail and proportion to official references. The ammunition belt is accurate in detail and proportion to official references. Light to medium weathering as per references Cracks may be painted on surface in metalic gold paint. Weathering details, Gold and gray adorntments etc to be added. OPTIONAL Level two certification (if applicable): The only detail visible on the front belt is the mounted ammunition boxes unlike the squares present on ANH belts. The top edge of the front belt has protruding teeth that nest inside gaps between the ribs and detail panels of the abdominal armor. The two center ammunition boxes are thinner than the other mounted ammunition boxes. The second and fifth mounted ammunition boxes are slightly wider than the two center ammunition boxes. The two outermost ammunition boxes are almost square. The two drop boxes are rectangular and as wide as the mounted square boxes. Weathering details, Gold and gray adorntments etc to be added. OPTIONAL Level three certification (if applicable): The ammo boxes across the front are all made separately from the main belt and are secured to it The two drop boxes hang no more than 1" 25mm below the front belt and the black strap is visible. The second and fifth mounted ammunition boxes have trapezoid detail on the top of each ammunition box. The front belt protrudes past all mounted ammunition boxes above and below by approximately ⅛"–¼" 3–6mm. All ammunition boxes have slightly beveled edges on the face of each box. Weathering details, Gold and gray adorntments etc to be added. Thermal Detonator The thermal detonator consists of a grey tube approximately 3" 76mm in diameter and 8" 203mm long approximately. There are two white endcaps and a white control panel. The white control panel has a horizontal row of white rectangles along the bottom of the control panel and a grey “D” shaped recessed on the left side of the horizontal row. There is an oval greeble that protrudes from the control near the top right side. The thermal detonator is mounted to the rear hard belt and there are no visible screws or clips and is accurate in detail and proportion to official references. Light to medium weathering as per references Cracks may be painted on surface in metalic gold paint. Weathering details, Gold and gray adorntments etc to be added. OPTIONAL Level two certification (if applicable): The thermal detonator mount should be fully enclosed with solid walls on all four sides. The center of both end caps is gray. Weathering details, Gold and gray adorntments etc to be added. OPTIONAL Level three certification (if applicable): The control panel bottom detail is a raised panel with 7 raised rectangles, all are evenly spaced except the right most rectangle. There is a panel line approximately ¼" 6mm from the edge around the control panel. There is a panel line approximately ⅛" 3mm from the edge of each endcap. The inside edge of both endcaps is beveled. The oval greeble consists of an oval tube protrusion with the top edge slightly extending past the tube wall thickness and is visually similar to the Deathtrooper chin greeble. Weathering details, Gold and gray adorntments etc to be added. Thigh Armor The thigh armor is mirrored for each leg and not interchangeable. The cover strips are beveled and approximately ⅛" thick that does not extend beyond the thigh and has a smaller cover strip layered thereon. The top edge of the thigh armor is unadorned, and the bottom edge has a raised detail that fallows the bottom edge contour. The small ammo belt consists of 5 evenly spaced rectangle ammunition boxes and is installed on the bottom of the right thigh, there are no visible screws or rivets. Light to medium weathering as per references Cracks may be painted on surface in metalic gold paint. Weathering details, Gold and gray adorntments etc to be added. OPTIONAL Level two certification (if applicable): Thighs are loosely held closed in the back with elastic, shock cord (bungee cord) or white Velcro and are designed to remain flexible. Cover strips will cover both the front and rear joints. Weathering details, Gold and gray adorntments etc to be added. OPTIONAL Level three certification (if applicable): The bottom outside edges of the small ammunition belt are angled at approximately 45 degrees. Thigh armor is suspended by a black strap approximately 1" 25mm in width with a plastic side release buckle that is covered by black webbing or elastic that runs down the side seam of the leg. Weathering details, Gold and gray adorntments etc to be added. Lower Leg Armor The greaves are mirrored for each leg and are not interchangeable. The top edge of the greaves has a raised detail that fallows the top edge contour. The bottom edge of the greaves flairs out to cover the top of the ankle and boots. The cover strips are beveled and approximately ⅛" thick that does not extend beyond the greave and has a smaller cover strip layered thereon. Greaves are loosely held closed in the back with elastic, shock cord (bungee cord) or white Velcro and are designed to remain flexible. Cover strips will cover both the front and rear joints. The trapezoid knee plate (sniper knee plate) is affixed to the top of the left greave and there are no visible screws or rivets. Sniper knee plate must be aligned with the vertical cover strip and the top raised edge detail on the greave and is accurate in detail and proportion to official reference. Light to medium weathering as per references Cracks may be painted on surface in metalic gold paint. Weathering details, Gold and gray adorntments etc to be added. OPTIONAL Level two certification (if applicable): The sniper knee plate has raised detail that fallows the top edge contour. The sniper knee plate has 3 trapezoidal lugs on each side and 2 on the center bottom edge (totalling 8) of the knee plate. Weathering details, Gold and gray adorntments etc to be added. OPTIONAL Level three certification (if applicable): Boots Boots are above ankle height and the same style as the First Order TK. Chelsea type boots in the style of OT TK are not acceptable. Boots are all white and made of leather or leather-like material Flat black soles without a heel. Patent leather or high gloss is not permitted. Light to medium weathering as per references Cracks may be painted on surface in metalic gold paint. Weathering details, Gold and gray adorntments etc to be added. OPTIONAL Level two certification (if applicable): There is no seam present on the front of the boot. The wearer's inner side of the boots have zippers and no side elastic. Weathering details, Gold and gray adorntments etc to be added. OPTIONAL Level three certification (if applicable): Optional Accessories Items below are optional costume accessories. These items are not required for approval, but if present appear as described below. If adding in an accessory after initial approval, the item still needs to be submitted to local GML for approval before use. E-11 Blaster Manufactured by BlasTech Industries, the E-11 is standard-issue for many Imperial troops. Light, compact yet powerful, the E-11 blaster is always in high demand throughout the galaxy. "Note, the E-11 holster as seen in the Original Trilogy movies is not an authorized accessory for rogue One armor". Based on a real or replica Sterling Airsoft Gun, Sterling Sub-Machine Gun, scratch-built, or a modified commercial toy Stormtrooper blaster. A small flashlight can be mounted on the right side of the blaster centred over the T-Tracks. OPTIONAL Level two certification (if applicable): Blaster shall be based on a real or replica S&T Sterling L2A1 AEG Airsoft Gun. (Folding Stock does not need to function) D-Ring shall be present on the rear end cap. Scope shall be a real or replica M.H.R. (Minneapolis Honeywell Regulator Co.) M38 Telescope. 1943 model is preferred. Counter shall be a real or replica Hengstler 400 Series counter. Eagle logo is preferred. Power Cylinders shall be mounted on top of the magazine well. R1 style power cylinders are preferred over ANH style. 6 rows of T-Tracks cover the Sterling receiver holes except for the lower left row with the bayonet lug. Flashlight if fitted shall be a real or replica Element M300A Mini Scout Light. 3D printed blasters can not contain visible print lines and must be sanded smooth for a more realistic appearance. OPTIONAL Level three certification (if applicable): Scope shall be a real or replica 1943 M.H.R. Co. M38 Telescope, 1942 model is not allowed. Counter shall be a real or replica Hengstler 400 Series counter with Small eagle logo. Large eagle logo is not allowed. Power Cylinders shall be R1 style, ANH style is not allowed.
 -
If you wish to you could also help with the CRL text, ROTK copied below, adjust to suit the Night Troopers, copy/paste from below then edit, strike through what needs removing and add in green for new text. If aiming to be the CRL model you would also need to provide all CRL images required, I would suggest using a contrasting background, makes photo editing a little easier. Required Costume Components The following costume components are present and appear as described below. Helmet Traps (trapezoids on dome of helmet) and tears (area beneath the corners of eye lenses) are gray. Rear traps and tears have engraved vertical black lines. Lenses can be flat material, green in color, sufficiently dark enough to obscure the costumer's eyes. The “ear” bars are gray or painted gray, with the largest bar oval cutout painted black. Frown is painted gray and does not leave the teeth area. The space between the 8 teeth is hollow and backed with Black or Dark grey wire screen mesh. Tube stripes are medium blue, numbering 12 per side. The stipes are straight, not curved like ANH. Vocoder (vertically ribbed chin detail) is painted black. Aerators/Hovi mix tips (cylinders on either side of the vocoder) have a black exterior and silver in color screen mesh. Tears and traps may not be hand-painted. Tube stripes are recessed, and the recessed section painted blue or backed by blue mesh. Note: The helmet is accurate in detail and proportion to official references. Many commercially available helmets or those considered disproportionate in size or shape are ineligible. The Black Series helmet is approvable if modified to meet the level 1 CRLs. OPTIONAL Level two certification (if applicable): Lenses have a very slight curve and are convex in style. Flat lenses and ANH style bubble lenses are not permissible. Rank bar area on ear must be of the correct RO style and pattern, no ANH style ear bumps allowed. Head opening has black trim running all along the edge. Brow trim should be positioned ¼" above the eyes. Ear screws must not have a visible slot mark and be flush to the ear. Any gap between the ears and helmet will only appear to be a seam, not any bigger. Correct 'Hovi mic' aerator tips. Chin section has a well defined seam from the angles of the mouth. OPTIONAL Level three certification (if applicable): The Tube stripes are completely hollowed out with a blue section underneath. Vocoder is tubular in nature with 7 vertical tubes. A visible gap must be present between the Vocoder and the helmet. The inside of each tear will be a raised area that is grey, with 8 engraved black lines, hand painted lines like ANH are not permitted. The frown shall be recessed to the proper depth, unlike standard ANH. The inside of each rear trap will be a raised area that is grey, with 13 engraved black vertical lines, hand painted lines like ANH are not permitted. The inside of each side trap will be a raised area that is grey. There is a small bump in the right eye socket (when worn) under the lens as an intended flaw to pay tribute to the original trilogy designers. TK anh stunt neckseal.jpeg Neck Seal Black with horizontal ribs, fitted to the wearer, and extending from the base of the neck to conceal the entire neck. Under Suit Black non-textured material, either one-piece or two-piece construction with no visible zippers or logos/designs. OPTIONAL Level two certification (if applicable): Top, where visible shall be fully ribbed with all horizontal ribbing on the arms, chest, and back. The centre of chest and back may be mesh as long as it is covered by armor. Pants shall be black non-textured material and have horizontal ribbing at the knees only. Knee gaskets are allowed as long as they correctly match top ribbing material, spacing and color. The hip section shall not have ribs. OPTIONAL Level three certification (if applicable): All ribbing on knees, arms, chest, and back must be stitched between each rib in detail and proportion to official references. The armpit area shall have the correct hexagonal mesh detail Shoulder Straps They may be affixed with Velcro or adhesive. OPTIONAL Level two certification (if applicable): OPTIONAL Level three certification (if applicable): These shall be inserted behind the chest tabs and into slots of the backplate. Shoulder Armor One on each shoulder. The shoulders are considered effectively symmetrical; they may be worn interchangeably on the left and right shoulders and may have a black elastic strap that wraps around the inside of the bicep. OPTIONAL Level two certification (if applicable): OPTIONAL Level three certification (if applicable): There is no swoop on the shoulder bell raised area. There is no elastic strap that wraps around the inside of the bicep. Upper Arm Armor Both biceps are symmetrical and interchangeable. The front strip is bevelled and approximately ⅛" thick that does not extend beyond the bicep, and has a smaller cover strip layered thereon. OPTIONAL Level two certification (if applicable): OPTIONAL Level three certification (if applicable): Cover strips will cover both the front and back joints. Biceps are loosely held closed in the back with elastic, shock cord (bungee cord) or white Velcro and are designed to remain flexible. Forearm Armor The front strip is bevelled and approximately ⅛" thick that does not extend beyond the bicep, and has a smaller cover strip layered thereon. OPTIONAL Level two certification (if applicable): OPTIONAL Level three certification (if applicable): Forearms are loosely held closed in the back with elastic, shock cord (bungee cord) or white Velcro and are designed to remain flexible. Cover strips will cover both the top and bottom joints. Hand Plates Roughly pentagonal in shape, the hand plates are mounted securely over the back of the glove. As an alternative to plastic, these may be made out of latex or latex-like material. OPTIONAL Level two certification (if applicable): Hand guards shall be made of plastic. OPTIONAL Level three certification (if applicable): Hand guards should follow the correct RO shape, ANH hand guards are not acceptable. A small indent in the front of the hand plate shall be present. Gloves Black in color, made of Nomex, leather, or leather-like material, with no visible straps or logos/designs. The fingers are enclosed, non-textured. Rubber ANH style gloves are not permitted. OPTIONAL Level two certification (if applicable): The base material of the gloves will be a black synthetic material similar to Lycra, Spandex, Elastane, or Nylon. Palms of gloves shall be shiny black fabric or leather or leather-like material. On the index finger shall be a stitched piece of fabric made from the same material as the hand's underside that while stitched to the finger has one cutout towards the end of the finger that reveals the netted material underneath. Gloves shall have the correct leather pattern along the fingers/palm. OPTIONAL Level three certification (if applicable): Chest Armor Chest plate overlaps the abdominal plate OPTIONAL Level two certification (if applicable): There are raised trapezoids at the top of the shoulder section beneath which the straps insert. The chest and back sides shall be connected by black extensions pieces. OPTIONAL Level three certification (if applicable): Top pectoral out lines swoop correctly outward. Bottom of ribcage flares correctly outward. Back Armor Back plate contains an "O II" design. There are raised trapezoids at the top of the backplate section beneath which the shoulder straps insert. The backplate continues past these trapezoids towards the top of the shoulder OPTIONAL Level two certification (if applicable): Top of box wall has a trapezoidal indentation. There is a roughly 8mm circular indent near the right top corner of the backplate. OPTIONAL Level three certification (if applicable): Bottom of backplate is curved and extends past abdominal back cover plate. The O cog shall have 16 spines. The 11 bars have 5 horizontal evenly spaced raised bars on the bottom of the face. There is a rectangular tab protruding from the bottom of each of the two raised trapezoids at the top of the backplate. Abdomen Armor The abdominal armor consists of a one-piece corset design with a vertical opening centered on the back. The back opening is covered by a rectangular cover plate that is worn under the back armor. There are 3 vertical ribs centered on the front of the abdomen and two (one left and one right) ribs further spaced to each side of the center. There are two (one left and one right) angled (approximately 70 degrees) ribs on each side of the abdominal armor. There are two (one left and one right) angled (approximately 70 degrees) recessed ribs on each side of the abdominal armor behind the raised angled ribs that are black Any side shims added are to be added to the white areas of the armor. The center front detail consists of a raised rectangular panel. On the right half of the panel, there is a vertical column of 4 buttons approximately ⁷⁄₁₆" (11mm) in diameter. The bottom button is blue while the other three are grey. On the left half of the panel, there is a vertical column of raised evenly spaced horizontal gear teeth with a recessed trapezoid at the top of the column. The rectangular inside bottom of the trapezoid is black. The left front detail consists of a raised rectangular panel with an angled top. There is a vertical column of 4 buttons approximately ⁷⁄₁₆" (11mm) in diameter. The bottom button is blue while the other three are grey. The right front detail consists of a primary raised rectangular panel with an additional secondary raised rectangular panel covering the top ⅓ of the primary panel. There is a column of three thin horizontal evenly spaced raised lines across the top ½ of the secondary panel. The abdominal armor is accurate in detail and proportion to official references. OPTIONAL Level two certification (if applicable): The cod armor is separate from the abdominal armor. The right front detail panel is centered between the two outer vertical right ribs. The left front detail panel is centered between the two outer vertical left ribs. OPTIONAL Level three certification (if applicable): The abdomen armor has two horizontal recessed rectangles centered above the center front detail panel and on each side of the center rib. All 8 Button details are recessed and bordered with a thin edge, only the recessed portion is painted. The center front panel column of raised gear teeth has only 9 teeth. There is a recessed edge (approximately ⅛" 3mm wide) along all four sides around the face of the center front panel The right front detail panel is centered between the two outer vertical right ribs. The left front detail panel is centered between the two outer vertical left ribs. There is a recessed edge (approximately ⅛" 3mm wide) along the sides and top around the face of the left front detail pane The abdominal armor back cover plate has two protruding tabs along the bottom that rest inside the back hard belt. Cod Armor The cod armor consists of a body shape formed triangular plate with a raised center rib and raised lower portion and is accurate in detail and proportion to official references. OPTIONAL Level two certification (if applicable): The cod shall be a separate piece from the abdominal plate. OPTIONAL Level three certification (if applicable): Kidney Armor The kidney armor is separated in the back and covered by a rectangular plate. The rectangular plate is separate from the posterior armor. OPTIONAL Level two certification (if applicable): OPTIONAL Level three certification (if applicable): Posterior Armor The posterior armor shall be a separate piece from the abdominal armor OPTIONAL Level two certification (if applicable): OPTIONAL Level three certification (if applicable): Belt The Ammunition belt consists of a hard belt made of the same or similar material as the armor in two separate parts front and back (with overlap). The back belt overlaps the front belt on the sides. There are 6 ammunition boxes mounted to the belt. There are 2 (one left and one right) drop boxes suspended by black webbing approximately 2" (50mm) wide. Drop boxes must be accurate in detail and proportion to official references. The ammunition belt is accurate in detail and proportion to official references. OPTIONAL Level two certification (if applicable): The only detail visible on the front belt is the mounted ammunition boxes unlike the squares present on ANH belts. The top edge of the front belt has protruding teeth that nest inside gaps between the ribs and detail panels of the abdominal armor. The two center ammunition boxes are thinner than the other mounted ammunition boxes. The second and fifth mounted ammunition boxes are slightly wider than the two center ammunition boxes. The two outermost ammunition boxes are almost square. The two drop boxes are rectangular and as wide as the mounted square boxes. OPTIONAL Level three certification (if applicable): The ammo boxes across the front are all made separately from the main belt and are secured to it The two drop boxes hang no more than 1" 25mm below the front belt and the black strap is visible. The second and fifth mounted ammunition boxes have trapezoid detail on the top of each ammunition box. The front belt protrudes past all mounted ammunition boxes above and below by approximately ⅛"–¼" 3–6mm. All ammunition boxes have slightly beveled edges on the face of each box. Thermal Detonator The thermal detonator consists of a grey tube approximately 3" 76mm in diameter and 8" 203mm long approximately. There are two white endcaps and a white control panel. The white control panel has a horizontal row of white rectangles along the bottom of the control panel and a grey “D” shaped recessed on the left side of the horizontal row. There is an oval greeble that protrudes from the control near the top right side. The thermal detonator is mounted to the rear hard belt and there are no visible screws or clips and is accurate in detail and proportion to official references. OPTIONAL Level two certification (if applicable): The thermal detonator mount should be fully enclosed with solid walls on all four sides. The center of both end caps is gray. OPTIONAL Level three certification (if applicable): The control panel bottom detail is a raised panel with 7 raised rectangles, all are evenly spaced except the right most rectangle. There is a panel line approximately ¼" 6mm from the edge around the control panel. There is a panel line approximately ⅛" 3mm from the edge of each endcap. The inside edge of both endcaps is beveled. The oval greeble consists of an oval tube protrusion with the top edge slightly extending past the tube wall thickness and is visually similar to the Deathtrooper chin greeble. Thigh Armor The thigh armor is mirrored for each leg and not interchangeable. The cover strips are beveled and approximately ⅛" thick that does not extend beyond the thigh and has a smaller cover strip layered thereon. The top edge of the thigh armor is unadorned, and the bottom edge has a raised detail that fallows the bottom edge contour. The small ammo belt consists of 5 evenly spaced rectangle ammunition boxes and is installed on the bottom of the right thigh, there are no visible screws or rivets. OPTIONAL Level two certification (if applicable): Thighs are loosely held closed in the back with elastic, shock cord (bungee cord) or white Velcro and are designed to remain flexible. Cover strips will cover both the front and rear joints. OPTIONAL Level three certification (if applicable): The bottom outside edges of the small ammunition belt are angled at approximately 45 degrees. Thigh armor is suspended by a black strap approximately 1" 25mm in width with a plastic side release buckle that is covered by black webbing or elastic that runs down the side seam of the leg. Lower Leg Armor The greaves are mirrored for each leg and are not interchangeable. The top edge of the greaves has a raised detail that fallows the top edge contour. The bottom edge of the greaves flairs out to cover the top of the ankle and boots. The cover strips are beveled and approximately ⅛" thick that does not extend beyond the greave and has a smaller cover strip layered thereon. Greaves are loosely held closed in the back with elastic, shock cord (bungee cord) or white Velcro and are designed to remain flexible. Cover strips will cover both the front and rear joints. The trapezoid knee plate (sniper knee plate) is affixed to the top of the left greave and there are no visible screws or rivets. Sniper knee plate must be aligned with the vertical cover strip and the top raised edge detail on the greave and is accurate in detail and proportion to official reference. OPTIONAL Level two certification (if applicable): The sniper knee plate has raised detail that fallows the top edge contour. The sniper knee plate has 3 trapezoidal lugs on each side and 2 on the center bottom edge (totalling 8) of the knee plate. OPTIONAL Level three certification (if applicable): Boots Boots are above ankle height and the same style as the First Order TK. Chelsea type boots in the style of OT TK are not acceptable. Boots are all white and made of leather or leather-like material Flat black soles without a heel. Patent leather or high gloss is not permitted. OPTIONAL Level two certification (if applicable): There is no seam present on the front of the boot. The wearer's inner side of the boots have zippers and no side elastic. OPTIONAL Level three certification (if applicable): Optional Accessories Items below are optional costume accessories. These items are not required for approval, but if present appear as described below. If adding in an accessory after initial approval, the item still needs to be submitted to local GML for approval before use. E-11 Blaster Manufactured by BlasTech Industries, the E-11 is standard-issue for many Imperial troops. Light, compact yet powerful, the E-11 blaster is always in high demand throughout the galaxy. "Note, the E-11 holster as seen in the Original Trilogy movies is not an authorized accessory for rogue One armor". Based on a real or replica Sterling Airsoft Gun, Sterling Sub-Machine Gun, scratch-built, or a modified commercial toy Stormtrooper blaster. A small flashlight shall can be mounted on the right side of the blaster centred over the T-Tracks. OPTIONAL Level two certification (if applicable): Blaster shall be based on a real or replica S&T Sterling L2A1 AEG Airsoft Gun. (Folding Stock does not need to function) D-Ring shall be present on the rear end cap. Scope shall be a real or replica M.H.R. (Minneapolis Honeywell Regulator Co.) M38 Telescope. 1943 model is preferred. Counter shall be a real or replica Hengstler 400 Series counter. Eagle logo is preferred. Power Cylinders shall be mounted on top of the magazine well. R1 style power cylinders are preferred over ANH style. 6 rows of T-Tracks cover the Sterling receiver holes except for the lower left row with the bayonet lug. Flashlight if fitted shall be a real or replica Element M300A Mini Scout Light. 3D printed blasters can not contain visible print lines and must be sanded smooth for a more realistic appearance. OPTIONAL Level three certification (if applicable): Scope shall be a real or replica 1943 M.H.R. Co. M38 Telescope, 1942 model is not allowed. Counter shall be a real or replica Hengstler 400 Series counter with Small eagle logo. Large eagle logo is not allowed. Power Cylinders shall be R1 style, ANH style is not allowed. BlasTech DLT-19 Heavy Blaster Rifle Based on a real or replica MG-34 machine. OPTIONAL Level two certification (if applicable): A DLT-19 is an MG-34 with T-tracks on the barrel, ejection port cover added, and a small disk on left side. 3D printed blasters can not contain visible print lines and must be sanded smooth for a more realistic appearance. OPTIONAL Level three certification (if applicable): A small flashlight shall can be mounted on the right side of the blaster forward the front sight. BlasTech T-21 Light Repeating Blaster Rifle Based on a real or replica Lewis Mark I machine gun. For this prop the magazine disk and bipod of the original gun are left off. Rubber or rubber-like tubing is wrapped around the barrel shroud covering about ½ the length of the shroud. A small flashlight shall be mounted on the right side of the blaster forward the front sight. OPTIONAL Level two certification (if applicable): A black nylon 2-point sling shall be attached. Front sight shall be present on top of forward most large barrel ring. 3D printed blasters can not contain visible print lines and must be sanded smooth for a more realistic appearance. OPTIONAL Level three certification (if applicable): Three large barrel shroud rings are present, two before the rubber tubbing and one prior to the shroud transition. Small barrel ring is present at end of the barrel. Charging handle is mounted on right side of the blaster. Gas Key Adjustment Lever greeble is mounted on the bottom of barrel shroud before forward most large barrel ring. Oil Cleaning Brush greebles are mounted on stock. Sling is mounted to blaster and stock and not wrapped around either. Flashlight shall be a real or replica Element M300A Mini Scout Light. Baton and holster Flat or matte black in color, free of adornment or decoration. Is composed of three sections that extend outward when in use. When not in use, it appears as one cylinder. Is approximately 14" long when collapsed and 1" in diameter. The baton hangs off of the left rear belt, on a black holster. It is be attached at two points on the holster: one at the top, and one at the bottom. The baton should not swing when holstered. The holster is made from leather or leather-like material. OPTIONAL Level two certification (if applicable): 3D printed blasters and any approvable accessories can not contain visible print lines and must be sanded smooth for a more realistic appearance. Imperial Binders Imperial binders accurate in detail and proportion to official references is an authorized accessory. OPTIONAL Level two certification (if applicable): 3D printed blasters and any approvable accessories can not contain visible print lines and must be sanded smooth for a more realistic appearance. Tk rogue one pauldron.jpg Pauldron Rogue One Pauldrons denote rank or mission specialization. The Rogue One Pauldron is specific to Rogue One and differs from the original trilogy in color and stitching. Original trilogy Pauldrons are not an authorized accessory for Rogue One armor. An Orange, white, or black ornament made of leather plastic or leather-like material, worn over the right shoulder. The Orange is specific to Rogue One and a different shade from the original trilogy. The colored panel is divided into three sections by color matched stitching to conform to the wearers shoulder and has black piping around the outside edge. The remainder of the Pauldron is black and divided by black stitching into 10 segments. The neck closure is black and has two black snaps visible. There is a black elastic strap that runs from back to front and is worn under the bicep to hold the Pauldron in place. The strap is conned to the Pauldron on top by two black snaps inlayed in black “D” shaped leather or leather-like ends. The underside of the Pauldron is white regardless of top color and is divided with white stitching into 13 segments. The entire outside edge is finished with black piping and the underside of the neck closure is black. Comlink A comlink may be worn on the belt
-
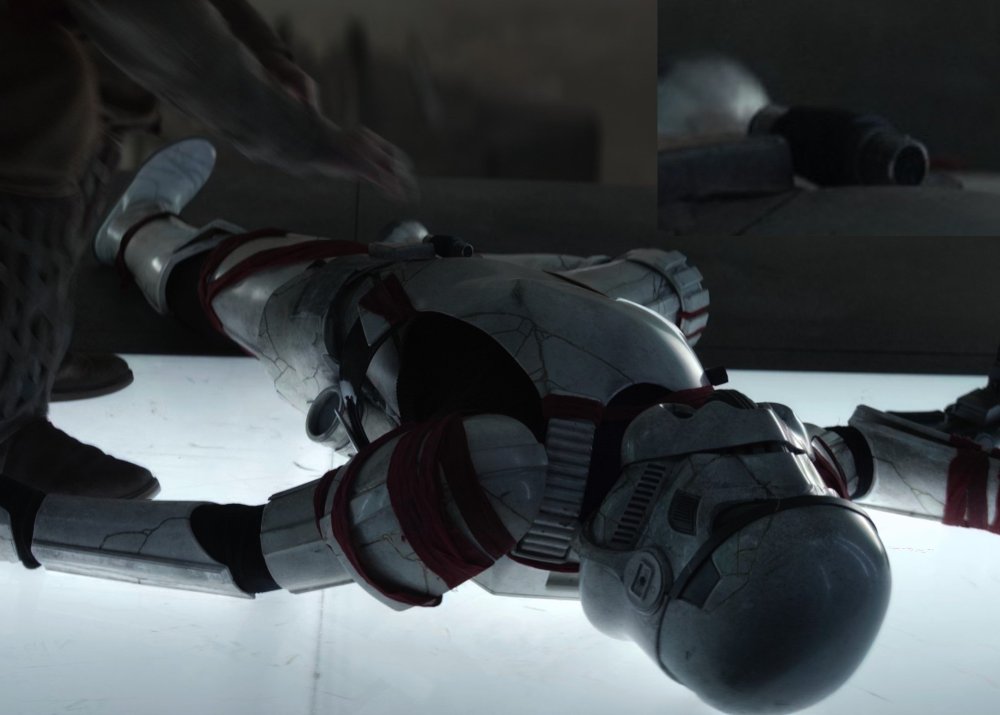
Night Troopers Night Troopers were the stormtroopers who served aboard the Imperial I-class Star Destroyer Chimaera under the command of Captain of the Guard Enoch. The troopers comprised the forces of Grand Admiral Thrawn while they were stranded on the planet Peridea. Night Troopers' armor featured cracks filled with gold and grey accents and red strips of fabric. Helmet Jimmiroquai Fiberglass - Facebook: Link Here Email jimmiroquai@yahoo.com 850 Armor Works Resin - Facebook: Link Here Website Link Here Email 850armorworks@gmail.com Galactic Armory 3D Files - Facebook: Link Here Patreon Link Here Website Link Here Etsy Link Here Nico Henderson 3D Files - Facebook: Link Here Etsy Link Here Upgrade files: TKModder421 & OxProps Lens: Mr Paul's Shoretrooper Build NerdForgeDesigns 3D Files - Facebook: Link Here Etsy Link Here DO3D 3D Files - Facebook: Link Here Website Link Here PewPewCrafts 3D Files - Facebook: Link Here Patreon Link Here Website Link Here Etsy Link Here Cults Link Here OxProps 3D Files - Facebook: Link Here Etsy Link Here Armor Jimmiroquai Fiberglass - Facebook: Link Here Email jimmiroquai@yahoo.com 850 Armor Works ABS - Facebook: Link Here Website Link Here Email 850armorworks@gmail.com DO3D - Facebook: Link Here Website Link Here PewPewCrafts 3D Files - Facebook: Link Here Patreon Link Here Website Link Here Etsy Link Here Cults Link Here Soft goods Dark Side Closet - Facebook: Link Here Geeky Pink’s Gaskets - Facebook: Link Here Keep Smiling (Formerly Imperial Boots) - Website Link Here Sheev's Emporium - Facebook: Link Here Gloves Keep Smiling (Formerly Imperial Boots) - Website Link Here Endor Finders - Website Link Here Boots Keep Trooping (Formerly Imperial Boots) - Website Link Here Crow Props - Website: Link Here E-11 S&T Full Metal Airsoft - Website Link Here War Machine - Website Link Here Bulldog Props - Facebook: Link Here Shear Tech - Facebook: Link Here E-11 - 3D Files OxProps - Facebook: Link Here Etsy Link Here trooper96 - ROGUE ONE E-11 HEAVY DUTY S&T STERLING L2A1 AND ROGUE ONE E-11 RECEIVER TUBE PARTS KIT ROGUE ONE E-11 CONVERSION KIT FOR STERLING SMG ELEMENT AIRSOFT M300A MINI SCOUT FLASHLIGHT E-11 References Link Here Facebook Build Group Night Trooper Build Enoch and Night Trooper Build Costume References Link Here
-
It's almost one year to the day that I began building my ANH Stormtrooper kit. I'm 20 troops in, having fun experiences, making good friends. After so long without a project, it was time to expand my kit collection and join the First Order. Sticking with the always recognizable, always popular clean storm trooper kit. I love the Star Wars Resistance show and I have some fellow troopers with some FO kits, so I want to expand on that. I also enjoy the Galaxy's Edge troopers. Their banter is always entertaining. Since I didn't really do a build thread of any sort for my first kit, I wanted to start out with one. Mostly because this kit seems like it might need some feedback on way to approval. Some details about the build First Order TK The Last Jedi CRL: https://databank.501st.com/databank/Costuming:TK_TLJ Kit: Imperial Surplus (I don't think they offer this kit any longer, so no link.) Boots: KeepTrooping https://keeptrooping.com/product/trooper-white/ Gaskets: May be used from a fellow Mountain Garrison member. If not, likely Geeky Pink. Helmet: Looking to get the Denuo Novo premier https://www.denuonovo.com/products/star-wars-the-last-jedi-stormtrooper-premier-helmet#description-flex Blaster: 3d print from this site. I'll find the article link... What am I forgetting?
-

Doggydoc’s Jimmiroquai TFA FO stormtrooper build thread.
gmrhodes13 replied to Doggydoc's topic in TFA Build Threads
Been waiting to see feedback on these. Rare I wear my Imperial Gaskets rubber ones, they are restrictive and build up a lot of heat, no air transfer, I now only wear them for LFL or high profile troops, fabric is way more comfortable in my opinion. Looking forward to see how much movement you have once you have the kit all fitted. -
 Name: Ardeshir Radpour Username: equuspolo TK-42128 Southern California Garrison Los Angeles Squadron Height = 5'10 Weight = 165 Armor Maker = Denuo Novo Helmet Maker = Denuo Novo Premium Boot Maker = Imperial Boots Gloves = Endor Finders Belt = Denuo Novo Belt Pouches = Denuo Novo and Trooperbay Pauldron = Denuo Novo Neck Seal = Denuo Novo Holster Maker = Damtooine props and Denuo Novo Gaskets = production made silicon rubber gaskets F-11 = Branfuhr Studios Resin Kit- Custom built by me with custom light system. SE-44C = 3DPrintMerchant Electronics = Wireless Microphone with Acker Amp Custom Parts = Chest yoke and Backplate welded together with ABS Slurry. Chest Pills and Chest cut out backed with Textured Fabric, TD custom modified Denuo Novo. Belt, Cod, Butt Plate and TD attached to armer with custom Made Anovos leather waist tassets. Holster Dantooine props, urethane spats from Sanitized Creations abs spats urethane spats corrected without picatinny rail SE-44C
 -
Name: Ardeshir Radpour Username: equuspolo TK-42128 Southern California Garrison Los Angeles Squadron Height = 5'10 Weight = 165 Armor Maker = Denuo Novo Helmet Maker = Denuo Novo Premium Boot Maker = Imperial Boots Gloves = Endor Finders Belt = Denuo Novo Belt Pouches = Denuo Novo and Trooperbay Pauldron = Denuo Novo Neck Seal = Denuo Novo Holster Maker = Dantooine props and Denuo Novo Gaskets = production made silicon rubber gaskets F-11 = Branfuhr Studios Resin Kit- Custom built by me with custom light system. SE-44C = 3DPrintMerchant Axe = 3DPrintMerchant Electronics = Wireless Microphone with Acker Amp Custom Parts = Chest yoke and Backplate welded together with ABS Slurry. Chest Pills and Chest cut out backed with Textured Fabric, TD custom modified Denuo Novo. Belt, Cod, Butt Plate and TD attached to armer with custom Made Anovos leather waist tassets. urethane spats from Sanitized Creations 2 special details Denuo Novo Abs Spats Sanitized Creations urethane soats gasket fit
-
Name: Ardeshir Radpour Username: equuspolo TK-42128 Southern California Garrison Los Angeles Squadron Height = 5'10 Weight = 165 Armor Maker = Denuo Novo Helmet Maker = Modified Anovos Premium Boot Maker = Imperial Boots Gloves = Endor Finders Belt = Denuo Novo Belt Pouches = Denuo Novo and Trooperbay Pauldron = Denuo Novo Neck Seal = Denuo Novo Holster Maker = Damtooine props and Denuo Novo Gaskets = production made silicon rubber gaskets F-11 = Branfuhr Studios Resin Kit- Custom built by me with custom light system. SE-44C = 3DPrintMerchant Electronics = Wireless Microphone with Acker Amp Custom Parts = Chest yoke and Backplate welded together with ABS Slurry. Chest Pills and Chest cut out backed with Textured Fabric, TD custom modified Denuo Novo. Belt, Cod, Butt Plate and TD attached to armer with custom Made Anovos leather waist tassets. Holster Dantooine props, urethane spats from Sanitized Creations 2 Special Details Denuo Novo Spats Sanitized Creations Urethane Spats F-11 rear tab and ring options SE-44C working light gasket fit
-

Doggydoc’s Jimmiroquai TFA FO stormtrooper build thread.
Doggydoc replied to Doggydoc's topic in TFA Build Threads
Since I am going to build this for centurion, I will need to get rubber gaskets. This seems to be a challenge as Imperial gaskets is no longer making them. Does anyone know of another place to source good rubber gaskets, or will I need to figure out a way to make them myself? -
TLJ / TROS CRL Update Work Flow
equuspolo replied to ukswrath's topic in Hard Armor (General Discussion)
I don’t know why it made me create an account but this is my actual account the other needs to not be used and I wont use it again so write me here Hi everyone. Due to the nature of the NDA’s I of course was not allowed to take any pictures. But what I can tell you is this is pretty darn spot on what you guys have stayed here. I have extensive photos of my rogue one armor that I can’t post for a king time because it will affect my work. The rise of skywalker FOTK that I wore I only wore it once for a fitting because we were going to use them for Previz. But I never wore it again. They just gave us the helmets hahaha so I have a few photos of that. So here are my inputs. Helmet details are spot on. neck seal, there were two types. 11 rib and 8 rib neck seals. Zipper is worn front or back. There were two reasons why they were worn in the front, 1 because some pointed their heads down to see and therefore zipper was visible in rhe back. 2 the zipper was worn in the back and since they clothing tag it down to the under suit s lot of guys would take it off when undressing first break or lunch, and then put it on zipping it in the front. So either is acceptable. I cousins remember how they attached the chest to the back and yoke but sides were Velcro. shoulder bells bad the tab and it was metal but I don’t think they is necessary and I’ll explain it later. Tab can be any material. Since our kits are abs I highly recommend abs tabs. That’s what I’ve done Shoulder bells attached to bicep via a clip and forearms slid up. Picatinny rail moved box aside and you zipped up the forearms and box was velcroed down . gaskets were rubber silicon and for me I thought they were soft. They were trimmed in a fabric that protected them on the edges and an elastic back with a buckle in the front. Elbows and forearms were attached but we can separate them but they were attached via the elbow gasket Same with the legs. Thighs and shins were attached as well via gasket and spats were attached to shins but I didn’t see how. torso had a cross cross strap system that had a thin pad on it and torso zipper up the back. The thermal detonator and butt plate were attached by a webbing and came down the back and the belt pinned it down and buckled inside the pouch. the blasters I saw had many variations. Some didn’t have d rings. Some did and the rings were either black or white. I thought I saw one silver one but not sure. D ring plates were both silver and white. But there were quite a few black d rings. I think if we go white and white or silver and white ring or silver and black ring it’s good. Pistol I did not see gloves I could swear were the exact endor finders gloves and rhe hand plates had a deep groove in it. unfirtunately I didn’t have enough time to take other notes such as the boxes with black being cut out or not. It was my first day and just insane to be able to do this and I had planned on my second run to take more detailed notes and photos. However the pills on the chest I did see that they were cut out, but the box in the center of the chest, the black was painted in. And if I remember correctly the box on the wrist was painted or decal. Not one hundred percent sure. now on the overlaps, the thighs and biceps are overlaps. They are held in place by rubber bands. And they literally pry them open for you to get in. This can not be done in abs, our armor will crack. So this brings me to my next point. I hit the ground over 60 times in one day and nothing happened to my armor. It’s very thick polyurethane armor and very strong. So back to the shoulder bridge that’s why I don’t recommend metal. I contemplated leaving my biceps and thighs open and attaching a rubber material but I decided against it as the armor will crack when trooping and grow apart. The clips on the body armor were TFA clips rhat I saw while helmet clips are TLJ. Very weird. undersuit was a one piece and had shiny built in. But I heard there’s other sets with shiny shorts but couldn’t confirm it. Boots are exact imperial boots first order boots and they may get it from the same maker. I have my actual boots, neck seal, gloves and undersuit that I wore for the rogue one and clone trooper on kenobi. The gloves for the rogue one and clone are again exact gloves from Endor finders like the first order gloves and the boots for the first order snd rogue one and clones are the exact same boots. the thermal detonator is a separate piece screwed in to the back plate just like the clone and rogue one. The TD is hollow and it has a black pvc like tube that slides in. You can take it out but I don’t remember what kept it in. I’ve made my TD hollowed out and with the pvc tube and it is much lighter. Also on rhe other side of rhe tube I painted to match TFA: cod pieces are polyurethane so they flex but there are also rubber vids as well and shoulder bells and chest pieces for stunts. That’s why the cod is flexing in pics. holsters were actual functioning metal ones, the ones I saw. mall the armor parts are polyurethane and very thick and durable. the thighs are attached by two straps to the torso just like the rogue one armor except the rogue one armor had ribbing material to cover them. I didn’t notice that it n this armor. the torso had leather scallops and a front flat leather plate that held the belt and the cod piece. I noticed different shaped cod pieces by the way. and the notes on the cut pieces, yes w lot of times they are cut to fit the performer. We modified armor parts all day long and that’s why you see the different shapes and cute. Oh one more thing there were also foam thermal detonators and you could barely tell they were foam. They looked just like the regular ones. Same thing with the rogue one armor. They are for stunts. I didn’t see executioner axes or batans or prods . it’s pretty much the TLJ armor and if yuu want to enforce the different cut in forearms then you can. I have my rubber gaskets but they were only the actual rubber pieces and none of the finishing. It was quite nice what they had. I just got the rubber parts themselves. The TFA I know snapped in to place even on the torso. I couldn’t tell how because it was already assembled so I’m assuming Velcro. anyway those are my four notes. My armor is almost done. I’ve made some changes to it to function the way I prefer like using smaller shoulder to bicep buckles as well as the double buckles for the thighs attach to a belt and not the toro so. With abs I just think it’s too much torque on the armor and on a belt you get a lot more freedom. The torso attach puts too much tension and weight on abs but also shoulders. That’s it for now. -

TLJ / TROS CRL Update Work Flow
Ardeshir Radpour replied to ukswrath's topic in Hard Armor (General Discussion)
Hi everyone. Due to the nature of the NDA’s I of course was not allowed to take any pictures. But what I can tell you is this is pretty darn spot on what you guys have stayed here. I have extensive photos of my rogue one armor that I can’t post for a king time because it will affect my work. The rise of skywalker FOTK that I wore I only wore it once for a fitting because we were going to use them for Previz. But I never wore it again. They just gave us the helmets hahaha so I have a few photos of that. So here are my inputs. Helmet details are spot on. neck seal, there were two types. 11 rib and 8 rib neck seals. Zipper is worn front or back. There were two reasons why they were worn in the front, 1 because some pointed their heads down to see and therefore zipper was visible in rhe back. 2 the zipper was worn in the back and since they clothing tag it down to the under suit s lot of guys would take it off when undressing first break or lunch, and then put it on zipping it in the front. So either is acceptable. I cousins remember how they attached the chest to the back and yoke but sides were Velcro. shoulder bells bad the tab and it was metal but I don’t think they is necessary and I’ll explain it later. Tab can be any material. Since our kits are abs I highly recommend abs tabs. That’s what I’ve done Shoulder bells attached to bicep via a clip and forearms slid up. Picatinny rail moved box aside and you zipped up the forearms and box was velcroed down . gaskets were rubber silicon and for me I thought they were soft. They were trimmed in a fabric that protected them on the edges and an elastic back with a buckle in the front. Elbows and forearms were attached but we can separate them but they were attached via the elbow gasket Same with the legs. Thighs and shins were attached as well via gasket and spats were attached to shins but I didn’t see how. torso had a cross cross strap system that had a thin pad on it and torso zipper up the back. The thermal detonator and butt plate were attached by a webbing and came down the back and the belt pinned it down and buckled inside the pouch. the blasters I saw had many variations. Some didn’t have d rings. Some did and the rings were either black or white. I thought I saw one silver one but not sure. D ring plates were both silver and white. But there were quite a few black d rings. I think if we go white and white or silver and white ring or silver and black ring it’s good. Pistol I did not see gloves I could swear were the exact endor finders gloves and rhe hand plates had a deep groove in it. unfirtunately I didn’t have enough time to take other notes such as the boxes with black being cut out or not. It was my first day and just insane to be able to do this and I had planned on my second run to take more detailed notes and photos. However the pills on the chest I did see that they were cut out, but the box in the center of the chest, the black was painted in. And if I remember correctly the box on the wrist was painted or decal. Not one hundred percent sure. now on the overlaps, the thighs and biceps are overlaps. They are held in place by rubber bands. And they literally pry them open for you to get in. This can not be done in abs, our armor will crack. So this brings me to my next point. I hit the ground over 60 times in one day and nothing happened to my armor. It’s very thick polyurethane armor and very strong. So back to the shoulder bridge that’s why I don’t recommend metal. I contemplated leaving my biceps and thighs open and attaching a rubber material but I decided against it as the armor will crack when trooping and grow apart. The clips on the body armor were TFA clips rhat I saw while helmet clips are TLJ. Very weird. undersuit was a one piece and had shiny built in. But I heard there’s other sets with shiny shorts but couldn’t confirm it. Boots are exact imperial boots first order boots and they may get it from the same maker. I have my actual boots, neck seal, gloves and undersuit that I wore for the rogue one and clone trooper on kenobi. The gloves for the rogue one and clone are again exact gloves from Endor finders like the first order gloves and the boots for the first order snd rogue one and clones are the exact same boots. the thermal detonator is a separate piece screwed in to the back plate just like the clone and rogue one. The TD is hollow and it has a black pvc like tube that slides in. You can take it out but I don’t remember what kept it in. I’ve made my TD hollowed out and with the pvc tube and it is much lighter. Also on rhe other side of rhe tube I painted to match TFA: cod pieces are polyurethane so they flex but there are also rubber vids as well and shoulder bells and chest pieces for stunts. That’s why the cod is flexing in pics. holsters were actual functioning metal ones, the ones I saw. mall the armor parts are polyurethane and very thick and durable. the thighs are attached by two straps to the torso just like the rogue one armor except the rogue one armor had ribbing material to cover them. I didn’t notice that it n this armor. the torso had leather scallops and a front flat leather plate that held the belt and the cod piece. I noticed different shaped cod pieces by the way. and the notes on the cut pieces, yes w lot of times they are cut to fit the performer. We modified armor parts all day long and that’s why you see the different shapes and cute. Oh one more thing there were also foam thermal detonators and you could barely tell they were foam. They looked just like the regular ones. Same thing with the rogue one armor. They are for stunts. I didn’t see executioner axes or batans or prods . it’s pretty much the TLJ armor and if yuu want to enforce the different cut in forearms then you can. I have my rubber gaskets but they were only the actual rubber pieces and none of the finishing. It was quite nice what they had. I just got the rubber parts themselves. The TFA I know snapped in to place even on the torso. I couldn’t tell how because it was already assembled so I’m assuming Velcro. anyway those are my four notes. My armor is almost done. I’ve made some changes to it to function the way I prefer like using smaller shoulder to bicep buckles as well as the double buckles for the thighs attach to a belt and not the toro so. With abs I just think it’s too much torque on the armor and on a belt you get a lot more freedom. The torso attach puts too much tension and weight on abs but also shoulders. That’s it for now. -
So here is the final product and 501st approval. TK-78945 A very big thank you to John Child (Captain’s Drydock) and Tony (ukswraith). It was your video series on YouTube and build thread on here that got me to pick the FOTK and have the confidence to build it. Also a big thanks to everyone who responded along the way. Your advice got me to the finish line. Body Armor Kit: Imperial Surplus Helmet: Anovos Gaskets: Geeky Pinks Belt: Belts of the First Order Belt Pouches: Trooper Bay Boots: CrowProps Gloves: Endor Finders Holster: Justin-Lee Morrison
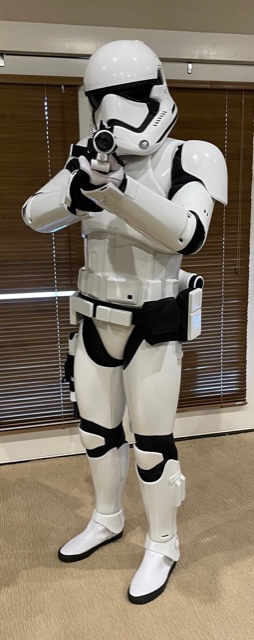
-
TheRascalKing's Denuo Novo First Order TK Build Thread
TheRascalKing replied to TheRascalKing's topic in TLJ Build Threads
Soft Goods & Accessories Discussion Placing this section a bit out of order near the top, because I'm sure many people are will be wondering... what else do I need order to finish out the suit? Well, let's get into it. 21. Gloves As far as I am aware, there are currently two options for gloves - either Endor Finders on the left, or TrooperBay on the right. Both have their benefits, which I'll get into, but overall, I think I prefer the Endor Finders. Endor Finders In general, I feel the Endor Finders are ever so slightly higher quality, though the soft inner lining will likely get removed, as I did with my all black Rogue One TK gloves from them. I'd rather have cooler hands in the California heat. Both sets of gloves had visible purple staining on the white leather as delivered, from the black thread in the palms and likely just transfer from the material, and the EF gloves also had a clear imprint where the outline of the thumb left a slight impression on the leather of the palm as well. If I purchased these again, I would go for the option to have white palm thread, and while less accurate, I would likely (painstakingly) color in the thread myself with a black paint pen or something that would not stain purple (NOT SHARPIE). TrooperBay These were an older pair of gloves from TrooperBay that came with my fiberglass kit purchase years ago, so I will say I am unsure of the quality when new. They're decent gloves overall, but pretty thin and they are also stained purple on the white leather all over. The handguards are resin cast from original, from Dantooine Props and attached with velcro to the gloves. 22. Boots I have had a pair of boots from Imperial Boots Keep Trooping since I started my ROTK project and will be utilizing them. They're high quality, fit great, and are more comfortable than disco boots. 23. Neckseal, Undersuit/Gaskets & Shiny Shorts I'll likely be using my neckseal and shirt from Sheev's Emporium (which has the awesome and accurate angle change on the arm gasket ribbing), and knee gaskets. I originally ordered them with pants, but I think I'm just going to cut the pants part off of it and have them be sleeves with velcro on the ends like the Denuo Novo ones, but so that they match. The pants were a good idea and they are generally well-made, but make things more complicated. The shiny shorts are from Teresa at Geeky Pink's Phantastic Gaskets, who also make excellent soft parts for FOTKs. The included Denuo Novo gaskets actually look okay but would need to be tailored and are oddly just like... inside out. They have a more shiny/rubbery interior and a cloth exterior - I would just wear them inside out, but would need to remove and resew the velcro, and turn the seams inside out as well. Maybe if I'm having them tailored to fit anyways, but probably not worth the time when I have my Sheev ones. I have no interest in owning actual rubber gaskets at this time and consider their specific mention unnecessary even at L3 - no way would I survive trooping in the Southern California heat anyways. If that's your thing, I believe they are available from Thorsson and Associates. 24. Belt Pouches It should be noted that the tallest pouch that Denuo Novo included does not really fit the largest belt box plate (38A), so I will be utilizing one from TrooperBay instead. 25. Blaster 26. Accessories -
TheRascalKing's Denuo Novo First Order TK Build Thread
TheRascalKing replied to TheRascalKing's topic in TLJ Build Threads
Below are the parts I'll be using for my build and a few prices and links: TLJ Armor Armor = Denuo Novo ($700*) Helmet = Anovos TLJ plastic Boot Maker = Imperial Boots Keep Trooping "Trooper" ($120) Gloves = Endor Finders ($55) Belt = Denuo Novo Belt Pouches = Denuo Novo + Trooperbay ($68) Neck Seal = Sheev's Emporium ($65) Holster = Dantooine Props (€75*) Handguards = Dantooine Props Spats = Sanotized Creations ($35) Greeblies = 3D Printed, mrpoopie/TheRascalKing files Thermal Detonator = 3D Printed, Jesse M files Gaskets = Sheev's Emporium F-11D Blaster = Classified Shoulder Bell Support Brackets = @ukswrath Chest Pill Mesh = @ukswrath TFA Conversion Helmet = Anovos TFA w/ VaderPainter Aerator Forearms = Imperial Surplus ($105) Cod = Imperial Surplus ($45) Thermal Detonator = Denuo Novo Executioner Conversion Helmet = KB Props ($150*)? with Ople Props Lense ($31) Back Yoke = Imperial Surplus ($160) Shoulders = Imperial Surplus ($55) Decals = Trooperbay ($8) Primer = SEM 39133 Flexible Primer Surfacer and SEM 42043 White High Build Primer Paint = SprayMAX 2K DTM Gloss White Topcoat Custom color-matched aerosol white Behr Premium #52 White Gloss Paint + Primer ($6/can) BPrices and links are for US and do not include shipping, but might help to know when available! *'s indicate the list price, but that I purchased them at a discount. -
-- EDIT 08/31/2022-- Future Jason here, I just wanted to provide this colorful edit to help explain how I'm going to handle additions to this original post. Initially, I was striking out verbiage as it was written, then adding new text, but it was getting messy. I will continue using strike through text whenever I remove something from the existing CRL, but will follow that up with red text indicating the agreed upon change. Of note, I will try not to make any of these changes unless it's captured in this conversation, but I am receiving input from detachment leadership in addition to what's captured here. If anything ever appears in the CRL text below that a person does not recall discussing, please let us know so the discussion can continue. What I absolutely refuse to do is create ambiguous text, or what I refer to as a "moving target CRL." Any edits to my original post will be written in yellow so you can follow the changes easier; I will also date any revision/ edit. So again, CRL changes/ additions in red instructions/ original post edits in yellow. Thanks, TK-51923 Fellow TKs. After several discussions regarding the inclusion of Remnant Stormtroopers, as seen in The Mandalorian seasons 1 and 2 into the Databank, we have decided to move forward with the creation of a CRL. The goal in developing this thread is to create a CRL specific to the heavily weathered Remnants serving Werner Herzog's "The Client" as well as those seen in Season 2 episode 7 The Believer, working in the rhydonium refinery on the planet Morak. For previous discussion on this topic, please see the following thread: https://www.whitearmor.net/forum/topic/48305-new-anthology-tk-crl/ Additionally, for reference, please see the following picture: Additionally, since we have several new references to draw from since the creation of the original Rogue One TK CRL and it's subsequent revision in 2020, this thread will also serve to address revisions to the current ROTK CRL and the potential creation of a separate CRL for the New Generation/ Anthology TK. Discussions are ongoing regarding how to handle this generation of TK armor that has become synonymous with the Anthology films and various Disney+ series. This includes the existing ROTK, which could be renamed, receive additional variations, remain unchanged, or none of the above. However, one item that has been emphasized to me from detachment staff is that we have to clearly show that this is a unique set of armor without stating "it's dirty." Additionally, we have found several instances in which items were either missing, broken, or taped together by the costume department for the respective productions; these discrepancies will not be included in any new CRL or revisions to existing CRLs. The goal of this thread is to identify the unique attributes of the costume that are uniform throughout all of it's appearances in Anthology films and Disney+ productions, not to capture broken or missing items. Things that will not be considered: broken thigh armor, drop boxes tucked into the thighs or missing altogether, missing TDs, and "$#1++y wardrobe dressing or stunt men with gaffer tape." I'm not going to say who's quote that was. With that said, we obviously have an ANH OT bucket resting atop Rogue One style armor. These are on prominent display, but there's other unique characteristics as well. This is our opportunity to post them up and start hashing out the details. Please take a look at the aforementioned thread, but I also intend on posting several of the pictures here. To get started, I will post the verbiage from our current ROTK CRL, and include the wording from the ANH Stunt helmet. I will continue updating everything as we go along and highlight any changes in red. Additionally, even though this isn't a New Generation/ Anthology CRL, we need to capture anything in the New Generation gear that hasn't been covered previously. If there's new things that have been discovered, please post them. Let's get started: Helmet Moderate to heavily weathered 8/24/2022 Traps (trapezoids on dome of helmet) and tears (area beneath the corners of eye lenses) are gray. Rear traps and tears have vertical black lines. Lenses are flat material, green in color, sufficiently dark enough to obscure the costumer's eyes. The “ear” bars have three or four bumps and are gray or painted gray, with a black outline. Painting the bumps with rank stripes (highlighted) in black is optional. Frown is painted gray and does not leave the teeth area. A total of 8 cut outs in the teeth area of the frown are present. Tube stripes are medium blue, numbering between 9 and 16 per side with the curve bends extending backwards. Vocoder (vertically ribbed chin detail) is painted black. Aerators/Hovi-MIX tips (cylinders on either side of the vocoder) are black or painted black. Tears, traps, and tube stripes may be hand painted, decals, or decals that replicate hand painted. Mesh may be used behind the frown to obscure the face of the wearer. Note: The helmet is accurate in detail and proportion to official references. Many commercially available helmets or those considered disproportionate in size or shape are ineligible. OPTIONAL Level two certification (if applicable): Ears shall have three screws per side, one above and one below the ear bar and one at the base of the helmet. Ear bars have four bumps only. Not three. Traps/tears and tube stripes shall have the correct ANH TK details. Ideally, the tube stripes are positioned approximately a pencil width from the side of the cheek. Fall of tube stripe tops ideally lean toward the front. Correct Aerators/Hovi-MIX tips are present. Screens used shall be of a wide type mesh, with the rim of the mic and the inside white or painted white. OPTIONAL Level three certification (if applicable): Ear bars shall have only one bump painted in black (rank stripes). Ideally, placement of ears (and screws) should closely follow the rear angle of the trap above them Neck trim shall be of an s-type profile rather than a u-type profile. Tears/traps shall be hand painted or use decals that emulate hand painted (with correct ANH TK details). Ear screws shall be slotted, flat topped, countersunk and painted white. The vocoder must be integrated into the helmet, and not a separate piece. Neck Seal Moderate to heavily weathered 8/24/2022 Black with horizontal ribs, fitted to the wearer, and extending from the base of the neck to conceal the entire neck Under Suit Moderate to heavily weathered 8/24/2022 Black non-textured material, either one-piece or two-piece construction with no visible zippers or logos/designs. OPTIONAL Level two certification (if applicable): Top, where visible shall be fully ribbed with all horizontal ribbing on the arms, chest, and back. The centre of chest and back may be mesh as long as it is covered by armor. Pants shall be black non-textured material and have horizontal ribbing at the knees only. Knee gaskets are allowed as long as they correctly match top ribbing material, spacing and color. The hip section shall not have ribs. OPTIONAL Level three certification (if applicable): All ribbing on knees, arms, chest, and back must be stitched between each rib in detail and proportion to official references. The armpit area shall have the correct hexagonal mesh detail Shoulder Straps Moderate to heavily weathered 8/24/2022 They may be affixed with Velcro or adhesive. OPTIONAL Level two certification (if applicable): OPTIONAL Level three certification (if applicable): These shall be inserted behind the chest tabs and into slots of the backplate. Shoulder Armor Moderate to heavily weathered 8/24/2022 One on each shoulder. The shoulders are considered effectively symmetrical; they may be worn interchangeably on the left and right shoulders and may have a black elastic strap that wraps around the inside of the bicep. OPTIONAL Level two certification (if applicable): OPTIONAL Level three certification (if applicable): There is no swoop on the shoulder bell raised area. There is no elastic strap that wraps around the inside of the bicep. Upper Arm (Bicep) Armor 8/31/2022 Moderate to heavily weathered 8/24/2022 Both biceps are symmetrical and interchangeable. The front strip is bevelled and approximately 1/8" thick that does not extend beyond the bicep, and has a smaller cover strip layered thereon. OPTIONAL Level two certification (if applicable): OPTIONAL Level three certification (if applicable): Cover strips will cover both the front and back joints. Biceps are loosely held closed in the back with elastic, shock cord (bungee cord) or white Velcro and are designed to remain flexible. The biceps are suspended from the shoulder armor via shock cord (bungee/ framilon cordage) via "J hooks" at the top of the biceps per the screen references. 8/31/2022 A separate piece of white 1" webbing or elastic, extends from the shoulder armor, through a slot in the bicep per the screen references. 8/31/2022 Forearm Armor Moderate to heavily weathered 8/24/2022 The front strip is bevelled and approximately 1/8" thick that does not extend beyond the bicep, and has a smaller cover strip layered thereon. OPTIONAL Level two certification (if applicable): OPTIONAL Level three certification (if applicable): Forearms are loosely held closed in the back with elastic, shock cord (bungee cord) or white Velcro and are designed to remain flexible. Cover strips will cover both the top and bottom joints. Hand Plates Moderate to heavily weathered 8/24/2022 Roughly pentagonal in shape, the hand plates are mounted securely over the back of the glove. As an alternative to plastic, these may be made out of latex or latex-like material. OPTIONAL Level two certification (if applicable): Hand guards shall be made of plastic. OPTIONAL Level three certification (if applicable): Hand guards should follow the correct RO shape, ANH hand guards are not acceptable. A small indent in the front of the hand plate shall be present. Gloves Moderate to heavily weathered 8/24/2022 Black in color, made of either rubber, Nomex, leather, or leather-like material, with no visible straps or logos/designs. The fingers are enclosed, non-textured. OPTIONAL Level two certification (if applicable): Gloves shall not be made of rubber. OPTIONAL Level three certification (if applicable): The base material of the gloves will be a black synthetic material similar to Lycra, Spandex, Elastane, or Nylon. Palms of gloves shall be shiny black fabric or leather or leather-like material. On the index finger shall be a stitched piece of fabric made from the same material as the hand's underside that while stitched to the finger has one cutout towards the end of the finger that reveals the netted material underneath. Gloves shall have the correct leather pattern along the fingers/palm. Chest Armor Moderate to heavily weathered 8/24/2022 Chest plate overlaps the abdominal plate OPTIONAL Level two certification (if applicable): There are raised trapezoids at the top of the shoulder section beneath which the straps insert. The chest and back sides shall be connected by black extensions pieces. OPTIONAL Level three certification (if applicable): Top pectoral out lines swoop correctly outward. Bottom of ribcage flares correctly outward. Back Armor Moderate to heavily weathered 8/24/2022 Back plate contains an "O II" design. There are raised trapezoids at the top of the backplate section beneath which the shoulder straps insert. The backplate continues past these trapezoids towards the top of the shoulder OPTIONAL Level two certification (if applicable): Top of box wall has a trapezoidal indentation. There is a roughly 8mm circular indent near the right top corner of the backplate. OPTIONAL Level three certification (if applicable): Bottom of backplate is curved and extends past abdominal back cover plate. The O cog shall have 16 spines. The 11 bars have 5 horizontal evenly spaced raised bars on the bottom of the face. There is a rectangular tab protruding from the bottom of each of the two raised trapezoids at the top of the backplate. Abdomen Armor Moderate to heavily weathered 8/24/2022 The abdominal armor consists of a one-piece corset design with a vertical opening centred on the back. The back opening is covered by a rectangular cover plate that is worn under the back armor. There are 3 vertical ribs centered on the front of the abdomen and two (one left and one right) ribs further spaced to each side of the center. There are two (one left and one right) angled (approximately 70 degrees) ribs on each side of the abdominal armor. There are two (one left and one right) angled (approximately 70 degrees) recessed ribs on each side of the abdominal armor behind the raised angled ribs that are black Any side shims added are to be added to the white areas of the armor. The center front detail consists of a raised rectangular panel. On the right half of the panel, there is a vertical column of 4 buttons approximately 7/16” (11mm) in diameter. The bottom button is blue while the other three are grey. On the left half of the panel, there is a vertical column of raised evenly spaced horizontal gear teeth with a recessed trapezoid at the top of the column. The rectangular inside bottom of the trapezoid is black. The left front detail consists of a raised rectangular panel with an angled top. There is a vertical column of 4 buttons approximately 7/16” (11mm) in diameter. The bottom button is blue while the other three are grey. The right front detail consists of a primary raised rectangular panel with an additional secondary raised rectangular panel covering the top 1/3 of the primary panel. There is a column of three thin horizontal evenly spaced raised lines across the top ½ of the secondary panel. The abdominal armor is accurate in detail and proportion to official references. OPTIONAL Level two certification (if applicable): The cod armor is separate from the abdominal armour. The right front detail panel is centered between the two outer vertical right ribs. The left front detail panel is centered between the two outer vertical left ribs. OPTIONAL Level three certification (if applicable): The abdomen armor has two horizontal recessed rectangles centred above the center front detail panel and on each side of the center rib. All 8 Button details are recessed and bordered with a thin edge, only the recessed portion is painted. The center front panel column of raised gear teeth has only 9 teeth. There is a recessed edge (approximately 1/8” 3mm wide) along all four sides around the face of the center front panel The right front detail panel is centered between the two outer vertical right ribs. The left front detail panel is centered between the two outer vertical left ribs. There is a recessed edge (approximately 1/8” 3mm wide) along the sides and top around the face of the left front detail pane The abdominal armor back cover plate has two protruding tabs along the bottom that rest inside the back hard belt. Move to "kidney armor" section. Cod Armor Moderate to heavily weathered 8/24/2022 The cod armor consists of a body shape formed triangular plate with a raised center rib and raised lower portion and is accurate in detail and proportion to official references. The cod shall be a separate piece from the abdominal plate 8/31/2022 Removed from Level Two certification. Having this as a level 2 requirement instead of basic may lead people to use OT amor in constructing their kits or create abdominal/ cod pieces that are not accurate to any available references for this costume. OPTIONAL Level two certification (if applicable): The cod shall be a separate piece from the abdominal plate. OPTIONAL Level three certification (if applicable): Kidney Armor Moderate to heavily weathered 8/24/2022 The kidney armor is separated in the back and covered by a rectangular kidney/ trauma plate. 8/31/2022 The rectangular plate is separate from the posterior armor and sits above the rear hard belt. 8/31/2022 OPTIONAL Level two certification (if applicable): The kidney/ trauma plate is large enough to cover the entire gap present in the rear of the abdominal armor and extends up underneath the back armor. 8/31/2022 OPTIONAL Level three certification (if applicable): The kidney armor cover plate has two protruding tabs along the bottom that rest inside the back hard belt. Posterior Armor Moderate to heavily weathered 8/24/2022 The posterior armor shall be a separate piece from the abdominal armor OPTIONAL Level two certification (if applicable): Belt Moderate to heavily weathered 8/24/2022 The Ammunition belt consists of a hard belt made of the same or similar material as the armor in two separate parts front and back (with overlap). The back front belt overlaps the front rear belt on the sides. 8/31/2022 There are 6 ammunition boxes mounted to the belt. There are 2 (one left and one right) drop boxes suspended by black webbing approximately 2" (50mm) wide. Drop boxes must be accurate in detail and proportion to official references. The ammunition belt is accurate in detail and proportion to official references. OPTIONAL Level two certification (if applicable): The only detail visible on the front belt is the mounted ammunition boxes unlike the squares present on ANH belts. The top edge of the front belt has protruding teeth that nest inside gaps between the ribs and detail panels of the abdominal armor. The two center ammunition boxes are thinner than the other mounted ammunition boxes. The second and fifth mounted ammunition boxes are slightly wider than the two center ammunition boxes. The two outermost ammunition boxes are almost square. The two drop boxes are rectangular and as wide as the mounted square boxes. OPTIONAL Level three certification (if applicable): The ammo boxes across the front are all made separately from the main belt and are secured to it The two drop boxes hang no more than 1” 25mm below the front belt and the black strap is visible. The second and fifth mounted ammunition boxes have a trapezoid detail on the top of each ammunition box. The trapezoid detail is a triangular prism that has no rounded edges. 8/31/2022 The front belt protrudes past above all mounted ammunition boxes above and below by approximately 1/8”-1/4” 3-6mm. The front belt protrudes approximately 1/2" below the front 4 ammo boxes in a trapezoidal shape that extends from the center of both medium sized ammo boxes where it tapers to 1/8"-1/4" (3-6mm) below the ammo boxes across the remaining span of the belt per the official references. 8/31/2022 All ammunition boxes, including the drop boxes, have slightly bevelled chamfered edges on the face of each box. 8/31/2022 Thermal Detonator Moderate to heavily weathered 8/24/2022 The thermal detonator consists of a grey tube approximately 3” 76mm in diameter and 8” 203mm long approximately. There are two white endcaps and a white control panel. The white control panel has a horizontal row of white rectangles along the bottom of the control panel and a grey “D” shaped recessed on the left side of the horizontal row. There is an oval greeble that protrudes from the control near the top right side. The thermal detonator is mounted to the rear hard belt and there are no visible screws or clips and is accurate in detail and proportion to official references. OPTIONAL Level two certification (if applicable): The thermal detonator mount should be fully enclosed with solid walls on all four sides. The center of both end caps is gray. OPTIONAL Level three certification (if applicable): The control panel bottom detail is a raised panel with 7 raised rectangles, all are evenly spaced except the right most rectangle. There is a panel line approximately ¼” 6mm from the edge around the control panel. There is a panel line approximately 1/8” 3mm from the edge of each endcap. The inside edge of both endcaps is bevelled. The oval greeble consists of an oval tube protrusion with the top edge slightly extending past the tube wall thickness and is visually similar to the Deathtrooper chin greeble. The thermal detonator is made separate from the mount and secured to it. 8/31/2022 I added this due to the number of instances in which we've seen the TD disconnected from it's mount or missing on screen. Similar to the belt boxes, the TD should be separate, but fixed to the mount appropriately as per the screen references. Thigh Armor Moderate to heavily weathered 8/24/2022 The thigh armor is mirrored for each leg and not interchangeable. The cover strips are bevelled and approximately 1/8" thick that does not extend beyond the thigh and has a smaller cover strip layered thereon. The top edge of the thigh armor is unadorned, and the bottom edge has a raised detail that fallows the bottom edge contour. The small ammo belt consists of 5 evenly spaced rectangle ammunition boxes and is installed on the bottom of the right thigh, there are no visible screws or rivets. OPTIONAL Level two certification (if applicable): Thighs are loosely held closed in the back with elastic, shock cord (bungee cord) or white Velcro and are designed to remain flexible. 8/31/2022 Thigh armor has been seen several times separated (flexible) in the rear, but never worn in the same manner as the arms (bungee cords/ framilon cordage). Cover strips will cover both the front and rear joints. Rear cover strips will close outside over inside, i.e. left over right for the left thigh and Right over Left for the right thigh. 8/31/2022 OPTIONAL Level three certification (if applicable): The bottom outside edges of the small ammunition belt are angled chamfered at approximately 45 degrees. Thigh armor is suspended by a black strap approximately 1” 25mm in width with a plastic side release buckle tri-glide buckle that is covered by black webbing fabric or elastic that runs down the side seam of the leg. 8/31/2022 Lower Leg Armor Moderate to heavily weathered 8/24/2022 The greaves are mirrored for each leg and are not interchangeable. The top edge of the greaves has a raised detail that fallows the top edge contour. The bottom edge of the greaves flairs out to cover the top of the ankle and boots. The cover strips are bevelled and approximately 1/8" thick that does not extend beyond the greave and has a smaller cover strip layered thereon. Greaves are loosely held closed in the back with elastic, shock cord (bungee cord) or white Velcro and are designed to remain flexible. Cover strips will cover both the front and rear joints. The trapezoid knee plate (sniper knee plate) is affixed to the top of the left greave and there are no visible screws or rivets. Sniper knee plate must be aligned with the vertical cover strip and the top raised edge detail on the greave and is accurate in detail and proportion to official reference. OPTIONAL Level two certification (if applicable): The sniper knee plate has raised detail that fallows the top edge contour. The sniper knee plate has 3 trapezoidal lugs on each side and 2 on the center bottom edge (totalling 8) of the knee plate. OPTIONAL Level three certification (if applicable): Boots Moderate to heavily weathered 8/24/2022 Boots are above ankle height and the same style as the First Order TK. Chelsea type boots in the style of OT TK are not acceptable. Boots are all white and made of leather or leather-like material Flat black soles without a heel. Patent leather or high gloss is not permitted. OPTIONAL Level two certification (if applicable): There is no seam present on the front of the boot. The wearer's inner side of the boots have zippers and no side elastic. OPTIONAL Level three certification (if applicable): Optional Accessories Items below are optional costume accessories. These items are not required for approval, but if present appear as described below. If adding in an accessory after initial approval, the item still needs to be submitted to local GML for approval before use. E-11 Blaster Weathering is optional 8/24/2022 Manufactured by BlasTech Industries, the E-11 is standard-issue for many Imperial troops. Light, compact yet powerful, the E-11 blaster is always in high demand throughout the galaxy. "Note, the E-11 holster as seen in the Original Trilogy movies is not an authorized accessory for rogue One armor". Based on a real or replica Sterling Airsoft Gun, Sterling Sub-Machine Gun, scratch-built, or a modified commercial toy Stormtrooper blaster. A small flashlight shall be mounted on the right side of the blaster centred over the T-Tracks. OPTIONAL Level two certification (if applicable): Blaster shall be based on a real or replica S&T Sterling L2A1 AEG Airsoft Gun. (Folding Stock does not need to function) D-Ring shall be present on the rear end cap. Scope shall be a real or replica M.H.R. (Minneapolis Honeywell Regulator Co.) M38 Telescope. 1943 model is preferred. Counter shall be a real or replica Hengstler 400 Series counter. Eagle logo is preferred. Power Cylinders shall be mounted on top of the magazine well. R1 style power cylinders are preferred over ANH style. 6 rows of T-Tracks cover the Sterling receiver holes except for the lower left row with the bayonet lug. Flashlight shall be a real or replica Element M300A Mini Scout Light. 3D printed blasters can not contain visible print lines and must be sanded smooth for a more realistic appearance. OPTIONAL Level three certification (if applicable): Scope shall be a real or replica 1943 M.H.R. Co. M38 Telescope, 1942 model is not allowed. Counter shall be a real or replica Hengstler 400 Series counter with Small eagle logo. Large eagle logo is not allowed. Power Cylinders shall be R1 style, ANH style is not allowed. SE-14r Light Repeating Blaster Weathering is optional 8/24/2022 SE-14r Light Repeating Blaster. The barrel detailing is evident with the cocking lever and slider in place. The ejection port is also evident. The scope mount looks similar to the magazine but smaller in size. OPTIONAL Level two certification (if applicable): E-22 Blaster Weathering is optional 8/24/2022 Based on a real or replica Sterling sub-machine gun, scratch-built, cast, 3D print or a modified commercial toy Stormtrooper blaster. It has a extended stock attached at the rear and a extended front housing with second lower barrel. Tactical flashlight (Surefire scout M300 or replica) mounted on right side of barrel. Magazine is extended length. Power cylinder is larger with 2 outer cylinders and 2 smaller central cylinders Scope is a M38 1943 version Scope rail is fitted onto rail blocks, one inside the rear sight and the other at the front end of the rail. There are 3 swivel studs fitted, one on the rear stock and one each side of the front barrel housing. Sling is 25mm webbing strap that is adjustable using a silver 25mm 3 fixed bar webbing buckle (optional). Sling is fitted with Talon quick release 25mm swivel or replica (optional). Red lights fitted on both sides of the rear housing, Hengstler fitted with a red light for the 3 forward tubes and 2 small red lights fitted into the rear barrel housing under the torch, the lights are permanent and are non flashing or pulsed (optional hero version only). OPTIONAL Level two certification (if applicable): Base is based on S&T Airsoft sterling with closed working parts (no spring) Screws used are M4 x 25mm Allen screw/bolts and sunken Allen screws for power cylinders Sling is fitted with Talon quick release 25mm swivel. Pauldron Rogue One Pauldrons denote rank or mission specialization. The Rogue One Pauldron is specific to Rogue One and differs from the original trilogy in color and stitching. Original trilogy Pauldrons are not an authorized accessory for Rogue One armor. An Orange, white, or black ornament made of leather plastic or leather-like material, worn over the right shoulder. The Orange is specific to Rogue One and a different shade from the original trilogy. A red pauldron as seen in The Mandalorian Chapter 14, may be worn as part of the New Generation TK costume, but not as a Rogue One stormtrooper. 8/31/2022 The colored panel is divided into three sections by color matched stitching to conform to the wearers shoulder and has black piping around the outside edge. The remainder of the Pauldron is black and divided by black stitching into 10 segments. The neck closure is black and has two black snaps visible. There is a black elastic strap that runs from back to front and is worn under the bicep to hold the Pauldron in place. The strap is conned to the Pauldron on top by two black snaps inlayed in black “D” shaped leather or leather-like ends. The underside of the Pauldron is white regardless of top color and is divided with white stitching into 13 segments. The entire outside edge is finished with black piping and the underside of the neck closure is black. OPTIONAL Level two certification (if applicable): OPTIONAL Level three certification (if applicable):
-
Gary, Glad to see you on the forum. I’m getting ready to hit the sack, so I’ll be quick. I spoke with Vincent at Imperial Boots a while back about their neck seal. They’ve started sending them out as a one size fits all item rather than offering several different sizes. The idea is that you’ll take it to a tailor to get adjusted. I was going to do a tutorial on resizing it, but I got rather busy. Regarding the undersuit, I can’t say enough good things about the full body suit from Imperial Boots; it’s phenomenal. However, like most ROTK undersuits, the ribbed knit fabric is hot. I also have a shirt and gaskets from the Darkside Closet which looks incredible, but again, you’re going to sweat a lot in it. Additionally, Mike has a rather long wait list, so if you want to get one, you should order it now. In my opinion, you can’t go wrong with a Jimmiroquai undersuit. The price is right, Jimi completes the work and ships quickly, and the fabric combination is a lot more suitable for hotter weather. Finally, regarding the helmet, I know I passed some info along while you were at the armor party, but if you have access to a 3d printer, I’d really encourage you to print the Nico Henderson bucket. Ultimately, the amount of work you have to do to his helmet (filling, sanding, painting) is about the same as the Black Series modification, plus it’s a lot more accurate. Anyways, I’ll be watching this build with great interest.
-
Name: Thor Nualsumlee Armor Maker: Anovos Helmet: Anovos Gaskets: Geeky pink Boots: Imperial Boots Height & Weight: No shoes I am 6’ even 165lbs Hello! I just moved from California and i’m trying to get into 501st Carolina Garrison with this new FOTK armor. Sadly I had to let my ANH hero go so I have to get re-approve with this new one. I requested Legion of the Guard to transfer my TKID over but currently I am retired looking to get back into the game. Thank you for helping. https://ibb.co/HHv6vFb https://ibb.co/qFFhZ5k https://ibb.co/QpSWfwg https://ibb.co/JmLfp0B https://ibb.co/VVPWMZ2 https://ibb.co/MDTxb5C https://imgur.com/a/BL8FjUv
-
Name: Ardeshir Radpour Username: equuspolo TK-42128 Southern California Garrison Los Angeles Squadron Height = 5'10 Weight = 165 Armor Maker = KB Armor - Trimmed to fit like Anovos Helmet Maker = Anovos Premium Fiberglass and Anovos Plastic Helmet Boot Maker = Imperial Boots Gloves = Endor Finders Belt = Trooperbay Belt Pouches = Trooperbay Pauldron = Trooperbay Neck Seal = Imperial Seamstress Holster Maker = Dan Sczudlik Gaskets = production made silicon rubber gaskets F-11 = Branfuhr Studios Resin Kit- Custom built by me with custom light system. SE-44C = 3DPrintMerchant Electronics = Wireless Microphone with Acker Amp Custom Parts = Chest yoke and Backplate welded together with ABS Slurry. Chest Pills and Chest cut out backed with Textured Fabric, TD slurry welded. Entire armor painted with Rustoleum 2x Glossy White. Belt, Cod, Butt Plate attached to armer with Anovos leather waist tassets EIB Approved FIBERGLASS HELMET PLASTIC HELMET updated blaster
-
Name: Ardeshir Radpour Username: equuspolo TK-42128 Southern California Garrison Los Angeles Squadron Height = 5'10 Weight = 165 Armor Maker = KB Armor - Trimmed to fit like Anovos Helmet Maker = Anovos Plastic Helmet Boot Maker = Imperial Boots Gloves = Endor Finders Belt = Trooperbay Belt Pouches = Trooperbay Pauldron = Trooperbay Neck Seal = Imperial Seamstress Holster Maker = Dan Sczudlik Gaskets = production made silicon rubber gaskets F-11 = Branfuhr Studios Resin Kit- Custom built by me with custom light system. SE-44C = 3DPrintMerchant Executioner Axe = 3DPrintMerchant - Resin Axe with reinforcements Electronics = Wireless Microphone with Acker Amp Custom Parts = Chest yoke and Backplate welded together with ABS Slurry. Chest Pills and Chest cut out backed with Textured Fabric, TD slurry welded. Entire armor painted with Rustoleum 2x Glossy White. Belt, Cod, Butt Plate attached to armer with Anovos leather waist tassets EIB Approved
-

fishgoh0nk's TLJ Build Thread (KB Props)
fishgoh0nk replied to fishgoh0nk's topic in TLJ Build Threads
I guess it'll be good to put where I'm sourcing the soft goods from: Gaskets, harness, neck seal, shiny shorts - GeekyPink's Boots - Imperial Boots Gloves - (likely Endor Finders) Belt - Might try to tackle this from scratch Pouches - Might try to tackle this from scratch -
Hey all, apologies for the lack of updates on this thread... where does the time go? I admittedly have had a bunch going on lately (which I'll post a bit about here - again, my threads are less of a 'how-to' and more of a diary of my journey, and often includes a bit of life updates as well for those curious...) but I have also made some progress that I haven't shared just yet. Hang on, it's a doozy. Sooooo what's that ol' Rascal been up to? Frankly, I've been super burnt out, took some time off, and am easing back into things. I was fortunate enough to be part of a pretty cool project over the summer and ended up working on (building or rebuilding) like a half dozen suits in a very short timeline, and by the end of it, didn't even want to look at armor again for a while! haha More on that... later maybe. Next up, let's do a workspace update - I finally took the time to do a little garage/workshop remodel, so I could stop building armor in the living room of our one-bedroom. This little overhaul included doing some restoration work on an old metal workbench and vice that was left to me by my late grandfather. The workbench was cleaned up, repainted inside and out, got a new laminate top, a very cool oversize architect style light, second movable clamp light for detail projects, new hand press for snaps/punches, a power strip, cutting surface, drawer organizers, and an old monitor I had laying around (with VGA-to-USB-C connector, so my phone can run an Android desktop environment on it - great for displaying reference materials, how-to videos, etc). The old Columbia vice was also disassembled, cleaned, sanded/filed, and repainted somewhere near its former glory. I was also fortunate enough to receive a couple of new tools as wedding presents, including a very nice Milwaukee drill from @Ninety-Nine and a cordless rotary tool. I also got some pretty awesome Wall Control pegboard for behind the bench, to hold many of my tools (and a row of blasters). Finally, I updated my little patch collection wall in the space above it - featuring some fun FISD, IOC, and Southern California Garrison/Orange County Squad patches (my personal units). A brighter, directional main garage light also replaced the bare low-watt bulb. Pretty happy with how it all came out, but I still have a good deal of organizing to do and will likely add some more bins/organizers to the side. I added a lot of links in case anyone wants to know where this stuff came from - I'd recommend any of it! Before: And after (still a work in progress): Speaking of wedding presents, I took a good deal of time out this summer to help plan things out, and well... get MARRIED! My wife (and Jawa, DZ-71490) and I had a beautiful, small ceremony in August at a resort overlooking the beach and it was a phenomenal day. @Dsposato0 was kind enough to help MC and represent the FISD Crazy enough, a few weeks after the wedding (bringing us to the last couple weeks), and she ended up spending a long weekend in the hospital with a burst appendix and recovering, so armor again went on the backburner while I took care of her. She's doing much better though and work continues! I also was PET-scanned again this summer and continue to be in remission from cancer, so that's cool too. Butttt I also ended up taking a fin to the back of the head while out surfing in May and needed 20 internal sutures and 17 staples to hold my head shut, so that wasn't fun and prevented me from wearing a bucket for about 6 weeks (Hall of Meat - a pic of the wound for those with a strong stomach). It healed up well but again, set me back. We've forsure had ENOUGH medical issues to deal with lately. I have a build for @JHowe102 and a new Shadowtrooper recruit I'm currently still working on (but nearing completion), then once those are out the door, it will be back to focusing on the FOTK, then on an Anovos ANH build to replace my original ANH-S suit that has seen some battle... I was able to be patient in my search and came across a deal I couldn't say no to. I won't be doing a build thread persay (why, when @ukswrath has it fully covered?) but will likely do a little 'tips and tricks' thread, showing some of the techniques and tools I use throughout my build, and maybe it'll help someone (or me with your comments!). Still a bit backed up in the (MESSY) workshop though. Okay, so where's the FOTK at?! So let's start with a little spoiler for future projects (since I SWEAR I'm done for a while after closing all of these open projects out... adding some little troopers will be the focus!)... I bought more armor haha I found someone selling JUST the pieces needed to upgrade from TFA to TLJ, also from @jimmiroquai , and painted, 'ready to wear'. I saw the Facebook Marketplace post right around when the new Black Series TLJ buckets started shipping, so it felt like fate. You'd think I'd have learned my lesson about BS conversions, orrr about buying secondhand armor, but nope - I had these parts shipped from the UK and was pretty disappointed in the paint preparation and overall quality. You can literally see where a piece of masking tape was left and just painted over... the chest pills were hacked pretty haphazardly... and there was both topical damage (scratches/gouges) and casting imperfections that were never addressed originally - NOT up to my high standards. It'll be a full sand and repaint too. The other downside of this new set of armor is there was a LOT of velcro epoxied into it that was very difficult to remove. One upside is that it has not had additional resin added to the interior, so it is significantly lighter than my other chest/yoke. I'll likely add some resin, but NOT as much as the other suit, which will likely get sanded back a bit. I'll actually probably use the new chest/back/shoulders (not the cod/TD) for the TFA that I'm likely to wear more often, and the heavier stuff for TLJ. Another pretty big update is that I have been working with Sheev's Emporium a bit and snagged one of the first of their new full soft good kits (gaskets, neckseal, and rigging) for FOTK's and the stitched ribbing is probably the best I've ever seen. Looks like a very well designed kit and I'll be excited to take delivery this week hopefully (will post an update). I also have shiny shorts coming from @Soulart/Geeky Pink's, and already have Trooperbay gloves and Imperial Boots chukkas in hand, so that should be all my soft goods accounted for. I also snagged a rubber F-11D since I decided to sell the 3D printed one I have instead of trying to sand the myriad of print lines out. The gentleman who cast it was both former Praetorian and Ano...ther company, and apparently there is some controversy as to the ownership of his mold over on Faceballs, soooo that was a whole thing. But it's a solid, good looking rubber blaster and was a fair price, so whatever. I'll get around to painting it up as well and will likely use it as my trooping blaster, but won't try to add electronics to it. Okay, but where's the actual armor at?! The armor still has a long way to go, and I've had several minor (that feel like major) setbacks, and much like my ROTK, I can tell that several steps in the process are very linear and need to happen before I can move on to the next. The first and most daunting is adding the additional resin to the new pieces. For many months (freakin' pandemic Etsy hobbyists) resin has been very difficult to come by, and I am FAR from an expert in it, so I was really trying to buy the same stuff I used on my ROTK that worked well, but it has been out of stock (and the can I had went bad... resin has a short shelf life and I should have known that). I finally was able to find what I believe is a comparable product in stock at a reasonable price, so that's up next. Happening somewhat in parallel has been general paint prep. I started with the new chest and back/yoke, and well, this isn't even as many priming/sanding passes as I've done total, but here's a few shots. I've definitely learned since doing my ROTK and need to be a bit less of a perfectionist, and to "follow the rules" when painting - stuff like to allow for proper dry times, don't try to paint at night or when it's cold/humid, mask and manage for overspray, etc... always lessons being learned the hard way, but it's coming along. Another big lesson I learned is that my ROTK... is too shiny. The screen used suits are maybe a semi-gloss at best, but definitely don't have a thick layer of high gloss clear like mine. While it does look great, the time and money I spent to get it that way... really just wasn't worth it. What I DO like about the paint is how hard and scuff resistant it is, which I attribute to the 2K paint. I think for this one, instead of a Rustoleum white base with 2K clear on top, I'm going to try just USC's 2K Gloss White on top of white primer and call it a day. This should in theory be MUCH easier to repaint in the event of damage... which has already happened to my ROTK and now that I have to think about repairing it, I wish I had done differently (live and learn). I haven't had major issues with using THIN layers of Dynatron filler (which is similar to Bondo glazing putty) but I was recommended USC Garage's Flexible Glaze, which is a 2 component filler. I'll SAND the old paint, make any structural/deep REPAIRS with Apoxie Sculpt or marine epoxy, then a thin layer of filler/GLAZE on top, then PRIME with light colored filler primer, then white sandable primer moving forward (scratches/chips on the ROTK revealed the dark colored primer, which wasn't ideal), and then TOPCOAT with the 2K gloss white. I'll be doing the inside with satin white, as the flat I used last time tends to scuff and transfer color more. I'll probably be purchasing one of those decent sized paint booths that are like a popup camping tent since I made a huge mess in my garage last time, even after hanging plastic sheets. Anyways, I think that's it for now... LONG overdue, but hopefully updates will be coming more frequently now and I'd like to have this thing approved by the end of the year. My brothers in the SoCal Garrison (including @equuspolo, @Surfintrooper, and @yo_its_nino) totally inspired me with this photoshoot over the weekend, and it is too cool not to share! Photo by @KC Grim who may be joining the FO ranks soon as well! LONG LIVE THE FIRST ORDER!
-
After reading/researching other build threads here, observing and talking to local garrison members I am starting one of these threads! My first official build step (other than acquiring the kit). I just purchased a kit from a fellow garrison member here in VT who lost interest in the build . The good thing is it is staying within our local squad and most of the trim work is done (only the belt, ab boxes and ankles left). All the soft goods came with the purchase as well . The kit is from Back Stage Props, that I believe, has since gone out of business. I have two other members @ShadyP here that bought this run a few years ago who I will be working with. The known issue with this early kit is the lack of a return edge on the chest yoke. I am in communication with a few vendors to see if I can get a replacement part instead of trying to build an edge. Here is what I have so far with a few pics: Boots: Imperial Boots Belt kit: Belts of The First Order Pouches x2: Trooper Bay Gaskets: Geeky Pink (he and I are are ironically close in size- 5'6" and slim) Tactical vest Gloves: Endor's (I think) Under suit: UK Extreme Racing Helmet: Anovos "BBB Day" for me was the day I got to pick everything up from my fellow squad member! Nice boxes of pre-trimmed armor I started to lay everything out and label L/R Belt Kit Blaster base and shoulder bell hanger Greeblies (I think everything is here?) Gaskets