Search the Community
Showing results for 'Geeky'.
-
Time for yet another round of "What have I gotten myself into this time?" courtesy of Sharkbait (ooh ha ha!). After numerous people telling me I should do a Phasma, what the character could (and should) have been (don't get me started on TLJ), how awesome Gwendoline Christie is, and that Make-A-Wish troop I don't stop talking about ever where our then-Squad Leader pulled every favor he ever had and then some to get the Make-A-Wish little girl her favorite character, Phasma (at the time there were about 10 Phasmas in the entire Legion), and I got to troop my TK along side, I finally decided I was going to do Phasma. Armor: KB Props, in hand Helmet: JImmi - in hand (Thorsson, in hand- being relegated to battle damage Phasma prop) Neck seal: Geeky Pink's, in hand Gaskets: Geeky Pink's, in hand Fingers: Jim (Starbuckcylon) (resin), in hand Belt: Jessica's, in hand Undersuit: TK undersuit/Easbay compression shirt and pants, in hand Cloth belt pouches: TrooperBay, in hand Boots: In hand, random black boots found on clearance for $12. Ended up using Calto lifted shoes. Inserts: 4.4''. I estimate with my barefoot height (5' 11''), the boot heel (1''), the inserts (4.4'') and the dome on the helmet (1''), I'll stand at about 6' 4''. Using lifted shoes for total lift, not inserts, but height still remains the same- about 6'4'' in costume. Cape: Jessica's, In hand Blaster: Heston3DSolutions F-11D in hand, chromed Chroming: Current plan is one of two professional chromers for the armor, I will do the prop helmet and blasters myself to save on costs. Extras: Heston 3DSolutions SE-44C, in hand and chromed and JJ Industries quicksilver baton. Are either from TFA? No. Do I care? Obviously not. Haha- hence "extras." Majority of my events are non-canon, the public doesn't know the difference, and that baton is amazing and I knew I wanted to play with it regardless. Toys and photo props and talking pieces. I won't use them at every troop, just once in a while for the fun of it, and obviously they will stay at home for the few canon troops we get. Also Heston had another 50% off sale and I had been toying with grabbing a SE-44C anyway, so just take my money already. Goal Timeline: Finish by the release of Episode IX - December 20, 2019, so I can troop that premiere (locally). Well, that didn't happen. New goal is Fresno State Men's Basketball Star Wars Night, January 4, 2020. Submitted for the third time 09/10/20. Third time's the charm, right?
-

SageLeader's TFA FOTK Build (Walt's Trooper Factory)
sageleader replied to sageleader's topic in TFA Build Threads
I'm finally back working on this again. I received my gaskets from Geeky Pink's so I feel like I can actually try to fit things. I still have a bunch of cutting and sanding to do. The goal is to have this done by Celebration. So I have about 90 days left. A couple questions in my planning: 1) If you had to estimate how many hours it takes total to complete a kit, what would that be? Trying to gauge how many hours per day I need to spend on this. 2) Does every kit need to be completely painted? I live in NYC so spray painting would be very difficult and I'd like to avoid it at all costs. The greeblies from WTF are a little yellow so they don't match, but I can either a) 3D print my own white ones or b) paint just those and get a paint to match the ABS plastic. I'll post some pictures as I get done with some sections. Do people find it's easier to trim/sand everything first and then fit different areas or to trim/sand an area (like shins) and fit them at the same time so you can complete that section? -

Got the builder and looking for tips on E-11, boots etc
gmrhodes13 replied to BATS2150's topic in New Member Introductions
For the the shorter trooper these are some great builds to follow https://www.whitearmor.net/forum/topic/38416-crickets-rs-stunt-build-for-the-vertically-challenged/ https://www.whitearmor.net/forum/topic/38842-fragarocks-rs-stunt-build-not-to-scale/ https://www.whitearmor.net/forum/topic/42868-sha-shas-wtf-anh-stunt-build-complete/ Imperialboots do runs of TK boots Undersuit, sporting compression shirt and pants work well, normally can find them quite easily E-11 suppliers Neck seal Teresa Geeky Pink Don't forget to check out this thread for resources -
 Hi, I already started on my build a few months ago, but someone reached out and suggested I make a WIP thread here. Makes sense... As White Armour has been my go-to for trying to work out how to put this all together. My WIP is slightly different as I'm also documenting in detail a video log on my channel. (CLICK HERE TO CHECK OUT GEEKY GOODNESS) Wondering why the following posts are the same date?! It's just to catch everyone up what I've done so far So we start with what and were I purchased everything so far. I've been soooo LUCKY that someone abandoned his attempt to make his armour, and sold all his 'soft' items for half the price he bought it for. Being in the UK as me, this was AMAZABALLS, as I didn't have to also pay for the HUGE import taxes and delivery charges from the US, Germany, Canada and Oz. First I downloaded The5thHorseman 3D file I found on this site. But I also added my bespoke light & sound effects using my girlfriends voice. Yep it's not cannon (pun intended), but I can turn it off at an official event. Here's the full video and some pics... (CLICK HERE TO SEE THE VIDEO) And here's the 'beauty' video of the final result. (CLICK HERE TO SEE A BEAUTIFUL BLASTER VIDEO)
 -

CptCasey's Captain Cardinal Build Thread [WTF]
CptCasey replied to CptCasey's topic in Captain Cardinal Build Threads
Character Research Name: Captain Cardinal; CD-0922; Archex History: Born on Jakku and was recruited by Brendol Hux. One of the first First Order Stormtroopers. Was the first captain of the First Order Stormtroopers. Given a set of red armor by Brendol Hux and made his honor guard. Was in charge of training all Stormtroopers, until Phasma joined the First Order, and then was in charge of the training of all the children who were to become stormtroopers. Was grievously wounded by Phasma, and left the First Order. He later helps the Resistance on Batuu, and eventually sacrifices his life help Batuu and the Resistance spy, Vi Moradi. Costume: There are four main visual references for Captain Cardinal. The first is the back of the book cover. Second is the promotional poster that was released with book Third is the Hasbro Black Series action figure. There are several detail pictures found here on FISD, so I will just post one. Lastly is the Black series helmet. Discrepancies: The helmet from the book cover and promotional poster is visualized as TFA style, while the Black Series action figure and helmet are from TLJ/TROS. It is my belief that the TFA style helmet/armor is correct due to the timeline. The beginning of Galaxy's Edge: Black Spire (which is a sequel of sorts to Phasma) is set several weeks after Captain Cardinal leaves the First Order. During the first part of that book, events of TFA and TLJ happen. It is fairly clear that all of Captain Cardinal's history of the first order is prior to TFA and should be similar armor. The boots are not clearly show on the book cover or promo poster, but are shown on the action figure. The boots are mentioned as being red in the novel Phasma. Captain Cardinal is described as having a red blaster in Phasma. I would assume that he would have color matching SE-44C, F-11D, and a F-11D Heavy. Armor style in book cover, promotional poster, and action figure all show standard First Order Stormtrooper armor, and not Phasma style armor. Seeing as how Phasma made her own armor and was not issued armor, Captain Cardinal should have standard TFA armor in red. The cape is show in several different ways. It is show with a silver stripe in 2 of the 3 references and no stripe in one. It is shown on the right shoulder on 2 of the 3 references and on the left shoulder on one of the references. I've reached out to Teresa Nuthall (Geeky Pink) who is making my cape. She has received guidance from the author that is is exactly like Phasma's cape, except with a grey stripe and worn on the right shoulder. Color: As far as color goes, none of the references are the exact same color, but they are all close. I am choosing to use Duplicolor Torch Red. This is the color I found that closely matches the references and also matches my gloves and shoes. All above information comes from the books Phasma and Glaxay's Edge: Black Spire, unless noted. I may add more to this section if I find any additional information. -
After pining over this character for nearly five years, I have finally committed to building my own set of armor. This will be my very first armored costume, so I’m quite nervous about it. Depending on who is measuring me, I am about 6’ tall (give or take an inch), so the prospect of portraying a tall character like Captain Phasma is something I am really looking forward to doing. I chose to do The Last Jedi version simply because I like the bright chrome look over the weathered version. Pieces of my costume: Helmet: Shawn Thorsson (first run, 2015) Armor Kit: KB Props (on order) Boots: Dr. Martens Flora Chelsea Boots Neck Seal: Geeky Pink’s Fabric Gaskets: Geeky Pink’s Rubber Gaskets (for EIB): ??? Belt: ??? Undersuit: ??? Cape: Sewn by me I’m still in the early stages of building this costume, so my first steps are to prepare the helmet, order everything else I need, and start on my cape. I do plan to eventually submit it for EIB status, so I am not cutting any corners along the way. This is going to be fun, I think. Terrifying, but fun.
-

Sea_Marshall: Captain Phasma TFA
Sea_Marshall replied to Sea_Marshall's topic in Captain Phasma Build Threads
T&A was a one stop shop for a lot of the items in the kit, including rubber gaskets. I was referred Geeky Pink on Facebook for cloth gaskets but I'm going to give what I have a go before buying into other items. T&A's is a one size fits most. I used some CA glue on the ribs and bound them together. The arms were a good fit, but the knees are a tight fit. At this point, I'm not sure about the shoulders, I need to research how they're worn. I'll be adding a strip of nylon down the seam of the gasket to help secure the bond. It's pretty solid as is, but reinforcement isn't a bad idea. The knees, when wrapped, don't fit up my knee/thigh, even though tapered. So, I'm attaching a section of black elastic to help fill the 1.5 inches I need for a good fit -- this means the gasket won't be a complete wrap as far as the ribs are concerned, but elastic at the back will be out of sight and covered by the cape. If this proves to be a CRL issue, I'll hit up Geeky Pink for a set of gaskets since she will build them to size. The Liquitex gloss gel and black paint showed up. Red for the stripe will be end of week. Here's a test swatch with the gel alone and with black paint added, with D23 references to the cape. The gel goes on white and dries clear. Not a huge difference, even when light hits the gloss coat. I'm going to go with adding black paint because there are parts of the cape where it appears glops are on the finish. Having the black color should help achieve the glops. Thinking about the size of the cape, I hope this 16 oz tub of Liquitex will get me there. I didn't need to coat it too thick for this result. -
 I've been searching the forum a lot to prepare for my ROTK build, and I think I've noticed there are at least two approaches to all "the black stuff" under the white armor. One has you wear a typical athletic shirt and pants (together or separate) with the visible gaskets (e.g. Geeky Pink's Phantastic Gaskets) worn over them or even attached to the armor. The other is to get a shirt and pants with integral gaskets (e.g. Jimmiroquai and Darkside Closet). People sometimes mention this in their build threads but don't go into details. I'm trying to decide on the best approach, so I'm wondering if folks wouldn't mind throwing out some pros and cons to the different methods and vendors. The mesh areas in Jimmiroquai and Darkside Closet seem like they would make for a cooler trooper in the summer. Thanks for any help!
 -
Started to list my parts collection in the first post. but I will also list it here. Parts: Armor - KB Props (May the 4th A-) Helmet - Anovos Standard (FA and TLJ) {also got a KB FA helmet, but I may sell it} Gaskets - Geeky Pink’s (Then perhaps rubber ones) Neckseal - Geeky Pinks or Anovos (have both) Belt - Belts of the First Order Belt Pouches - Trooperbay Gloves - Imperial Boots Boots - Imperial Boots Metal Holster - R2Dan (order request posted, no response at the moment) F-11D - Imperial Factory and Anovos F-11D guts - BlastFX SE-44C - Imperial Factory Voice Amp - TRamp
-
 Hey all! Not much progress, but some updates! On the bright side, both of my other side projects have been completed - the Shadowtrooper I was mentoring has been approved and received his TKID this week! And the other suit I was building for a friend is out the door as well, so focus is back on the FOTK and finishing out my various other little projects. Since my last post, soft goods from Sheev's Emporium and Geeky Pinks have been delivered! I was EXTREMELY impressed with the care and attention that was put into packaging both orders, and with the overall quality of each. They'll obviously, definitely need some additional tailoring, but are in the right ballpark out of the box, and I'm very excited for them. I threw everything on with my TLJ BS helmet real quick for a test run below! I'm supersuper impressed with the stitching on the ribs that Sheev's does - my seamstress literally almost didn't believe that it was sewn and not a pattern until I showed her the backside. The material is also super flexible and pretty breathable - I won't be cool, but it's genuinely not THAT hot. The arms and 'shirt' actually fit pretty spot on (and I LOVE the accurate change in direction on the ribs), but the pants need to be trimmed to bring the knee gaskets up about 2", and I'll be adding stirrups. The shiny shorts fit pretty well, but will also need to be shortened. Neck seal quality is top notch (albeit worn crooked in the pic, my bad) though I may add some velcro to keep the bib held down. While we're on the topic of new stuff, I did order the shoulder/yoke reinforcement brackets from Tony, and I'm currently trying to figure out if/how I can install them, as I believe they were designed with ABS kits in mind. They still may work for me with a little bending and trimming. Interestingly enough, I pulled the holster off and noticed it is not in fact an R2-Dan and all metal as I thought, but a metal faceplate on a resin block. Still nice with the metal screws and all, just needs a repaint and I may use it until I can snag one of Dan's. Finally, I did end up selling the 3D printed F-11D from my original post to a garrison mate... I honestly just didn't want to sand it that much. I happened across a great deal for the above blaster and am pretty hyped on it. Metal accents really make a statement! And just some closing thoughts from @Dsposato0 and I - hit the bar, hang with friends, just make time to have some fun too, like we did at the Funko Pop Hollywood flagship store recently! Cleaning up the workshop over the Thanksgiving holiday here in the States, but I should have more to post once I get back into the bodywork on the suit!
 -
Well, took forever to figure out the best way to do all the strapping/suspension. I tried using the fancy top from Sheev's I had bought, posted above, but found I couldn't get the bicep armor far enough up my arm to be in the right spot, as the material would bunch up too much and keep me from getting it into the right position. Ended up using Ukswrath suspension kit, shoulder and elbow gaskets from Geeky Pink's, and with the pants from Sheev's for a test fit. Worked well enough, except that I didn't put a belt through the pants, and as the suspension for the thighs and such hangs from it, after walking around for a bit they all started to slide down. Easily fixed with a belt later on. I'd really like to get the Sheev's top to fit, as it would make suiting up immensely easier compared to having suspension both from the shoulder gaskets and Uks kit, but we'll see. Oh, also got the belt sorted out. Used a kit from Belts of the First Order. Nothing too fancy about assembly, just following the assembly directions, although I am still fidgeting with how to wear it exactly. I installed a pair of snaps on the front of the ab plate for it to snap on to, and then velcro across the posterior plate where it rests against to make sure it's secure and doesn't droop. The only problem I have is that I had already assembled the belt before the velcro, so the velcro is only adhered with the mounting adhesive to the belt, so whenever I take the belt off the velcro seems to go with it. Once everything is on it seems to be secured well enough, but I'd like to figure out something a little more secure.

-
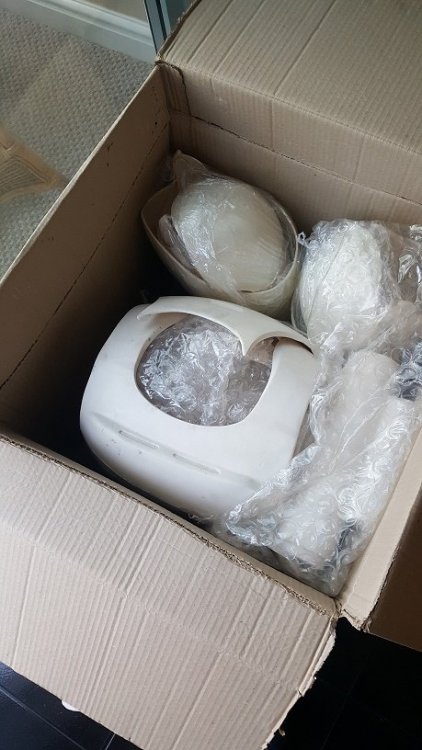
Hello fellow troopers, Been meaning to post something for a while but work and life seem to always get in the way - so apologies. I will start by saying that I have completed my build and had clearance approved by my local garrison but I still wanted to drop some notes in here on issues I came across / experienced along the way in the hope that it may prove useful or even just interesting to others on this journey......I will also include a bit at the end on some minor upgrades that I have completed and plan on completing, I'm also looking forward to seeing what other bits you guys can suggest to improve my build......... I will break up the build thread so its not just one long post and I will try to post updates as often as possible, but please dont expect anything like the quality of the build threads that ive seen from others, I'm just not that good .....tbh I forgot to take pictures a lot of the time!! So to start the list of bits / kit - Jim's TLJ fibreglass kit - think this was v4 - more on this later.... - Boots from Imperial boots - so comfy...... - Gloves - as above Imperial Boots - Belt - one of Darrens fantastic belts (Belts of the first order) - a work of art. - Undersuit - think this was from stormtrooper undersuit.com with shiny stictched in crotch area (ooer) - Gaskets - Geeky Pink - Neck Seal - Geeky Pink - Harness - home made - Blaster - originally from Heston studios but gave that to my son to play with and went with JJ industries 3d print (with my own electronic bits) - Aerator - 3d abs print from a friend - looks brilliant - Lots of sandpaper of various grades - Filler primer - P38 filler - Various webbing / elastics - Snaps - Small Files - Various screws / ball bearings for holster Pic below is from my BBB day, packaged extremely well and came within a matter of a couple of weeks after placing the order.... Note - Ive posted this in the WIP section but if any Mod feels it needs moving to the general TLJ area then please move ....
-
If you can be bothered to rewire your voltmeter, you could consider one of these.... https://www.ebay.co.uk/itm/Voltmeter-DIY-Mini-Digital-Timer-LED-Display-Car-Electric-Clock-Thermometer-/383581823026?mkcid=16&mkevt=1&_trksid=p2349624.m46890.l49286&mkrid=710-127635-2958-0 (UK eBay but shipped direct from china) It's a voltmeter/thermometer/clock, and I mounted it in the front of my lid near the back of the hovi tips. I had to put some masking tape over the display otherwise it lit up my face so much you could see me through the lenses. It's utterly overkill, but very geeky and I love it [emoji1]
-
Hey all, apologies for the lack of updates on this thread... where does the time go? I admittedly have had a bunch going on lately (which I'll post a bit about here - again, my threads are less of a 'how-to' and more of a diary of my journey, and often includes a bit of life updates as well for those curious...) but I have also made some progress that I haven't shared just yet. Hang on, it's a doozy. Sooooo what's that ol' Rascal been up to? Frankly, I've been super burnt out, took some time off, and am easing back into things. I was fortunate enough to be part of a pretty cool project over the summer and ended up working on (building or rebuilding) like a half dozen suits in a very short timeline, and by the end of it, didn't even want to look at armor again for a while! haha More on that... later maybe. Next up, let's do a workspace update - I finally took the time to do a little garage/workshop remodel, so I could stop building armor in the living room of our one-bedroom. This little overhaul included doing some restoration work on an old metal workbench and vice that was left to me by my late grandfather. The workbench was cleaned up, repainted inside and out, got a new laminate top, a very cool oversize architect style light, second movable clamp light for detail projects, new hand press for snaps/punches, a power strip, cutting surface, drawer organizers, and an old monitor I had laying around (with VGA-to-USB-C connector, so my phone can run an Android desktop environment on it - great for displaying reference materials, how-to videos, etc). The old Columbia vice was also disassembled, cleaned, sanded/filed, and repainted somewhere near its former glory. I was also fortunate enough to receive a couple of new tools as wedding presents, including a very nice Milwaukee drill from @Ninety-Nine and a cordless rotary tool. I also got some pretty awesome Wall Control pegboard for behind the bench, to hold many of my tools (and a row of blasters). Finally, I updated my little patch collection wall in the space above it - featuring some fun FISD, IOC, and Southern California Garrison/Orange County Squad patches (my personal units). A brighter, directional main garage light also replaced the bare low-watt bulb. Pretty happy with how it all came out, but I still have a good deal of organizing to do and will likely add some more bins/organizers to the side. I added a lot of links in case anyone wants to know where this stuff came from - I'd recommend any of it! Before: And after (still a work in progress): Speaking of wedding presents, I took a good deal of time out this summer to help plan things out, and well... get MARRIED! My wife (and Jawa, DZ-71490) and I had a beautiful, small ceremony in August at a resort overlooking the beach and it was a phenomenal day. @Dsposato0 was kind enough to help MC and represent the FISD Crazy enough, a few weeks after the wedding (bringing us to the last couple weeks), and she ended up spending a long weekend in the hospital with a burst appendix and recovering, so armor again went on the backburner while I took care of her. She's doing much better though and work continues! I also was PET-scanned again this summer and continue to be in remission from cancer, so that's cool too. Butttt I also ended up taking a fin to the back of the head while out surfing in May and needed 20 internal sutures and 17 staples to hold my head shut, so that wasn't fun and prevented me from wearing a bucket for about 6 weeks (Hall of Meat - a pic of the wound for those with a strong stomach). It healed up well but again, set me back. We've forsure had ENOUGH medical issues to deal with lately. I have a build for @JHowe102 and a new Shadowtrooper recruit I'm currently still working on (but nearing completion), then once those are out the door, it will be back to focusing on the FOTK, then on an Anovos ANH build to replace my original ANH-S suit that has seen some battle... I was able to be patient in my search and came across a deal I couldn't say no to. I won't be doing a build thread persay (why, when @ukswrath has it fully covered?) but will likely do a little 'tips and tricks' thread, showing some of the techniques and tools I use throughout my build, and maybe it'll help someone (or me with your comments!). Still a bit backed up in the (MESSY) workshop though. Okay, so where's the FOTK at?! So let's start with a little spoiler for future projects (since I SWEAR I'm done for a while after closing all of these open projects out... adding some little troopers will be the focus!)... I bought more armor haha I found someone selling JUST the pieces needed to upgrade from TFA to TLJ, also from @jimmiroquai , and painted, 'ready to wear'. I saw the Facebook Marketplace post right around when the new Black Series TLJ buckets started shipping, so it felt like fate. You'd think I'd have learned my lesson about BS conversions, orrr about buying secondhand armor, but nope - I had these parts shipped from the UK and was pretty disappointed in the paint preparation and overall quality. You can literally see where a piece of masking tape was left and just painted over... the chest pills were hacked pretty haphazardly... and there was both topical damage (scratches/gouges) and casting imperfections that were never addressed originally - NOT up to my high standards. It'll be a full sand and repaint too. The other downside of this new set of armor is there was a LOT of velcro epoxied into it that was very difficult to remove. One upside is that it has not had additional resin added to the interior, so it is significantly lighter than my other chest/yoke. I'll likely add some resin, but NOT as much as the other suit, which will likely get sanded back a bit. I'll actually probably use the new chest/back/shoulders (not the cod/TD) for the TFA that I'm likely to wear more often, and the heavier stuff for TLJ. Another pretty big update is that I have been working with Sheev's Emporium a bit and snagged one of the first of their new full soft good kits (gaskets, neckseal, and rigging) for FOTK's and the stitched ribbing is probably the best I've ever seen. Looks like a very well designed kit and I'll be excited to take delivery this week hopefully (will post an update). I also have shiny shorts coming from @Soulart/Geeky Pink's, and already have Trooperbay gloves and Imperial Boots chukkas in hand, so that should be all my soft goods accounted for. I also snagged a rubber F-11D since I decided to sell the 3D printed one I have instead of trying to sand the myriad of print lines out. The gentleman who cast it was both former Praetorian and Ano...ther company, and apparently there is some controversy as to the ownership of his mold over on Faceballs, soooo that was a whole thing. But it's a solid, good looking rubber blaster and was a fair price, so whatever. I'll get around to painting it up as well and will likely use it as my trooping blaster, but won't try to add electronics to it. Okay, but where's the actual armor at?! The armor still has a long way to go, and I've had several minor (that feel like major) setbacks, and much like my ROTK, I can tell that several steps in the process are very linear and need to happen before I can move on to the next. The first and most daunting is adding the additional resin to the new pieces. For many months (freakin' pandemic Etsy hobbyists) resin has been very difficult to come by, and I am FAR from an expert in it, so I was really trying to buy the same stuff I used on my ROTK that worked well, but it has been out of stock (and the can I had went bad... resin has a short shelf life and I should have known that). I finally was able to find what I believe is a comparable product in stock at a reasonable price, so that's up next. Happening somewhat in parallel has been general paint prep. I started with the new chest and back/yoke, and well, this isn't even as many priming/sanding passes as I've done total, but here's a few shots. I've definitely learned since doing my ROTK and need to be a bit less of a perfectionist, and to "follow the rules" when painting - stuff like to allow for proper dry times, don't try to paint at night or when it's cold/humid, mask and manage for overspray, etc... always lessons being learned the hard way, but it's coming along. Another big lesson I learned is that my ROTK... is too shiny. The screen used suits are maybe a semi-gloss at best, but definitely don't have a thick layer of high gloss clear like mine. While it does look great, the time and money I spent to get it that way... really just wasn't worth it. What I DO like about the paint is how hard and scuff resistant it is, which I attribute to the 2K paint. I think for this one, instead of a Rustoleum white base with 2K clear on top, I'm going to try just USC's 2K Gloss White on top of white primer and call it a day. This should in theory be MUCH easier to repaint in the event of damage... which has already happened to my ROTK and now that I have to think about repairing it, I wish I had done differently (live and learn). I haven't had major issues with using THIN layers of Dynatron filler (which is similar to Bondo glazing putty) but I was recommended USC Garage's Flexible Glaze, which is a 2 component filler. I'll SAND the old paint, make any structural/deep REPAIRS with Apoxie Sculpt or marine epoxy, then a thin layer of filler/GLAZE on top, then PRIME with light colored filler primer, then white sandable primer moving forward (scratches/chips on the ROTK revealed the dark colored primer, which wasn't ideal), and then TOPCOAT with the 2K gloss white. I'll be doing the inside with satin white, as the flat I used last time tends to scuff and transfer color more. I'll probably be purchasing one of those decent sized paint booths that are like a popup camping tent since I made a huge mess in my garage last time, even after hanging plastic sheets. Anyways, I think that's it for now... LONG overdue, but hopefully updates will be coming more frequently now and I'd like to have this thing approved by the end of the year. My brothers in the SoCal Garrison (including @equuspolo, @Surfintrooper, and @yo_its_nino) totally inspired me with this photoshoot over the weekend, and it is too cool not to share! Photo by @KC Grim who may be joining the FO ranks soon as well! LONG LIVE THE FIRST ORDER!
-
From the Phasma FB Group: an old list so prices may have increased The Kits Helmets: Jimmiroquai (Jimmi/Jim): Jim’s helmet is $175 by itself. Requires some modifications to remove the excess eye flashing. Shipping ranges in price since it’s shipping from the Philippines. PM Jim for a shipping quote. Teresa Nuthall, Jessica Bowyer, Molly Lewis, Jen Belgin and Laura Williams have Jim’s helmets. You can find his work on the RPF. http://www.therpf.com/showthread.php?t=252114&highlight=jimmiroquai How to buy: PM on the RPF or Facebook (Shipping may take a while) Construction status: Message Jim Shawn Thorsson: Resin helmet. $225 for the raw cast plus shipping. Will require some mods as well. Ingrid Moon have Shawn’s helmets. Construction status: Active Misty Melillo started out with a Curtis Hoines helmet (Phasma V1) but now she has an Anovos for her V2. Armor: Jimmiroquai (Jimmi/Jim): Jim Tripon is the maker. His armor is made out of flexible fiberglass. It has some weight to it and certain pieces will flex, like the ab and calf armor. His newer kits are extremely accurate and are a fair bit lighter than some of the earlier versions. Jessica Bowyer, Jen Belgin and Molly Lewis have Jim’s armors. Cost is laid out as follows: Full set of armor and helmet: $980usd Armor only: $880 Jim requires a 40% deposit to start casting the kit. Shipping cost ranges. Message Jim for quote. You can find his work on the RPF. http://www.therpf.com/showthread.php?t=252114&highlight=jimmiroquai (Shipping may take a while. Message Jim for construction time) Phasma extras: Yes. Message Jim for info about what this involves. Construction status: Message Jim Shawn Thorsson armor: Shawn’s armor is made of fiberglass with some of the smaller bits made out of urethane resin. A complete kit costs $1965 and gets you all of the hard parts, helmet included. Shawn says the armor is best suited for those of a medium build. 5’8” and up. Misty Melillo has Shawn’s armor. Shipping varies, depending on buyers location. Shawn is located in Northern California. PM him for quotes. Construction time is 2-3 weeks depending on backlog. His process can be seen here: https://www.flickr.com/photos/8050182@N06/sets/72157659464323179 How to buy: PM on the RPF or Facebook Phasma extras: Yes. Message Shawn for info about what this involves Construction status: Active 850 Armor Works: 850 makes a basic plastic FOTK kit. Like KB, it fits a wide range of body styles with some trimming. Cost: Base kit is $600. Phasma upgrades is $150. How to buy: PM on Facebook. Construction status: Active (Helmet is not approvable.) ****All kits come with greeblies, finger armor, holsters and foot armor. Toe plates may need to be made by builder. See page for tutorials.**** KB also makes FOTK armor and Phasma kits, should be listed with Geeky Pinks thread Soft Parts (Gaskets/Neck Seal/Belt/Boots/Cape/Belt Pouches) Gaskets and Neck Seal: Geeky Pink’s Phantastic Gaskets: Our very own Teresa Nuthall stepped in to make gaskets for our group. Her gaskets are extremely well made and made with much love. Most will require some modifications to get them to fit to your body but she provides clear instructions. Teresa has a neck seal as well that runs about $45. She will take commissions for anything you might need. She’s done gaskets for Death Troopers and Shore Troopers. If there’s anything you want, PM her and she will do what she can to help. Minimal wait time for costruction. Cost: Contact Teresa Construction status: Active Neck seal: Amazon: $12-30 eBay: $15 Trooper Bay: $55 Darman’s Neck Seals: http://www.whitearmor.net/forum/topic/21385-darmans-neck-seals/ Cost: TK with velcro: $30+shipping TK with zipper: $38+shipping Gaskets: Imperial Gaskets: They make two kinds, a rubber latex version and a fabric version. Fabric version: $150. Has the shiny look that the rubber gaskets do but is latex free. Compression shirt neck seal: $75 Rubber version $300. Movie accurate. Will require some assembly and modification on your part. Contact: ImperialGaskets@gmail.com Construction status: Extreme Waitlist FN Armour: FN Armour gaskets are pretty common but a word of caution, the FN company has had issues with recasting in the past and has been placed on various DNB lists throughout the FISD. Their gaskets aren’t very popular with many of the Phasma’s. Consider going to another maker. Construction status: Caution Jim Tripon gaskets/pouches: Jim makes gaskets for his FO armors. They’re cloth and pretty sturdy. Cost: $120+shipping Pouches: $20+shipping (Both of these can be included with the armor. Jim recommends Imperial Gaskets, for more screen accuracy.) Sister Margaret’s Gasket Emporium: Sister Margaret’s works in Waves. Which means orders will be taken until slots are full and then construction will begin. This is a group of 1-1.5 so construction runs in a limited manner and as such may take some time. According to Sister Margaret’s maker, this would make a great alternative gasket maker. Orders may take 2-4 months to complete. Cost: Monies only due at time of sale once items are shipped. Currently sets with internal ribbing is set at 255 before shipping. Without internal ribbing and instead double foam (ribs will collapse a bit but not as much) 180. Message for pictures of different styles. Larger sizes would start at that price but wouldn't move much. Shipping is through Fedex Contact: PM on Facebook Cape: Jessica Bowyer is one of our own. She makes a gorgeous cape that is screen accurate and comes in two versions. There’s the rubberized version and the canvas version, both of which can be 501st approved. Cost: Contact Jessica Construction status: Active Joanne Marriott: Joanne takes costume commissions and she does a little bit of everything. Her cape is gorgeous so if you’re interested in getting a cape made, give her a PM. Cost: Contact Joanne Construction status: Active ***Cape hint and tip*** The cape is kind of tricky, especially since many people don’t make them to sell. A lot of people make them themselves or go to a local seamstress. This might be good because it can be custom made to your measurements. There just aren’t a lot of trusted sellers out there so if you see a person selling her cape, post in the forum and the veterans may be able to give you some advice. There may be some cape patterns floating around as well, that individual makers may be willing to share with the party. Belt: Jessica Bowyer also makes a belt that can be used to attach the boxes and pouches too. It’s a ribbed rubber and attaches with velcro. Very simple to use and works great (no clips!) Cost: Contact Jessica Construction status: Active Darren Vaughan (Belts of the First Order): Darren’s belts are pretty common with the FO’s. There are three layers to the belt: the outer is ribbed rubber, the inner is sponge rubber and the inner is webbing. Buckled together and there are chicago screws included for the boxes. It all comes together to form a fitted and comfy belt. Cost: AU$70 shipped Contact: PM on Facebook or email: beltsofthefirstorder@gmail.com Construction status: Active ***Belt hint and tip*** Many people have made their belt themselves, using ribbed rubber they find at their hardware stores. That way, if you can’t get one from any of the listed makers, there are still options. Also, self-drilling screws are a great way to mount the boxes to the rubber. Then you don’t have to fiddle with gluing chicago screws and the like. Belt pouches: Phasma has two belt pouches located on her left hip. They are canvas in construction. The longest one is about the size of a Samsung cellphone and is faced with chrome. The second box is relatively squat. This one does not have to be faced with chrome. Trooperbay is kind of the only place I’ve found the belts ready-to-ship, already-constructed. If there are any independent makers, please let me know! I have these pouches and I don’t mind them at all. They’re big enough to hold my phone and Aker and some snacks, which is always a plus in my book. Where to buy: https://trooperbay.com/star-wars-stormtrooper-tfa-first-order-stormtrooper-black-canvas-ammo-pouch-set Cost: $60 Belt and pouches: KB and Shawn both make their own belts and pouches and are included with the armors. Justin Lee Morrison’s Extras (holster/greeblies/belt): Justin’s holsters and clips are very clean and well made. Fit great with the armors and he now has a way to attach blasters to the thighs, which is always handy. Justin’s easy to work with and will combine orders when needed. Turn around time is extremely quick, especially considering he’s in Ireland and shipping can be funky. Holsters (v3, now stainless steel top) with rifle bolts. Assembled £50 Aerators (aluminium) £20 (Not necessary for Phasma’s but good for FOTK’s) Clip set (6 large, 8 small) £20 Belt £25 All of the above in a set £100 plus shipping (and Justin will also add extra clips) Contact: PM on Facebook Construction status: Active Boots: Okay boots are tricky. There’s no real specific design needed (unlike the TK’s and FO’s). As long as they’re black leather or leather-like and have no pronounced heel. Because Phasma is so tall, many Legionnaires have gone with lifted boots. These can be found on Amazon or ---------------- For now I’ll just list the first pair of boots I got, so you can see a common style and maybe go from there. Jodhpur style boots (common TK style) Amazon: https://www.amazon.com/gp/product/B00CUHT46M/ref=oh_aui_detailpage_o08_s00?ie=UTF8&psc=1 Cost: Around $60 Boots don’t have to be too specific. Some have even gotten boots with lacing. The armor will cover it and the foot armor will hide a majority of the boot. It just kind of depends on comfort for you and how tall you want to be. My second pair of boots is a lifted pair of boots that I found on clearance on tallmenshoes. They give me an additional 4 inches in height with room for another inch lift insert. I’m not sure how stable they’ll be but my hope is that they’ll be comfortable enough for my armor. If anyone has boot suggestions, send them my way. I’ll add them to the list. The bits and bobs So if you’re like me and live in a small town in the middle of nowhere, this costume can be kind of tricky to put together. I got a lot of stuff on Amazon and eBay because it was cheaper than driving to a city an hour or more away and run the risk of the stores there not having what I needed. I’m just going to list some of the things I’ve had questions on over the past year and go from there! You know the drill-if you think of anything you want me to add, let me know! Or if you have any questions, ask and I’ll try to find the answers and get them here. Sound system: ------------------- I think most people go with Akers but I found this little guy for relatively cheap and it works well. I just keep it in my smaller belt pouch and it fits perfectly. Wireless mic:---------------------- I love this wireless mic. It works great and it’s one less thing I have to have on my head! Syncs up great and works perfectly with my sound system. Hearing system: Enviro Kit is a great little trick. My handlers call it the Diva Hearing Aids. Jessica Bowyer brought this to the group. What it is is a set of tiny mics that you place in your bucket and it’s connected to an audio feed that you can connect headphones too. It’s a great system and if you’re like me who is already HoH it’s a good trick to have in a visually impaired bucket. Cost: $80 +$17 shipping anywhere in US or Canada. Shawn Preston is the builder and he has everything on hand to make it. If you want to wear it with headphones he’ll give you a discounted price. How to contact: Reach out to Jessica Bowyer. She’ll get you set up. Helmet lens: I am currently using the lens that came with my Jimmi bucket. It works pretty well but it’s getting scratched up so I will eventually have to replace it. Jessica told me to get a welding mask shield. Seems like a great thing to have on hand. --------------- Extra fingers: My fingers broke the first time I wore Phasma so I needed a Plan B. I got mine from Jim Sleeth. They’re resin cast, extremely sturdy and very easy to modify. Cost: $30 plus shipping. Contact: starbuck@gate.net KB Props and Shawn make replacement fingers as well. Contact for cost and shipping estimates. Fans: Fans are pretty essential for this costume. And pretty much any helmeted costume. If you’re interested in an already assembled setup, check out Troopercoola. They make custom fan setups and have a lot of different options. Cost: Varies Contact: Troopercoola Undersuits: This is all personal preference. I did the one piece bodysuit for a while and hated it. It made going to bathroom difficult, it wasn’t comfortable and after 6 troops I couldn’t do it anymore. I’m currently wearing an underarmor compression type shirt and some high waisted yoga pants that are extremely comfy and make emergency bathroom stops easy. If you’re going for movie accuracy though, then Stormtrooper Undersuit might be for you. This is the suit that was used in the movie and it’s a thick spandex with the glossed upper thigh. It has a crotch zipper as well, which might be handy for the guys. Maybe not so much for the ladies. Cost: £49.99 Where to buy: https://www.stormtrooperundersuit.com/star-wars-first-order-stormtrooper-costume-armour-compatible-bodysuit-undersuit.html Blaster: A blaster is not required to be approved of course, but it really is cool to have when you’re in the armor. I believe most people have the Heston blaster. There’s a lot of options for this blaster and price varies depending. You will have to chrome it yourself and if you want to be extra fancy, you’ll have to tint the chrome gold. Where to buy:-------------- Cost: $175+ If you have the ability and a 3d printer, there are free stl files on whitearmor for the F-11. Will require some work on your part but could be fun! http://www.whitearmor.net/forum/topic/32544- (you’ll have to be a member of the forum to open the link) There’s a lot of other makers on etsy but I am not sure about their quality or their ship times. So proceed with caution and make sure to do your research. Spear: (TLJ) JJ Industries is currently knocking out some great spears for current and future Phasmas. Luke offers a raw kit and a polished and finished kit as well. Current pricing breakdown: Price: - £90 Raw Kit - £120 Mirror Polished Extras: - £20 Padded Case & Polishing cloth Shipping: - £25 UK - Parcelforce Express - £30 Europe - DPD Express Classic - £40 USA - DPD Air Classic pictures can be seen here: https://imgur.com/a/rm9P0do Visit his page for more info. https://www.facebook.com/JJIndustriesUK/ Did you get your kit from another maker not listed here? Be sure to let me know so that the rest of the group can find them! List is subject to change.
-
So, turns out the UK company that said they could make faux leather ammo pouches, can't (sounds like they tried, but it just didn't work out). I've contacted Geeky Pinks for a quote as they've also said they could make them, but there's then the additional cost of international postage. I can get canvas pouches for £40 each, and was thinking of painting them in matte PlastDip, then weathering to give a leather appearance. Anyone tried anything like that before, as no idea if it'll actually work(?)
-
 Armor info: Armor: KB Props Helmet: Props Emporium Gaskets: Imperial Gaskets Rifle: Branfuhr Studios Gloves & Boots: Imperial Boots Neckseal: Geeky Pink Lady Undersuit: Stormtrooper undersuit Cape: Geeky Pink Lady Belt & Pouches: Trooperbay Personal info: Name: Katie Taylor 501st ID: TK36544 Garrison: Wisconsin (Black Ice Squad) Height: 5' 5" Weight: 138 LB
 -
John Child's TFA First Order Trooper Build (Imperial Surplus)
sillyface replied to sillyface's topic in TFA Build Threads
As mentioned at the start, I was lucky to purchase almost all the supplementary - soft stuff, from an absolute gentlemen that abandoned his build due to waiting years for armour that didn't come. (CLICK HERE TO SEE THE VIDEO OF EMOTIONAL GOODNESS) The under armour soft stuff is from Geeky Pinks Gloves are Imperial Boots and also the boots (not pictured) -
After building a Biker Scout and a Galactic Marine, I figure I'll complete the costuming saga with the TFA Stormtrooper. Seeing the Force Awakens with my 501st friends is an experience I'll never forget. The TKs in the drop ship was an awesome reveal! Need to Order Belt Received TFA Kit - Jimmiroquai Gloves - Endor Finders Boots - Imperial Boots Gaskets + Neck Seal - Geeky Pink Anovos TFA Helmet Accessories Metal thigh holster - R2Dan Z-26 Riot Baton - Amazon SE-44C Side-arm - 850 Armorworks F-11D Blaster Rifle - Anovos produced F-11D replica
-

List of Soft Parts for Your OT TK build
CallMeMrTibbles replied to justjoseph63's topic in Getting Started - Read this First!
Hi Joseph, Would you mind adding some info to your post above. Geeky Pinks have told me that they are able to produce all of their items in non-leather alternatives, for those plant based troopers amongst us. In their words, this includes: "...neck seals... pauldrons, gunner bibs, vader suit, imperial knight, jedi or sith items, jawa bandoliers... Basically any item the SW universe could need in leather, I'll make in a vinyl/faux leather" -
I received my geeky pink gaskets yesterday which look amazing!!! [emoji2956] thank you Teresa for your hard work and effort to make my first order gaskets and neck seal a reality! I am really looking forward to test fitting 90% of the costume soon!! [emoji2962] Last night I made progress with more pieces primed and some pin holes filled! Thus far I’m really impressed with Jim’s kit for several reasons: 1 - it’s a very clean kit, with very few pinholes and scratches to fill, s as I rotated the piece I was surprised how few imperfections there were. which means it’s faster to get it painted and onto strapping. 2 - crisp detailed pulls with sharp edges. I’ve seen other builds where details are soft and need to be cut out and replaced but not having to deal with that is awesome. 3 - It comes with no pieces needing to be shimmed . Compared to my galactic marine build this is much easier and I’m excited to keep making progress and I’ll keep you updated! Before filling
-
 My first attempt at EIB for my new FOTK TLJ. Armour information Armour maker- Jim Tripon Helmet maker- Jim Tripon Blaster/s - F-11D Branfuhr props ( it’s a converted Captain Phasma blaster) Se-44c- unknown 3d print( re detailed using plasticard by myself) Gaskets- Geeky Pink Neck seal- Geeky pink Gloves- Endor finders Boots- Imperial Boots Belt- Belts of the First Order Holster- R2Dan ( working and screen accurate) Personal info Name-Ian Rickhuss Height- 190cm Weight-106kg 501st ID- TK23650 Garrison- UK Garrison Just a note for the photos, you will notice my knee plates don’t sit quite right, this is down to my legs being a bit messed up after knee operations! This is as straight as they get. I’d welcome any feedback from your good selves and fingers crossed!! Many thanks Ian Sent from my iPhone using Tapatalk
 -
Right? I decided I’m going to prime, sand, and fill the parts I know fit. I will wait to tackle the thigh issue later. I have motivation back and I want to put it to good use as there’s are a lot of work to be done. I ordered my gaskets from the amazing geeky pink last month. The only other piece I need to order is my belt and I’m working on getting in better shape so that I can fit into all my costumes more comfortably.
-
Ok so today I glued the first piece, the one giving me the most trouble: the yoke and the back. I got it to sit properly, after doing a bit of trimming on the inside and a little elsewhere. It still didn't want to sit flush too well on the inside, but it was able to be done so once I put the clamps and the like on there. In the photos it looks a bit messy, but I cleaned it up after I got it where I wanted. I need to get a better applicator for the glue. Outside Inside Until I can get something better, even like a tongue depressor or something, I will hold on gluing much more, which next being the abdomen, which I also want to wait on so I can see how this turns out once fully cured and then also size it with the abdomen on to make sure it looks good. In other news, I did purchase the metal support brackets that go inside the yoke to add support as well as support the shoulder bells. My boots should arrive tomorrow, and I have sent my sizing information to Geeky Pinks for the gaskets. More updates to come.
-
So didn't get too much done today. Just trimmed down the posterior armor and the cod piece, as well as the "lips" that go under the shoulder bells. Cod Piece "Posterior Piece" (Upon looking at it now, I see I forgot to trim down the sides of the very top, so that it is similar to "Anovos's style") Shoulder bell lips (Forgot to take a picture of the trimmed and sanded TD plate.) Tomorrow I am planning on working on the thighs and possibly the shins as well, maybe the spats too. (I have to fight against the sun going down and work, lol; the reason for my slow progress) Once that is done, I plan on doing a bit more finer sanding as well as detail trimming, and then I will start gluing parts (that do not need proper fitment w/gaskets.) Also, my boots from IB should be coming sometime this upcoming week, UPS somehow got my and another trooper's address mixed up, so it is now on it's way to me properly. As for the gaskets, I have inquired them from Geeky Pinks on FB (I forget who's handle it is here and don't want to bother them) but I understand the delay's currently. I plan on getting the undersuit and gloves sometime next week as well, and will inquire about the belt and other soft goods quite soon. More to come tomorrow.